Brother P-touch 9500PC Referencia Rápida
Tabla de contenido
Idiomas disponibles
Idiomas disponibles
Enlaces rápidos
Capítulos
Tabla de contenido
Solución de problemas

Manuales relacionados para Brother P-touch 9500PC


Resumen de contenidos para Brother P-touch 9500PC
- Página 1 Quick Reference Referencia rápida...
- Página 129 Referencia rápida...
-
Página 130: Introducción
- Debe usarse el cable de interfaz que se incluye para garantizar la conformidad con los límites para un dispositivo digital de Clase B. - Los cambios o las modificaciones no expresamente aprobados por Brother Industries, Ltd., anulan la autorización del usuario para utilizar el equipo. -
Página 131: Utilización De Este Manual
Utilización de este manual La PT-9500PC incluye la siguiente Referencia Rápida. Consulte la Referencia Rápida para utilizar la PT-9500PC según sus necesidades. Referencia Rápida Archivos de ayuda Manual de Manual (este manual) sobre el software CD-ROM Para la preparación y el funcionamiento de la PT-9500PC y para la instalación del software... -
Página 132: Precauciones Generales
● Utilice sólo los cables de interfaz incluidos con la PT-9500PC (cable de interfaz USB, cable de interfaz en serie). ● Utilice sólo accesorios y repuestos originales de Brother. No utilice ningún accesorio o repuesto no autorizado. ■ Adaptador de CA ●... - Página 133 ● Tenga en cuenta que Brother Co., Ltd. no se responsabiliza por ningún daño, etc., que pueda resultar del incumplimiento de las precauciones descritas. ® ● Avery es una marca comercial registrada de AVERY DENNISON CORPORATION. ■ CD-ROM ● No raye el CD-ROM.
- Página 134 Índice 1 Información previa al uso ................ 9 Confirmación de los accesorios incluidos ................10 Términos relacionados con la PT-9500PC ...............12 Vista frontal ............................12 Vista posterior ..........................12 Visualización de las lámparas ......................13 Preparaciones previas a la creación de etiquetas ............14 Conexión de la PT-9500PC ....................15 Conexión a la fuente de alimentación ....................15 Conexión a una computadora personal ..................16 Instalación del casete de cinta ..................20...
- Página 135 3 Creación de etiquetas: Versión para Windows ........69 Creación de etiquetas ......................70 Creación de etiquetas utilizando P-touch Editor .............71 Activación de P-touch Editor ......................71 Ventana de diseño ..........................72 Creación de un rótulo ........................74 Impresión de etiquetas ........................75 Utilización de “Help” ........................76 Creación de otros tipos de etiquetas ....................78 Creación de etiquetas utilizando P-touch Quick Editor ...........79 Activación de P-touch Quick Editor ....................79...
- Página 136 Accesorios (sólo para EE.UU.) ..................116 Índice alfabético ......................120 Información de contacto (sólo para EEUU) ..............122...
-
Página 137: Información Previa Al Uso
Información previa al uso Este capítulo contiene información que debe ser confirmada antes de utilizar la PT-9500PC. Confirmación de los accesorios incluidos .............10 Términos relacionados con la PT-9500PC .............12 Preparaciones previas a la creación de etiquetas ..........14 Conexión de la PT-9500PC................15 Instalación del casete de cinta ..............20 Instalación de la bandeja de recogida ............22... -
Página 138: Confirmación De Los Accesorios Incluidos
Confirmación de los accesorios incluidos Abra la caja y confirme que estén incluidos los siguientes elementos. Si alguno de estos elementos falta o está dañado, por favor, contacte con la tienda minorista donde compró la PT-9500PC. ■ PT-9500PC ■ Cable de interfaz en serie Impresora de etiquetas Este cable se utiliza para conectar la PT-9500PC al puerto en serie de una... - Página 139 ■ Referencia Rápida (este manual) Guárdelo para futuras consultas. ■ CD-ROM El CD-ROM contiene, entre otras cosas, el software que debe instalarse en una computadora personal. ■ Catálogo de cintas Este catálogo contiene una lista de casetes de cinta diseñados exclusivamente para la serie de impresoras P-touch.
-
Página 140: Términos Relacionados Con La Pt-9500Pc
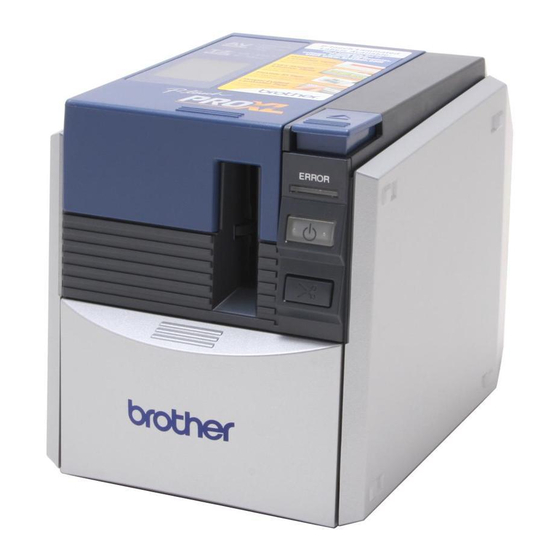
Términos relacionados con la PT-9500PC Esta sección identifica los principales términos relacionados con la PT-9500PC. Vista frontal Cubierta del Botón de apertura de la compartimiento cubierta de la cinta Lámpara de ERROR Salida de etiquetas Botón de encendido (con lámpara) Botón FEED/CUT Soporte para la bandeja de recogida... -
Página 141: Visualización De Las Lámparas
Visualización de las lámparas Puede determinarse cuál es el estado de la PT-9500PC por la lámpara del botón de encendido (verde) y la lámpara de ERROR (roja). Estado de la lámpara Botón de Estado Solución Lámpara de encendido ERROR (roja) (verde) Estado en espera de la Encendida... -
Página 142: Preparaciones Previas A La Creación De Etiquetas
Preparaciones previas a la creación de etiquetas Antes de crear etiquetas con la PT-9500PC, son necesarios los siguientes preparativos. Nota ● Los procedimientos de conexión varían dependiendo del sistema operativo instalado en la computadora personal y de si se utiliza una conexión en serie o una conexión USB. Para obtener más información, consulte “Instalación del software”... -
Página 143: Conexión De La Pt-9500Pc
Conexión de la PT-9500PC Conecte la PT-9500PC a la fuente de alimentación y a la computadora personal. Inserte el cable de alimentación en el Conexión a la fuente de enchufe (CA 120V). alimentación Conecte el cable de alimentación al adaptador de CA. Nota Inserte el conector del adaptador de CA ●... -
Página 144: Conexión A Una Computadora Personal
Conexión a una computadora personal Conecte la PT-9500PC a una computadora personal utilizando los cables de interfaz incluidos con el producto. Los cables de interfaz utilizados para la conexión con un puerto USB y un puerto en serie son diferentes. ®... - Página 145 ■ Conexión a un puerto USB Inserte la clavija del extremo del cable de Siga los siguientes pasos para conectar la interfaz USB en el puerto USB situado en PT-9500PC al puerto USB de una la parte trasera de la PT-9500PC. computadora personal que funciona con ®...
- Página 146 ■ Conexión a un puerto en serie Asegúrese de que la PT-9500PC y la Las computadoras personales que funcionan computadora personal estén apagadas. ® con Windows 95/NT 4.0 deben conectarse Si están encendidas, apáguelas. a un puerto en serie. Para conectar computadoras personales que Inserte la clavija del extremo del cable de ®...
- Página 147 Presione el botón de encendido de la PT-9500PC. Botón de encendido →Se iluminará el botón de encendido (verde). Encienda la computadora. Nota ● Para utilizar la PT-9500PC, se debe instalar el software en la computadora personal. Consulte “Instalación del software” (→ P.23).
-
Página 148: Instalación Del Casete De Cinta
Instalación del casete de cinta En esta sección se describen los tipos de casetes de cinta que se pueden utilizar con la PT-9500PC y se explica el procedimiento para instalarlos. Cinta autorizada Instalación del casete de cinta. A continuación se enumeran los tipos de cinta que se pueden utilizar con la PT-9500PC. - Página 149 Verifique el casete de cinta. Presione el botón de encendido de la Compruebe que el extremo de la cinta no PT-9500PC. esté doblado y que esté correctamente colocado a través de las guías de la cinta. Botón de encendido Extremo de la cinta Guías de la cinta →Se iluminará...
-
Página 150: Instalación De La Bandeja De Recogida
Instalación de la bandeja de recogida Instale la bandeja de recogida. La bandeja de recogida se utiliza para recolectar las etiquetas que expulsa la PT-9500PC. Utilice la bandeja de recogida, por ejemplo, cuando se disponga a imprimir muchas etiquetas. Monte la bandeja de recogida. Instale la bandeja de recogida en la Consulte las ilustraciones que se incluyen PT-9500PC. -
Página 151: Instalación Del Software
Instalación del software En este capítulo se detallan el procedimiento de instalación del software necesario para utilizar la PT-9500PC. Tipos de software utilizados................24 Sistemas con Windows..................25 Sistemas con Mac OS 8.6–9.x ...............49 Sistemas con Mac OS X 10.1 o posterior............56... -
Página 152: Tipos De Software Utilizados
Tipos de software utilizados Para utilizar la PT-9500PC se debe instalar el siguiente software en la computadora personal. Consulte las páginas abajo mencionadas para el tipo de sistema operativo que funciona en la computadora personal. P-touch Quick Controlador de Software P-touch AV Editor P-touch Editor Editor... -
Página 153: Sistemas Con Windows
Sistemas con Windows En esta sección se describe el procedimiento de instalación del software en una computadora personal ® que funcione con Windows 95/98/98 SE/Me/NT 4.0/2000 Pro/XP. El software se instala por Inserte el CD-ROM en la unidad de separado. CD-ROM y comience la instalación. -
Página 154: Precauciones De Instalación
“Brother Setup”. autoridad de administrador de la • Si el cuadro de diálogo “Brother Setup” computadora. no aparece, haga doble clic sobre el icono “My Computer” y, a continuación, haga doble clic sobre el... - Página 155 →Cuando se completa la preparación, aparece el cuadro de diálogo “InstallShield Wizard” con el siguiente mensaje: “Welcome to the InstallShield Wizard for Brother P-touch Editor Version 4.0.” Lea el contenido y luego haga clic sobre [Next]. • P-touch Quick Editor y P-touch AV...
- Página 156 Lea atentamente el contrato de licencia y Seleccione la carpeta de destino donde se luego haga clic sobre [Yes]. instalarán los archivos y luego haga clic sobre [Next]. Para seleccionar otra carpeta de destino, haga clic sobre [Browse]. →Aparece el cuadro de diálogo “Customer Information”.
- Página 157 Si desea revisar o cambiar alguna configuración, haga clic sobre [Back]. • Este cuadro de diálogo puede no aparecer, dependiendo del sistema operativo que funcione en la computadora personal. →Aparece el cuadro de diálogo “Driver Setup (Brother PT-9500PC)”. →Aparece el cuadro de diálogo “Install Driver”.
- Página 158 Haga clic sobre [Next]. Haga clic sobre “Install the software automatically (Recommended)” y luego haga clic sobre [Next]. →Comienza la preparación para la instalación. →Se detectarán los programas necesarios. →Cuando se haya completado la preparación para la instalación, se le indicará...
- Página 159 Haga clic sobre [Finish]. Registration. Seleccione “Yes, display the page.” y, a continuación, haga clic sobre [Next]. →Aparece nuevamente el cuadro de diálogo “Driver Setup (Brother PT-9500PC)”. →Al completarse la instalación, del Haga clic sobre [Finish]. P-touch Editor, aparece el cuadro de diálogo “InstallShield Wizard...
-
Página 160: Instalación De P-Touch Editor Exclusivamente
• Puede transcurrir algún tiempo hasta que aparezca el cuadro de diálogo “Brother Setup”. • Si el cuadro de diálogo “Brother Setup” no aparece, haga doble clic sobre el icono “My Computer” y, a continuación, haga doble clic en el icono P-touch. -
Página 161: Instalación De P-Touch Quick Editor Exclusivamente
• Puede transcurrir algún tiempo hasta que aparezca el cuadro de diálogo “Brother Setup”. →Cuando la instalación se ha • Si el cuadro de diálogo “Brother Setup” completado, aparece el cuadro de no aparece, haga doble clic sobre el diálogo “Welcome”. - Página 162 →Aparece el cuadro de diálogo Escriba su nombre y el nombre de la empresa en “Name” y “Company” “Setup” y comienza la instalación. respectivamente y luego haga clic sobre [Next]. →Aparece el cuadro de diálogo →Durante la instalación, aparece el “Registration Confirmation”.
-
Página 163: Instalación De P-Touch Av Editor Exclusivamente
• Puede transcurrir algún tiempo hasta que aparezca el cuadro de diálogo Brother Setup. • Si el cuadro de diálogo Brother Setup no aparece, haga doble clic sobre el icono My Computer y, a continuación, haga doble clic sobre el icono P-touch. - Página 164 →Aparece el cuadro de diálogo Haga clic sobre el botón correspondiente a P-touch AV Editor. Registration Confirmation. Compruebe que su nombre y el nombre de la empresa son correctos y luego haga clic sobre [Yes]. Para corregir la información de registro, haga clic sobre [No].
-
Página 165: Instalación Del Controlador De Impresora Exclusivamente
→Aparece el cuadro de diálogo Setup “Brother Setup”. Complete. • Si el cuadro de diálogo “Brother Setup” no aparece, haga doble clic sobre el Extraiga el CD-ROM de la unidad de icono “My Computer” y, a CD-ROM. - Página 166 “Brother →Aparece el cuadro de diálogo Setup”. “Confirmation”. • Si el cuadro de diálogo “Brother Setup” no aparece, haga doble clic sobre el Siga las instrucciones de cada cuadro de icono “My Computer” y, a continuación, diálogo y comience la instalación.
- Página 167 [Next]. Para corregir la información de instalación haga clic sobre [Back]. →Aparece el cuadro de diálogo “Driver Setup (Brother PT-9500PC)” que indica que la instalación va a →Comienza la instalación. comenzar. Haga clic sobre “Install” y luego sobre [Next].
- Página 168 115.200 bps para el puerto en serie, seleccione la velocidad en baudios apropiada. →Aparece el cuadro de diálogo “Change Baud Rate Wizard (Brother PT-9500PC)”. Seleccione el puerto en Serie Apropiado y luego haga clic sobre [Next].
- Página 169 ■ Utilización como impresora de red Extraiga el CD-ROM de la unidad de CD-ROM. En esta sección se describe el procedimiento de instalación del controlador de impresora Haga clic sobre “Yes, I want to restart my cuando se utiliza el servidor de impresora computer now”...
- Página 170 • Puede transcurrir algún tiempo hasta que aparezca el cuadro de diálogo “Brother Setup”. • Si el cuadro de diálogo “Brother Setup” no aparece, haga doble clic sobre el icono “My Computer” y, a continuación, haga doble clic en el icono P-touch.
-
Página 171: Configuración De La Velocidad En Baudios De La Computadora Personal Y La Pt-9500Pc
Haga clic sobre [Next]. →Aparece un cuadro de diálogo que Configuración de la indicará que la instalación se ha velocidad en baudios de la completado. computadora personal y la PT-9500PC Siga los siguientes pasos para cambiar o confirmar la velocidad en baudios de la computadora personal y de la PT-9500PC. - Página 172 Haga clic sobre “Printers and Other Haga clic con el botón derecho del Hardware”. mouse en el icono Brother PT-9500PC y, a continuación, haga clic sobre “Properties”. →Aparecerá la ventana “Brother PT-9500PC Properties”. Haga clic sobre la ficha “Device Setting”.
- Página 173 Para Windows 95/98/98 SE/Me, haga clic sobre [Utilities]. →Aparecerá nuevamente la ventana →Aparecerá el cuadro de diálogo “Brother PT-9500PC Properties”. “Brother PT-9500 Utility”. Haga clic sobre [OK]. Seleccione la velocidad en baudios deseada. →La instalación se ha completado y la ventana “Brother PT-9500PC...
-
Página 174: Desinstalación Del Software
Computer” y luego haga clic sobre “Add or remove programs”. ® " Para Windows 95/98/98SE/Me/NT 4.00 Seleccione Brother P-touch Editor Version 4.0 o P-touch Quick Editor de la lista que aparece en la ventana “Add/Remove Programs Properties”. →Aparece la ventana “Add or Remove Programs”. -
Página 175: La Impresora Ya No Se Utiliza
• Puede transcurrir algún tiempo hasta que aparezca el cuadro de diálogo “Brother Setup”. • Si el cuadro de diálogo “Brother Setup” no aparece, haga doble clic sobre el icono “My Computer” y, a continuación, haga doble clic en el icono P-touch. - Página 176 2000 Pro/XP y se disponga a cambiar la PT-9500PC por otra con un número de serie diferente. " If “Add Brother PT-9500PC” is selected, a Si selecciona “Add Brother PT-9500PC”, se agregará un nuevo configurador de impresora. Seleccione esta opción cuando...
-
Página 177: Sistemas Con Mac Os 8.6-9.X
Sistemas con Mac OS 8.6–9.x Siga el siguiente procedimiento para instalar el software en una Macintosh que funcione con Mac OS 8.6–9.x. ■ Creación de etiquetas con varios diseños Consulte “IInstalación de P-touch Editor y del controlador de impresora” (→ P.49). ■... - Página 178 Abajo se detallan los programas que se Haga clic sobre [Quit]. pueden instalar. Programa Descripción P-touch Editor 3.2 Software de P-touch Editor Controlador de impresora PT-9500PC Driver para la PT-9500PC Haga clic sobre [Restart]. Se pueden instalar fuentes Fonts para idiomas con el alfabeto latino, tales como (13 tipografías) Atlanta, etc.
-
Página 179: Instalación De P-Touch Quick Editor Y Del Controlador De Impresora
Confirme la unidad en la que desee Instalación de P-touch instalar el software y luego haga clic sobre “Install”. Quick Editor y del Para cambiar la unidad, haga clic sobre controlador de impresora “Drive”. Instale P-touch Quick Editor, para imprimir etiquetas utilizando operaciones simples, y el controlador de impresora. -
Página 180: Instalación Del Controlador De Impresora Exclusivamente
→Comienza la instalación. Instalación del controlador de impresora exclusivamente Instale sólo el controlador de impresora necesario para utilizar la PT-9500PC como impresora. Nota ● No conecte el cable de interfaz USB a la →Cuando se completa la instalación, Macintosh hasta que el controlador de aparece el mensaje “Installation is impresora haya sido instalado y la done.”. - Página 181 Haga doble clic sobre el icono P-touch Haga clic sobre [Install]. Editor 3.2 Installer. →Comienza la instalación. →Comienza el instalador. Confirme la unidad en la que desee instalar el software y luego haga clic →Cuando se completa la instalación, sobre [Custom Install]. aparece el mensaje “Installation is Para cambiar la unidad, haga clic sobre done.”.
-
Página 182: Selección De La Impresora
Selección de la impresora Desinstalación del software Seleccione la PT-9500PC como impresora. Si la PT-9500PC no se va a utilizar en el futuro con una computadora Macintosh, siga los Despliegue el menú “Apple” siguientes pasos para desinstalar el software. seleccione “Chooser”. ■... - Página 183 ■ Eliminación del controlador de impresora Retire el cable de interfaz USB que está conectado a la PT-9500PC desde el puerto USB de Macintosh. Haga doble clic sobre la unidad en la que está instalado el sistema operativo de la Macintosh.
-
Página 184: Sistemas Con Mac Os X 10.1 O Posterior
Sistemas con Mac OS X 10.1 o posterior Siga el siguiente procedimiento para instalar el software en una Macintosh que funcione con Mac OS X 10.1–10.2.6. Instale el controlador de impresora después de instalar P-touch Editor o P-touch Quick Editor. ■... - Página 185 Haga doble clic sobre el icono P-touch Seleccione el conjunto de funciones y los Editor 3.2 Installer. programas que desea instalar y luego haga clic sobre [Next]. →Comienza el instalador. Haga clic sobre [Next]. Abajo se detallan los programas que se pueden instalar.
- Página 186 Seleccione la ubicación en la que desea crear un alias y haga clic sobre [Next]. →Al completarse la instalación, • Para Mac OS X 10.2, seleccione una aparece el cuadro de diálogo ubicación que no sea “Dock”. Si hace “Install Complete”. clic sobre “Dock”...
-
Página 187: Instalación De P-Touch Quick Editor
Haga doble clic sobre la carpeta P-touch Instalación de P-touch Quick Editor. Quick Editor Instale P-touch Quick Editor para imprimir etiquetas utilizando operaciones simples. Nota ● Al instalar el software, regístrese utilizando un nombre de usuario con autoridad de administrador. →Aparece la ventana “P-touch Quick ●... - Página 188 Haga clic sobre [Next]. Haga clic sobre [Install]. →Aparece el cuadro de diálogo →Comienza la instalación. “Choose Alias Folder”. Seleccione la ubicación en la que desea crear un alias y haga clic sobre [Next]. →Al completarse la instalación, aparece el cuadro de diálogo “Install Complete”.
-
Página 189: Instalación Del Controlador De Impresora
Escriba el nombre y la contraseña del Instalación del controlador administrador y luego haga clic sobre [OK]. de impresora Instale el controlador de impresora necesario para utilizar la PT-9500PC como impresora. Nota ● No conecte el cable de interfaz USB a la Macintosh hasta que el controlador de impresora haya sido instalado y la Macintosh haya sido reiniciada. - Página 190 Confirme el contenido y luego haga clic Para continuar con la instalación haga sobre [Continue]. clic sobre [Agree]. →Aparece el cuadro de diálogo →Aparece el cuadro de diálogo “Select “Software License Agreement”. a Destination”. Lea el contenido y luego haga clic sobre Seleccione la unidad en la que desee [Continue].
- Página 191 Haga clic sobre [Upgrade]. Haga clic sobre [Restart]. →Aparece un cuadro de diálogo en el →La instalación del controlador de que podrá confirmar la instalación. impresora se ha completado y la Macintosh se reiniciará. Para continuar con la instalación, haga clic sobre [Continue Installation].
-
Página 192: Selección De La Impresora
Haga doble clic sobre el icono “Print Selección de la impresora Center”. Seleccione la PT-9500PC como impresora. Haga doble clic sobre la unidad en la que está instalado Mac OS X. Haga doble clic sobre la carpeta “Applications”. " No hay impresoras disponibles para seleccionar Aparece el mensaje “You have no printers available”. -
Página 193: Desinstalación Del Software
Seleccione PT-9500PC y luego haga clic sobre [Add]. Desinstalación del software Si la PT-9500PC no se va a utilizar en el futuro con una computadora Macintosh, siga los siguientes pasos para desinstalar el software. ■ Desinstalación de P-touch Editor Haga doble clic sobre la carpeta “Applications”... - Página 194 →Se elimina el software. Haga doble clic sobre la carpeta “Uninstall P-touch Editor”. →Aparece la ventana “Uninstall P-touch Editor”. →Al completarse la desinstalación, Haga doble clic sobre “Uninstall P-touch aparece el cuadro de diálogo Editor”. “Uninstall Complete” Haga clic sobre [Quit]. →Comienza “InstallAnywhere Uninstaller”.
- Página 195 ■ Desinstalación de P-touch Quick Editor Haga doble clic sobre “Uninstall Quick Editor”. Haga doble clic sobre la carpeta “Applications” en la unidad en la que está instalado Mac OS X. →Comienza “InstallAnywhere Uninstaller”. Haga clic sobre [Uninstall]. →Aparece la ventana “Applications”. Haga doble clic sobre la carpeta P-touch Quick Editor.
- Página 196 Haga clic sobre [Quit]. Haga doble clic sobre la carpeta “Utilities”. →Aparece la ventana “Utilities”. Haga doble clic sobre la carpeta “Preferences” en Macintosh HD/Users/ User Name/Library/Preferences. Haga doble clic sobre el icono “Print Center”. Elimine P-touch Quick Editor Prefs. →Se elimina P-touch Quick Editor.
-
Página 197: Creación De Etiquetas: Versión Para Windows
Creación de etiquetas: Versión para Windows Este capítulo contiene los procedimientos para diseñar e imprimir etiquetas utilizando Windows. Creación de etiquetas..................70 Creación de etiquetas utilizando P-touch Editor ...........71 Creación de etiquetas utilizando P-touch Quick Editor.........79 Creación de etiquetas utilizando P-touch AV Editor ........84 Después de la impresión ................89... -
Página 198: Creación De Etiquetas
Creación de etiquetas Cuando haya terminado de preparar el PC, comience a crear etiquetas. ■ Creación de etiquetas con varios diseños Continúe con “Creación de etiquetas utilizando P-touch Editor” (→ P.71). ■ Impresión sencilla de etiquetas Continúe con “Creación de etiquetas utilizando P-touch Quick Editor” (→ P.79). -
Página 199: Creación De Etiquetas Utilizando P-Touch Editor
Creación de etiquetas utilizando P-touch Editor Con P-touch Editor se pueden crear etiquetas con diferentes diseños. Nota ● Este capítulo contiene un resumen de P-touch Editor. Los detalles sobre el uso de P-touch Editor se encuentran en “Help”. Consulte “Utilización de “Help”” (→ P.76). ®... -
Página 200: Ventana De Diseño
" Propiedades de la página Ventana de diseño Establezca el tamaño y la orientación de la etiqueta. Aparece el cuadro de diálogo para activar P-touch Editor y para seleccionar el método de diseño que se desea activar. Seleccione el diseño. "... - Página 201 ■ Banco de objetos " Captura de pantalla El banco de objetos contiene iconos para Capture una imagen del escritorio y agregar a una etiqueta ilustraciones e imágenes. agréguela a la etiqueta. " Texto Inserte las líneas de texto. " Organizar el texto "...
-
Página 202: Creación De Un Rótulo
Seleccione “Category” y “Style”. Creación de un rótulo En este ejemplo, se selecciona Simple para “Category” y se selecciona un marco rectangular redondeado (línea fina) para En esta sección se describen los procedimientos “Style”. para crear un rótulo. Active P-touch Editor. Haga clic sobre →Aparece el cuadro de propiedades de la página. -
Página 203: Impresión De Etiquetas
Establezca las condiciones de impresión. Impresión de etiquetas Imprima la etiqueta que usted creó. ■ Impresión Haga clic sobre →Aparece el cuadro de propiedades de impresión Haga clic sobre en el " Producción cuadro de propiedades de impresión. →Se imprimirá la etiqueta. Estándar: Para una impresión de alta velocidad. -
Página 204: Utilización De "Help
Temas Barra de herramientas Utilización de “Help” Aparece la explicación de Botones de la barra cada elemento de herramientas para seleccionado utilizar “Help” “Help” está incluido en P-touch Editor para explicar de manera detallada cómo utilizar el software. En esta sección se describen los procedimientos para utilizar “Help”. - Página 205 ■ Impresión de “Help” Seleccione el contenido que desea Se pueden imprimir los contenidos de los imprimir. archivos de “Help”. Los archivos de “Help” se imprimen en una impresora normal. Seleccione la ficha “Contents”. Seleccione en la lista el tema que desea imprimir.
-
Página 206: Creación De Otros Tipos De Etiquetas
Creación de otros tipos de etiquetas Se incluyen ejemplos de creación de las diferentes etiquetas enumeradas a continuación en “Description of operations”, en P-touch Editor Help. Muestra Función descrita • Especificación del tamaño de la etiqueta • Alineación centrada del Creación de rótulos texto de la etiqueta •... -
Página 207: Creación De Etiquetas Utilizando P-Touch Quick Editor
Creación de etiquetas utilizando P-touch Quick Editor Se pueden crear etiquetas de una forma sencilla utilizando P-touch Editor. Nota ® ● En este capítulo se utilizan principalmente los ejemplos de cuadros de diálogo de Windows Activación de P-touch Barra de herramientas Quick Editor Active P-touch Quick Editor. -
Página 208: Uso Sencillo
Uso sencillo Otras funciones En esta sección se describen los procedimientos Esta sección explica las otras funciones de para crear etiquetas de manera sencilla. P-touch Quick Editor. Nota Active P-touch Quick Editor. ● Si hace clic con el botón derecho sobre el Haga clic sobre el cuadro de texto y cuadro de texto o la barra de herramientas, escriba el texto. - Página 209 ■ Especificación de la forma del texto ■ Utilización del historial de texto Especifique la forma y escriba el texto. Se guardan hasta 10 textos anteriormente impresos. Estos textos pueden ingresarse Haga clic sobre fácilmente. →Aparece el cuadro de la lista desplegable.
- Página 210 ■ Inserción de símbolos ■ Cambio de color del fondo Se pueden insertar en las etiquetas los Se puede cambiar el color del fondo en el símbolos incluidos en P-touch Quick Editor. cuadro de texto. Haga clic con el botón derecho sobre el Haga clic con el botón derecho sobre el cuadro de texto, apunte a “Symbols”...
- Página 211 ■ Impresión de etiquetas ■ Minimización de P-touch Quick Editor Establezca las condiciones de impresión e imprima la etiqueta. Haga clic sobre →Se quita P-touch Quick Editor del Haga clic sobre escritorio y se reduce a un botón en →Aparece el cuadro de la lista la barra de tareas.
-
Página 212: Creación De Etiquetas Utilizando P-Touch Av Editor
Creación de etiquetas utilizando P-touch AV Editor P-touch AV Editor permite insertar y formatear texto de una forma rápida y sencilla para cualquiera de los tres formatos de etiqueta predefinidos de las etiquetas AV: las etiquetas de direcciones AV2067, las etiquetas de direcciones de devolución AV1957 y las etiquetas para carpetas de archivos AV1789. -
Página 213: Funcionamiento Básico
Funcionamiento básico Otras funciones Esta sección describe los procedimientos Esta sección explica otras funciones disponibles básicos para imprimir etiquetas AV utilizando con P-touch AV Editor. P-touch AV Editor. Nota Inicie P-touch AV Editor. ● Hay varias funciones disponibles en el menú... - Página 214 ■ Adición de un símbolo ■ Importación de texto Se puede agregar un símbolo de una de las P-touch AV Editor se puede configurar de fuentes de símbolos instaladas en el lado forma que sea posible importar texto de izquierdo de la etiqueta. diferentes aplicaciones en la etiqueta.
- Página 215 ■ Utilización del historial de texto ■ Impresión de la etiqueta Diez de los textos que se han imprimido más Especifique las opciones de impresión e recientemente se almacenan para su uso imprima la etiqueta. futuro. Para agregar fácilmente a la etiqueta un texto que se ha usado con anterioridad, Haga clic sobre a la derecha de...
- Página 216 " Chain Printing Seleccione esta opción para dejar la etiqueta impresa en la P-touch e impedir que salga hasta que se haya imprimido la siguiente etiqueta. Esto reduce el exceso de cinta de la sesión de impresión anterior, que normalmente se expulsaría antes de imprimir la primera etiqueta de la sesión en curso.
-
Página 217: Después De La Impresión
Después de la impresión En esta sección se describen los procedimientos para quitar la hoja de respaldo de la etiqueta cuando es difícil quitarla. Sostenga un extremo de la etiqueta Extracción de la hoja de impresa con una mano y sujete el palillo con la otra mano. - Página 218 Después de utilizar el palillo para etiquetas, guárdelo dentro de la cubierta del compartimiento de la cinta de la PT-9500PC Nota ● Cuando se utiliza el palillo para etiquetas, el texto impreso puede despegarse de la etiqueta si se trabaja con una cinta que no sea una cinta laminada, cinta de seguridad o cinta de acabado mate.
-
Página 219: Creación De Etiquetas: Versión Para Macintosh
Creación de etiquetas: Versión para Macintosh Este capítulo contiene los procedimientos para diseñar e imprimir etiquetas utilizando Macintosh. Creación de etiquetas..................92 Creación de etiquetas utilizando P-touch Editor ...........93 Creación de etiquetas utilizando P-touch Quick Editor.......101 Después de la impresión ................102... -
Página 220: Creación De Etiquetas
Creación de etiquetas Cuando haya terminado de preparar el equipo Macintosh, comience a crear etiquetas. ■ Creación de etiquetas con varios diseños Continúe con “Creación de etiquetas utilizando P-touch Editor” (→ P.93). ■ Impresión sencilla de etiquetas Continúe con “Creación de etiquetas utilizando P-touch Quick Editor” (→ P.101). -
Página 221: Creación De Etiquetas Utilizando P-Touch Editor
Creación de etiquetas utilizando P-touch Editor Con P-touch Editor se pueden crear etiquetas con diferentes diseños. Nota ● Este capítulo contiene un resumen de P-touch Editor. Los detalles sobre el uso de P-touch Editor se encuentran en la Guía de usuario del CD-ROM. Consulte “Utilización de la Guía de usuario del CD-ROM”... -
Página 222: Ventana De Diseño
" Propiedades de diseño Ventana de diseño Establezca la alineación de la figura o del texto. Cuando P-touch Editor se activa, aparece la ventana de diseño. " Propiedades del texto Establezca la alineación del texto, el espaciado de línea, etc. ■... -
Página 223: Creación De Un Rótulo
■ Banco de objetos El banco de objetos contiene iconos para Creación de un rótulo agregar a una etiqueta ilustraciones e imágenes. " Código de barras En este capítulo se describe un ejemplo para Configure un código de barras. crear un rótulo utilizando Mac OS 8.6–9.x. Active P-touch Editor. -
Página 224: Impresión De Etiquetas
En el cuadro del tamaño, seleccione 36. Impresión de etiquetas Imprima la etiqueta creada. ■ Impresión Haga clic sobre Haga clic sobre en la barra de →Aparece el cuadro de diálogo “Print”. herramientas. Haga clic sobre [Print]. →La herramienta de texto está seleccionada. - Página 225 ■ Configuración de las condiciones de Establezca las condiciones de impresión. impresión e impresión de la etiqueta (Mac OS X 10.1 o posterior) Haga clic sobre →Aparece el cuadro de diálogo “Print”. Haga clic sobre “Copies & Pages” y luego seleccione los elementos que desea cambiar.
- Página 226 " “Output Options” " “Halftone/Color” Especifique cuándo desea imprimir la Especifique el semitono, el brillo y el contraste. información en un formato de archivo. " “Tape Setting” “Length”: Especifique el largo de la cinta que va a utilizar. " P-touch Editor “Margin”: Especifique el espacio que se “Numbering”: Cuando se ha definido una debe insertar a la izquierda y a la derecha...
-
Página 227: Utilización De La Guía De Usuario Del Cd-Rom
Haga doble clic sobre el icono main.htm Utilización de la Guía de de P-touch Editor 3.2/User’s Guide en la unidad en la que está instalada la Guía de usuario del CD-ROM usuario del CD-ROM. →El buscador se inicia y aparece el El CD-ROM incluye una Guía de usuario con menú... - Página 228 En la ventana de explicación, se describe el funcionamiento de los elementos de cada menú. Los métodos de funcionamiento están clasificados por función. Haga clic sobre los métodos de funcionamiento para visualizar la ventana de explicación. Haga clic sobre “Home” para regresar al menú principal. Aparece la explicación Aparecen los elementos de cada elemento...
-
Página 229: Creación De Etiquetas Utilizando P-Touch Quick Editor
Creación de etiquetas utilizando P-touch Quick Editor Se pueden crear etiquetas de una manera sencilla utilizando P-touch Quick Editor. Activación de P-touch Utilización de P-touch Quick Editor Quick Editor Active P-touch Quick Editor. Las operaciones básicas para P-touch Quick Editor para Macintosh son las mismas que para ■... -
Página 230: Después De La Impresión
Después de la impresión Para obtener más información, consulte “Después de la impresión” (→ P.89) en “Creación de etiquetas”: Versión para Windows. -
Página 231: Apéndice
Apéndice Este capítulo contiene información para la solución de problemas y una lista con los accesorios disponibles. Creación de etiquetas de códigos de barras ..........104 Cambio de los ajustes del P-touch...............106 Mantenimiento....................108 Solución de problemas ................112 Especificaciones del producto ..............114 Accesorios (sólo para EE.UU.)..............116 Índice alfabético ..................120 Información de contacto (sólo para EEUU)..........122... -
Página 232: Creación De Etiquetas De Códigos De Barras
Creación de etiquetas de códigos de barras La PT-9500PC permite crear etiquetas con códigos de barras para el control de productos y para las transacciones comerciales de una forma sencilla. Dada la gran variedad de estándares de códigos de barras, es aconsejable crear las etiquetas de código de barras después de confirmar los estándares de creación y de exploración del lector de códigos de barras. -
Página 233: Precauciones Para La Impresión De Las Etiquetas De Código De Barras
Confirme que el lector de códigos de barras puede leer correctamente las etiquetas de código de barras impresas con PT-9500PC antes de utilizarlas. ● Brother Co., Ltd. no se hace responsable de ningún daño, pérdida, etc. que pueda derivarse de errores de léctura de las etiquetas de código de barras impresas utilizando la PT-9500PC. ●... -
Página 234: Cambio De Los Ajustes Del P-Touch
Cambio de los ajustes del P-touch Esta sección describe los procedimientos para cambiar la velocidad en baudios de la PT-9500PC e incluye una explicación para los casos en los que se utiliza un entorno LAN. Cambie el interruptor ID USB situado en Cambio del modo ID USB la parte posterior de la PT-9500PC. -
Página 235: Utilización De Varios Ordenadores
Utilización de varios Cambio de la velocidad en ordenadores baudios Varios ordenadores personales pueden utilizar La velocidad en baudios de la interfaz en serie la PT-9500PC como una impresora común. se establece en 115.200 bps en la fábrica. Conecte la PT-9500PC a un PC y configúrela Si utiliza un PC que no es compatible con una para su uso común. -
Página 236: Mantenimiento
Mantenimiento Las partes internas de la PT-9500PC se ensuciarán gradualmente con el uso. En esta sección se describen los procedimientos para el mantenimiento de la PT-9500PC. Presione el botón FEED/CUT. La etiqueta no se imprime claramente Si la etiqueta impresa contiene una línea horizontal negra o los caracteres no están claros, el cabezal de impresión y el rodillo del cabezal pueden estar sucios. - Página 237 ■ Limpieza del cabezal de impresión y del " Rodillo del cabezal rodillo del cabezal Si el cabezal de impresión no se limpió con la función de autolimpieza, lleve a cabo los siguientes procedimientos para limpiar la PT-9500PC. Apague la PT-9500PC. Presione el botón de apertura de la cubierta y abra la cubierta del compartimiento de la cinta.
-
Página 238: Limpieza Del Cortador
■ Otros métodos de limpieza Utilice la cinta limpiadora TZ-CL6 con una Limpieza del cortador cinta de 1 1/2" (36 mm) de ancho (se vende por separado) para limpiar fácilmente la Si las etiquetas impresas no se expulsan PT-9500PC. correctamente de la PT-9500PC, limpie el cortador para cortar las etiquetas. - Página 239 Instale el casete de cinta que quitó y cierre la cubierta del compartimiento de la cinta. Nota ● Tenga especial cuidado de no tocar el cortador cuando limpie la PT-9500PC. ● El cabezal de impresión se calienta mucho durante el uso y puede seguir caliente inmediatamente después.
-
Página 240: Solución De Problemas
Solución de problemas Para solucionar los problemas de la PT-9500PC, consulte la siguiente lista de posibles problemas. P y R Problema Causa Solución El cable de interfaz está flojo. El casete de cinta no está insertado correctamente. Compruebe que el cable de interfaz está La PT-9500PC no conectado correctamente, que el casete de imprime. - Página 241 Dependiendo del PC, el puerto COM puede Wizard” o las utilidades desactivarse como puerto por defecto en la de Brother PT-9500PC. fábrica. Consulte el manual de instrucciones Error 1 o error 5: no se puede del PC o contacte al fabricante del PC para utilizar el puerto en serie del activar el puerto COM.
-
Página 242: Especificaciones Del Producto
Especificaciones del producto PT-9500PC Elemento Especificación Pantalla Indicadores DEL (verde/rojo) Impresión laminada con transferencia de calor/ Método de impresión impresión térmica Cabezal de impresión 360 ppp/384 puntos Resolución de Impresión Para casetes de cinta TZ: 360 ppp impresión Velocidad de impresión Para casetes de cinta TZ: Hasta 20 mm/seg Ancho de impresión 27,1 mm... -
Página 243: Entorno Operativo
Entorno operativo Elemento Especificación Para una conexión en serie ® Windows /98/98 SE/Me/NT 4.0* /2000 Pro* (Dispositivo preinstalado) Dispositivo de preparación de puerto en serie (RS-232C) IBM PC o PC compati- Para una conexión USB Sistema Opera- ® tivo Windows 98/98 SE/Me/2000 Pro/XP (Dispositivo preinstalado) Dispositivo de preparación de puerto USB... - Página 244 Accesorios (sólo para EE.UU.) Los siguientes suministros y accesorios están disponibles para su máquina P-touch. Puede pedirlos directamente a Brother si su tienda no dispone de ellos. ■ Etiquetas Avery para P-touch: Ideales para imprimir etiquetas de papel Avery de una en una (etiquetas impresas en negro sobre fondo blanco).
- Página 245 Cintas de identificación flexibles: Adhesivo especial para doblar, envolver y crear indicaciones Nº de producto Descripción Precio TZFX231 Negro sobre fondo blanco 1/2" (12 mm) 18,99 TZFX241 Negro sobre fondo blanco 3/4" (18 mm) 21,99 TZFX251 Negro sobre fondo blanco 1" (24 mm) 25,99 TZFX261 Negro sobre fondo blanco 1-1/2"...
- Página 246 Cintas laminadas de 3/4" (18 mm) de anchura Nº de producto Descripción Precio TZ141 Negro sobre fondo transparente 18,99 TZ145 Blanco sobre fondo transparente 20,99 TZ241 Negro sobre fondo blanco 20,99 TZ242 Rojo sobre fondo blanco 20,99 TZ243 Azul sobre fondo blanco 20,99 TZ344 Dorado sobre fondo negro...
- Página 247 499.95 Existen 4 sencillas formas de hacer pedidos directos a Brother. 1. Llámenos al número gratuito 1-888-879-3232 y pague con una de las principales tarjetas de crédito. 2. Visite nuestra página Web www.brothermall.com y pague con una de las principales tarjetas de crédito.
- Página 248 Índice alfabético Contact Information ........122 Controlador de impresora ..24, 37, 49, 52 Accesorios ........... 10, 116 Cortador ............ 110 Activación de P-touch Editor....71, 93 Crear imagen ......... 73, 95 Activación de P-touch Quick Editor ..79, 101 Cubierta del compartimiento de la cinta ..
- Página 249 Instalación básica......... 26 Símbolo ............73 Instalación de la bandeja de recogida ..22 Sistema operativo......... 24 Instalación del casete de cinta...... 20 Software............24 Instalación del controlador de impresora ..61 Solución de problemas ......112 Interruptor de ID USB ......12, 106 Soporte para la bandeja de recogida ....
-
Página 250: Información De Contacto (Sólo Para Eeuu)
Brother. Este sistema está disponible 24 horas al día, 7 días a la semana. Puede usar el sistema para enviar la información a cualquier número de fax, no sólo al número desde el que llama. -
Página 251: Descripción
• Entrega al día siguiente d.Envíe por correo el formulario cumplimentado (Sólo en territorio continental junto con el correspondiente abono a: de EEUU): $14.75 BROTHER INTERNATIONAL CORP. TOTAL A PAGAR Attn: Consumer Accessory Div. No se admiten pedidos contra reembolso P.O.Box 341332 Bartlett, TN 38184-1332 Método de abono (marque uno) - Página 253 • Entrega al día siguiente d.Envíe por correo el formulario cumplimentado (Sólo en territorio continental junto con el correspondiente abono a: de EEUU): $14.75 BROTHER INTERNATIONAL CORP. TOTAL A PAGAR Attn: Consumer Accessory Div. No se admiten pedidos contra reembolso P.O.Box 341332 Bartlett, TN 38184-1332 Método de abono (marque uno)
- Página 254 Printed in China LN2975001...