Tabla de contenido

Publicidad

Idiomas disponibles

Idiomas disponibles

Enlaces rápidos

USER'S GUIDE
GUÍA DE USUARIO
• Read this User's Guide before you start using your P-touch.
• Keep this User's Guide in a handy place for future reference.
• Antes de usar su equipo por primera vez, lea cuidadosamente esta guía de usuario.
• Guarde esta guía para futuras referencias.
1900/1910

Publicidad

Capítulos

Tabla de contenido

Solución de problemas

loading

Resumen de contenidos para Brother P-touch 1900

  • Página 1 1900/1910 USER’S GUIDE GUÍA DE USUARIO • Read this User’s Guide before you start using your P-touch. • Keep this User’s Guide in a handy place for future reference. • Antes de usar su equipo por primera vez, lea cuidadosamente esta guía de usuario. •...
  • Página 2 You no longer have to worry about urgent tasks that require professional printing. In the office, the factory, the lab and the home, the quality and performance of the P-touch 1900/1910 makes it an extremely practical machine.
  • Página 3 Year 2000 compliance. defect to determine whether a defect After the 90 Day Period, and until one exists, and if it does exist, Brother (or its year from date of original purchase by the Authorized Service Center) will repair or Original Purchaser (referred to in this (at Brother’s option) replace the Product...
  • Página 4 Product to Brother within This Limited Warranty is the only warranty five (5) business days; (ii) the malfunctions that Brother is giving for this Product. It is the of your original Product are not covered by final expression and the exclusive and only statement of Brother’s obligations to you.
  • Página 5 Important Information Should you have questions, or need information about your Brother Product, we have a variety of support options for you to choose from: USA-Customer Service: Customer Service 877-478-6824 (voice) Customer Service 901-379-1210 (fax) Automated Faxback 800-521-2846 World Wide Web www.brother.com...
  • Página 6: Tabla De Contenido

    CONTENTS Getting Started GENERAL DESCRIPTION ................... 1 GENERAL PRECAUTIONS .................. 3 BATTERIES ......................3 OPTIONAL AC ADAPTOR ................. 4 TAPE CASSETTE ....................5 ATTACHING LABELS ..................6 PRINT HEAD & ROLLERS ................... 7 For Your Information POWER KEY ....................... 8 CURSOR KEYS ....................
  • Página 7 FEED & CUT FUNCTION ................. 40 NUMBERING FUNCTION ................40 REPEAT PRINTING FUNCTION ............... 42 MEMORY FUNCTIONS ..................43 TROUBLESHOOTING ..................47 ERROR MESSAGE LIST ..................48 SPECIFICATIONS ..................... 51 ACCESSORIES ....................52 INDEX ......................54 BROTHER CONTACT INFORMATION ............56...
  • Página 9: Getting Started

    Getting Started GENERAL DESCRIPTION TOP VIEW Tape compartment cover AC adaptor connector LCD display Keyboard BOTTOM VIEW Tape exit slot Battery compartment cover...
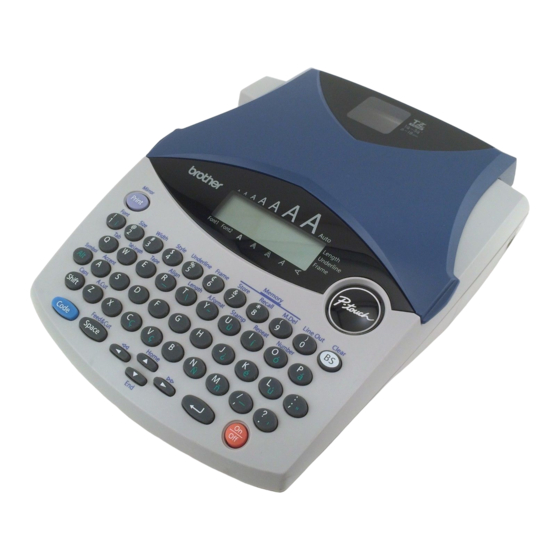
  • Página 10: Keyboard & Lcd Display

    KEYBOARD & LCD DISPLAY Delete key Cursor keys Return key Power key...
  • Página 11: General Precautions

    GENERAL PRECAUTIONS To avoid injuries, do not touch the cutter’s edge. Use only Brother TZ tapes with this machine to avoid damage. Do not use tapes that do not have the mark. Brother cannot be held responsible for trouble or damage by the use of unauthorized supplies.
  • Página 12: Optional Ac Adaptor

    Remove the batteries and disconnect the AC adaptor if you do not intend to use this machine for an extended period of time. When the power is disconnected, all text shown in the display and stored in the memory will be lost. If the batteries are not installed with their positive and negative poles pointing in the correct direction, the batteries may leak, overheat or burst, or the print head may overheat.
  • Página 13: Tape Cassette

    TAPE CASSETTE A single TZ tape cassette is supplied with this unit. However, since TZ tape cassettes are avail- able for this machine in a wide variety of colors and sizes, it is possible to make distinctive color-coded and stylized labels. In addition, this machine has been designed to allow you to change the tape cassettes quickly and easily.
  • Página 14: Attaching Labels

    ATTACHING LABELS LAMINATED TAPE The enclosed stick enables you to easily remove the backing from labels printed on laminated tapes. 1 Hold the tape in your left hand, with the printed surface facing up, and hold the stick in your right hand. 2 Pass the tape halfway through the long narrow hole in the stick.
  • Página 15: Print Head & Rollers

    PRINT HEAD & ROLLERS Occasionally, specks of dust or dirt become attached to the machine’s print head and rollers. This is particularly likely when you are using the unit outdoors or in a very dusty environment. If a section of the print head is covered with dust, a black horizontal streak may appear through the label text.
  • Página 16: For Your Information

    For Your Information POWER KEY The Power key ( o ) is located in the lower-right corner of the keyboard. If batteries have been installed or the machine has been plugged in using the optional AC adaptor, the previ- ous session’s information is displayed when the machine is turned on. This feature allows you to stop work on a label, turn off the machine, and return to it later without having to re-enter the text.
  • Página 17: Code, Alt & Shift Keys

    RIGHT CURSOR KEY To move the cursor one character to the right: Press w once. If this key is pressed when the cursor is at the end of a line followed by another line, the cursor moves to the beginning of the next line. To move the cursor several characters to the right: Hold down w until the cursor moves to the desired position.
  • Página 18 EXAMPLE To start the Symbol function: 1: D A N G E R _ Hold down and press once. Ü Æ æ Ã ã ALT KEY To type in characters printed in color on the right-hand side of the keys: Hold down a and press the key of the desired character written in color.
  • Página 19 SHIFT KEY To type in an uppercase letter or a symbol printed in the top left-hand corner of a key: Hold down s and press the key of the desired letter or symbol. EXAMPLE To type in “%”: 1: 5 _ Hold down and press 1: 5 % _...
  • Página 20: Space Key

    SPACE KEY The Space key ( _ ) lets you add blank spaces between characters in your text. It is differ- ent from the right cursor key ( w ), which just moves the cursor without adding blank spaces. To add a space: Press _.
  • Página 21: Tab Function

    Tape widths Maximum number of lines that can be printed 1/4" (6 mm) 3/8" (9 mm) 1/2" (12 mm) 3/4" (18 mm) Stamp 3/4" (18 mm) The return key can also be used to select an item from a list (e.g., add a symbol or accented character to the text) or to apply a selected setting.
  • Página 22 To set the tab length: 1 Hold down c and press W once. The current tab length is displayed. 2 Press h or e until the desired length is displayed or use the number keys to type in the length. To change the units (inches or centimeters) used to display the tab lengths, press M until the desired units are displayed.
  • Página 23: Delete Key

    Press until 1.0 is displayed. T A B L E N G T H 1 . O i n c h Press To add a tab: Hold down and press once. 1: a r t N O . DELETE KEY The Delete (backspace) key ( * ) allows you to remove characters to the left of the cursor’s current position.
  • Página 24: Line Out Function

    To delete a sequence of characters: 1 Press f, w, h or e to position the cursor below the character immediately to the right of the last character that you wish to delete. 2 Hold down * until all of the characters that you wish to delete are deleted. To quit a function without changing your text: Press * to return to your text.
  • Página 25: Clear Function

    CLEAR FUNCTION When clearing the display before entering new text, the Clear function can be used to choose whether all of the text is erased and all format functions (Font, Size, Width, Style, Underline, Frame, Tape margin, Alignment, Tab length, Mirror printing, and Length) are returned to their default settings, or whether just the text is erased.
  • Página 26 To delete just the text: 1 Hold down c and press *. 2 Press h or e until TEXT ONLY is selected (flashing). To return to the text without erasing anything, press *. 3 Press r. EXAMPLE To clear just the text: 1: G a r d e n 2: 3 4 5 –...
  • Página 27: Accent Function

    ACCENT FUNCTION The Accent function can also be used to add accented characters to your text. Many of these characters can also be typed in using the Symbol function. The accented characters are grouped according to the capital or small letter that they are com- bined with.
  • Página 28: Symbol Function

    EXAMPLE To add the accented character “É”: Hold down and press A C C E N T a – u / A – U ? Hold down and press È ˜ É Ë Ê E Press until É appears in the frame. É...
  • Página 29 Group Symbol ˜ Ü Æ æ Ã ã e ˜ Õ õ ° × ÷ § To type in a symbol: 1 Hold down c and press a. A row of symbols appears in the display. 2 Press h or e to display different rows of symbols and press f or w until the desired symbol appears enlarged within the frame in the middle of the display.
  • Página 30: Auto Format Function

    Press 1: D A N G E R AUTO FORMAT FUNCTION With the Auto Format function, you can select from a variety of preset formats perfect for your specific need. This function automatically adjusts the label length, tape margins and horizon- tal alignment without changing the text or any other formats, allowing you to create labels faster and easier.
  • Página 31: Stamp Function

    To select a preset format: 1 Hold down c and press Y once. The currently selected setting appears in the dis- play. 2 Press h or e to select the desired setting. To return to default settings, press _. 3 Press r to apply the selected setting. The Length indicator comes on if any setting other than DEFAULT is selected.
  • Página 32 3 Press r. The text is automatically formatted for the installed stamp: centered within the preset message area with the tape length and margins automatically adjusted. 4 Press p to cut the text out of the stamp stencil film. 5 After the stamp stencil film is cut off, remove the backing paper from the stamp stencil film and affix it to the ink pad of a stamp film holder.
  • Página 33 Hold the end of the stamp stencil film in place Guides with your thumb, and then pass the tape through the guides while pulling it tight. Fold the other end of the stamp stencil film over Fold over the other side of the stamp film holder and hold it in place with your finger.
  • Página 34: Font Function

    FONT FUNCTION With the Font function, you can choose one of two fonts for your text. The following font settings are available: The default font setting is FONT 1. The font indicator at the bottom left of the display shows the currently selected font setting.
  • Página 35: Size & Width Functions

    SIZE & WIDTH FUNCTIONS The character size can be adjusted using both the Size and Width functions. Since the charac- ter size that can be used depends on the width of the tape, the following table shows the char- acter sizes that can be used with each tape width. Tape Widths Sizes (in points) 1/4"...
  • Página 36 To change the size setting: 1 While holding down c, press 2 once, and keep c held down to display the current size setting. 2 While still holding down c, continue pressing 2 until the desired size setting is displayed. The current size setting is shown by the size indicator at the top of the display.
  • Página 37: Style Function

    EXAMPLE To select the ON width setting: While holding down , press once, and keep held down. W I D E O F F While still holding down , continue pressing until ON is displayed. W I D E Release STYLE FUNCTION You can choose from nine different character styles to apply to your text.
  • Página 38 EXAMPLE To select the I+SHAD style setting: While holding down , press once, and keep held down. S T Y L E N O R M A L While still holding down , continue pressing until I+SHAD is displayed. S T Y L E I + S H A D Release REFERENCE...
  • Página 39: Underline Function

    UNDERLINE FUNCTION You can emphasize your text by underlining it. The default underline setting is OFF. When the Underline function is set to ON, the Underline indicator on the right side of the display comes on. UNDL (Sample) To turn the Underline function on or off: 1 While holding down c, press 5 once, and keep c held down to display the current underline setting.
  • Página 40: Frame Function

    FRAME FUNCTION With the Frame function, you can choose from various frames and highlights to design a more decorative or emphasized label. The default setting is OFF; however, the following five settings are also available. When any setting other than OFF is selected, the Frame indicator on the right side of the dis- play comes on.
  • Página 41: Tape Margin Function

    EXAMPLE While still holding down , continue press- until the candy frame is displayed. Release TAPE MARGIN FUNCTION The Tape margin function allows you to adjust the size of the margins on the left and right sides of your text. The default tape margin setting is FULL;...
  • Página 42: Horizontal Alignment Function

    To change the tape margin setting: 1 While holding down c, press E once, and keep c held down to display the current tape margin setting. 2 While still holding down c, continue pressing E until the desired tape margin set- ting is displayed.
  • Página 43: Mirror Printing Function

    To change the horizontal alignment setting: 1 While holding down c, press R once, and keep c held down to display the current horizontal alignment setting. 2 While still holding down c, continue pressing R until the desired horizontal align- ment setting is displayed.
  • Página 44: Length Function

    To turn the mirror printing setting on or off: 1 While holding down c, press p once, and keep c held down to display the current mirror printing setting. 2 While still holding down c, continue pressing p until the desired mirror printing setting is displayed.
  • Página 45 To turn the Length function on or off: 1 While holding down c, press T once, and keep c held down to display the current length of the label (the text and both margins). Then the display will show the cur- rent label length setting (ON or OFF).
  • Página 46: Auto Cut Function

    Press until 5.0 inch is displayed. L E N G T H 5 . 0 i n c h Press AUTO CUT FUNCTION The Auto cut function allows you to set whether or not the machine will automatically cut each label after it is printed. Turn on the Auto cut function before starting to print in order to cut the labels automatically after printing them.
  • Página 47: Print Key

    While still holding down , continue pressing until ON is displayed. A U T O C U T Release PRINT KEY After you have entered your text and chosen the desired format settings, you are ready to print. If the Auto cut function is set to ON, the label will automatically be cut after it is printed.
  • Página 48: Feed & Cut Function

    FEED & CUT FUNCTION The Feed & Cut function is used to feed out 1” (24 mm) of tape and automatically cut it off. For example, after printing with the Auto cut function set to OFF or when printing has been interrupted.
  • Página 49 EXAMPLE To print three labels with numbers 1, 2 and 3: Position the cursor below “1”. 1: S T U D I O Hold down and press N U M B E R U N T I L Press N U M B E R U N T I L Press C O P I E S...
  • Página 50: Repeat Printing Function

    REPEAT PRINTING FUNCTION This function allows you to print up to 9 copies of the same text. To use the Repeat printing function: 1 Hold down c and press I. The message COPIES appears in the display with the “ ”...
  • Página 51: Memory Functions

    Press C O P I E S C O P I E S C O P I E S If the Tape margin function is set to any setting other than NONE, a cut- ting guide (:) is printed between each label so the tape can be cut to the correct size.
  • Página 52: Deleting A File

    To quit the Store function without storing the text, hold down c and press 7 (or press just * ). 2 Press a number key (or press h or e) to select the file number where you wish to store the text. 3 Press r.
  • Página 53 To cancel the Memory delete function without deleting the text file, hold down c and press 9 (or press just * ). 2 Press a number key (or press h or e) to select the file number containing the text that you wish to delete.
  • Página 54 To recall the text from file number 1: Hold down and press R E C A L L [ 4 ] J . S m i t Press R E C A L L [ 1 ] B i l l Press 1: _ i l l R e y n...
  • Página 55: Troubleshooting

    TROUBLESHOOTING Problem Remedy 1. The display stays blank after you have • Check that the AC adaptor is connected turned on the machine. correctly. • If you are using alkaline batteries, check that they are correctly inserted. • If the batteries are low, replace them with new ones.
  • Página 56: Error Message List

    ERROR MESSAGE LIST Error Message Cause Remedy 4 LINE This message appears if four lines Limit the number of lines to four. already exist when you press r. LIMIT! BATTERIES This message appears when the Replace the batteries or use the WEAK! installed alkaline batteries become AC adaptor.
  • Página 57 Error Message Cause Remedy LENGTH • This message appears if the text is • Shorten the text to less than 3’ LIMIT! longer than 3’ 3 1/3” (1 meter) when 3 1/3” (1 meter) before trying you try to print. to print.
  • Página 58 SHOULD YOU ENCOUNTER ANY PROBLEMS WITH YOUR PRODUCT, PLEASE DO NOT RETURN YOUR PRODUCT TO THE STORE! After referring to this User’s Guide, if you still need assistance, refer to the Brother Contact information in this guide.
  • Página 59: Specifications

    (each can be combined with Italic), and Vertical IMPORTANT WARRANTY IMFORMATION Thank you for purchasing this Brother product. We hope that you will enjoy using it. We suggest you keep all packing and other materials. Consult your product’s warranty for details.
  • Página 60: Accessories

    Supplies Obtain tape cassettes from your nearest authorized dealer. Use only Brother TZ tapes with this machine. Brother cannot be held responsible for trouble caused by the use of unauthorized supplies. Do not use tapes that do not have the mark.
  • Página 61 QTY/ Stock No. Description PRICE** PACKAGE 3/8” (9-mm) wide laminated tapes TZ-121 Black characters on clear adhesive $14.99 TZ-221 Black characters on white adhesive $16.99 TZ-325 White characters on black adhesive $18.99 TZ-421 Black characters on red adhesive $16.99 TZ-S121 Industrial (strong adhesive) black characters on clear adhesive $17.99 TZ-S221...
  • Página 62: Index

    INDEX AC adaptor ..........4 Entering Accented characters .......19 accented characters ......10, 19 Adding capital letters ........11 spaces ..........12 spaces ..........12 tabs ............14 symbols........10, 11, 20 Aligning ..........34 tabs ............14 Alt key ...........10 Error messages ........48 Automatic formatting ......22 Automatic tape-cutting ......38 Fabric tape ..........6 Feeding &...
  • Página 63 Power ............8 Tab length ..........14 Preset formatting ........22 Tabs ............13 Print head ..........7 Tape cassettes ..........5 Printing ..........39 Tape length ..........36 Text alignment ...........34 Recalling stored files ......44 framing ..........32 Repeat printing function ......42 margins ..........33 Return key ..........12 size ............28 style ...........29 underlining .........31 Shift key ..........11...
  • Página 64: Brother Contact Information

    For purchasing accessories and certain Brother products: http://www.brothermall.com Accessories and Supplies To order Brother accessories or supplies by Visa, MasterCard, Discover or American Express, you may call toll tree 1-888-879-3232, or complete the order form in your user’s guide and fax both sides of the form to 1-800-947-1445.
  • Página 65: P-Touch Accessory Order Form

    State/Zip: Daytime Phone: Shipping/Handing Options SEND ORDER FORM TO: Please choose one: Brother International Corp. • Standard ($5.00) Attn: Consumer Accessory Div. • 2nd day air freight ($8.75) Mandatory for all P.O. Box 341332 deliveries outside of the continental U.S.
  • Página 66 For purchasing accessories and certain Brother products: http://www.brothermall.com Accessories and Supplies To order Brother accessories or supplies by Visa, MasterCard, Discover or American Express, you may call toll tree 1-888-879-3232, or complete the order form in your user’s guide and fax both sides of the form to 1-800-947-1445.
  • Página 67 State/Zip: Daytime Phone: Shipping/Handing Options SEND ORDER FORM TO: Please choose one: Brother International Corp. • Standard ($5.00) Attn: Consumer Accessory Div. • 2nd day air freight ($8.75) Mandatory for all P.O. Box 341332 deliveries outside of the continental U.S.
  • Página 69 GUÍA DE USUARIO...
  • Página 70: Introducción

    Ya no hay por qué preocuparse por tareas urgentes que requieren impresión profesional. En la oficina, fábrica, laboratorio, o en casa, la calidad y el rendimiento del P-touch 1900/1910 la convierten en una máquina muy práctica.
  • Página 71 ÍNDICE CUIDADOS Y PRECAUCIONES GENERALES............1 PILAS........................2 ADAPTADOR DE CA OPCIONAL............... 3 CASETES DE CINTA .................... 4 COLOCACIÓN DE ETIQUETAS ................5 CABEZA DE IMPRESIÓN Y RODILLOS ............... 6 TECLA DEL CURSOR ..................7 TECLAS CODE, ALT Y SHIFT................8 TECLA DE RETORNO..................
  • Página 72 ESPECIFICACIONES ..................32 ACCESORIOS....................33 ÍNDICE ALFABÉTICO ..................36 INFORMACIÓN PARA CONTACTAR CON BROTHER ........38...
  • Página 73: Cuidados Y Precauciones Generales

    CUIDADOS Y PRECAUCIONES GENERALES Para evitar daños, no toque el borde de la cuchilla. Con esta máquina emplee sólo cintas Brother TZ para evitar daños. No emplee cintas que no tengan la marca . Brother no se hará responsable de problemas o daños ocasiona- dos por el uso de suministros no autorizados.
  • Página 74: Pilas

    PILAS Esta máquina portátil puede utilizarse en cualquier lugar instalando seis (6) pilas alcalinas AA. Cuando cambie las pilas, reemplace siempre las seis pilas al mismo tiempo. Para cambiar las pilas: 1 Extraiga la cubierta del compartimiento de las pilas de la parte posterior de la máquina. 2 Si ya hay pilas instaladas, extráigalas.
  • Página 75: Adaptador De Ca Opcional

    ADAPTADOR DE CA OPCIONAL El adaptador de CA (modelo AD-60) le permite emplear esta máquina siempre que disponga de una toma de corriente eléctrica. Para conectar el adaptador de CA opcional: 1 Inserte el conector del adaptador que tiene la marca DC IN 9,5V al lado derecho de la máquina.
  • Página 76: Casetes De Cinta

    CASETES DE CINTA Un casete de TZ se suministra con la unidad. Sin embargo, para esta máquina hay disponibles una amplia gama de cintas TZ de distintos colores y tamaños, es posible crear etiquetas dife- rentes codificadas por colores o tamaños. Además, este equipo ha sido diseñado para permitirle cambiar los casetes de cinta rápida y fácilmente.
  • Página 77: Colocación De Etiquetas

    COLOCACIÓN DE ETIQUETAS CINTA LAMINADA La varilla suministrada permite que, en las cintas laminadas, usted pueda extraer facilmente el papel del dorso de la etiqueta. 1 Tome la cinta con la mano izquierda, con la superficie impresa arriba, y tome la varilla con la mano derecha.
  • Página 78: Cabeza De Impresión Y Rodillos

    CABEZA DE IMPRESIÓN Y RODILLOS De vez en cuando, el polvo se adhieren al cabezal de impresión y a los rodillos del el equipo. Suele suceder cuando se emplea la unidad en exteriores o en lugares con mucho polvo. Si alguna parte de la cabeza termica de impresión está...
  • Página 79: Tecla Del Cursor

    TECLA DEL CURSOR La pantalla de LCD de esta máquina muestra dos filas de 9 caracteres; sin embargo, el texto que usted diseñe puede tener hasta 99 caracteres de longitud. Podrá revisar y editar diferentes partes de la izquierda moviendo el cursor hacia atrás y hacia delante. TECLA DEL CURSOR IZQUIERDA Para mover el cursor un carácter hacia la izquierda: Presione f una vez.
  • Página 80: Teclas Code, Alt Y Shift

    Para mover el cursor varias líneas hacia abajo: Mantenga presionado e hasta que el cursor se mueva a la línea deseada. Para mover el cursor al final de todo el texto: Mantenga presionado c y presione e. TECLAS CODE, ALT Y SHIFT La mayoría de los caracteres pueden introducirse simplemente presionando sus teclas.
  • Página 81: Tecla De Retorno

    TECLA DE RETORNO Al igual que en una máquina de escribir o procesador de texto, la tecla de Retorno ( r ) de esta máquina se emplea para poner fin a una línea de texto y empezar otra. Cuando haya terminado de introducir una línea, presione la tecla de retorno para hacer una línea nueva y mover al cursor a la misma.
  • Página 82: Tabulación

    TABULACIÓN Esta función le permitirá separar secciones de una línea de texto añadiendo tabulaciones. Esto le permitirá crear columnas perfectamente alineadas sin tener que introducir varios espa- cios. Todas las tabulaciones tendrán la misma longitud y se medirán desde el comienzo de la línea, o de la tabulación anterior, si es que existe.
  • Página 83: Tecla De Borrado (Del)

    Se imprimirá la etiqueta mostrada a continuación. Margen Tabulación Tabulación Margen (1,2” (3,0 cm)) (1,2” (3,0 cm)) TECLA DE BORRADO (DEL) La tecla de Borrado ( * ) le permite eliminar caracteres situados a la izquierda de la posi- ción actual del cursor. Se diferencia de la tecla del cursor izquierda ( f ) que sólo mueve el cursor sin borrar ningún carácter.
  • Página 84: Función De Borrado De Línea (Line Out)

    FUNCIÓN DE BORRADO DE LÍNEA (LINE OUT) Con la función de borrado de línea, podrá sacar con facilidad una línea entera de texto. Para borrar una línea de texto: 1 Presione f, w, h o e para situar el cursor dentro de la línea del texto que usted desee borrar.
  • Página 85: Función De Acentos

    FUNCIÓN DE ACENTOS La función de Acentos también se puede utilizar para añadir caracteres acentuados a su texto. Muchos de estos caracteres también se pueden escribir utilizando la función de Símbolos. Los caracteres acentuados se agrupan de acuerdo con la letra mayúscula o minúscula con la que se combinan.
  • Página 86: Función De Símbolos

    FUNCIÓN DE SÍMBOLOS Además de letras, de los símbolos y los números de las teclas, hay 53 marcas adicionales con la función de símbolos. Los siguientes símbolos están disponibles: Grupo Símbolos ˜ Ü Æ æ Ã ã e ˜ Õ õ...
  • Página 87: Función De Formato Automático

    FUNCIÓN DE FORMATO AUTOMÁTICO Con la función de formato automático, podrá seleccionar gran variedad de formatos preajus- tados adecuados para su necesidad específica. Esta función ajustará automáticamente la lon- gitud de la etiqueta y los márgenes de la cinta sin cambiar el texto ni ningún otro formato, permitiéndole crear etiquetas con mayor rapidez y facilidad.
  • Página 88: Función De Sellos

    FUNCIÓN DE SELLOS Le permite crear con rapidez y facilidad sus propios sellos. Después de haber insertado un casete de clichés, seleccione esta función para centrar automáticamente el texto y ajustar la longitud de la cinta y los márgenes a un formato perfecto para los soportes de películas de membrete entintados.
  • Página 89: Función Del Tipo De Caracteres

    FUNCIÓN DEL TIPO DE CARACTERES Con la función del tipo de caracteres podrá seleccionar uno de cuatro de tipos de caracteres para su texto. Los ajustes de tipos de caracteres siguientes están disponibles: El ajuste inicial del tipo de caracteres es FONT 1. El indicador de tipo de caracteres de la parte inferior izquierda del visualizador muestra el tipo de caracteres seleccionado actualmente.
  • Página 90 El ajuste de tamaño inicial es AUTO y el ajuste de ancho inicial es OFF. El ajuste de tamaño seleccionado actualmente se indica siempre mediante los indicadores de encima del visual- izador. Con el ajuste de tamaño AUTO, la máquina compara el texto ajustado con el ancho de la cinta instalada y ajusta automáticamente los caracteres al tamaño más grande posible.
  • Página 91: Función De Estilo

    FUNCIÓN DE ESTILO Podrá seleccionar entre nueve estilos de caracteres distintos que podrá aplicar a su texto. Los caracteres que se imprimen utilizando los tamaños más pequeños pueden resultar difíciles de leer si se seleccionan ciertos ajustes de estilos (por ejemplo, (I+SHAD). Hay disponibles los siguientes ajustes de estilos: NORMAL, BOLD (negrilla), OUTLINE (perfilado), SHADOW (sombreado), ITALIC (cursiva), I+BOLD (cursiva y negrilla), I+OUTL (cursiva y perfilado),...
  • Página 92: Función De Marcos

    Para cambiar el ajuste del subrayado: 1 Manteniendo presionada c, pulse una vez 5, y mantenga presionada c para hacer que se visualice el subrayado actualmente ajustado. 2 Siguiendo manteniendo presionada c, continúe presionando 5 hasta que se visualice el subrayado actualmente ajustado mediante el indicador del mismo. Cuando seleccione el ajuste ON, el indicador de Underline se en encenderá.
  • Página 93: Función De Cinta

    FUNCIÓN DE CINTA La función de margen cinta le permite ajustar el tamaño de los márgenes de los lados izquierdo y derecho del texto. El ajuste inicial de margen cinta es FULL, aunque hay también disponibles otros tres ajustes. FULL (márgenes de 1" (24 mm)) NARROW (márgenes de 1/6"...
  • Página 94: Función De Impresión En Modo Espejo

    Para cambiar el ajuste de la alineación horizontal: 1 Manteniendo presionada c, pulse una vez R, y mantenga presionada c para hacer que se visualice la alineación horizontal actualmente ajustado. 2 Siguiendo manteniendo presionada c, continúe presionando R hasta que se visualice la alineación horizontal actualmente ajustado.
  • Página 95: Función De Longitud

    FUNCIÓN DE LONGITUD Aunque la longitud de la etiqueta impresa ajusta automáticamente dicha longitud de acuerdo con el texto introducido, es posible que usted desee hacer una etiqueta con una longitud específica. La función de longitud le permitirá ajustar la longitud de la etiqueta entre 1,6” y 11,8”...
  • Página 96: Función De Corte Automático

    FUNCIÓN DE CORTE AUTOMÁTICO La función de Corte automático le permite ajustar si la máquina va a cortar automáticamente o no cada etiqueta después de imprimirla. Active la función de corte automático antes de empezar a imprimir para cortar automáticamente las etiquetas después de imprimirlas. Después de imprimir una etiqueta con la función de Corte automático ajustada en OFF, mantenga presionada c y presione _ una vez para avanzar la cinta, y después córtela.
  • Página 97: Función De Numeración

    FUNCIÓN DE NUMERACIÓN Esta función podrá utilizarse para imprimir muchas copias del mismo texto aumentando en cierto número en el texto después de haber impreso cada etiqueta. Para utilizar la función de numeración: 1 Presione f, w, h, o e para colocar el cursor debajo del número que desee aumentar.
  • Página 98: Funciones De La Memoria

    FUNCIONES DE LA MEMORIA Usted podrá utilizar la memoria para almacenar los archivos de texto que utilice con más fre- cuencia. El texto permanecerá en la memoria, junto con su formato, incluso después de haber quitado todos los caracteres del visualizador utilizando la función de Borrado (manteniendo presionada c y presionando *).
  • Página 99: Invocación De Texto

    INVOCACIÓN DE TEXTO Para invocar un archivo de texto: 1 Mantenga presionada c y presione 8. En el visualizador aparecerá el mensaje “RECALL” con el número de archivo y el principio del texto almacenado o invocado más recientemente. Para abandonar la función de memoria sin solicitar texto, mantenga pulsada c y presione 8 (o presione simplemente *).
  • Página 100: Solución De Problemas

    SOLUCIÓN DE PROBLEMAS Problema Remedio 1. La pantalla se queda en blanco después • Compruebe que el adaptador de CA esté de haber conectado la alimentación de correctamente enchufado. la máquina. • Si está empleando pilas alcalinas, com- pruebe que estén correctamente inserta- das.
  • Página 101: Lista De Mensajes De Error

    LISTA DE MENSAJES DE ERROR Mensaje de Causa Remedio error 4 LINE Este mensaje aparecerá si ya existen Límite el número de líneas a cuatro líneas cuando presione r. LIMIT! cuatro. BATTERIES Este mensaje aparece cuando las Reemplace las pilas o emplee el WEAK! pilas alcalinas instaladas están gasta- adaptador de CA.
  • Página 102 Mensaje de Causa Remedio error INVAL. Este mensaje aparecerá si el cursor Mueva el cursor hasta debajo CHRS! está al final del texto cuando man- del número manteniendo pul- tenga pulsada c y presione O. sada c y presionando O. LENGTH •...
  • Página 103 ¡SI TUVIERA ALGÚN PROBLEMA CON SU PRODUCTO, LE ROGAMOS QUE NO DEVUELVA EL PRODUCTO A LA TIENDA! Después de referirse a la Guía del usuario, si todavía necesita asistencia, refiérase a la infor- mación de contacto con Brother de esta guía.
  • Página 104: Especificaciones

    Normal, Bold, Outline, Shadow (todos pueden combinarse con cur- siva), y Vertical INFORMACIÓN IMPORTANTE SOBRE LA GARANTÍA Muchas gracias por la adquisición de este producto Brother. Esperamos que disfrute utilizándolo. Le sugerimos que guarde el cartón de embalaje y todos los demás materiales.
  • Página 105: Accesorios

    Adquiera los casetes de cinta en el distribuidor autorizado que le quede más cerca. Emplee sólo cintas Brother TZ con esta máquina. Brother no puede hacerse responsable por los problemas causados por el empleo de accesorios de consumo no autorizados.
  • Página 106 N.º de CANT./ Descripción PRECIO** producto PAQUETE Industrial (adhesivo fuerte) caracteres negros sobre TZ-S131 $18.99 fondo transparente Industrial (adhesivo fuerte) caracteres negros sobre TZ-S231 $18.99 fondo blanco Cintas laminadas de 3/8” (9 mm) TZ-121 Caracteres negros sobre fondo transparente $14.99 TZ-221 Caracteres negros sobre fondo blanco $16.99...
  • Página 107 Opciones N.º de CANT./ Descripción PRECIO** producto PAQUETE TZ-CL4 Limpiador de cabezales $20.99 AD-60 Adaptador de CA $24.99 6994 Caja de transporte protectora $29.99 Para adquirir accesorios vía Internet, le rogamos que visite el sitio Web: http://www.brothermall.com ** Los precios son solamente para clientes en EE.UU.
  • Página 108 ÍNDICE ALFABÉTICO Adaptador de CA ........3 Impresión..........24 Adición Impresión en modo espejo ..... 22 líneas nuevas........9 Incremento..........25 tabulaciones........10 Introducción Alineación ..........21 caracteres acentuados ......13 Almacenamiento........26 letras mayúsculas ......... 8 Anchura ..........17 símbolos..........
  • Página 109 Símbolos ..........14 Tabulaciones.......... 10 Sobreescritura ........26 Tamaño..........17 Solución de problemas......28 Tecla Alt ..........8 Subrayado..........19 Tecla Code..........8 Tecla de retorno........9 Tecla Shift ..........8 Teclas de cursor ........7 Texto alineacións......... 21 ancho..........17 estilo ..........
  • Página 110: Información Para Contactar Con Brother

    Bartlett, TN 38133-1332 Sistema de contestación por fax El servicio de asistencia postventa de Brother tiene instalado un sistema de contestación por fax fácil de utilizar para que usted pueda obtener contestación instantánea a las preguntas técnicas más comunes e información sobre todos los productos Brother.
  • Página 111: Hoja De Pedidos De Accesorios Para La P-Touch

    Código postal: Teléfono diurno: Opciones de envío/manejo ENVIAR LA HOJA DE PEDIDOS A: Le rogamos que elija una: Brother International Corp. • Estandar ($5.00) Attn: Consumer Accessory Div. • Segundo día de transporte por aire ($8.75). P.O. Box 341332 Obligatorio para todos los envíos fuera de Bartlett, TN38184-1332 EE.UU.
  • Página 112: Asistencia Por Internet

    Bartlett, TN 38133-1332 Sistema de contestación por fax El servicio de asistencia postventa de Brother tiene instalado un sistema de contestación por fax fácil de utilizar para que usted pueda obtener contestación instantánea a las preguntas técnicas más comunes e información sobre todos los productos Brother.
  • Página 113 Código postal: Teléfono diurno: Opciones de envío/manejo ENVIAR LA HOJA DE PEDIDOS A: Le rogamos que elija una: Brother International Corp. • Estandar ($5.00) Attn: Consumer Accessory Div. • Segundo día de transporte por aire ($8.75). P.O. Box 341332 Obligatorio para todos los envíos fuera de Bartlett, TN38184-1332 EE.UU.
  • Página 114 Printed in China LA7771001...

Este manual también es adecuado para:

P-touch 1910

Tabla de contenido