NEC MultiSync LCD205WXM Manual Del Usuario

Manuales relacionados para NEC MultiSync LCD205WXM


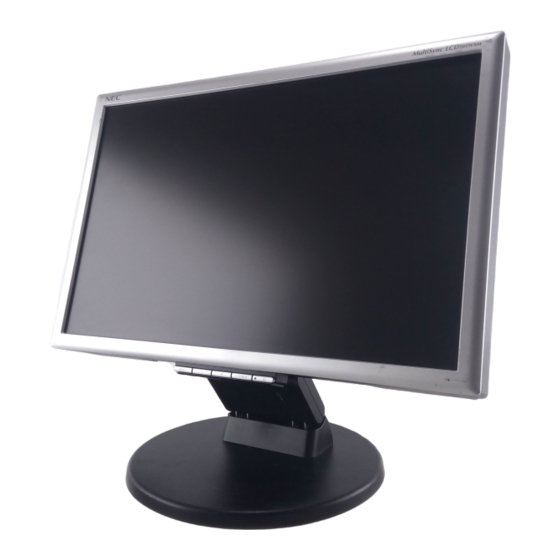
Resumen de contenidos para NEC MultiSync LCD205WXM
- Página 1 MultiSync LCD205WXM MultiSync LCD225WXM User’s Manual Bedienerhandbuch Manual del usuario Manuel Utilisateur Manuale utente Руководство пользователя 00_Cover 6/6/07, 8:36 AM...
- Página 2 TCO’03 Congratulations! The display you have just purchased carries the TCO’03 Displays label. This means that your display is designed, manufactured and tested according to some of the strictest quality and environmental requirements in the world. This makes for a high performance product, designed with the user in focus that also minimizes the impact on our natural environment.
-
Página 3: Manufacturer's Recycling And Energy Information
To ensure the best recycling of our products, NEC DISPLAY SOLUTIONS offers a variety of recycling procedures and gives advice on how to handle the product in an environmentally sensitive way, once it has reached the end of its life. - Página 4 Chinese RoHS-information relevant for Chinese market 00_Cover 6/6/07, 8:36 AM...
-
Página 5: Declaration Of The Manufacturer
Japan Voltage 120* * When operating the MultiSync LCD205WXM/LCD225WXM monitor with its AC 125-240V power supply, use a power supply cord that matches the power supply voltage of the AC power outlet being used. NOTE: This product can only be serviced in the country where it was purchased. - Página 6 3. Remove the Cable management cover (Figure A.4). Stand 4. Connect all cables to the appropriate connector on the back of the monitor (Figure B.1). Connect Headphones (not included) to the appropriate connector at the rear side of the monitor, if desired (Figure B.1). Base Cable management cover 5.
- Página 7 Controls OSD (On-Screen-Display) control buttons on the front of the monitor function as follows: 1. Basic function at pressing each key – Button SELECT 1<->2 / RESET At No OSD Showing OSD. Shortcut to Brightness Shortcut to Volume adjust Input signal select. showing adjust Menu.
- Página 8 OSD LOCK OUT INPUT RESOLUTION (Analog Input Only) This control completely locks out access to all OSD control Sets of the resolution of input signal to one of the following: functions without Volume, Brightness and Contrast. When When vertical active size is 768, you can select resolution attempting to activate OSD controls while in the Lock Out from 1024 x 768, 1280 x 768, 1360 x 768.
-
Página 9: Erklärung Des Herstellers
Spannung 120* * Verwenden Sie ein Netzkabel, das dem Spannungswert der Netzsteckdose entspricht, wenn Sie für den MultiSync LCD205WXM/ LCD225WXM-Monitor das 125-240-V-Wechselstromnetzteil verwenden. HINWEIS: Für dieses Produkt werden Kundendienstleistungen nur in dem Land angeboten, in dem Sie es gekauft haben. - Página 10 3. Entfernen Sie die Kabelabdeckung (Abbildung A.4). Monitorfuß 4. Verbinden Sie alle Kabel mit den entsprechenden Anschlüssen auf der Rückseite des Monitors (Abbildung B.1). Schließen Sie die Kopfhörer (nicht mitgeliefert) an die entsprechende Buchse auf der Rückseite des Monitors an, wenn gewünscht (Abbildung B.1). Standfuß...
- Página 11 Bedienelemente Die OSD Bedienelemente (On-Screen-Display) auf der Vorderseite des Monitors haben folgende Funktionen: 1. Basisfunktion beim Betätigen der jeweiligen Taste – Taste SELECT 1<->2/RESET Ohne OSD- Zeigt den OSD an. Öffnet das Fenster für die Öffnet das Fenster für die Auswahl des Anzeige Helligkeitseinstellung.
- Página 12 OSD ABSCHALTUNG EINGANGSAUFLÖSUNG (nur analoger Mit „OSD Abschaltung“ werden alle OSD-Funktionen bis auf Eingang) Lautstärke, Helligkeit und Kontrast gesperrt. Wenn Sie im Legt die Auflösung des Eingangssignals auf eine der Modus „OSD Abschaltung“ auf die OSD Steuerungen folgenden Einstellungen fest: zugreifen, wird ein Bildschirm angezeigt, der auf die Sperre Wenn die aktive Bildhöhe 768 ist, können Sie zwischen der OSD Steuerungen hinweist.
-
Página 13: Declaración Del Fabricante
(excepto Reino Unido) Voltaje 120* * Al utilizar el monitor MultiSync LCD205WXM/LCD225WXM con su alimentación de CA 125-240V, utilice un cable de alimentación adecuado al voltaje de la caja de enchufe de corriente alterna en cuestión. NOTA: este producto sólo puede recibir asistencia técnica en el país en el que ha sido adquirido. -
Página 14: Especificaciones
3. Retire el conducto para cables (figura A.4). Soporte 4. Conecte todos los cables al conector apropiado de la parte posterior del monitor. (figura B.1). Conecte los auriculares (no incluidos) al conector apropiado de la parte trasera del monitor, si lo desea. (figura B.1) Base Cubierta para cables 5. - Página 15 Controles Los botones de control OSD (On-Screen-Display) situados en la parte frontal del monitor funcionan del siguiente modo: 1. Funciones básicas pulsando una tecla – SELECT 1<->2/RESET Botón Si no aparece Aparece OSD. Acceso rápido al menú de Acceso rápido al menú de Selección de señal de ajuste del brillo.
- Página 16 DURACIÓN OSD DDC/CI El menú de control de OSD permanecerá activado mientras Activa o desactiva la comunicación y control bidireccional del se esté utilizando. En el submenú Actividad OSD puede monitor. indicar cuánto tiempo debe transcurrir desde que se toca por RESOLUCIÓN ENTRADA (sólo para entradas última vez un botón del menú...
-
Página 17: Déclaration Du Constructeur
Tension 120* * Pour utiliser le moniteur MultiSync LCD205WXM/LCD225WXM avec une alimentation 125-240 V, employez un cordon d’alimentation qui correspond à la tension d’alimentation de la prise de courant alternatif utilisée. REMARQUE : La maintenance de ce produit peut s’effectuer uniquement dans le pays d’achat. - Página 18 REMARQUE : Certains systèmes Macintosh n’ont pas besoin Support d’adaptateur de câble. 3. Retirez le cache-câbles (Figure A.4). 4. Reliez tous les câbles au connecteur approprié à l’arrière du moniteur (Figure B.1). Branchez les écouteurs (non fournis) Socle Cache-câbles au connecteur approprié à l’arrière du moniteur si nécessaire Figure A.4 (Figure B.1).
- Página 19 Commandes Fonctionnement des boutons de commandes OSD (On-screen-Display) sur la face avant du moniteur : 1. Fonction de base en pressant chaque touche – SELECT 1<->2/RESET Bouton Aucun affichage OSD Affichage de l’OSD. Raccourci vers le menu Raccourci vers le menu Sélection du signal d’entrée.
- Página 20 QUITTER L’OSD DDC/CI Le menu des commandes OSD restera à l’écran aussi ACTIVE ou DÉSACTIVE le contrôle et la communication longtemps qu’il sera utilisé. Dans le sous-menu Quitter l’OSD, bidirectionnels du moniteur. vous pouvez choisir la durée d’attente du moniteur entre la RÉSOLUTION D’ENTRÉE dernière pression de touche et l’extinction du menu des (Entrée analogique seulement)
-
Página 21: Dichiarazione Del Costruttore
Regno Unito) Tensione 120* * Usando il monitor MultiSync LCD205WXM/LCD225WXM con il relativo alimentatore AC 125-240V, utilizzare un cavo di alimentazione che corrisponde alla tensione della presa di corrente usata. NOTA: L’assistenza al prodotto viene fornita nel Paese in cui è stato acquistato il prodotto. - Página 22 3. Rimuovere la copertura cavi (Figura A.4). Supporto 4. Collegare tutti i cavi al connettore appropriato sul retro del monitor (Figura B.1). Collegare le cuffie (non incluse) al connettore appropriato sulla parte posteriore del monitor, se lo si desidera (Figura B.1). Base Copertura per cavi 5.
- Página 23 Controlli I tasti OSD (On-Screen-Display) sulla parte anteriore del monitor hanno le seguenti funzioni: 1. Funzioni principali tasti – Pulsante SELECT 1<->2/RESET Visualizzazione OSD Visualizzazione OSD. Collegamento al menu di Collegamento al menu di Seleziona il segnale di nulla regolazione della Luminosità. regolazione del Volume.
- Página 24 BLOCCO OSD RISOLUZIONE INPUT (solo ingresso analogico) Questo comando blocca l’accesso a tutte le funzioni di Imposta la risoluzione del segnale di ingresso su uno dei comando OSD ad eccezione di Volume, Luminosità e seguenti valori: Contrasto. Se si tenta di attivare i controlli OSD in modalità Quando la dimensione verticale attiva è...
-
Página 25: Краткое Руководство По Началу Работы
(кроме Великобритании) Напряжение 120* * Если монитор MultiSync LCD205WXM/LCD225WXM работает от источника питания переменного тока 125-240 В, необходимо использовать кабель питания, соответствующий напряжению этой электрической сети. ПРИМЕЧАНИЕ. Обслуживание данного изделия можно проводить только в той стране, где оно было приобретено. - Página 26 ПРИМЕЧАНИЕ. Для некоторых компьютеров Macintosh адаптер Подставка кабеля Macintosh не требуется. 3. Снимите крышку кабельного отсека (Рисунок A.4). 4. Подключите все кабели к соответствующим разъемам на задней панели монитора (Рисунок В.1) При желании можно Основание Крышка отсека подключить наушники (не входят в комплект) к распределения...
- Página 27 Органы управления Кнопки управления OSD (Экранного меню) на передней панели монитора выполняют следующие функции: 1. Основная функция при нажатии каждой кнопки – SELECT 1<->2/RESET Button Когда не отображается Отображение меню OSD. Вызов меню настройки Вызов меню настройки Выбор входного сигнала. экранный...
- Página 28 OSD TURN OFF (ОТКЛЮЧЕНИЕ МЕНЮ OSD) DDC/CI Меню параметров OSD будет оставаться на экране, пока Включение или отключение двухстороннего управления оно используется. В подменю OSD Turn Off (Отключение монитором. экранного индикатора) можно выбрать время ожидания INPUT RESOLUTION (ВХОДНОЕ монитора после последнего нажатия кнопки до закрытия РАЗРЕШЕНИЕ) (только...
- Página 29 xx_Back 6/6/07, 8:38 AM...
- Página 30 Printed in China Printed on recycled paper Part Number: 1E505392 xx_Back 6/6/07, 8:38 AM...