Publicidad

Idiomas disponibles

Idiomas disponibles

Enlaces rápidos

GE 5
GE 5 R
GSE 5 R

Publicidad

Tabla de contenido
loading

Resumen de contenidos para Flex GE 5

  • Página 1 GE 5 GE 5 R GSE 5 R...
  • Página 2 Instruction manual ........3 Notice d'utilisation........16 Instrucciones de funcionamiento .... 31...
  • Página 3: Tabla De Contenido

    Intended use CAUTION! Denotes a possibly dangerous situation. Non-observance of this warning may result The wall sander GE 5/GE 5 R/GSE 5 R is in slight injury or damage to property. designed – for commercial use in industry and trade, NOTE –...
  • Página 4: General Safety Rules For All Power Tools

    GE 5/GE 5 R/GSE 5 R ENERAL OWER AFETY ARNINGS WARNING: Read all safety warnings and all instructions. Failure to follow the warnings and instructions may result in electric shock, fire and/or serious injuries. Save all warnings and instructions for future reference.
  • Página 5 GE 5/GE 5 R/GSE 5 R 4. Power tool use and care 5. Battery tool use and care (a) Do not force the power tool. Use the (a) Recharge only with the charger specified correct power tool for your application.
  • Página 6: Specific Safety Rules

    GE 5/GE 5 R/GSE 5 R SPECIFIC SAFETY RULES This power tool is intended to function yourself and bystanders away from the  as a sander. Read all safety warnings, plane of the rotating accessory and run the instructions, illustrations and speci- power tool at maximum no-load speed for fications provided with this power tool.
  • Página 7 GE 5/GE 5 R/GSE 5 R Regularly clean the power tool's air Do not position your body in the area   vents. where power tool will move if kickback occurs. The motor's fan will draw the dust inside the housing and excessive accumulation...
  • Página 8: Noise And Vibration

    GE 5/GE 5 R/GSE 5 R harm. Some examples of these chemicals It may be used for a preliminary assessment are: of exposure. The declared vibration emis- – Lead from lead-based paints. sion level represents the main applications – Crystalline silica from bricks, cement, of the tool.
  • Página 9: Overview

    Overview Sanding head (GE 5) 12 Retaining washer with closed brush ring 13 Screw Sanding head (GE 5 R/GSE 5 R) 14 Velcro pad with open brush ring for sanding edges 15 Backing pad Gimbal bearings 16 Replaceable protective corners...
  • Página 10: Technical Specifications

    Uncertainty K Instructions for use NOTE The connection piece of the GE 5/GE 5 R/ GSE 5 R is a new development.If electric Before switching on the power tool power tools are used with conventional Unpack power tool and accessories connection pieces together with the ...
  • Página 11 GE 5/GE 5 R/GSE 5 R Insert the special dust bag for dry con- Place the sanding sheet in the centre   struction dust into your dust extractor of the Velcro pad and press on. according to the instructions supplied Conduct a test run to check that the san- ...
  • Página 12: Preselecting The Speed

    Hold the electric power tool with both hands! An extension tube is available for the wall When working, always have one hand sander GE 5/GE 5 R/GSE 5 R. on the handle – even when working with The extension tube can be used to increase attached extension.
  • Página 13: Operating Instructions

    GE 5/GE 5 R/GSE 5 R This avoids a sickle-shaped depression caused by the edge of the sanding disc. – The ring also retains the dust until it is extracted by the dust extractor. If the brush ring is damaged or shows excessive wear, it should be replaced (see section entitled “Maintenance and...
  • Página 14: Maintenance And Care

    GE 5/GE 5 R/GSE 5 R Maintenance and care WARNING! Before performing any work, pull out the mains plug. Cleaning WARNING! Do not use water or liquid detergents. Regularly blow out the housing interior  and motor with dry compressed air.
  • Página 15: Spare Parts And Accessories

    GE 5/GE 5 R/GSE 5 R Replacing the protective corners Warranty (GE 5 R/GSE 5 R) FLEX North America limited one year Remove protective corners  Warranty to be replaced. FLEX North America warrants its Professional Power Tools for a period of one year from the date of original purchase.
  • Página 16: Symboles Utilisés

    GE 5 / GE 5 R / GSE 5 R Table des matières Informations de sécurité importantes Symboles utilisés ....16 Informations de sécurité importantes ..16 Avant d’utiliser ou d’entretenir cet outil...
  • Página 17: De Sécurité

    GE 5 / GE 5 R / GSE 5 R ’ VERTISSEMENTS DE SÉCURITÉ GÉNÉRAUX POUR L OUTIL AVERTISSEMENT ! Lire tous les avertissements de sécurité et toutes les instructions. Ne pas suivre les avertissements et instructions peut donner lieu à un choc électrique, un incendie et/ou une blessure sérieuse.
  • Página 18 GE 5 / GE 5 R / GSE 5 R (d) Retirer toute clé de réglage avant de fonctionnement de l’outil. En cas de mettre l’outil en marche. Une clé laissée dommages, faire réparer l’outil avant de fixée sur une partie tournante de l’outil peut l’utiliser.
  • Página 19: Règles Spécifiques De Sécurité

    GE 5 / GE 5 R / GSE 5 R RÈGLES SPÉCIFIQUES DE SÉCURITÉ Il faut utiliser cette ponceuse électropor- Ne pas utiliser d’accessoire endom-   tative comme ponceuse à papier émeri. magé. Avant chaque utilisation, vérifiez Lire toutes les mises en garde de sécu- si des parties des outils mis en œuvre...
  • Página 20 GE 5 / GE 5 R / GSE 5 R Tenir l’outil par les surfaces de préhension De ce fait, un outil électroportative non  isolées, lors de la réalisation d’une fermement tenue subit une accélération opération au cours de laquelle l’organe de en sens opposé...
  • Página 21: Bruit Et Vibrations

    GE 5 / GE 5 R / GSE 5 R Ne pas fixer de chaîne coupante, – de la silice cristalline provenant de la  de lame de sculpture sur bois, de chaîne brique, du ciment ou d’autres matériaux coupante ni de lame de scie dentée.
  • Página 22 GE 5 / GE 5 R / GSE 5 R REMARQUE Le niveau de vibrations indiqué dans ces instructions a été mesuré selon un procédé standardisé dans la norme EN 60745, et peut servir à comparer les outils électroportatifs entre eux.
  • Página 23: Vue D'ensemble

    GE 5 / GE 5 R / GSE 5 R Vue d’ensemble Tête de ponçage (GE 5) 12 Rondelle de retenue Avec couronne de brosses fermée 13 Vis Tête de ponçage (GE 5 R / GSE 5 R) 14 Plateau auto-agrippant Avec couronne de brosses ouverte 15 Assiette d’appui...
  • Página 24: Données Techniques

    GE 5 / GE 5 R / GSE 5 R Données techniques Type d’appareil Ponceuse murale GE 5 GE 5 R GSE 5 R Classe de protection Puissance absorbée Vitesse tr / mn 1150–1750 Diamètre max. du disque Longueur 1520 1160 Flexible / Longueur x Diamètre...
  • Página 25: Instructions D'utilisation

    Si des outils électroportatifs à embout conventionnel doivent être utilisés avec le flexible d’aspiration de la GE 5 / GE 5 R / GSE 5 R, il est possible d’utiliser un adaptateur puisé dans la gamme d’accessoires FLEX. Mise en œuvre d’une installation d’aspiration...
  • Página 26: Présélection De La Vitesse

    Utilisation Un tube rallonge est proposé en option pour la ponceuse murale GE 5 / GE 5 R / GSE 5 R. Avec le tube rallonge, il est possible Enclenchement de l’appareil : d’accroître la portée pendant le travail avec la ponceuse murale.
  • Página 27 GE 5 / GE 5 R / GSE 5 R 9. Haussez la pression pour amener la feuille abrasive en contact avec la surface de travail. Ce faisant, faites pivoter la ponceuse en décrivant des mouvements se chevauchant, afin de lisser la surface jusqu’à...
  • Página 28: Consignes De Travail

    GE 5 / GE 5 R / GSE 5 R Consignes de travail Si vous immobilisez la ponceuse en marche sur la surface à travailler ou si vous la dépla- cez de façon irrégulière, des rayures Brosses en couronne inesthétiques en spirale ainsi que des défauts de planéité...
  • Página 29: Pièces De Rechange Et Accessoires

    GE 5 / GE 5 R / GSE 5 R Tournez la vis de retenue de la plaque Desserrez les vis de retenue.   de ponçage dans le sens antihoraire Détachez la couronne du carter.  et retirez-la. Mettez une couronne de brosses neuve ...
  • Página 30: Consignes Pour La Mise Au Rebut

    GE 5 / GE 5 R / GSE 5 R Consignes pour la mise au rebut Pour obtenir des renseignements portant sur la garantie de performance, veuillez écrire au : FLEX - North America, Inc. AVERTISSEMENT ! 2720 E. Phillips Road Lorsque les appareils ont fini de servir, Greer, SC 29650, États-Unis...
  • Página 31: Símbolos Empleados

    Indicaciones respecto o cepillos giratorios. Durante el uso de la amoladora para pared de la eliminación de equipos GE 5/GE 5 R/GSE 5 R debe utilizarse una en desuso (consultar página 45)! aspiradora del tipo M.
  • Página 32: Herramientas Eléctricas

    GE 5/GE 5 R/GSE 5 R DVERTENCIAS DE PELIGRO GENERALES PARA HERRAMIENTAS ELÉCTRICAS ADVERTENCIA: Lea íntegramente estas advertencias de peligro e instrucciones. En caso de no atenerse a las advertencias de peligro e instruccio-nes siguientes, ello puede ocasionar una descarga eléctrica, un incendio y/o lesión grave.
  • Página 33 GE 5/GE 5 R/GSE 5 R (b) Utilice un equipo de protección personal (b) No utilice herramientas eléctricas con un y en todo caso unas gafas de protección. interruptor defectuoso. Las herramientas El riesgo a lesionarse se reduce conside- eléctricas que no se puedan conectar o...
  • Página 34: Instrucciones De Segurida Específicos

    GE 5/GE 5 R/GSE 5 R (c) Si no utiliza el acumulador, guárdelo 6. Servicio separado de clips, monedas, llaves, clavos, (a) Únicamente haga reparar su tornillos o demás objetos metálicos que herramienta eléctrica por un profesional, pudieran puentear sus contactos. El corto-...
  • Página 35 GE 5/GE 5 R/GSE 5 R Usar equipo de protección personal. de asiento, lo que lleva a la pérdida  Utilice protección facial integral, protec- de control sobre el equipo. ción para los ojos o gafas protectoras No dejar la herramienta eléctrica ...
  • Página 36 GE 5/GE 5 R/GSE 5 R Un contragolpe es la consecuencia Otras indicaciones de seguridad de un uso incorrecto o deficiente Utilizar exclusivamente cables autori-  de la herramienta eléctrica. zados para su uso en el exterior. Puede evitárselo mediante medidas pre- No se recomienda el amolado de pintu- ...
  • Página 37: Ruidos Y Vibraciones

    GE 5/GE 5 R/GSE 5 R aserrado, la trituración y el taladrado, y Para una estimación exacta de la carga por otras actividades de construcción. Use oscilaciones, deberán tenerse en cuenta ropa protectora y lave todas las áreas también, los tiempos durante los cuales expuestas del cuerpo con agua y jabón.
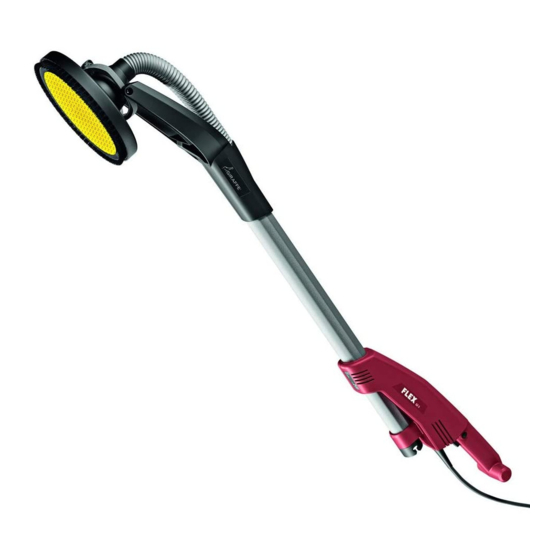
  • Página 38: De Un Vistazo

    Cabezal amolador (GE 5) 11 Tubo de conexión de 32 mm con cepillo corona cerrado 12 Disco de sujeción Cabezal amolador (GE 5 R/GSE 5 R) 13 Tornillo con cepillo corona abierto para 14 Plato abrojo el amolado de cantos 15 Plato de apoyo Rodamiento de acoplamiento cardánico...
  • Página 39: Datos Técnicos

    GE 5/GE 5 R/GSE 5 R Datos técnicos Tipo de equipo Amoladora para pared GE 5 GE 5 R GSE 5 R Tipo de protección Consumo de energía Número de revoluciones r.p.m. 1150–1750 Diámetro máx. del disco Longitud 1520 1160 Manguera de aspiración/largo x diámetro...
  • Página 40: Indicaciones Para El Uso

    32 mm. en el equipo eléctrico, desconectar NOTA el enchufe de red. El tubo de conexión de la GE 5/GE 5 R/ Quitar la hoja amoladora desgastada  GSE 5 R presenta un nuevo diseño. Si se del plato abrojo.
  • Página 41: Encendido Y Apagado Del Equipo Eléctrico

    Encendido y apagado del equipo Utilizar la prolongación (opcional) eléctrico Para la amoladora para pared GE 5/GE 5 R/ GSE 5 R puede adquirirse un tubo de prolon- gación. Mediante el tubo de prolongación puede aumentarse el radio de acción duran- te el trabajo con la amoladora de pared.
  • Página 42: Trabajar Con La Herramienta Eléctrica

    GE 5/GE 5 R/GSE 5 R Trabajar con la herramienta eléctrica ¡CUIDADO! ¡Sujetar la herramienta eléctrica con ambas manos! Una mano siempre debe permane- cer en la manija durante el trabajo – también cuando se trabaja con la prolongación. Las manos no deberán penetrar en la zona del cabezal amolado.
  • Página 43: Indicaciones Para El Trabajo

    GE 5/GE 5 R/GSE 5 R Indicaciones para el trabajo Si la amoladora se para estando en con- tacto con la superficie o bien si se la mueve de forma irregular, puede generarse un di- Anillo cepillo bujo desagradable en forma de espiral o irregularidades en la superficie.
  • Página 44: Cambio De Las Esquinas De Protección (Solamente Ge 5 R/Gse 5 R)

     Montar el cabezal amolador en orden  inverso. Cambio de las esquinas de protec- ción (solamente GE 5 R/GSE 5 R) Desmontar las esquinas de protección  a cambiar. Cambiar las piezas que hagan falta. Montar las esquinas de protección ...
  • Página 45: Indicaciones Para La Depolución

    Para reparación o reemplazo, devuelva la herramienta o accesorio completo, cubriendo el precio de transporte, al Centro de Servicio de FLEX o a la Estación de Servicio Autorizado más cercana. Puede ser que requiera prueba de compra. Esta garantía no incluye la reparación...

Este manual también es adecuado para:

Ge 5 rGse 5 r

Tabla de contenido