Descargar Imprimir esta página
DeWalt DWF83C Manual De Instrucciones

DeWalt DWF83C Manual De Instrucciones

Clavadora alimentada por rollo de 15

Publicidad

Idiomas disponibles

Idiomas disponibles

Enlaces rápidos

INSTRUCTION MANUAL
GUIDE D'UTILISATION
MANUAL DE INSTRUCCIONES
DWF83C
15° Coil Framing Nailer
Cloueuse à bobine pour charpente 15°
Clavadora alimentada por rollo de 15°
If you have questions or comments, contact us.
Pour toute question ou tout commentaire, nous contacter.
Si tiene dudas o comentarios, contáctenos.
1-800-4-D
WALT • www.dewalt.com
e
INSTRUCTIVO DE OPERACIÓN, CENTROS DE SERVICIO Y PÓLIZA DE
GARANTÍA. ADVERTENCIA: LÉASE ESTE INSTRUCTIVO ANTES DE
USAR EL PRODUCTO.

Publicidad

loading

Resumen de contenidos para DeWalt DWF83C

  • Página 1 If you have questions or comments, contact us. Pour toute question ou tout commentaire, nous contacter. Si tiene dudas o comentarios, contáctenos. 1-800-4-D WALT • www.dewalt.com INSTRUCTION MANUAL INSTRUCTIVO DE OPERACIÓN, CENTROS DE SERVICIO Y PÓLIZA DE GARANTÍA. ADVERTENCIA: LÉASE ESTE INSTRUCTIVO ANTES DE GUIDE D’UTILISATION...
  • Página 3 BEFORE OPERATING THIS TOOL, CAREFULLY READ AND WARNING: Some dust contains chemicals known to the State of UNDERSTAND ALL INSTRUCTIONS IN THE IMPORTANT California to cause cancer, birth defects or other reproductive harm such SAFETY INSTRUCTIONS SECTION. as asbestos and lead in lead based paint. •...
  • Página 4 the tool to a compressor rated at over 200 psi. The tool operating canister, perform maintenance or clear jammed fasteners while connected to the air supply. If the contact trip is adjusted pressure must never exceed 200 psi even in the event of regulator failure.
  • Página 5 • Do not point the tool at co-workers or yourself at any time. • Refer to the Maintenance and Repairs FIG. N sections for detailed information on No horseplay! Work safe! Respect the tool as a working implement. (Fig. J) the proper maintenance of the tool •...
  • Página 6 nails are set into the material and not pushed completely through. the trigger method that is appropriate to the fastener application (Fig. P) and the training of the operator. • Keep hands and body parts clear of FIG. Q CONTACT ACTION TRIGGER FIG.
  • Página 7 A moment of inattention while operating power tools may result in FIG. 1 serious personal injury. WARNING: Some dust created by power sanding, sawing, grinding, drilling, and other construction activities contains chemicals known to the State of California to cause cancer, birth defects or other reproductive harm.
  • Página 8 Tool Specifications OPERATION Preparing the Tool (Fig. 2, 3) MODEL DWF83C HEIGHT 12.5" (317.5 mm) WARNING: Read the section titled Important Safety Instructions WIDTH 4.95" (125.7 mm) at the beginning of this manual. Always wear eye and ear protection LENGTH 14.1"...
  • Página 9 4. Remove all fasteners from the canister. Contract Trip: The common operating procedure on contact trip tools is for the operator to contact the work surface to actuate 5. Check for smooth and proper operation of contact trip. Do not the trip mechanism while keeping the trigger pulled, thus driving use tool if either assembly is not functioning properly.
  • Página 10 2. Check Adjustment: The nailer must be set for the length of nail to WARNING: A nail will fire each time the trigger is depressed as be used. Nails will not feed smoothly if the canister is not correctly long as the contact trip remains depressed. adjusted.
  • Página 11 4. Swing cover closed. When operating tools at temperatures below freezing, complete preparation procedures outlined above and follow the directions below. 5. Close the door: Check that latch engages. (If it does not engage, 1. Make sure compressor tanks have been properly drained prior check that the nail heads are in the slot on the nose.) to use.
  • Página 12 If a nail becomes jammed in the nosepiece, keep the tool pointed FIG. 9 away from you and follow these instructions to clear: 1. Disconnect the air supply from the tool. 2. Open the canister: Pull down door latch and swing door/canister cover outward.
  • Página 13 Prevents jams, leaks and premature failure of tool If you need assistance in locating any accessory, please contact parts DEWALT Industrial Tool Co., 701 East Joppa Road, Towson, MD Tighten loose screws or other fasteners using the 21286, call 1-800-4-DEWALT (1-800-433-9258) or visit our website appropriate hex wrench or screwdriver www.dewalt.com.
  • Página 14 For further detail of warranty coverage and warranty repair information, visit www.dewalt.com or call 1-800-4-D WALT (1-800- 433-9258). This warranty does not apply to accessories or damage caused where repairs have been made or attempted by others.
  • Página 15 TROUBLESHOOTING GUIDE MANY COMMON PROBLEMS CAN BE SOLVED EASILY BY UTILIZING THE CHART BELOW. FOR MORE SERIOUS OR PERSISTENT PROBLEMS, CONTACT A D WALT SERVICE CENTER OR CALL 1-(800)-4-D WALT. WARNING: To reduce the risk of serious personal injury, remove fasteners from canister before making any adjustments or servicing this tool.
  • Página 16 TROUBLESHOOTING GUIDE MANY COMMON PROBLEMS CAN BE SOLVED EASILY BY UTILIZING THE CHART BELOW. FOR MORE SERIOUS OR PERSISTENT PROBLEMS, CONTACT A D WALT SERVICE CENTER OR CALL 1-(800)-4-D WALT. WARNING: To reduce the risk of serious personal injury, remove fasteners from canister before making any adjustments or servicing this tool.
  • Página 17 OUTIL OU DE TOUT AUTRE OUTIL D WALT, COMPOSEZ LE des yeux. (fig. A) NUMÉRO SANS FRAIS : 1 800 4-DEWALT (1 800 433-9258) • Porter systématiquement un casque de protection CONSERVER TOUS LES AVERTISSEMENTS approprié. Le casque de protection doit être conforme aux standards ANSI Z89.1.
  • Página 18 • Toujours porter des protecteurs d’oreilles appropriés et pneumatiques. Ne jamais utiliser de gaz FIG. G autres dispositifs de protection durant l’utilisation. Selon les combustibles ou tout autre type de gaz conditions et la durée d’utilisation, le bruit émis par cet outil peut réactif comme source d’énergie pour cet causer une perte auditive.
  • Página 19 que les clous sont chargés, une libération accidentelle pourrait peuvent entraîner une perte de maîtrise. Verrouiller l’outil dans un subvenir. (Fig. G) endroit sûr, hors de la portée des enfants lorsqu’il n’est pas utilisé. • Brancher l’outil à la source d’alimentation en air avant •...
  • Página 20 d’éviter une décharge accidentelle • Être conscient que lorsque l’outil est FIG. N FIG. Q et les risques de blessure. (fig. M) utilisé à des pressions du côté élevé de sa gamme de fonctionnement, les • Consulter les sections Entretien clous peuvent passer complètement et Réparations pour obtenir les à...
  • Página 21 • Saisir l’outil fermement pour en garder la maîtrise tout le contrôle de l’outil. Une position incorrecte de l’outil pourra en lui permettant de reculer hors de la surface de travail provoquer la libération accidentelle d’un clou. lorsque l’attache est enfoncée. En « mode d’actionnement DÉTENTE À...
  • Página 22 AVERTISSEMENT: TOUJOURS PORTER DES LUNETTES FIG. 1 DE SÉCURITÉ. Les lunettes optiques ne constituent PAS des lunettes de sécurité. Utiliser également un masque facial ou anti-poussières si l’opération génère de la poussière. TOUJOURS PORTER UN ÉQUIPEMENT DE PROTECTION HOMOLOGUÉ : •...
  • Página 23 64 mm (2,5 po) 2. Lubrifier l’outil comme suit: PRESSION DE SERVICE 70 - 120 psig a. Utiliser de l’huile pour outil pneumatique DEWALT ou une huile RECOMMANDÉE S.A.E. de grade 20 non détergente. NE PAS utiliser une huile CONSOMMATION D'AIR PAR 100 6,5 pi3/min...
  • Página 24 5. Vérifiez que le déclencheur par contact fonctionne correctement du recul (se reporter à Déclenchement par contact). L’outil à déclenchement séquentiel constitue un avantage sur le plan de et librement. N’utilisez pas l’outil si ses dispositifs ne fonctionnent pas correctement. N’utilisez JAMAIS un outil dont le déclencheur la sécurité, puisqu’il interdit tout déclenchement accidentel d’une deuxième attache si l’outil heurte la surface de travail ou quoi que ce par contact est bloqué...
  • Página 25 FIG. 4 DÉCLENCHEMENT SÉQUENTIEL - AVERTISSEMENT  : ne plus appuyer sur la gâchette en fin d’utilisation de l’outil. 1. Maintenez appuyé l’axe (I) à l’opposé du sélecteur, tout en tournant le sélecteur (J) Chargement de l’outil (Fig. 1, 6) à 180° vers la gauche sur la position de AVERTISSEMENT ...
  • Página 26 Réglage de la profondeur (fig. 7) FIG. 6 FIG. 6a AVERTISSEMENT : déconnecter la ligne d'air de l’outil et retirer les attaches du magasin avant tout réglage pour prévenir tout risque de dommages corporels. La fonction de réglage du contrôle de profondeur de la fixation permet de contrôler la profondeur à...
  • Página 27 1. S’assurer que les réservoirs du compresseur ont été purgés 1. Déconnectez l’outil de l’air comprimé. adéquatement avant l’utilisation. Toujours purger les réservoirs 2. Ouvrez le magasin. Abaissez le verrou du portillon et poussez le du compresseur au moins une fois par jour durant l’utilisation de portillon/couvercle du magasin vers l’extérieur.
  • Página 28 ACTION Lubrifier l’outil avec 5 à 10 gouttes d’huile pour outils de l’outil. Ces produits chimiques peuvent affaiblir les matériaux pneumatiques DEWALT de plastique utilisés dans ces pièces. Utiliser un chiffon humecté POURQUOI Prévenir la défaillance des joints toriques uniquement d’eau et de savon doux.
  • Página 29 à une usure normale ou à une mauvaise utilisation de l’outil. Accessoires Pour en savoir plus sur la protection et les réparations sous garantie, visiter le site Web www.dewalt.com ou composer le 1 800 433-9258 AVERTISSEMENT : puisque les accessoires autres que ceux (1 800 4-D WALT).
  • Página 30 AMÉRIQUE LATINE : Cette garantie ne s’applique pas aux produits vendus en Amérique latine. Pour ceux-ci, veuillez consulter les informations relatives à la garantie spécifique présente dans l’emballage, appeler l’entreprise locale ou consulter le site Web. REMPLACEMENT GRATUIT DES ÉTIQUETTES D’AVERTISSEMENT  : Si l’étiquette d’avertissement devient illisible ou est manquante, composer le 1 800 433-9258 (1 800 4-D WALT) pour un remplacement gratuit.
  • Página 31 GUIDE DE DÉPANNAGE IL EST POSSIBLE DE RÉSOUDRE FACILEMENT LES PROBLÈMES LES PLUS COMMUNS À L’AIDE DU TABLEAU CI-DESSOUS. POUR DES PROBLÈMES PLUS GRAVES OU DES PROBLÈMES QUI PERSISTENT, COMMUNIQUER AVEC UN CENTRE DE RÉPARATION WALT OU COMPOSER LE 1 800 4-D WALT.
  • Página 32 GUIDE DE DÉPANNAGE IL EST POSSIBLE DE RÉSOUDRE FACILEMENT LES PROBLÈMES LES PLUS COMMUNS À L’AIDE DU TABLEAU CI-DESSOUS. POUR DES PROBLÈMES PLUS GRAVES OU DES PROBLÈMES QUI PERSISTENT, COMMUNIQUER AVEC UN CENTRE DE RÉPARATION WALT OU COMPOSER LE 1 800 4-D WALT.
  • Página 33 SI TIENE ALGUNA PREGUNTA O DESEA HACER ALGÚN COMENTARIO ocular. (Fig. A) SOBRE ESTA O CUALQUIER OTRA HERRAMIENTA DEWALT, LLAME • Use siempre protección adecuada SIN COSTO AL: 1-800-4-DEWALT (1-800-433-9258) para la cabeza. La protección de la FIG.
  • Página 34 • Regule la presión del aire. Utilice una presión compatible • Desconecte la herramienta del suministro de aire cuando con los valores indicados en la placa de características. no se vaya a usar. Siempre desconecte la herramienta del (No debe exceder de 120 psi, 8.3 bar.) No conecte la herramienta suministro de aire y retire los clavos del depósito antes de dejar la zona de trabajo o de pasar la herramienta a otro a un compresor con un valor superior a 200 psi.
  • Página 35 FIG. N diariamente para ver si el disparador y el activador por contacto se • No ponga en peligro su estabilidad. mueven libremente. Se puede producir una descarga incontrolada. Manténgase siempre bien apoyado y equilibrado. La pérdida del equilibrio podría •...
  • Página 36 que la superficie de trabajo esté limpia de todo desecho y tenga materiales delgados o muy blandos. Asegúrese de que la cuidado de no perder el equilibrio cuando trabaje en entornos presión del compresor esté definida para que los clavos se elevados como tejados.
  • Página 37 GATILLO DE ACCIÓN DE CONTACTO FIG. T • Al utilizar una herramienta eléctrica, esté atento, concéntrese en lo que hace y aplique el sentido común. • Al usar el gatillo de acción de No utilice la herramienta si se encuentra fatigado o bajo la contacto, tenga cuidado de no influencia de drogas, alcohol o fármacos.
  • Página 38 
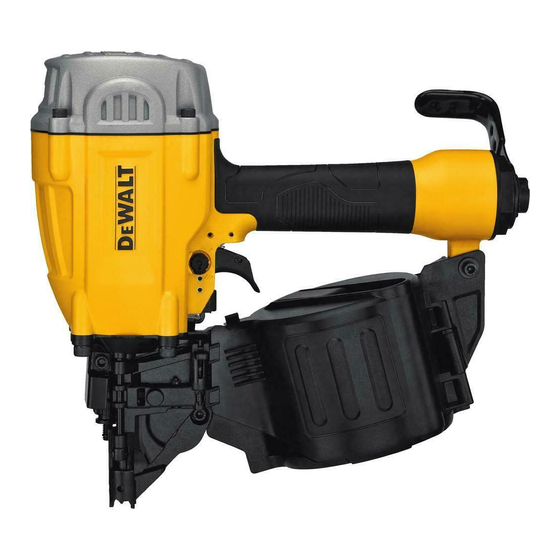
INSTRUCCIONES PARA FUTURAS CONSULTAS COMPONENTES (FIG. 1) A. Gatillo B. Escape C. Gancho de arrastre D. Activador por contacto E. Depósito Especificaciones de la herramienta MODELO DWF83C ALTURA 12.5" (317.5 mm) ANCHO 4.95" (125.7 mm) LARGO 14.1" (358.5 mm) PESO 8.5 lb (3.85 kg) DISTANCIA DE LA TOBERA A LA 2.5"...
  • Página 39 Especificaciones de la herramienta. 7. Conecte la manguera de aire. a. Utilice aceite DEWALT para herramientas neumáticas o un aceite no detergente de peso 20 S.A.E. NO utilice aceite 8. Controle si hay pérdidas audibles alrededor de válvulas y sellos.
  • Página 40 área de trabajo, mover la herramienta a otra ubicación o alcanzarle la y el ensamblaje de palés. Todas las herramientas neumáticas están sujetas al rebote al colocar remaches. La herramienta puede herramienta a otra persona. rebotar, liberando el interruptor, y si accidentalmente vuelve a tocar Selección de modo la superficie de trabajo con el gatillo aún presionado (el dedo aún ADVERTENCIA: Siempre use protección ocular [ANSI Z87.1...
  • Página 41 Carga de la herramienta (Fig. 1, 6) Para utilizar la clavadora en la modalidad FIG. 5 de activador secuencial: ADVERTENCIA: Desconecte la herramienta del suministro 1. Presione firmemente el activador por de aire antes de cargar los clavos para evitar que se dispare contacto contra la superficie de trabajo.
  • Página 42 – Ajuste de profundidad (Fig. 7) 2º paso: Clavos de 2-3/4” 3” (70 - 75 mm) – 3er paso: Clavos de 3-1/4” 3-1/2” (80 - 90 mm) ADVERTENCIA: Desconecte la línea de aire de la herramienta y retire los clavos del depósito antes de realizar ajustes o podrían FIG.
  • Página 43 Extracción de un clavo atascado (Fig. 8) Si va a operar herramientas con temperaturas bajo cero, siga los preparativos indicados anteriormente y las instrucciones siguientes.  Advertencia: Desconecte la línea de aire de la herramienta, engrane 1. Los tanques del compresor se deben haber drenado el bloqueo del gatillo y retire los clavos del depósito antes de realizar adecuadamente antes de la utilización.
  • Página 44 Cuadro de mantenimiento diario b. Retire el depósito. c. Retire el clavo doblado. ACCIÓN Lubrique la herramienta con 5-10 gotas de aceite d. Vuelva a ensamblar en orden inverso. para herramientas neumáticas D WALT MOTIVO Evita averías en las juntas tóricas FIG.
  • Página 45 ADVERTENCIA: Debido a que no se han probado con este garantía, visite www.dewalt.com o llame al 1 800 433-9258 (1 800 producto otros accesorios que no sean los que ofrece D WALT, el WALT).
  • Página 46 SERVICIO GRATUITO DE 1 AÑO WALT mantendrá la herramienta y reemplazará las piezas desgastadas por el uso normal sin costo y en cualquier momento durante el primer año después de la compra. Los elementos que sufren desgaste de la clavadora, como juntas tóricas y hojas de transmisión, no están cubiertos. GARANTÍA DE REEMBOLSO DE 90 DÍAS Si usted no está...
  • Página 47 GUÍA DE SOLUCIÓN DE PROBLEMAS CON LA TABLA SIGUIENTE, PODRÁ SOLUCIONAR MUCHOS PROBLEMAS COMUNES CON FACILIDAD. PARA PROBLEMAS PERSISTENTES O MÁS GRAVES, PÓNGASE EN CONTACTO CON EL CENTRO DE MANTENIMIENTO D WALT O LLAME AL 1-(800)-4-D WALT. ADVERTENCIA: Para reducir el riesgo de lesiones corporales graves, quite los clavos del depósito antes de realizar ajustes o reparar esta herramienta.
  • Página 48 GUÍA DE SOLUCIÓN DE PROBLEMAS CON LA TABLA SIGUIENTE, PODRÁ SOLUCIONAR MUCHOS PROBLEMAS COMUNES CON FACILIDAD. PARA PROBLEMAS PERSISTENTES O MÁS GRAVES, PÓNGASE EN CONTACTO CON EL CENTRO DE MANTENIMIENTO D WALT O LLAME AL 1-(800)-4-D WALT. ADVERTENCIA: Para reducir el riesgo de lesiones corporales graves, quite los clavos del depósito antes de realizar ajustes o reparar esta herramienta.
  • Página 49 GUÍA DE SOLUCIÓN DE PROBLEMAS CON LA TABLA SIGUIENTE, PODRÁ SOLUCIONAR MUCHOS PROBLEMAS COMUNES CON FACILIDAD. PARA PROBLEMAS PERSISTENTES O MÁS GRAVES, PÓNGASE EN CONTACTO CON EL CENTRO DE MANTENIMIENTO D WALT O LLAME AL 1-(800)-4-D WALT. ADVERTENCIA: Para reducir el riesgo de lesiones corporales graves, quite los clavos del depósito antes de realizar ajustes o reparar esta herramienta.
  • Página 52 El compresor será suficiente a velocidades de trabajo bajas o moderadas, pero puede tener dificultades en velocidades muy rápidas. WALT Industrial Tool Co., 701 East Joppa Road, Towson, MD 21286 (JUNE16) Part No. 9R212333 DWF83C Copyright © 2016 D WALT The following are trademarks for one or more D WALT power tools: the yellow and black color scheme;...

Este manual también es adecuado para:

Dwf83c-ca