Saf-Fro SAXOTIG 160 Instrucciones De Seguridad, Empleo Y Mantenimiento
Tabla de contenido
Idiomas disponibles
Idiomas disponibles
Enlaces rápidos
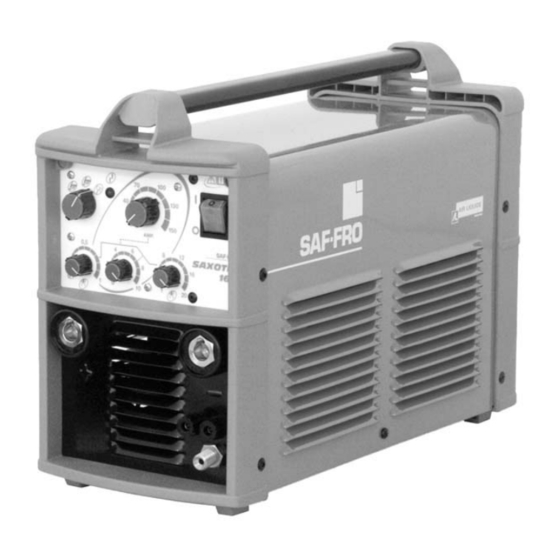
SAXOTIG 160
EN Safety instruction for use and maintenance - Do not destroy this manual
FR Instruction de securite d'emploi et d'entretien - Conserver ce livret d'instructions
ES Instrucciones de seguridad, empleo y mantenimiento - Conservar el presente manual
IT Istruzioni per la sicurezza nell'uso e per la manutenzione - Conservare il presente libretto
NL Veiligheidsinstructies voor gebruik en onderhoud - Bewaar deze handleiding
RO Instructiuni privind siguranta in exploatare si intretinerea - Pastrati acest manual
SK Bezpečnostné pokyny pri používaní a pri údržbe - Odložte si tento návod na použitie
Cat. Nr.:
800035051
Rev.:
03
Date:
07. 05. 2013
www.airliquidewelding.com
Air Liquide Welding - 13, rue d'Epluches - BP 70024 Saint-Ouen L'Aumône
Capítulos
Tabla de contenido

Manuales relacionados para Saf-Fro SAXOTIG 160


Resumen de contenidos para Saf-Fro SAXOTIG 160
-
Página 2: Tabla De Contenido
CONTENTS TECHNICAL DESCRIPTION ..........GB - 2 DESCRIPTION . - Página 6 SOMMAIRE RÈGLES DE SÉCURITÉ ........... . . F - 2 INSTALLATION DE L'APPAREIL .
- Página 10 SUMARIO DATOS TÉCNICOS ............E - 2 DESCRIPCIÓN .
-
Página 11: Datos Técnicos
DATOS TÉCNICOS 1.0 DATOS TÉCNICOS Compruebe si Ia toma de corriente dispone del fusible que se indica en Ia tabla técnica del generador. Todos los modelos de generador necesitan que se compen- sen las oscilaciones de voltaje. A una oscilación de ± 10% corresponde una varia- DESCRIPCIÓN ción de Ia corriente de soldadura de ±... -
Página 12: Soldadura Gtaw (Tig) Manual
FUNCIONES 1 - INTERRUPTOR DE ENCENDIDO Este interruptor (Rif.1 - Fig. ATENCION: EL CONECTOR DEL CABLE DE MASA Y EL DE POTENCIA-PORTAE- 4.1 pág. 3) puede colocarse en dos posiciones: I = ENCENDIDO LECTRODO CONECTADOS DE ESTA MANERA DARÀN COME RESULTADO - O = APAGADO. -
Página 13: Panel Trasero
MANTENIMIENTO PANEL TRASERO 5.0 MANTENIMIENTO ATENCIÓN: Desconectar el enchufe y dejar pasar - unos 5 minutos antes de iniciar el mantenimiento. La frecuencia de mantenimiento ha de aumen- tar en condiciones duras deuso. Cada tres (3) meses: Ejemplo Sustituir las etiquetas ilegibles. Limpiar y apretar los terminales de soldadura. - Página 14 INDICE GENERALE DESCRIZIONE E CARATTERISTICHE TECNICHE ........I - 2 DESCRIZIONE .
- Página 18 INHOUD BESCHRIJVING EN TECHNISCHE KENMERKEN ........NL - 2 BESCHRIJVING .
- Página 22 CUPRINS DESCRIERE ≤I CARACTERISTICI TEHNICE ....... RO - 2 DESCRIERE ..........RO - 2 CARACTERISTICI TEHNICE .
- Página 26 VŠEOBECNÝ INDEX POPIS A TECHNICKÉ CHARAKTERISTIKY ..........SK - 2 POPIS.
- Página 30 SPARE PARTS LIST - PIÈCES DÉTACHÉES - LISTA DE LAS PIEZAS DE RECAMBIO - LISTA PEZZI DI RICAMBIO WISSELSTUKKEN - LISTA PIESE COMPONENTE - ZOZNAM NÁHRADNÝCH DIELOV 13.1...
- Página 31 SPARE PARTS LIST - PIÈCES DÉTACHÉES - LISTA DE LAS PIEZAS DE RECAMBIO - LISTA PEZZI DI RICAMBIO WISSELSTUKKEN - LISTA PIESE COMPONENTE - ZOZNAM NÁHRADNÝCH DIELOV CODE DESCRIPTION DESCRIPTION DESCRIPCIÓN DESCRIZIONE W000050170 CIRCUIT BOARD HF 344/TH CIRCUIT ÉLECTRONIQUE HF 344/TH CIRCUITO ELECTRÓNICO HF 344/TH CIRCUITO ELETTRONICO HF 344/TH W000232541...
- Página 32 DUTY CYCLE - FACTEUR DE MARCHE - CICLO DE TRABALHO - CICLO DI LAVORO BEDRIJFSCYCLUS - DUTY CYCLE DUTY CYCLE - FACTEUR DE MARCHE - CICLO DE TRABAJO - CICLO DI LAVORO CICLO DE TRABALHO - BEDRIJFSCYCLUS - DUTY CYCLE VOLT/AMPERE CURVES - COURBES VOLT /AMPERE - CURVE VOLT/AMPERE - CURVA VOLTIOS/AMPERIOS KURVOR VOLT/AMPERE - VOLT –...
- Página 33 WIRING DIAGRAM - SCHÉMA ÉLECTRIQUE - ESQUEMA ELÉCTRICO - SCHEMA ELETTRICO ELEKTRISCHE SCHEMA'S - SCHEMA ELECTRICA - ELEKTRICKÁ SCHÉMA...
- Página 34 ✍...
- Página 35 ✍...
- Página 36 • SHOULD YOU WISH TO MAKE A COMPLAINT, PLEASE QUOTE THE CONTROL NUMBER SHOWN HERE. • EN CAS DE RECLAMATION VEUILLEZ MENTIONNER LE NUMERO DE CONTROLE INDIQUE. • EN CASO DE RECLAMACIÓN, SE RUEGA COMUNICAR EL NÚMERO DE CONTROL INDICADO AQUÍ. •...