Delta MultiChoice T27 Serie Instrucciones De Instalación
Ocultar thumbs
Ver también para MultiChoice T27 Serie:
- Instrucciones para la instalación del asiento de pared (35 páginas) ,
- Manual para propietarios (35 páginas)
Tabla de contenido
Idiomas disponibles
Idiomas disponibles
Enlaces rápidos
Write purchased model number here.
Table of Contents:
Warranties ............................................................................... P age 2
Installation Instructions ........................................................... P ages 3 - 7
Clean and care......................................................................... P age 9
Maintenance ............................................................................ Page 9
Cartridge Summary Reference Sheet ..................................... P age 9
For additional replacement parts, visit www.deltafaucet.com
THIS VALVE MEETS OR EXCEEDS THE
FOLLOWING STANDARDS: ASME A112.18.1/
CSA B125.1 and ASSE 1016 (Type -P- or -T-).
CAUTION: This system/device must be set by the
installer to ensure safe, maximum temperature.
Any change in the setting may raise the discharge
temperature above the limit considered safe and
may lead to hot water burns.
NOTICE TO INSTALLER: CAUTION!–As the
installer of this valve, it is your responsibility
to properly INSTALL and ADJUST this valve
per the instructions given. This valve does
not automatically adjust for inlet temperature
changes, therefore, someone must make the
necessary Rotational Limit Stop adjustments
at the time of installation and further adjustments
may be necessary due to seasonal water
temperature change. YOU MUST inform the
owner/user of this requirement by following
the instructions. If you or the owner/user are
unsure how to properly make these adjustments
please refer to page 6 and if still uncertain, call
us at 1-800-345-DELTA.
After installation and adjustment, you must affix
your name, company name and the date you
10/20/2020
You May Need
3/32"
1
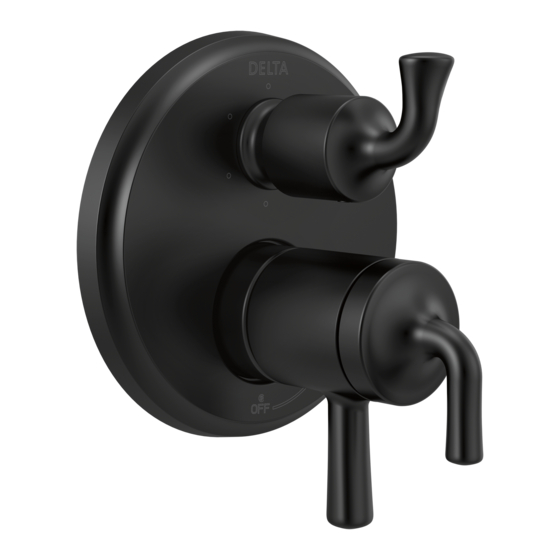
MultiChoice
with Diverter
Installation Instructions
Owners Manual
T27 Models
adjusted the Rotational Limit Stop to the caution
label provided and apply or attach the label to
the back side of the closest cabinet door and the
warning label to the water heater. Leave this
Instruction Sheet for the owner's/user's
reference.
WARNING: This pressure balanced or
thermostatic bath valve is designed
to minimize the effects of outlet water
temperature changes due to inlet pressure
changes, commonly caused by dishwashers,
washing machines, toilets and the like. It may
not provide protection from hot water burns
when there is a failure of other temperature
controlling devices elsewhere in the
plumbing system, if the rotational limit stop
is not properly set or if the hot water
temperature is changed after the settings are
made or if the water inlet changes
due to seasonal changes.
WARNING: Do not install a shut-off device on
either outlet of this valve. When this type of
device shuts off the water flow, it can defeat
the ability of the valve to balance the hot and
cold water pressures.
®
Valve Trim
X00107532
107532 Rev. C
Tabla de contenido

Manuales relacionados para Delta MultiChoice T27 Serie


Resumen de contenidos para Delta MultiChoice T27 Serie
- Página 10 107532 Rev. C...
-
Página 11: Puede Necesitar
6 y si aún tiene duda, para balancear las presiones del agua caliente y fría. llámenos al 1-800-345-DELTA. Después de la instalación y el ajuste, debe colocar su nombre, nombre de la empresa y la fecha en que ajustó la... - Página 12 Piezas electrónicas. Las piezas electrónicas (excepto las pilas), si las hay, de las llaves de agua Delta® compradas de deltafaucet.com o vendedores autorizados por Delta están garantizadas al consumidor comprador original de estar libres de defectos en material y fabricación durante cinco (5) años a partir de la fecha de compra o para los consumidores comerciales, por un (1) año a partir de la fecha de compra.
-
Página 13: Instalación Del Cartucho
Instalación del cartucho Cierre los suministros de agua. Quite la tuercas Introduzca el ensamble del adaptador (1) en tapas (1) y las tapas de prueba (2) del cuerpo de la el cuerpo de la tubería preliminar interna (2). tubería preliminar detrás de la pared (3). Asegúrese de que el ensamble del adaptador está... -
Página 14: Instalación Del Cartucho De Desvío
Instalación del cartucho de desvío PARA LA INSTALACIÓN DEL CARTUCHO DE Para la instalación del casquete DESVÍO: Deslice la tuerca tapa (1) sobre el casquillo Aplique lubricante de silicona a la junta tórica (2) desviador (2) y enrosque en el cuerpo de la para facilitar la instalación del cartucho desviador tubería preliminar. -
Página 15: Instalación Del Accesorio
(5) proporcionada en el casquillo del desviador. Nota: Para la instalación en pared gruesa, visite el sitio web de delta faucet, verifique "diagrama de piezas y accesorios" de los modelos que ha comprado, pida el juego de instalación en pared de espesor adecuado RP para apoyar un espesor de pared acabada de hasta 2 1/8". -
Página 16: Instalación Y Ajuste Del Tope Del Límite Rotacional
Instalación y ajuste del tope del límite rotacional Coloque la perilla para el control de temperatura (1) en la palanca de volumen y gire a la posición mixta (si es necesario). NO FIJE CON EL TORNILLO. Abra los suministros de agua; deje que el agua Hotter fluya hasta que esté... -
Página 17: Instalación Del Desviador De La Manija
Coloque a presión la tapa del control de temperatura sobre el pomo del control de temperatura alineando primero la lengüeta más pequeña (1) con la muesca para encajar en la cubierta (2) ubicada en el pomo de temperatura. Gire la lengúeta más grande (3) para que encaje con el mecanismo de presión (4). - Página 18 Water Flow For 3 Function Diverter / Flujo de agua para Desviadores de 3 posiciones / Écoulement de l’eau pour les inverseurs à 3 positions 1st Position 3rd Position 2nd Position 1 ª posición Outlet 1 2 ª Posición 3 ª...
-
Página 19: Limpieza Y Cuidado
Limpieza y Cuidado Se debe tener cuidado con la limpieza de este producto. Aunque su acabado es extremadamente resistente, puede ser dañado por abrasivos o pulimentos ásperos. Para limpiar, simplemente frote con un paño húmedo y seque con una toalla suave. Mantenimiento Si hay filtración de agua desde la llave de agua/grifo de Retire los asientos y resortes y reemplácelos. - Página 20 107532 Rev. C...
- Página 30 Notes/Notas/Notes 107532 Rev. C...
- Página 31 Notes/Notas/Notes 107532 Rev. C...