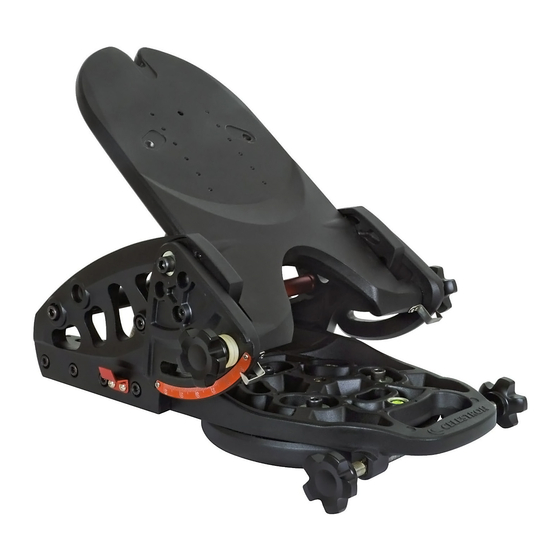
Celestron Pro HD Wedge Manual Del Usuario
Idiomas disponibles
Idiomas disponibles
Your Celestron telescope has a motor drive built into the base
allowing it to track the stars as they move across the sky from
east to west. However, for this drive to be useful, (particularly
for astrophotography) the telescope's axis of rotation should be
made parallel to the Earth's axis. The Pro HD Wedge allows you
to tilt the telescope's axis of rotation (polar or R.A. axis) so that
the telescope can track the stars as they move in an arc around
A
W
ssembling the
1. Loosen the two latitude locking screws on both sides of the
wedge (Figure 2).
2. Push the tilt plate all the way forward as far as it will go, and
hand tighten the locking screws to hold the tilt plate in place.
3. Thread back the latitude adjustment knob so that the threaded
rod does not interfere with the orange support rod.
4. Remove the three top screws from each of the L-brackets on
the bottom of the tilt plate. Do not remove the bottom screws.
5. Place one end of the swivel block into one of the top holes
on the inside of the L-bracket. It may be necessary to loosen
the bottom screws and rotate the L-bracket enough to fit the
swivel block between the brackets.
Note: The top hole position can be used for most latitudes.
At higher latitudes the upper hole will give more stability.
However at lower latitudes the middle or lower hole
position will give more range of motion if needed.
6. Once one side of the swivel block is in place, reattach the
screws to hold the L-bracket to the tilt plate.
7. Attach the remaining L-bracket to the bottom of the tilt plate
making sure the other end of the swivel block fits inside the
corresponding hole on the bracket. Tighten both brackets.
A
W
Djusting tHe
eDge for
Your wedge can be configured in two different ways; for latitude
range of 0° – 50°, or a latitude range of 40° - 90°. If you are at
a latitude between 40° - 50° either configuration should work
for you. The wedge comes pre-assembled in the 40° - 90°
configuration. However, if you are located at a latitude of 40° or
below you will need to adjust the latitude plates on the side of
the wedge. To adjust the latitude plates:
1. Loosen the pivot bolt on one of the side latitude plates.
2. Remove the three countersunk bolts holding the latitude plate
to the wedge.
3. Rotate the latitude plate downward so that the three holes line
up with the lower set of holes.
P
ro
MODEL #93664
edge
Y
L
our
AtituDe
HD W
eDge
ENGLISH
the celestial pole. When this is accomplished, the sky's motion
can be cancelled out simply by having the telescope rotate at
the same rate as the rotation of the Earth, but in the opposite
direction. This process is known as polar alignment.
Your wedge comes pre-assembled out of the box. However you
will need to attach the latitude adjustment rod and may need to
adjust the side latitude plate depending on your latitude.
4. Replace the three bolts to attach the plates to the wedge
and tighten the pivot bolt.
5. Repeat the steps above for the second latitude plate.
6. Reattach the latitude locking screws and hand tighten.
1
F
1
igure
F
2
igure
Pivot Bolt
Latitude Adjustment Knob
Tilt Plate
L-Bracket
Swivel
Block
Latitude
Plate
Latitude
Locking
Screw
Latitude
Scale
Tabla de contenido

Manuales relacionados para Celestron Pro HD Wedge


Resumen de contenidos para Celestron Pro HD Wedge
- Página 9 MODELO Nº 93664 ESPAÑOL Su telescopio Celestron tiene un motor impulsor incorporado a la Cuando se logra esto, se puede cancelar el movimiento del cielo base, que le permite buscar las estrellas al cruzar el firmamento simplemente haciendo rotar el telescopio a la misma velocidad de este a oeste.
- Página 10 ¿Q hacia delante si está observando desde una latitud más alta (50° ué escALA De LAtituD Debo usAr o más). Esto colocará el centro de gravedad del telescopio más Notará que las escalas en las dos placas de latitud laterales no cerca del centro de su trípode y ofrece una estabilidad máxima.
- Página 11 juste Atitud Antes de colocar su telescopio en el prisma, es conveniente 2. Use el botón de ajuste de latitud para mover la placa de ajustar primero la latitud adecuada en el prisma. Para hacerlo: inclinación hasta que la escala de latitud indique la latitud de su posición.
-
Página 12: A Lineación P Olar D El P Risma
ArAntíA ArAntíA limitAdA de un Año (nº 93685) onsulte el cAtálogo de Accesorios de elestron pArA Ver los detAlles de lA gArAntíA o VAYA A WWW celestron Celestron, 2835 Columbia Street, Torrance, CA 90503 • Teléfono: 310.328.9560 • Fax: 310.212.5835 #93664-INST 09-10...