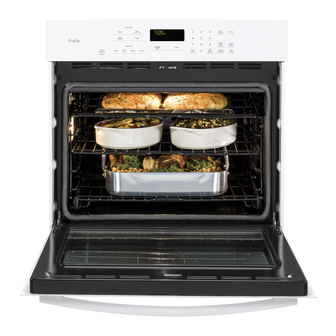
GE JT3800DH5BB Instrucciones De Instalación
Tabla de contenido
Idiomas disponibles
Idiomas disponibles
Enlaces rápidos
Installation Instructions
27" & 30" Electric Built-In Wall Ovens
Questions?
Call 1.800.GE.CARES (1.800.432.2737) or visit www.GEAppliances.com
In Canada, call 1.800.561.3344 or visit www.GEAppliances.ca
BEFORE YOU BEGIN
Read these instructions completely and
carefully.
•
Save these instructions
for local inspector's use.
•
Observe all governing
codes and ordinances.
• Note to Installer – Be sure to leave these
instructions with Consumer.
ATTENTION INSTALLER:
All electric wall ovens must be hard-wired (direct-wired) into an
approved junction box. A plug and receptacle is NOT permitted on these products.
FOR YOUR SAFETY:
WARNING:
Before beginning the installation, switch power off at the service panel and
lock the service disconnecting means to prevent power from being switched on accidentally. When the
service disconnecting means cannot be locked, securely fasten a prominent warning device, such as a tag,
to the service panel.
Be sure the oven is securely installed in a cabinet that is firmly attached to the house structure.
Weight on the oven door could cause the oven to tip and result in injury. Never allow anyone to climb, sit,
stand or hang on the oven door.
Make sure the wall coverings, counters and cabinets around the oven can withstand the heat
(up to 200°F [93.3°C]) generated by the oven.
MATERIALS YOU MAY NEED
Junction Box
Wire Nuts
Strain Relief Clamp for 1/2" Conduit
36" (91 cm) of String
1
REMOVE PACKAGING MATERIALS
Failure to remove packaging materials could result in damage to the appliance. Remove all packing
parts from oven, racks and heating elements. Remove protective film and labels on the outer door
and control panel. Also, remove plastic on trims and panel, all tape around the oven and any shipping
screws securing the oven to the base pad. Open oven door and remove literature pack and oven
racks. Remove the bottom trim from the top of the oven. It will be installed at the end of the installation
process. The trim is wrapped separately and taped to the top of the unit. Remove pedestal rails from
seperate box and set aside (30" Double Wall Ovens Only).
• Note to Consumer – Keep these instructions
for future reference.
• Skill level – Installation of this appliance
requires a qualified installer or electrician.
• Proper installation is the responsibility
of the installer.
• Product failure due to improper installation
is not covered under Warranty.
• Product is for indoor use only.
TOOLS YOU MAY NEED
1/8" Drill Bit and Electric or Hand Drill
Phillips Screwdriver
Wire Strippers
7/16" Nut Driver
T20 Screwdriver (hinge bracket)
1/4" Nut Driver
DESIGN INFORMATION
SINGLE OVEN INSTALLATIONS
The single oven may be installed in a cabinet alone or above a warming drawer. The single oven may also
be installed below a countertop or below specified cooktops. See the label on top of the oven for approved
models.
DOUBLE OVEN INSTALLATIONS
A double oven may be installed in a cabinet alone or above a warming drawer. See the label on top of the
oven for approved models.
IMPORTANT: Always refer to individual installation instructions packed with each product for specific
requirements.
2
PREPARE THE OPENING
NOTE: If the cabinet does not have a solid bottom, two
braces or runners must be installed to support the weight
of the oven. For single ovens, the runners and braces
must support 200 lbs (91 kg). For double ovens, the
runners and braces must support 375 lbs. (170 kg).
NOTE: If marks, blemishes or the cutout opening are
visible above the installed oven, it may be necessary to
add wood shims under the runners and front trim until
the marks or opening are covered.
NOTE: If the cabinet does not have a front frame and
the sides are less than ¾" (1.9 cm) thick, shim both sides
equally to establish the cutout width.
2" x 4" (5 cm x 10 cm)
or Equivalent Runners Level
with Bottom of Cutout
and Flush with Sides of Cutout
C
L
Suitable
Bracing
to Support
Tabla de contenido

Manuales relacionados para GE JT3800DH5BB


Resumen de contenidos para GE JT3800DH5BB
-
Página 9: Antes De Comenzar
¿Preguntas? puede instalarse debajo de un mostrador de encimera o debajo de las estufas especificadas. Vea la Llame al 1.800.GE.CARES (1.800.432.2737) o visite GEAppliances.com etiqueta de la parte superior del horno para consultar los modelos aprobados. En Canadá, llame al 1.800.561.3344 o visite www.GEAppliances.ca. - Página 10 ABERTURA PARA HORNOS ÚNICOS EN UN GABIENTE DE PARED ABERTURA PARA HORNOS ÚNICOS – BAJO EL MOSTRADOR DE ENCIMERA NOTA: Si el gabinete no cuenta con un armazón frontal y los lados son menores a un grosor de 3/4” (1,9 cm), NOTA: Estos hornos sólo pueden instalarse bajo los modelos específicos como se indica en la etiqueta coloque cuñas uniformemente sobre ambos lados para establecer al ancho de la abertura.
- Página 11 ABERTURA PARA HORNOS DOBLES (2 HORNOS TÉRMICOS) ABERTURA PARA HORNOS DOBLES (con horno de microondas superior) NOTA: Si el gabinete no cuenta con un armazón frontal y los lados son menores a un grosor de 3/4” (1,9 cm), NOTA: Si el gabinete no cuenta con un armazón frontal y los lados son menores a un grosor de 3/4” coloque cuñas uniformemente sobre ambos lados para establecer al ancho de la abertura.
-
Página 12: Aremoción De La Puerta (Recomendada)
CÓMO ASEGURAR EL HORNO MICROONDAS/ ADVANTIUM INSTALACIÓN DEL RIEL CON PEDESTAL (30” HORNOS DOBLES ÚNICAMENTE) SUPERIOR AL GABINETE Para hornos dobles como hornos superiores con microondas o Advantium. Asegure un taco de A. Coloque un riel con pedestal en cada rodadura del gabinete o centrado en el lado opuesto de la Madera sobre el costado del gabinete, de modo que el horno superior pueda ser asegurado al taco parte inferior del gabinete sólido nivelado con el lateral de la abertura del gabinete. -
Página 13: Bretiro De Los Tornillos De Embalaje (Para Horno De Pared Doble Con Horno Microondas Superior Únicamente)
RETIRO DE LOS TORNILLOS DE EMBALAJE (PARA HORNO REQUISITOS ELÉCTRICOS (CONT.) DE PARED DOBLE CON HORNO MICROONDAS SUPERIOR Este aparato debe recibir el voltaje y frecuencia adecuados, y debe conectarse a un circuito derivado individual con adecuada conexión a tierra, protegido por un interruptor de circuitos o fusible. Ver la placa de ÚNICAMENTE) clasificación ubicada en el armazón del horno para determinar la clasificación del producto. -
Página 14: Realice Las Conexiones Eléctricas
* Los hornos vienen equipados con un conducto de 40” o 54” de longitud. Si desea un conducto más largo, puede mientras C. A medida que desliza el horno haber uno disponible para su modelo. Para verificar la disponibilidad o solicitar piezas, llame al 1.800.GE.CARES. empuja el hacia atrás, jale del hilo para ** Para el Horno Doble con horno microondas superior recomendamos la instalación del conducto al costado de la caja... -
Página 15: Instalación Del Reborde Inferior
10 A INSTALE LOS TORNILLOS DE MONTAJE (HORNO INSTALACIÓN DEL REBORDE INFERIOR MICROONDAS SUPERIOR) • Una vez instalado el horno, adjunte el borde inferior a través de sus agujeros de montaje frente al soporte vertical, utilizando los dos tornillos con cabeza recortada provistos. El labio de la cubierta •... -
Página 16: Cómo Volver A Colocar La Puerta Del Horno
GUÍA DE INSTALACIÓN DE LA ESTANTERÍA DEL HORNO (SI CÓMO VOLVER A COLOCAR LA PUERTA DEL HORNO CORRESPONDE) NOTA: La puerta del horno es pesada. Puede necesitar ayuda para levantar la puerta lo suficiente como para deslizarla dentro de las ranuras de la bisagra. No levante la puerta de la manija. A.