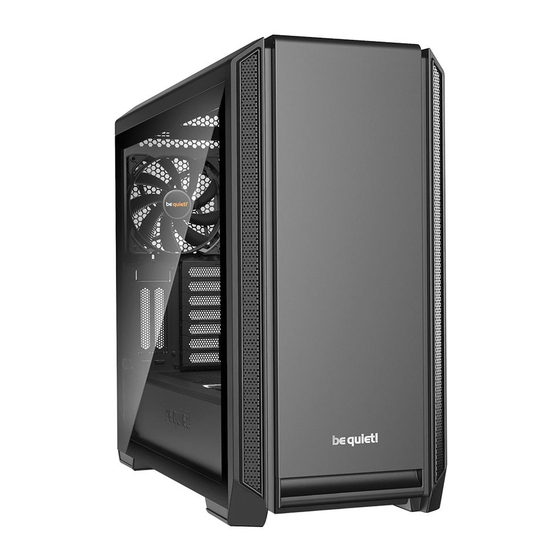
BE QUIET! Silent Base 801 Manual Del Usuario
Tabla de contenido
Idiomas disponibles
Idiomas disponibles
Enlaces rápidos
Tabla de contenido

Manuales relacionados para BE QUIET! Silent Base 801


Resumen de contenidos para BE QUIET! Silent Base 801
- Página 1 USER MANUAL...
-
Página 2: Tabla De Contenido
INDEX Glinde, June 2018 INTRODUCTION ............................... SPECIFICATIONS ..............................CONTENTS................................EXPLODED VIEW & PARTS ............................FAN COMPATIBILITY ..............................RADIATOR SUPPORT ............................... REMOVING INDIVIDUAL COMPONENTS ......................... AFFIXING AND REMOVING DISK DRIVES ....................... INSTALLING THE COMPONENTS ..........................10. INVERTED LAYOUT ..............................LIMITED WARRANTY ............................... EINLEITUNG ................................ -
Página 24: Introducción
INTRODUCCIÓN Gracias por elegir nuestro Dark Base. Le rogamos que lea la información de este manual y siga atentamente las instrucciones antes de la instalación. Si tiene cualquier pregunta póngase en contacto con nuestro servicio de atención al cliente. La información de contacto se indica en la sección «Información del fabricante». Garantía ∙ El fabricante proporciona una garantía de cinco años para consumidor (solo en caso de adquisición de be quiet! en un distribuidor autorizado). -
Página 25: Especificaciones
GPU: 449/287 (sin jaula de disco duro) Cancelación de ruido Esteras de aislamiento acústico (frontal / lateral / superior) Soluciones de refrigeración Canales de aire (superior y frontal) Controlador del ventilador (6x 3 pines): a mano (5V, 8V, 12V), módulo PWM *Silent Base 801 Window... -
Página 26: Contenido
CONTENIDOS Imágenes Nombre de la pieza Cantidad Jaula para discos duros Instalación de un disco duro Amortiguador de goma para disco Montaje desacoplado del disco duro duro Tornillo de disco duro Fijación del disco duro Tornillo M3 Fijación del SSD Tornillo #6-32 Fijación de la placa base Bridas para cables... -
Página 27: Vista Detallada Y Descripción De Las Piezas
Filtro de aire de la base Panel de E/S frontal Frontal de la caja Soporte de la fuente de alimentación Filtro de aire frontal *Silent Base 801 Window 4.1 Puertos multimedia y de E/S frontales Controlador de ventilador Botón de reinicio USB 2.0 LED de disco duro Audio HD (micrófono y audio) -
Página 28: Puertos / Panel Pcb
4.2 Puertos de E/S Los puertos de E/S frontales proporcionan las conexiones necesarias para la placa base.Consulte el manualde la placa base si necesita más información acerca de la asignación de pines y contactos. Audio HD (tomas de auriculares y micrófono) Determine los conectores de pines de audio HD de su placa base e inserte los cables de audio HD a las tomas asignadas. -
Página 50: Removing Individual Components
REMOVING INDIVIDUAL COMPONENTS ENTFERNEN DER EINZELNEN KOMPONENTEN | RETRAIT DE CHAQUE COMPOSANT | DEMONTAŻ POSZCZEGÓLNYCH ELEMENTÓW OBUDOWY | DESMONTAJE DE COMPONENTES 個々のコンポ INDIVIDUALES | 拆除個別元件 | 卸下单个组件 | ДЕМОНТАЖ КОМПОНЕНТОВ | ーネントを取り外す 7.1 Remove the side panel | Entfernen des Seitenteils | Enlever le panneau latéral | Enlever le panneau latéral | Demontaż... -
Página 51: Affixing And Removing Disk Drives
EN: To insert the front panel, slide it in at the top and down to the bottom. DE: Um die Frontblende einzusetzen, schieben Sie diese von oben nach unten herein. FR: Pour insérer le panneau avant, faites-le glisser du haut vers le bas. - Página 52 Заглушка слотов HDD | HDD 插槽蓋板 | 硬盘插槽盖 | HDD スロッ トカバー la ranura para disco duro | Silent Base 801 Window) EN: The five HDD slot covers may each be positioned in three ways. They can either completely cover the openings at two offset distances to suit different cable widths.
- Página 53 EN: According to requirements, they can be removed or repo- sitioned to install graphics cards or for cable management. DE: Je nach Anforderung können die Cover entfernt werden, zum Einsetzen von Grafikkarten oder für die Ka- belorganisation justiert werden. FR: Selon les besoins, ils peuvent être supprimés ou repo- sitionnés pour installer des cartes graphiques ou pour la gestion des câbles.
- Página 54 Air filter removal | Entfernen der Luftfilter | Démontage des filtres a poussière | Wyciąganie filtrów powietrza | Retirada de los filtros de aire | Демонтаж воздушных фильтров | 拆除空氣濾網 | 卸下空气过滤器 | エアフィ ルターの取り外し EN: To remove or clean the air filter the front panel of the case must first be detached. DE: Zum Entfernen und Reinigen der Luftfilter muss zu- nächst die Frontblende des Gehäuses entfernt werden.
-
Página 55: Installing The Components
INSTALLING THE COMPONENTS INSTALLATION DER KOMPONENTEN | INSTALLATION DES COMPOSANTS | INSTALACJA KOMPONENTÓW | INSTALACIÓN DE LOS COMPONENTES | 安裝元件 | 安装组件 | コンポーネントの取り付け УСТАНОВКА КОМПЛЕКТУЮЩИХ | 9.1. Installing the motherboard | Installation des Mainboards | Installation de la carte mère | | 安裝主機板... - Página 56 9.3 Installing a graphics card vertically | Grafikkarte vertikal installieren | Installation verticale d'une carte graphique | Instalowanie karty graficznej w pionie | Instalación vertical de una tarjeta gráfica | | 垂直安裝顯示卡 | 垂直安装显卡 | グラフィックスカ Вертикальная установка графической карты ードを垂直に取り付ける...
- Página 57 EN: Mount the power supply on the bracket and attach it with the screws supplied along with the power supply. DE: Installieren Sie das Netzteil auf die Netzteilhalterung und fixieren Sie dieses mit den beim Netzteil mitgelieferten Schrauben. FR: Montez l’alimentation sur le support et fixez-le avec les vis fournies avec l’alimentation. PL: Zamontuj zasilacz na wsporniku i przymocuj go załą- czonymi do zasilacza śrubami.
-
Página 58: Inverted Layout
JP: ラジエーターまたはファンをブラケットに置き、 図のよ うにねじを締めます。 INVERTED LAYOUT | INVERTIERTES LAYOUT | CHANGEMENT DE CONFIGURATION | UKŁAD ODWRÓCONY | CONFIGURACIÓN INVERTIDA 反向配置 | 倒置布局 | 反転レイアウト ОБРАТНОЕ РАСПОЛОЖЕНИЕ Default layout of the Silent Base 801 Inverted layout of the Silent Base 801... - Página 59 How to switch to inverted layout / Invertieren des Gehäuses / Comment passer à la configuration inversée / Jak przejść na układ odwrócony / Cómo cambiar a la configuración invertida / Инструкция по сборке корпуса с обратным расположением / 如何切換至反向配置 / 如何切换到倒置布局 / 反転レイ アウトに切り替える方法...
- Página 60 To remove the side panel of the PSU shroud, depress the centrally marked portion and detach it. Um die seitliche Abdeckung des PSU-Covers zu entfernen, drücken Sie die markierte Rastnase und ziehen die Abdeckung weg. Pour retirer le panneau latéral du cache alimen- tation, appuyez sur la partie marquée au centre puis détachez-la. Aby zdjąć boczny panel osłony zasilacza, naciśnij środkową część i odłącz ją. Para quitar el panel lateral de la cubierta de la fuente de alimentación, presione la parte marcada centralmente y suéltela.
- Página 61 Remove the five screws of the HDD tray. Entfernen Sie die fünf Schrauben des HDD-Trays. Retirez les cinq vis du plateau pour disque dur. Wykręć pięć śrub tacki dysku twardego. Retire los cinco tornillos de la bandeja de discos duros. RU: Выкрутите пять винта лотка HDD. TW: 拆下 HDD 托盤的五支螺絲。 CN: 拆下硬盘托盘的五个螺钉 。 JP: HDD トレイの...
- Página 62 Now reinsert the motherboard tray into the case and fasten it with the nine previously removed screws. Setzen Sie nun das Mainboard-Tray wieder in das Gehäuse ein und befestigen Sie es mit den neun zu- vor entfernten Schrauben. Maintenant, réintégrez le plateau de la carte mère dans le boîtier et fixez-le avec les neuf vis préalablement enlevées.
- Página 64 bequiet.com...