Pioneer DEH-P9800BT Manual De Instrucciones
Reproductor de cd/mp3/wma/acc dsp de alta po-tencia con tecnología inalámbrica bluetooth, sintoni-zador rds y control de cd múltiple

Manuales relacionados para Pioneer DEH-P9800BT


Resumen de contenidos para Pioneer DEH-P9800BT
- Página 1 Operation Manual Manual de instrucciones High power DSP CD/MP3/WMA/AAC Player with Bluetooth Wireless Technology, RDS tuner and Multi- CD control Reproductor de CD/MP3/WMA/ACC DSP de alta po- tencia con tecnología inalámbrica Bluetooth, sintoni- zador RDS y control de CD múltiple DEH-P9800BT...
- Página 113 Contenido Gracias por adquirir este producto Pioneer. Lea con detenimiento estas instrucciones sobre el funcionamiento del aparato, para que pueda darle el mejor uso posible. Una vez que las haya leído, conserve este manual en un lugar seguro para consultarlo en el futuro.
- Página 114 Contenido – Selección de carpetas con diseños de Uso de las funciones de títulos de discos 142 funda 150 – Ingreso de títulos de discos 142 Teléfono Bluetooth – Visualización de los títulos 143 Función manos libres con teléfonos móviles Uso de las funciones CD TEXT 143 provistos de tecnología inalámbrica –...
- Página 115 Contenido – Edición del nombre de una entrada del Reproducción de canciones en el Directorio de teléfonos 163 reproductor de audio Bluetooth 174 – Edición de números de teléfono 164 Para poner en pausa una canción 174 – Selección del icono de una entrada del Para detener la reproducción 175 Directorio de teléfonos 164 Desconexión de un reproductor de audio...
- Página 116 Contenido – Desplazamiento de información de Exploración de las pistas de un CD/MP3/ texto en el display 183 WMA 194 – Selección de pistas de la lista de títulos Uso de la lista de reproducción ITS y las de las pistas 184 funciones de títulos de discos 195 Uso de las funciones de títulos de Para reproducir canciones en el iPod...
- Página 117 Contenido – Selección de AUX como la fuente 217 Ajuste de los niveles de la fuente 206 – Ajuste del título del equipo Uso de la interfaz de usuario auditivo 206 TA y EQ automáticos (alineación temporal y auxiliar 217 ecualización automáticas) 206 Uso de diferentes visualizaciones de –...
-
Página 118: Antes De Comenzar
Solicite a personal calificado que realice el servicio técnico. Las viviendas privadas en los 25 estados ! El CarStereo-Pass Pioneer es para usarse sólo miembros de la UE, en Suiza y Noruega pue- en Alemania. den devolver gratuitamente sus productos ! Conserve este manual a mano para que electrónicos usados en las instalaciones de re-... -
Página 119: Registro Del Producto
En caso de que este producto no funcione co- Reproducción de ficheros WAV rrectamente, póngase en contacto con su con- Se pueden reproducir ficheros WAV grabados cesionario o con el centro de servicio Pioneer en CD-ROM/CD-R/CD-RW (grabaciones en autorizado más cercano. formatos LPCM (PCM lineal) o MS ADPCM). -
Página 120: Acerca De Wma
WMA codi- ficados con datos de imagen. Compatibilidad iPod® Cuando usa esta unidad con un adaptador Pioneer para iPod (CD-IB100), puede controlar un iPod con un conector del Dock. Acerca de AAC ! iPod es una marca comercial de Apple Computer, Inc., registrada en los EE.UU. -
Página 121: Acerca De Bluetooth
Sección Antes de comenzar % Pulse RESET con la punta de un lapicero Acerca de Bluetooth u otro instrumento con punta. Bluetooth es una tecnología inalámbrica de conectividad por radio de corto alcance, desa- Botón RESET rrollada para sustituir los cables de los teléfo- nos móviles, ordenadores de bolsillo y otros dispositivos. -
Página 122: Protección Del Producto Contra Robo
Sección Antes de comenzar Pulse MULTI-CONTROL para borrar la Extracción de la carátula memoria. Mantenga pulsado EJECT para abrir la Todos los datos de la fuente de teléfono, inclui- carátula. das las entradas en el Directorio de teléfonos, los números preajustados y el Historial de lla- madas, se borrarán. -
Página 123: Acerca Del Modo Demo
Sección Antes de comenzar Acerca del modo demo Uso y cuidado del mando a distancia Esta unidad ofrece dos modos de demostra- ción. Uno es el modo inverso y el otro es la ca- Instalación de la batería racterística de modo demo. Deslice y extraiga la bandeja de la parte poste- rior del mando a distancia y coloque la batería Importante... -
Página 124: Uso Del Mando A Distancia
Sección Antes de comenzar Uso del mando a distancia Nota Apunte el mando a distancia hacia la carátula Consulte Introducción a las funciones avanzadas para utilizarlo. del reproductor de CD incorporado en la página ! Es posible que el mando a distancia no 140. -
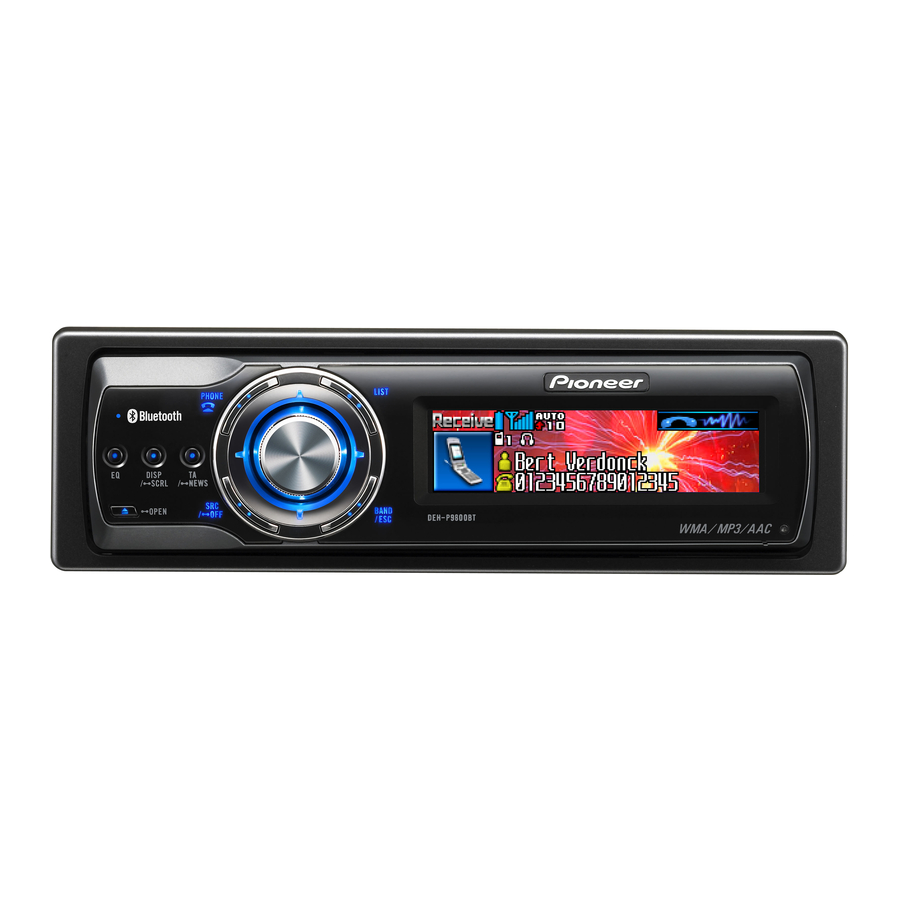
Página 125: Qué Es Cada Cosa
Sección Qué es cada cosa 1 1 1 2 2 2 3 3 3 4 4 4 5 5 5 7 7 7 b b b a a a 9 9 9 8 8 8 Unidad principal Gire el control para aumentar o disminuir el volumen. -
Página 126: Mando A Distancia
Sección Qué es cada cosa g Botón CLEAR c c c 9 9 9 d d d Pulse este botón para cancelar el número ingresado cuando se utilizan los botones 0–9. h Botones 0–9 m m m a a a Pulse estos botones para seleccionar direc- e e e l l l... -
Página 127: Funciones Básicas
Funciones básicas ! Por unidad externa se entiende un producto Encendido de la unidad Pioneer (como el que pueda estar disponible % Pulse SOURCE para encender la unidad. en el futuro) que, si bien es incompatible Cuando se selecciona una fuente, la unidad como fuente, permite que este sistema con- se enciende. -
Página 128: Ajuste Del Volumen
Sección Funciones básicas Ajuste del volumen Ranura de carga de CD % Utilice MULTI-CONTROL para ajustar el nivel de sonido. Si utiliza la unidad principal, gire MULTI-CONTROL para aumentar o disminuir el volumen. Si utiliza el mando a distancia, pulse VOLUME para aumentar o disminuir el volumen. -
Página 129: Sintonizador
Sección Sintonizador Para escuchar la radio Pulse SOURCE para seleccionar el sinto- nizador. Pulse SOURCE hasta que visualice Tuner. 1 1 1 2 2 2 2 3 3 3 3 4 4 4 4 5 5 5 5 Pulse BAND para seleccionar una banda. -
Página 130: Introducción A Las Funciones Avanzadas Del Sintonizador
Sección Sintonizador Introducción a las funciones Nota avanzadas del sintonizador Si no se utiliza la función en unos 30 segundos, el display volverá automáticamente a la visualiza- ción de la frecuencia. Almacenamiento y 1 1 1 recuperación de frecuencias Se pueden almacenar con facilidad hasta seis 1 Visualización de función frecuencias de emisoras para recuperarlas Muestra el estado de la función. -
Página 131: Almacenamiento De Las Frecuencias De Radio Más Fuertes
Sección Sintonizador Almacenamiento de las Selección de emisoras de la frecuencias de radio más lista de canales fuertes presintonizados La función BSM (memoria de las mejores emi- La lista de canales presintonizados le permite soras) permite guardar automáticamente las ver la lista de emisoras presintonizadas y se- seis frecuencias de las emisoras más fuertes leccionar la que desea recibir. - Página 132 Sección Sintonizador Utilice MULTI-CONTROL para seleccio- nar Local en el menú de funciones. Local aparece en el display. Pulse MULTI-CONTROL para activar la sintonización por búsqueda local. La sensibilidad de búsqueda local (p. ej., Level 2) aparece en el display. # Vuelva a pulsar MULTI-CONTROL para desac- tivar la sintonización por búsqueda local.
-
Página 133: Introducción A La Operación Rds
Sección ! Si se recibe un código PTY cero de una Introducción a la operación emisora, el display aparecerá en blanco. Esto indica que la emisora no ha defini- do el contenido del programa. ! Si la señal es demasiado débil como 1 1 1 2 2 2 2 para que esta unidad capte el código... -
Página 134: Cambio De La Visualización
Sección ! Es posible que no todas las emisoras suminis- Notas tren el servicio RDS. ! Sólo se sintonizan las emisoras RDS durante ! Las funciones RDS como AF y TA sólo se acti- la sintonización por búsqueda o BSM cuando van cuando la radio está... -
Página 135: Limitación De Las Emisoras Para Programación Regional
Sección Limitación de las emisoras para sora que brinda información que remite a emi- soras TP). programación regional Cuando se usa la función AF para resintonizar Sintonice una emisora TP o la emisora frecuencias automáticamente, la función re- TP de otra red realzada. gional limita la selección a las emisoras que transmiten programas regionales. -
Página 136: Uso De Las Funciones Pty
Sección Uso de las funciones PTY Uso de la interrupción por programa de noticias Se puede sintonizar una emisora usando la in- Cuando se transmite un programa de noticias formación PTY (tipo de programa). de una emisora de noticias con código PTY, la unidad puede cambiar de cualquier emisora a la emisora que transmite las noticias. -
Página 137: Recepción De Transmisiones De Alarma Pty
Sección Recepción de transmisiones de Pulse MULTI-CONTROL izquierda o de- recha para recuperar los tres radio textos alarma PTY más recientes. La alarma PTY es un código PTY especial para Al pulsar MULTI-CONTROL izquierda o dere- anuncios de emergencias tales como un de- cha se cambia entre la visualización de radio sastre natural. -
Página 138: Lista Pty
Sección Lista PTY Generales Específico Tipo de programa News&INFO News Noticias Affairs Temas de actualidad Info Información general y consejos Sport Programas deportivos Weather Informes del tiempo/Información meteorológica Finance Informes del mercado de valores, comercio, transacciones, etc. Popular Pop Mus Música popular Rock Mus Música moderna contemporánea... -
Página 139: Reproductor De Cd Incorporado
Sección Reproductor de CD incorporado Reproducción de un CD Para saltar y retroceder o avanzar hasta otra pista, pulse MULTI-CONTROL izquierda o derecha. 1 1 1 1 2 2 2 2 Si pulsa MULTI-CONTROL derecha, se salta al principio de la pista siguiente. Si pulsa MULTI-CONTROL izquierda una vez, se salta al principio de la pista actual. -
Página 140: Introducción A Las Funciones Avanzadas Del Reproductor De Cd Incorporado
Sección Reproductor de CD incorporado ! Si no se utiliza la función en unos 30 segun- Introducción a las funciones dos, el display volverá automáticamente a la avanzadas del reproductor visualización de reproducción. de CD incorporado Repetición de reproducción Hay dos gamas de repetición para la reproduc- ción de un reproductor de CD incorporado: Disc repeat (repetición de disco) y Track repeat (repetición de una pista). -
Página 141: Exploración De Las Pistas De Un Cd
Sección Reproductor de CD incorporado Exploración de las pistas de Selección del método de un CD búsqueda La reproducción con exploración le permite Se puede cambiar el método de búsqueda escuchar los primeros 10 segundos de cada entre las opciones de avance rápido/retroceso pista de un CD. -
Página 142: Uso De Las Funciones De Títulos De Discos
Sección Reproductor de CD incorporado # Si un disco tiene menos de 10 pistas, al man- Pulse MULTI-CONTROL arriba o abajo tener pulsado MULTI-CONTROL izquierda se re- para seleccionar una letra del alfabeto. cupera la primera pista del disco. También si Cada vez que se pulsa MULTI-CONTROL arri- después de realizar una búsqueda cada 10 pistas, ba, se visualizan las letras del alfabeto, núme-... -
Página 143: Visualización De Los Títulos
Sección Reproductor de CD incorporado Visualización de los títulos del disco, título de la pista y nombre del artista de la pista. Cuando la información de texto Puede visualizar la información de texto en tiene más de 24 letras, puede desplazarse por cualquier disco al cual se le haya ingresado ella de la siguiente manera. -
Página 144: Reproductor De Mp3/Wma/Aac/Wav
Sección Reproductor de MP3/ WMA/AAC/WAV Reproducción de ficheros Pulse SOURCE para seleccionar el repro- ductor de CD incorporado. MP3/WMA/AAC/WAV Pulse SOURCE hasta que visualice Compact Disc. # Si no hay un disco cargado en la unidad, no 1 1 1 1 2 2 2 2 3 3 3 3 4 4 4 4... -
Página 145: Selección Directa De Una Pista En La Carpeta Actual
Sección Reproductor de MP3/ WMA/AAC/WAV sulte Cambio del desplazamiento continuo en Notas la página 215. ! Al reproducir discos con ficheros MP3/WMA/ AAC/WAV y datos de audio (CD-DA), tales como CD-EXTRA y CD de MODO MIXTO (MIXED-MODE CD), los dos tipos de discos se Selección directa de una pueden reproducir sólo si se cambia el modo pista en la carpeta actual... -
Página 146: Introducción A Las Funciones Avanzadas Del Reproductor De Cd Incorporado (Mp3/ Wma/Aac/Wav)
Sección Reproductor de MP3/ WMA/AAC/WAV Introducción a las funciones Nota avanzadas del reproductor Si no se utiliza la función en unos 30 segundos, de CD incorporado (MP3/ el display volverá automáticamente a la visualiza- ción de reproducción. WMA/AAC/WAV) Repetición de reproducción Para reproducción de MP3/WMA/AAC/WAV, hay tres gamas de repetición de reproducción: 1 1 1... -
Página 147: Reproducción De Las Pistas En Orden Aleatorio
Sección Reproductor de MP3/ WMA/AAC/WAV Reproducción de las pistas Pulse MULTI-CONTROL para activar la reproducción con exploración. en orden aleatorio Se reproducirán los primeros 10 segundos de La reproducción aleatoria le permite reprodu- cada pista de la carpeta actual (o la primera cir las pistas en un orden aleatorio dentro de pista de cada carpeta). -
Página 148: Selección Del Método De Búsqueda
Sección Reproductor de MP3/ WMA/AAC/WAV Selección del método de MULTI-CONTROL se recupera la última pista de la carpeta. búsqueda # Si la carpeta actual tiene menos de 10 pistas, Se puede cambiar el método de búsqueda al pulsar y mantener pulsado MULTI-CONTROL entre las opciones de avance rápido/retroceso se recupera la primera pista de la carpeta. -
Página 149: Al Reproducir Un Disco Wav
Sección Reproductor de MP3/ WMA/AAC/WAV ! Si se activa la función de desplazamiento con- Al reproducir un disco WAV tinuo en el ajuste inicial, la información de % Pulse DISPLAY. texto se desplazará de manera ininterrumpida Pulse DISPLAY repetidamente para cambiar por el display. -
Página 150: Visualización De Diseños De Funda En Discos Cd-Rom
Puede visualizar la lista de carpetas que ya tie- http://www.pioneer.co.jp/car/pclink4/index- nen diseños de funda asignados y seleccionar e.html una carpeta para iniciar la reproducción. ! Es posible leer los diseños de funda (15 ! En la lista de diseños de funda, la unidad... - Página 151 Sección Reproductor de MP3/ WMA/AAC/WAV # También puede cambiar el diseño de funda de la carpeta si pulsa MULTI-CONTROL izquierda o derecha. # Si no se utiliza la lista en unos 30 segundos, el modo de lista de diseños de funda se cancela- rá...
-
Página 152: Teléfono Bluetooth
Sección Teléfono Bluetooth ! El indicador de nivel de señal puede dife- Función manos libres con rir del nivel de señal real. teléfonos móviles ! Dependiendo de cuáles sean los teléfo- provistos de tecnología nos móviles con tecnología inalámbrica inalámbrica Bluetooth Bluetooth, la intensidad de campo de radio puede no estar disponible. -
Página 153: Información Sobre La Fuente Telefónica
Sección Teléfono Bluetooth ! La distancia de visibilidad entre esta unidad y Configuración de la función su teléfono móvil deber ser de 10 metros o in- manos libres ferior para el envío y recepción de voz y datos Antes de poder hacer uso de la función mediante la tecnología inalámbrica Bluetooth. -
Página 154: Funciones Básicas Manos Libres
Sección Teléfono Bluetooth # Antes de desconectar el teléfono móvil de Llamar a un número del Directorio de esta unidad, no olvide ajustar el volumen a un teléfonos o del Historial de llamadas nivel adecuado. Si el volumen ha sido silenciado Consulte Llamada a un número del Directorio (nivel cero) en su teléfono móvil, permanecerá... -
Página 155: Aceptación De Una Llamada Telefónica
Sección Teléfono Bluetooth Mantenga pulsado BAND hasta que Rechazo de una llamada entrante Voice dial aparezca en el display. Puede rechazar una llamada entrante. Si Voice dial aparece en el display. Cuando se vi- desea hacer que esta unidad rechace automá- sualiza Voice dial ON, se activa la función de ticamente todas las llamadas entrantes, con- reconocimiento de voz. -
Página 156: Introducción Al Uso Avanzado De La Función Manos Libres
Sección Teléfono Bluetooth # Además de alternar entre las llamadas en Introducción al uso avanzado línea, no puede terminar cada llamada en espera de la función manos libres por separado. Pulse PHONE para finalizar todas las llamadas. Rechazo de una llamada entrante Si desea no interrumpir su llamada actual para responder una llamada entrante, puede 1 1 1... -
Página 157: Conexión De Un Teléfono Móvil
Sección Teléfono Bluetooth # Si el teléfono móvil está conectado a esta uni- Si aún no está conectado Search & connect (buscar y conectar)— dad mediante tecnología inalámbrica Bluetooth Connection open (conexión abierta)— con HSP (Perfil de audífono), no se podrá selec- Connect phone (conectar teléfono)—... -
Página 158: Búsqueda De Los Teléfonos Móviles Disponibles
Bluetooth en la página 216. Connecting. Para completar la conexión, veri- fique el nombre del dispositivo (Pioneer BT unit) e ingrese el código de enla- ce de su teléfono móvil. Si la conexión se esta- Desconexión de un blece, se visualizará... -
Página 159: Registro Del Teléfono Móvil Conectado
Sección Teléfono Bluetooth Utilice MULTI-CONTROL para seleccio- No data. Si ya se ha adoptado la asignación, apa- nar Disconnect phone en el menú de fun- recerá el nombre del dispositivo. Si desea volver a ciones. fijar una asignación en un nuevo teléfono, en pri- Disconnect phone y el nombre del dispositivo mer lugar debe eliminar la asignación actual. -
Página 160: Conexión A Un Teléfono Móvil Registrado
Sección Teléfono Bluetooth # Si necesita saber la dirección BD (Bluetooth Phone1 (teléfono de usuario 1)—Phone2 (te- Device) del teléfono, pulse MULTI-CONTROL iz- léfono de usuario 2)—Phone3 (teléfono de quierda aquí. usuario 3)—Guest1 (teléfono de invitado 1)— Guest2 (teléfono de invitado 2) # Si la asignación está... -
Página 161: Uso Del Directorio De Teléfonos
Sección Teléfono Bluetooth ! Esta función no se puede configurar para Para rellenar el Directorio de teléfonos puede cada teléfono de usuario distinto. transferir los números almacenados en una li- breta de direcciones de un teléfono de usuario Utilice MULTI-CONTROL para seleccio- registrado. -
Página 162: Cambio Del Orden De Visualización Del Directorio De Teléfonos
Sección Teléfono Bluetooth # El display indica cuántas entradas se han # Si gira MULTI-CONTROL hacia la derecha o transferido y el número total que se transferirán. izquierda también puede realizar la misma opera- ción. Aparece Data transferred y se completa la transferencia del Directorio de teléfonos. -
Página 163: Asignación De Géneros A Números De Teléfono
Sección Teléfono Bluetooth Asignación de géneros a Edición del nombre de una entrada números de teléfono del Directorio de teléfonos Si hay muchas entradas en el Directorio de te- Puede editar los nombres de las entradas del léfonos, puede resultar útil asignarlos a géne- Directorio de teléfonos. -
Página 164: Edición De Números De Teléfono
Sección Teléfono Bluetooth # Si mantiene pulsado DISPLAY puede cambiar Mantenga pulsado MULTI-CONTROL para visualizar la pantalla de ingreso de gé- el conjunto de caracteres entre ISO8859-1 (carac- teres europeos) e ISO8859-5 (caracteres rusos) de nero. manera alternante. Se visualiza Edit genre. # Los caracteres europeos y los caracteres rusos no se pueden combinar. -
Página 165: Borrado De Una Entrada Del Directorio De Teléfonos
Sección Teléfono Bluetooth Utilice MULTI-CONTROL para visualizar Borrado de una entrada del la lista detallada de su entrada del Directo- Directorio de teléfonos rio de teléfonos. Puede eliminar entradas del Directorio de telé- Consulte los pasos 2 al 5 Llamada a un núme- fonos una a una. -
Página 166: Uso De Números Prefijados
Sección Teléfono Bluetooth Presione MULTI-CONTROL para eliminar Borrado de la memoria la entrada del Directorio de teléfonos. Puede borrar la memoria de cada elemento: Se visualiza Cleared. Directorio de teléfonos, lista de historial de lla- La entrada del Directorio de teléfonos se elimi- madas marcadas/recibidas/perdidas y número nará. -
Página 167: Uso Del Historial De Llamadas
Sección Teléfono Bluetooth # Si el número ya está ingresado en el Directo- Uso del Historial de llamadas rio de teléfonos, también aparecerá el nombre. Las diez últimas llamadas realizadas (marca- # Al girar MULTI-CONTROL hacia la derecha o das), recibidas y perdidas, junto con sus fe- izquierda se cambiará... -
Página 168: Asignación De Números Prefijados
Sección Teléfono Bluetooth # Si vuelve a mantener pulsado Utilice MULTI-CONTROL para seleccio- MULTI-CONTROL se eliminará +. nar Number dial en el menú de funciones. Number dial aparece en el display. Pulse MULTI-CONTROL para hacer una # También es posible acceder a este menú llamada. -
Página 169: Cancelación Del Eco Y Reducción De Ruido
Sección Teléfono Bluetooth Cancelación del eco y Nota reducción de ruido Ring tone3 es diferente según la situación de la fuente (activada o desactivada). Cuando usa la función manos libres en el ve- hículo, puede que escuche un eco no desea- do. -
Página 170: Selección Del Icono Del Teléfono De Usuario
Sección Teléfono Bluetooth Visualización de la dirección Nota BD (Bluetooth Device) Si las funciones de rechazo automático y res- puesta automática están activadas, el rechazo Cada dispositivo que posee tecnología inalám- automático tendrá prioridad, y todas las llamadas brica Bluetooth recibe una dirección de dispo- entrantes se rechazarán automáticamente. -
Página 171: Visualización De La Dirección Bd De Esta Unidad
Device INFO. en el menú de funciones. unidad. El nombre del dispositivo (Pioneer BT unit) de esta unidad se mostrará en el display. Pulse MULTI-CONTROL izquierda para visualizar la dirección BD. -
Página 172: Bluetooth Audio
Sección Bluetooth Audio ! No es posible mostrar en esta unidad informa- Escuchar canciones en BT ción sobre las canciones (p.ej.: tiempo de re- Audio (reproductor de producción transcurrido, título de la canción, audio Bluetooth) índice de canciones, etc.) ! Mientras escucha canciones en su reproduc- tor de audio Bluetooth, no realice operaciones 1 1 1 2 2 2... -
Página 173: Ajuste Del Reproductor De Audio Bluetooth
Sección Bluetooth Audio Ajuste del reproductor de Pulse MULTI-CONTROL para visualizar el menú principal. audio Bluetooth FUNCTION, AUDIO y ENTERTAINMENT apa- Antes de utilizar su reproductor de audio Blue- recen en el display. tooth, debe configurar la unidad para su uso. Utilice MULTI-CONTROL para seleccio- Activación nar FUNCTION. -
Página 174: Función
Sección Bluetooth Audio Función funciones y las otras funciones no estarán dispo- nibles. # Para volver a la visualización de reproducción, pulse BAND. Notas ! Si no se utiliza la función en unos 30 segun- 1 1 1 dos, el display volverá automáticamente a la visualización de reproducción. -
Página 175: Para Detener La Reproducción
Utilice MULTI-CONTROL para seleccio- nar Device INFO. en el menú de funciones. Utilice MULTI-CONTROL para seleccio- El nombre del dispositivo (Pioneer BT unit) de nar Stop en el menú de funciones. esta unidad se mostrará en el display. Stop aparece en el display. - Página 176 Sección Bluetooth Audio Pulse MULTI-CONTROL abajo para cam- biar a la versión del sistema de esta uni- dad. Se muestra la versión del sistema (micropro- cesador) de esta unidad. # Si se pulsa MULTI-CONTROL izquierda apare- ce la versión del módulo Bluetooth de esta uni- dad.
-
Página 177: Reproductor De Cd Múltiple
Sección Reproductor de CD múltiple Reproducción de un CD Pulse MULTI-CONTROL arriba o abajo para seleccionar el disco que desea escu- char. 1 1 1 1 2 2 2 2 3 3 3 3 # También se puede seleccionar un disco, utili- zando los botones 1–6 en el mando a distancia. -
Página 178: Selección Directa De Una Pista
Sección Reproductor de CD múltiple Selección directa de una pista Introducción a las funciones avanzadas del Al utilizar el mando a distancia, se puede se- leccionar directamente una pista ingresando reproductor de CD múltiple el número de la pista deseada. Pulse DIRECT. -
Página 179: Repetición De Reproducción
Sección Reproductor de CD múltiple Reproducción de las pistas Notas en orden aleatorio ! Al reproducir un disco CD TEXT en un repro- ductor de CD múltiple compatible con CD La reproducción aleatoria le permite reprodu- TEXT, no se podrá cambiar al ingreso de títu- cir las pistas en orden aleatorio dentro de la los de discos. -
Página 180: Pausa De La Reproducción De Un Cd
Sección Reproductor de CD múltiple Pulse MULTI-CONTROL para activar la Uso de listas de reproducción con exploración. reproducción ITS Se reproducirán los primeros 10 segundos de La función ITS (selección instantánea de cada pista del disco actual (o la primera pista pista) le permite crear una lista de reproduc- de cada disco). -
Página 181: Reproducción De La Lista De Reproducción Its
Sección Reproductor de CD múltiple Si la reproducción ITS ya está activada, vaya al Nota paso 2. Si la reproducción ITS todavía no está Después que los datos para 100 discos han sido activada, utilice MULTI-CONTROL. almacenados en la memoria, los datos para un nuevo disco se sobreponen a los datos más anti- Reproduzca el CD que tiene la pista que guos. -
Página 182: Uso De Las Funciones De Títulos De Discos
Sección Reproductor de CD múltiple Pulse MULTI-CONTROL abajo para bo- ropeos, tales como aquéllas con acentos (p. rrar todas las pistas del CD que se está re- ej., á, à, ä, ç)—Números y símbolos produciendo de la lista de reproducción ITS. -
Página 183: Visualización De Los Títulos
Sección Reproductor de CD múltiple ! Después que los datos para 100 discos han Uso de las funciones CD TEXT sido almacenados en la memoria, los datos Estas funciones sólo se pueden usar con un re- para un nuevo disco se sobreponen a los productor de CD múltiple compatible con CD datos más antiguos. -
Página 184: Selección De Pistas De La Lista De Títulos De Las Pistas
Sección Reproductor de CD múltiple % Mantenga pulsado DISPLAY hasta que Utilice MULTI-CONTROL para seleccio- la información de texto comience a despla- nar el título de la pista deseada. zarse por el display. Haga girar el control para cambiar el título de Se desplazan los títulos. -
Página 185: Para Reproducir Canciones En El Ipod
Sección Para reproducir canciones en el iPod Para escuchar canciones en MULTI-CONTROL izquierda una vez, se salta al principio de la canción actual. Si pulsa otra su iPod vez, se salta a la canción anterior. 1 1 1 1 2 2 2 2 Para buscar una canción El manejo de esta unidad para controlar el iPod está... -
Página 186: Para Buscar Una Canción
Sección Para reproducir canciones en el iPod Para buscar una canción Se visualiza la lista de canciones de la lista de reproducción seleccionada. Para ir al menú superior de la búsqueda # Puede comenzar la reproducción por la lista de listas, pulse LIST. de reproducción seleccionada manteniendo pul- sado MULTI-CONTROL. -
Página 187: Introducción A Las Funciones Avanzadas Del Adaptador De Ipod
Sección Para reproducir canciones en el iPod Introducción a las Repetición de reproducción funciones avanzadas del Hay dos gamas de repetición de reproducción de las canciones en el iPod. Repeat one (re- adaptador de iPod petición de una canción) y Repeat all (repeti- ción de todas las canciones de la lista). -
Página 188: Para Poner En Pausa Una Canción
Sección Para reproducir canciones en el iPod ! Shuffle Songs – Reproduce canciones en un orden aleatorio dentro de la lista selec- cionada ! Shuffle Albums – Selecciona un álbum de manera aleatoria y luego reproduce todas las canciones en el orden en que se en- cuentran en el álbum ! Shuffle OFF –... -
Página 189: Uso Del Televisor
Sección Sintonizador de TV Uso del televisor Para utilizar la sintonización por bús- queda, mantenga pulsado MULTI-CONTROL izquierda o derecha du- 1 1 1 1 2 2 2 2 3 3 3 3 rante aproximadamente un segundo y luego suelte el control. El sintonizador explorará... -
Página 190: Introducción A Las Funciones Avanzadas Del Sintonizador De Tv
Sección Sintonizador de TV Introducción a las Utilice el MULTI-CONTROL para almace- nar la emisora seleccionada en la memoria. funciones avanzadas del Haga girar el control para cambiar el número sintonizador de TV de presintonía, mantenga pulsado para alma- cenarlo. El número de presintonía que ha seleccionado parpadeará... -
Página 191: Selección De Emisoras De La Lista De Canales Presintonizados
Sección Sintonizador de TV Utilice MULTI-CONTROL para seleccio- tonías pulsando MULTI-CONTROL arriba o nar la emisora deseada. abajo durante la visualización de canales. ! También se pueden recuperar emisoras asig- Haga girar el control para cambiar la emisora y pulse para seleccionarla. nadas a los números de ajuste de presinto- # También puede cambiar la emisora pulsando nías 1–6 pulsando uno de los botones de... -
Página 192: Reproductor De Dvd
Sección Reproductor de DVD 4 Indicador de número de capítulo/pista Reproducción de un disco Muestra el capítulo (al reproducir un vídeo DVD) o la pista (al reproducir vídeo CD, CD, 1 1 1 1 2 2 2 2 3 3 3 3 4 4 4 4 MP3 o WMA) que se está... -
Página 193: Introducción A Las Funciones Avanzadas Del Reproductor De Dvd
Sección Reproductor de DVD Introducción a las Scan mode (reproducción con exploración)— Pause (pausa) funciones avanzadas del # Para volver a la visualización de reproducción, reproductor de DVD pulse BAND. Nota Al utilizar esta unidad con un reproductor de DVD múltiple, se puede cambiar a las funciones ITS play mode, ITS memory y Title Input. -
Página 194: Pausa De La Reproducción De Un Disco
Sección Reproductor de DVD ! Track repeat – Sólo repite la pista actual Utilice MULTI-CONTROL para seleccio- nar Random mode en el menú de funcio- nes. Notas Random mode aparece en el display. ! Si se seleccionan otros discos durante la repe- tición de reproducción, la gama de repetición Pulse MULTI-CONTROL para activar la cambia a Disc repeat. -
Página 195: Uso De La Lista De Reproducción Its Y Las Funciones De Títulos De Discos
Sección Reproductor de DVD Uso de la lista de reproducción ITS y las funciones de títulos de discos ! Se pueden utilizar estas funciones sólo si un reproductor de DVD múltiple está co- nectado a esta unidad. ! Esta función es ligeramente diferente de la reproducción ITS con un reproductor de CD múltiple. -
Página 196: Ajustes De Audio
Sección Ajustes de audio Ajuste sencillo del sistema Funciones adicionales de audio Estas funciones son útiles para ajustar el soni- do de acuerdo con el sistema de que dispone Las siguientes funciones le permiten ajustar o sus preferencias personales. con facilidad el sistema de audio de acuerdo ! Uso del sonido BBE (BBE) con las características acústicas del interior ! Uso de la compresión y BMX (COMP/BMX) -
Página 197: Introducción A Los Ajustes De Audio
Sección Ajustes de audio Introducción a los ajustes corte de subgraves)—Subwoofer3 (pendiente de subgraves)—Front HPF (pendiente del fil- de audio tro de paso alto delantero)—Front HPF FREQ. (frecuencia de corte del filtro de paso alto de- lantero)—Rear HPF (pendiente del filtro de paso alto trasero)—Rear HPF FREQ. -
Página 198: Uso Del Selector De Posición
Sección Ajustes de audio Uso del selector de posición Pulse MULTI-CONTROL arriba o abajo para ajustar el balance entre los altavoces Una manera de garantizar un sonido más na- delanteros/traseros. tural consiste en posicionar con claridad la Cada vez que se pulsa MULTI-CONTROL arri- imagen estéreo, colocándola en el centro pro- ba o abajo, se mueve el balance entre los alta- piamente dicho del campo sonoro. -
Página 199: Ajuste De La Alineación Temporal
Sección Ajustes de audio ! Initial es la alineación temporal que viene Pulse MULTI-CONTROL izquierda o de- recha para seleccionar el altavoz a ajustar. ajustada de fábrica. ! Custom es una alineación temporal ajus- Cada vez que se pulsa MULTI-CONTROL iz- tada, creada por el usuario. -
Página 200: Uso De La Salida De Subgraves
Sección Ajustes de audio Uso de la salida de subgraves Pulse MULTI-CONTROL izquierda o de- recha para seleccionar la frecuencia de Esta unidad está equipada con una salida de corte. subgraves que se puede activar o desactivar. Cada vez que se pulsa MULTI-CONTROL iz- Si hay un altavoz de subgraves conectado a quierda o derecha, se selecciona una frecuen- esta unidad, active la salida de subgraves. -
Página 201: Uso Del Filtro De Paso Alto
Sección Ajustes de audio Pulse MULTI-CONTROL izquierda o de- Mantenga pulsado MULTI-CONTROL recha para seleccionar la pendiente. abajo para silenciar el altavoz (filtro) selec- Cada vez que se pulsa MULTI-CONTROL iz- cionado. quierda o derecha, se selecciona una pendien- Se visualiza MUTE ON. # Para cancelar el silenciamiento, pulse te en el siguiente orden: –18—... -
Página 202: Ajuste Del Filtro De Paso Alto Para Los Altavoces Traseros
Sección Ajustes de audio de los altavoces traseros. Se visualiza 0 a –24 Pulse MULTI-CONTROL arriba o abajo para ajustar el nivel de salida de los altavo- mientras se aumenta o disminuye el nivel. ces delanteros. Cada vez que se pulsa MULTI-CONTROL arri- ba o abajo, se aumenta o disminuye el nivel Uso del autoecualizador de los altavoces delanteros. -
Página 203: Recuperación De Las Curvas De Ecualización
Sección Ajustes de audio Recuperación de las curvas de Utilice MULTI-CONTROL para seleccio- nar el ajuste del ecualizador gráfico. ecualización Powerful aparece en el display. Hay siete curvas de ecualización almacenadas # Si se ha seleccionado anteriormente la curva que se pueden recuperar con facilidad en de ecualización, se visualizará... -
Página 204: Bandas
Sección Ajustes de audio ! Se puede crear una curva Custom2 común al sonido original mediante una corrección re- a todas las fuentes. Si se realizan ajustes sultante de la combinación de la compensa- cuando la curva Custom2 está selecciona- ción de fases y la intensificación de las gamas da, la curva Custom2 se actualizará. -
Página 205: Uso De La Compresión Y Bmx
Sección Ajustes de audio Uso de la compresión y BMX Utilice MULTI-CONTROL para seleccio- nar Loudness. El uso de las funciones COMP (compresión) y Loudness aparece en el display. BMX le permiten ajustar la calidad de repro- ducción de sonido de este reproductor. Cada Pulse MULTI-CONTROL para activar la una de las funciones tiene un ajuste de dos sonoridad. -
Página 206: Ajuste De Los Niveles De La Fuente
Sección Ajustes de audio ! La unidad externa 1 y la unidad externa 2 se Low (bajo)—Mid-Low (medio-bajo)—Mid (medio)—Mid-High (medio-alto)—High definen automáticamente con el mismo ajus- (alto) te del nivel de fuente. Uso de la interfaz de Ajuste de los niveles de la usuario auditivo fuente La interfaz de usuario auditivo (AUI) le permite... -
Página 207: Antes De Utilizar Las Funciones Ta Y Eq Automáticas
Sección Ajustes de audio El autoecualizador mide automáticamente las móvil o quítelos antes de hacer estos ajus- características acústicas del interior del auto- tes. Sonidos distintos al tono de medición móvil y crea la curva de ecualización automáti- (sonidos del entorno, sonidos del motor, te- ca de acuerdo con la información recopilada. -
Página 208: Para Realizar Los Ajustes Ta Y Eq Automáticos
Sección Ajustes de audio — Cuando el sonido reflejado en el interior Coloque el micrófono provisto en el centro del apoyacabezas del asiento del del vehículo es fuerte y se producen de- moras. conductor, mirando hacia adelante, con la — Cuando se producen demoras con soni- ayuda de un cinturón (se vende por separa- do). - Página 209 Sección Ajustes de audio Mantenga pulsado EQ para ingresar al 12 Guarde el micrófono con cuidado en la modo de medición de TA y EQ automáticos. guantera. Guarde el micrófono con cuidado en la guan- Enchufe el micrófono en el conector de tera o en otro lugar seguro.
-
Página 210: Ajustes Iniciales
Sección Ajustes iniciales Configuración de los (audio Bluetooth)—Pin code input (ingreso del código PIN)—Phone reset (reajuste del te- ajustes iniciales léfono) Siga las instrucciones que se indican a conti- nuación para operar cada ajuste en particular. # Para cancelar los ajustes iniciales, pulse BAND. -
Página 211: Ajuste De La Fecha
Sección Ajustes iniciales Ajuste de la fecha Pulse MULTI-CONTROL izquierda o de- recha para seleccionar el segmento de la vi- La visualización de calendario ajustada en sualización del reloj que desea ajustar. este modo aparece cuando la fuente del telé- Al pulsar MULTI-CONTROL izquierda o dere- fono está... -
Página 212: Activación Y Desactivación De La Visualización Del Reloj De Apagado
Sección Ajustes iniciales Activación y desactivación está activada. El paso de sintonía de FM selec- cionado aparecerá en el display. de la visualización del reloj de apagado Nota Si la visualización del reloj de apagado está El paso de sintonía es de 50 kHz durante la sinto- activada, cuando las fuentes y la demostra- nización manual. -
Página 213: Cambio De La Apertura Automática De La Cara
Sección Ajustes iniciales # Para desactivar la función AUX, vuelva a pul- Pulse MULTI-CONTROL para activar el tono de advertencia. sar MULTI-CONTROL. ON aparece en el display. # Para desactivar el tono de advertencia, vuelva a pulsar MULTI-CONTROL. Cambio del ajuste del atenuador de luz Para evitar que el display quede muy brillante Cambio de la apertura... -
Página 214: Corrección De Distorsiones Del Sonido
Sección Ajustes iniciales Corrección de distorsiones Pulse MULTI-CONTROL para seleccionar el ajuste deseado. del sonido Pulse MULTI-CONTROL repetidamente para Al escuchar un CD u otra fuente en que el cambiar entre los siguientes ajustes: ! TEL mute – Silenciamiento nivel de grabación es alto, el ajuste de la curva ! 10dB ATT –... -
Página 215: Cambio Del Modo Inverso
Sección Ajustes iniciales Cambio del modo inverso Calibración de las RPM Si no se realiza ninguna operación en unos 30 Siga estas instrucciones para medir las RPM segundos, las indicaciones de la pantalla co- del vehículo y guardarlas. Si lo hace, el cuen- mienzan a invertirse y siguen haciéndolo cada tarrevoluciones de la unidad podrá... -
Página 216: Ingreso Del Código Pin Para La Conexión Inalámbrica Bluetooth
Sección Ajustes iniciales Pulse MULTI-CONTROL para encender la Después de ingresar el código PIN fuente BT Audio. (hasta 16 dígitos), pulse MULTI-CONTROL. ON aparece en el display. El código PIN que ha ingresado quedará en # Para apagar la fuente BT Audio, vuelva a pul- espera para almacenarse en memoria. -
Página 217: Otras Funciones
Sección Otras funciones Uso de la fuente AUX Selección de AUX como la fuente % Pulse SOURCE para seleccionar AUX Esta unidad puede controlar hasta dos com- (AUX1 o AUX2) como la fuente. ponentes auxiliares, como VCR o dispositivos Pulse SOURCE hasta que AUX aparezca en el portátiles (se venden por separado). -
Página 218: Uso De Diferentes Visualizaciones De Entretenimiento
Sección Otras funciones Pulse MULTI-CONTROL derecha para Uso de diferentes mover el cursor a la siguiente posición de visualizaciones de carácter. entretenimiento Cuando visualice la letra deseada, pulse MULTI-CONTROL derecha para mover el cur- sor a la siguiente posición y seleccione la letra 1 1 1 1 2 2 2 2 siguiente. -
Página 219: Ajuste De La Visualización De Fondo
Sección Otras funciones Pulse MULTI-CONTROL para visualizar del aspecto del instrumento entre cinco combina- el menú principal. ciones de colores. # Los texto no se muestran en los ajustes FUNCTION, AUDIO y ENTERTAINMENT apa- recen en el display. Movie y OFF. Pulse MULTI-CONTROL para determinar Utilice MULTI-CONTROL para seleccio- el ajuste de la visualización de entreteni-... -
Página 220: Regrabación De Las Visualizaciones De Entretenimiento Y Los Iconos De Las Funciones Teléfonicas
Slideshow (slideshow)—Texture1 (textura 1) —Texture2 (textura 2)—Texture3 (textura 3) ner más información, visite la página web si- —Texture4 (textura 4)—OFF (visualización de guiente: http://www.pioneer.co.jp/car/pclink4/index- fondo desactivada) # No es posible utilizar ENTERTAINMENT en el e.html mando a distancia para cambiar la visualización de fondo. - Página 221 Sección Otras funciones Ranura de carga de CD Después de visualizar Finished, pulse EJECT para expulsar el disco. Se sale del modo de descarga y se apaga la unidad. Notas ! No coloque ningún otro elemento que no sea un CD en la ranura de carga de CD. ! Esta operación puede tardar varios minutos.
-
Página 222: Información Adicional
Cuando contacte con su concesionario o con Cuando no se puede obtener una medición el centro de servicio Pioneer más cercano, correcta de las características acústicas del asegúrese de anotar el mensaje de error. interior del automóvil con las funciones TA y EQ automáticas, se visualiza un mensaje de... -
Página 223: Comprensión De Los Mensajes De Error Durante La Regrabación De Visualizaciones De Entretenimiento
Cuando contacte con su concesionario o con el centro de servicio Pioneer más cercano, asegúrese de anotar el mensaje de error. ! Revise todos los discos compactos para ver Mensaje Causa Acción... -
Página 224: Discos Cd-R/Cd-Rw
Apéndice Información adicional Discos CD-R/CD-RW cir problemas de reproducción en esta uni- dad. En algunos casos, un disco doble ! Cuando se utilizan discos CD-R/CD-RW, pueden atascarse en la ranura de carga del sólo se pueden reproducir los discos finali- disco y no se expulsará. -
Página 225: Ficheros Mp3, Wma, Aac Y Wav
Apéndice Información adicional ! Se pueden visualizar, como máximo, 64 ca- Ficheros MP3, WMA, AAC y racteres del nombre de una carpeta. ! En el caso de los ficheros grabados con el ! MP3 es la abreviatura de “MPEG Audio sistema Romeo, sólo se pueden visualizar los primeros 64 caracteres. -
Página 226: Información Adicional Sobre Mp3
Apéndice Información adicional ! Esta unidad reproduce ficheros con extensio- puede reproducir grabaciones con veloci- nes (.mp3, .wma, m4a o .wav) como ficheros dades de 48 kbps a 320 kbps (CBR) o de 48 MP3/WMA/AAC/WAV, respectivamente. Para kbps a 384 kbps (VBR), pero para poder dis- evitar ruidos y fallas de funcionamiento, no frutar de una determinada calidad de soni- use estas extensiones para ficheros que no... -
Página 227: Acerca De Las Carpetas Y Los Ficheros Mp3/Wma/Aac/Wav
Apéndice Información adicional ! La calidad del sonido de los ficheros WAV 1 Primer nivel suele ser mejor cuando se utiliza una gran 2 Segundo nivel cantidad de bits de cuantificación. Esta unidad puede reproducir grabaciones con 3 Tercer nivel 8 y 16 bits de cuantificación (LPCM) o con 4 bits de cuantificación (MS ADPCM), pero Notas... -
Página 228: Glosario
Apéndice Información adicional Glosario tenido se puede editar libremente utilizando programas con funciones de edición de eti- A2DP quetas ID3. Si bien las etiquetas están limi- A2DP es la abreviatura de Advanced Audio tadas en la cantidad de caracteres, se puede Distribution Profile. - Página 229 Apéndice Información adicional HSP es la abreviatura de Head Set Profile (Per- OPP es la abreviatura de Object Push Profile fil de audífono), el que se usa para conectar (Perfil de Objeto Push), que se utiliza para los audífonos con un terminal de comunica- transferir los datos del directorio de teléfonos, ción mediante la tecnología inalámbrica Blue- los datos del organizador y otros tipos de infor-...
- Página 230 Apéndice Información adicional Velocidad de grabación Expresa el volumen de datos por segundo o unidades bps (bits por segundo). Cuanto mayor sea la velocidad, más información habrá para reproducir el sonido. Si se utiliza el mismo método de codificación (tal como MP3), cuanto mayor sea la velocidad, la cali- dad del sonido será...
-
Página 231: Especificaciones
Apéndice Información adicional Ganancia ......+6 dB a –24 dB/Silencio Especificaciones Fase ........Normal/Inversa Generales Fuente de alimentación ..14,4 V CC (12,0 V a 14,4 V Reproductor de CD permisible) Sistema ........Sistema de audio de discos Sistema de conexión a tierra compactos ............. - Página 232 Apéndice Información adicional Relación de señal a ruido ..65 dB (red IEC-A) Bluetooth Versión .......... Certificada para Bluetooth Potencia de salida ....+4 dBm Máx. (Clase de potencia 2) Perfil ..........GAP (Generic Access Profi- SDP (Service Discovery Pro- tocol) HSP (Head Set Profile) HFP (Hands Free Profile)
- Página 233 TEL: (03) 9586-6300 PIONEER ELECTRONICS OF CANADA, INC. 300 Allstate Parkway, Markham, Ontario L3R OP2, Canada TEL: 1-877-283-5901 PIONEER ELECTRONICS DE MEXICO, S.A. de C.V. Blvd.Manuel Avila Camacho 138 10 piso Col.Lomas de Chapultepec, Mexico, D.F. 11000 TEL: 55-9178-4270 先鋒股份有限公司...