Tabla de contenido
Publicidad
Idiomas disponibles
Idiomas disponibles
Enlaces rápidos
Publicidad
Capítulos
Tabla de contenido

Manuales relacionados para Pioneer DEH-P55BT


Resumen de contenidos para Pioneer DEH-P55BT
- Página 1 Operation Manual Manual de instrucciones High power CD/MP3/WMA Player with Bluetooth Wireless Technology, RDS tuner and Multi-CD control Reproductor de CD/MP3/WMA de alta potencia con tecnología inalámbrica Bluetooth, sintonizador RDS y control de CD múltiple DEH-P55BT...
-
Página 3: Tabla De Contenido
Contents Thank you for buying this Pioneer product. Please read through these operating instructions so you will know how to operate your model properly. After you have finished reading the instructions, keep this man- ual in a safe place for future reference. - Página 4 Contents – Changing the Phone Book transference Selecting the search method 29 Searching every 10 tracks in the current order 39 – Calling a number in the Phone folder 29 Displaying text information on MP3/WMA/ Book 40 – Editing the name of a Phone Book WAV disc 30 –...
- Página 5 Contents – Erasing a CD from your ITS playlist 49 Using subwoofer output 60 – Adjusting subwoofer settings 61 Using disc title functions 50 – Entering disc titles 50 Using the high pass filter 61 – Displaying disc titles 51 Boosting the bass 62 –...
-
Página 6: Before You Start
Refer all ser- vicing to qualified personnel. ! The Pioneer CarStereo-Pass is for use only in If you want to dispose this product, do not mix it with general household waste. There is a se- Germany. -
Página 7: In Case Of Trouble
Features iPod compatibility CD playback When you use this unit with a Pioneer iPod Music CD/CD-R/CD-RW playback is possible. adapter (CD-IB100), you can control an iPod with Dock Connector. MP3 file playback ! iPod ®... -
Página 8: About Bluetooth
! The Bluetooth word mark and logos are Press OPEN to open the front panel. owned by the Bluetooth SIG, Inc. and any use of such marks by Pioneer Corporation is under license. Other trademarks and trade names are those of their respective... -
Página 9: Attaching The Front Panel
Section Before You Start Grip the left side of the front panel and Press RESET with a pen tip or other pull it gently outward. pointed instrument. Take care not to grip it too tightly or to drop the front panel and protect it from contact with water or other fluids to prevent perma- nent damage. -
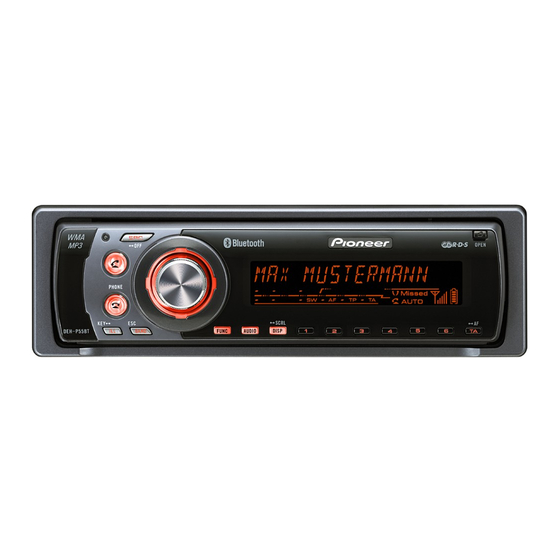
Página 10: What's What
Section What’s What 8 AUDIO button Head unit Press to select various sound quality con- 1 Connection status indicator trols. Lights up when your cellular phone is con- nected via Bluetooth wireless technology. 9 FUNCTION button Press to select functions. 2 SOURCE button This unit is turned on by selecting a source. -
Página 11: Remote Control
Section What’s What Remote control The steering remote control CD-SR110 is sold separately. Operation is the same as when using the buttons on the head unit. e PHONE button Press to select the phone as the source. f ON HOOK button While operating the phone source, press to end a call or reject an incoming call. -
Página 12: Basic Operations
! There is sometimes a delay between starting (refer to page 64). up CD playback and the sound being issued. ! External unit refers to a Pioneer product (such When being read, FORMAT READ is dis- as one available in the future) that, although played. -
Página 13: Adjusting The Volume
Section Basic Operations ! When the CD loading or ejecting function does not operate properly, you can eject the CD by pressing and holding EJECT while opening the front panel. Adjusting the volume % Use MULTI-CONTROL to adjust the sound level. With the head unit, turn MULTI-CONTROL to increase or decrease the volume. -
Página 14: Tuner
Section Tuner Listening to the radio Press SOURCE to select the tuner. Press SOURCE until you see TUNER dis- played. 1 1 1 1 2 2 2 2 3 3 3 3 Press BAND to select a band. Press BAND until the desired band is dis- played, FM1, FM2 for FM or MW/LW. -
Página 15: Introduction Of Advanced Tuner Operation
Section Tuner Introduction of advanced frequencies for later recall with the touch of a button. tuner operation % When you find a frequency that you 1 1 1 1 want to store in memory, press one of pre- set tuning buttons 1–6 and hold until the preset number stops flashing. -
Página 16: Tuning In Strong Signals
Section Tuner Push MULTI-CONTROL up to turn BSM BSM begins to flash. While BSM is flashing the six strongest broadcast frequencies will be stored under preset tuning buttons 1–6 in the order of their signal strength. When finished, BSM stops flashing. # To cancel the storage process, push MULTI-CONTROL down. -
Página 17: Rds
Section 7 TP indicator Introduction of RDS operation Shows when a TP station is tuned in. 1 1 1 1 2 2 2 2 3 3 3 3 8 AF indicator Shows when AF (alternative frequencies search) function is on. 9 Stereo (5) indicator Shows when the selected frequency is 9 9 9... -
Página 18: Selecting Alternative Frequencies
Section % Press DISPLAY. data for the station received differs from that Press DISPLAY repeatedly to switch between of the originally stored station. ! Sound may be temporarily interrupted by an- the following settings: Program service name—PTY information— other program during an AF frequency Frequency search. -
Página 19: Receiving Traffic Announcements
Section Push MULTI-CONTROL up to turn the re- Use MULTI-CONTROL to adjust the TA gional function on. volume when a traffic announcement be- REG :ON appears in the display. gins. # To turn the regional function off, push Rotate it to increase or decrease the volume. MULTI-CONTROL down. -
Página 20: Receiving Pty Alarm Broadcasts
Section Receiving PTY alarm Specific Type of program PHONE IN Phone in broadcasts TOURING Travel programs; not for traffic an- nouncements PTY alarm is a special PTY code for announce- LEISURE Hobbies and recreational activities ments regarding emergencies such as natural DOCUMENT Documentaries disasters. -
Página 21: Built-In Cd Player
Section Built-in CD Player Playing a CD To perform fast forward or reverse, push and hold MULTI-CONTROL left or right. 1 1 1 1 2 2 2 2 # If you select ROUGH, pushing and holding MULTI-CONTROL left or right enables you to search every 10 tracks in the current disc. -
Página 22: Introduction Of Advanced Built-In Cd Player Operation
Section Built-in CD Player ! RPT:TRK – Repeat just the current track Introduction of advanced built-in CD player operation Note If you perform track search or fast forward/re- 1 1 1 1 verse during RPT:TRK, the repeat play range changes to RPT :DSC. Playing tracks in random order 1 Function display Random play lets you play back tracks on the... -
Página 23: Pausing Cd Playback
Section Built-in CD Player # If the display has automatically returned to Push MULTI-CONTROL up or down to the playback display, select SCAN again by press- select your favorite setting. ing FUNCTION. Push MULTI-CONTROL up or down repeatedly to switch between the following settings: COMP OFF—COMP 1—COMP 2—... -
Página 24: Using Disc Title Functions
Section Built-in CD Player Push and hold MULTI-CONTROL left or # < order. Each time MULTI-CONTROL is right to search every 10 tracks on a disc. pushed down, letters are displayed in Z Y X ... # If a disc contains less than 10 tracks, pushing C B A order. -
Página 25: Displaying Disc Titles
Section Built-in CD Player # If specific information has not been recorded Displaying disc titles on a CD TEXT disc, NO XXXX will be displayed You can display the text information of any (e.g., NO ARTIST NAME). disc that has had a disc title entered. % Press DISPLAY. -
Página 26: Mp3/Wma/Wav Player
Section MP3/WMA/WAV Player Playing MP3/WMA/WAV Push MULTI-CONTROL up or down to select a folder. # You cannot select a folder that does not have 1 1 1 1 2 2 2 2 3 3 3 3 an MP3/WMA/WAV file recorded in it. # To return to folder 01 (ROOT), press and hold BAND. -
Página 27: Introduction Of Advanced Built-In Cd Player (Mp3/Wma/Wav) Operation
Section MP3/WMA/WAV Player ! There is no sound on fast forward or reverse. Introduction of advanced ! If the inserted disc contains no files that can built-in CD player (MP3/ be played back, NO AUDIO is displayed. WMA/WAV) operation ! If the inserted disc contains WMA files that are protected by digital rights management (DRM) , SKIPPED is displayed while the pro- 1 1 1 1... -
Página 28: Playing Tracks In Random Order
Section MP3/WMA/WAV Player Push MULTI-CONTROL left or right to Note select the repeat range. If you turn random play on during RPT:FLD and Push MULTI-CONTROL left or right until the then return to the playback display, FRDM ap- desired repeat range appears in the display. pears in the display. -
Página 29: Pausing Mp3/Wma/Wav Playback
Section MP3/WMA/WAV Player Pausing MP3/WMA/WAV Selecting the search method playback You can switch the search method between fast forward/reverse and searching every 10 Pause lets you temporarily stop playback of tracks. the MP3/WMA/WAV. Press FUNCTION to select FF/REV. Press FUNCTION to select PAUSE. Press FUNCTION until FF/REV appears in the Press FUNCTION until PAUSE appears in the display. -
Página 30: Displaying Text Information On Mp3/Wma/Wav Disc
Section MP3/WMA/WAV Player # If the current folder contains less than 10 and other text information may not be correctly tracks, pushing and holding MULTI-CONTROL displayed. left recalls the first track of the folder. Also, if the remaining number of tracks after searching every When playing back a WAV disc 10 tracks is less than 10, pushing and holding MULTI-CONTROL left recalls the first track of the... -
Página 31: Bluetooth Telephone
Section Bluetooth Telephone 3 Battery strength indicator Hands-free phoning with Shows the battery strength of cellular cellular phones featuring phone. Bluetooth wireless technology ! Battery strength indicator may differ from the actual battery strength. ! If the battery strength is not available, 1 1 1 2 2 2 nothing is displayed in the battery... -
Página 32: Setting Up For Hands-Free Phoning
Section Bluetooth Telephone ! Registered cellular phones can be connected Registration to this unit via Bluetooth wireless technology. Prior to use, register your cellular phone fea- This unit automatically searches the regis- turing Bluetooth wireless technology to this tered cellular phone, and if found, connection unit. -
Página 33: Making A Phone Call
Section Bluetooth Telephone Making a phone call Voice recognition If your cellular phone features voice recogni- Dial a number tion technology, you can make a call by voice The most basic way to make a call is to simply commands. dial the number. -
Página 34: Standby Mode
Section Bluetooth Telephone Press ON HOOK to end the call. Introduction of advanced The estimated call time appears in the display hands-free phoning operation (this may differ slightly from the actual call time). Operating the hands-free # You may hear a noise when you disconnect phoning menu the phone. -
Página 35: Operating The Hands-Free Phoning Details Menu
Section Bluetooth Telephone Operating the hands-free P BOOK TRANSFER and P BOOK NAMES cannot be selected. phoning details menu # If cellular phone is connected to this unit via Bluetooth wireless technology with HSP (Head 1 1 1 1 Set Profile), P BOOK TRANSFER, P BOOK NAMES and CLR MEMO cannot be se- lected. -
Página 36: Using A Cellular Phone To Initiate A Registration
Push MULTI-CONTROL up to register the cellular phone in this unit. REGISTERING begins to flash. To complete the registration, please check the device name (PIONEER BT UNIT) and enter the link code (1111) on your cellular phone. If the registra-... -
Página 37: Connecting To A Cellular Phone
CONNECT PHONE. To complete the registration, please check the Each time MULTI-CONTROL is pushed left or device name (PIONEER BT UNIT) and enter right, the status is selected in the following the link code (1111) on your cellular phone. If... -
Página 38: Disconnecting A Cellular Phone
Section Bluetooth Telephone Press FUNCTION and hold until phone Deleting a registered phone user setting (e.g., PHONE 1, P1) appears in If you no longer need to use a registered the display, then press FUNCTION to select phone with this unit, you can delete it from the AUTO CONNECT. -
Página 39: Using The Phone Book
Section Bluetooth Telephone Using the Phone Book Push MULTI-CONTROL up to switch to the phone book transfer standby mode. The Phone Book can store up to 500 names TRANSFER appears in the display. and numbers. Use the Phone Book to browse for numbers on the unit’s display and select Use cellular phone to perform phone numbers to call. -
Página 40: Calling A Number In The Phone Book
Section Bluetooth Telephone Calling a number in the Phone Press FUNCTION to select PHONE BOOK LIST. Book Press FUNCTION until PHONE BOOK LIST ap- You can select a Phone Book entry and make pears in the display. the call. The caller name stored in the Phone Book is displayed. -
Página 41: Clearing Memory
Section Bluetooth Telephone Push and hold MULTI-CONTROL right Push and hold MULTI-CONTROL up to until the beep sounds after editing name. clear the memory. The entered name is stored in memory. CLEAR is displayed and data on the selected item is cleared from this unit’s memory. Clearing memory Using the Call History You can clear memory of each item;... -
Página 42: Calling A Number From The Call History
Section Bluetooth Telephone Press DISPLAY to switch the display. Press OFF HOOK to make a call. Press DISPLAY repeatedly to switch between While calling, DIALLING is flashing. the following displays: Press ON HOOK to end the call. Caller name—Phone number—Calling time The estimated call time appears in the display and date (this may differ slightly from the actual call... -
Página 43: Making A Call By Entering Phone Number
Section Bluetooth Telephone ! This feature cannot be set for each different Making a call by entering user phone. phone number Press FUNCTION and hold until phone You can make a call by directly entering phone user setting (e.g., PHONE 1, P1) appears in numbers on this unit. -
Página 44: Setting The Automatic Answering
Section Bluetooth Telephone Setting the automatic Push MULTI-CONTROL up to turn auto- matic call rejection on. answering REFUSE CALLS :ON appears in the display. # To turn automatic call rejection off, push If this function is on, this unit automatically answers all incoming calls. -
Página 45: Displaying Bd Address Of This Unit
FUNCTION until DEVICE INFO appears in the display. RAINBOW1 and RAINBOW2 change the illumi- The device name (PIONEER BT UNIT) of this nation color continuously. Since color patterns unit appears in the display. for RAINBOW1 and RAINBOW2 are different, se- lect the setting that fits your mood. -
Página 46: Multi-Cd Player
Section Multi-CD Player Playing a CD Select a disc you want to listen to with the 1–6 buttons. For discs 1 to 6, press the corresponding but- 1 1 1 1 2 2 2 2 3 3 3 3 ton number. For discs 7 to 12, press and hold the corre- sponding numbers, such as 1 for disc 7, until the disc number appears in the display. -
Página 47: Introduction Of Advanced Multi-Cd Player Operation
Section Multi-CD Player Introduction of advanced Push MULTI-CONTROL left or right to select the repeat range. multi-CD player operation Push MULTI-CONTROL left or right until the desired repeat range appears in the display. ! RPT:MCD – Repeat all discs in the multi- 1 1 1 1 CD player ! RPT:TRK –... -
Página 48: Scanning Cds And Tracks
Section Multi-CD Player Pausing CD playback Note Pause lets you temporarily stop playback of If you turn random play on during RPT:DSC and the CD. then return to the playback display, DRDM ap- pears in the display. Press FUNCTION to select PAUSE. Press FUNCTION until PAUSE appears in the display. -
Página 49: Playback From Your Its Playlist
Section Multi-CD Player TITLE IN (disc title input)—ITS (ITS program- Erasing a track from your ITS ming) playlist You can delete a track from your ITS playlist if Select the desired track by pushing ITS play is on. MULTI-CONTROL left or right. If ITS play is already on, skip to step 2. -
Página 50: Using Disc Title Functions
Section Multi-CD Player Press FUNCTION and hold until TITLE IN TITLE IN. The disc title has already been recorded appears in the display, then press on a CD TEXT disc. FUNCTION to select ITS. Push MULTI-CONTROL up or down to After TITLE IN is displayed, press FUNCTION select a letter of the alphabet. -
Página 51: Displaying Disc Titles
Section Multi-CD Player Displaying disc titles Using CD TEXT functions You can display the text information of any You can use these functions only with a CD disc that has had a disc title entered. TEXT compatible multi-CD player. Some discs have certain information encoded % Press DISPLAY. -
Página 52: Using Compression And Bass Emphasis
Section Multi-CD Player Using compression and bass emphasis You can use these functions only with a multi- CD player that supports them. Using COMP (compression) and DBE (dy- namic bass emphasis) functions lets you ad- just the sound playback quality of the multi- CD player. -
Página 53: Playing Songs On Ipod
Section Playing songs on iPod Listening to songs on your To perform fast forward or reverse, push and hold MULTI-CONTROL left or iPod right. 1 1 1 1 2 2 2 2 To skip back or forward to another track, push MULTI-CONTROL left or right. Pushing MULTI-CONTROL right skips to the start of the next track. -
Página 54: Introduction Of Advanced Ipod Adapter Operation
Section Playing songs on iPod Introduction of advanced Push MULTI-CONTROL left or right to select the repeat range. iPod adapter operation Push MULTI-CONTROL left or right until the desired repeat range appears in the display. ! RPT:ONE – Repeat just the current song 1 1 1 1 ! RPT:ALL –... -
Página 55: Browsing For A Song
Section Playing songs on iPod Push MULTI-CONTROL up to turn pause throughout the selected list. To do this, push and hold MULTI-CONTROL right. # To return to the previous group of list titles, Playback of the current song pauses. # To turn pause off, push MULTI-CONTROL push MULTI-CONTROL left. -
Página 56: Tv Tuner
Section TV tuner Watching the television To perform manual tuning, push MULTI-CONTROL left or right. The channels move up or down step by step. 1 1 1 1 2 2 2 2 3 3 3 3 To perform seek tuning, push and hold MULTI-CONTROL left or right for about one second and release. -
Página 57: Storing The Strongest Broadcast Stations Sequentially
Section TV tuner Storing the strongest broadcast stations sequentially 1 1 1 1 1 Function display Shows the function names. Press FUNCTION to select BSSM. Push MULTI-CONTROL up to turn BSSM BSSM begins to flash. While BSSM is flashing the 12 strongest broadcast stations will be stored in order from the lowest channel up. -
Página 58: Audio Adjustments
Section Audio Adjustments Introduction of audio (front image enhancer)—SLA (source level ad- justment) adjustments # When the subwoofer controller setting is P/O :FUL, you cannot switch to SUB W. (Refer to 1 1 1 1 page 65.) # You can select the S/W only when subwoofer output is turned on in SUB W. -
Página 59: Using The Equalizer
Section Audio Adjustments # FAD : 0 is the proper setting when only two curves by switching alternatively between FLAT and a set equalizer curve. speakers are used. # When the rear output setting is R-SP :S/W, you cannot adjust front/rear speaker balance. Press AUDIO to select POWERFUL. -
Página 60: Fine-Adjusting Equalizer Curve
Section Audio Adjustments Note Note If you make adjustments, CUSTOM curve is up- If you make adjustments, CUSTOM curve is up- dated. dated. Fine-adjusting equalizer curve Adjusting loudness You can adjust the center frequency and the Q factor (curve characteristics) of each currently Loudness compensates for deficiencies in the selected curve band (EQ-L/EQ-M/EQ-H). -
Página 61: Adjusting Subwoofer Settings
Section Audio Adjustments # To turn subwoofer output off, push Using the high pass filter MULTI-CONTROL down. When you do not want low sounds from the subwoofer output frequency range to play Push MULTI-CONTROL left or right to from the front or rear speakers, turn on the select the phase of subwoofer output. -
Página 62: Boosting The Bass
Section Audio Adjustments Boosting the bass Push MULTI-CONTROL left or right to select a desired frequency. Bass boost function boosts the bass level of Each time MULTI-CONTROL is pushed left or sound lower than 100 Hz. The more the bass right, frequencies are selected in the following level is increased, the more the bass sound is order:... -
Página 63: Initial Settings
Section Initial Settings Adjusting initial settings Push MULTI-CONTROL left or right to select the segment of the calendar display you wish to set. 1 1 1 1 Pushing MULTI-CONTROL left or right will se- lect one segment of the calendar display: Day—Month—Year As you select segments of the calendar dis- play the segment selected will blink. -
Página 64: Turning The Off Clock Display On Or Off
Section Initial Settings Push MULTI-CONTROL up or down to Note set the clock. The tuning step remains at 50 kHz during manual Pushing MULTI-CONTROL up will increase tuning. the selected hour or minute. Pushing MULTI-CONTROL down will decrease the se- lected hour or minute. -
Página 65: Setting The Rear Output And Subwoofer Controller
Section Initial Settings Press FUNCTION to select AUX1/AUX2. Push MULTI-CONTROL left or right to Press FUNCTION repeatedly until AUX1/ switch the subwoofer output or rear out- AUX2 appears in the display. put. Pushing MULTI-CONTROL left or right will Push MULTI-CONTROL up to turn switch between P/O :S/W and P/O :FUL and AUX1/AUX2 on. -
Página 66: Other Functions
Section Other Functions Using the AUX source Selecting AUX as the source % Press SOURCE to select AUX (AUX1 or This unit can control up to two auxiliary equip- AUX2) as the source. ments such as VCR or portable devices (sold Press SOURCE until AUX appears in the dis- separately). -
Página 67: Switching The Display Illumination
Section Other Functions Move the cursor to the last position by Press ILLUMINATION and hold until KEY pushing MULTI-CONTROL right after enter- appears in the display. ing the title. When you push MULTI-CONTROL right one Press ILLUMINATION to select a button illumination color. -
Página 68: Additional Information
CD player and care ! Use only CDs that have either of the two When you contact your dealer or your nearest Pioneer Service Center, be sure to record the Compact Disc Digital Audio marks as error message. shown below. -
Página 69: Cd-R/Cd-Rw Discs
Appendix Additional Information ! If the heater is used in cold weather, moist- ! WMA is short for Windows Media™ Audio ure may form on components inside the and refers to an audio compression tech- CD player. Condensation may cause the CD nology that is developed by Microsoft Cor- player to malfunction. -
Página 70: Mp3 Additional Information
Appendix Additional Information ! The folder selection sequence for playback ! The sound quality of MP3 files generally be- and other operations becomes the writing comes better with an increased bit rate. sequence used by the writing software. For This unit can play recordings with bit rates this reason, the expected sequence at the from 8 kbps to 320 kbps, but in order to be time of playback may not coincide with the... -
Página 71: About Folders And Mp3/Wma/Wav Files
Appendix Additional Information ! The sound quality of WAV files generally be- 2 Second level comes better with a larger number of quan- 3 Third level tization bits. This unit can play recordings with 8 and 16 (LPCM) or 4 (MS ADPCM) quantization bits, but in order to be able to Notes enjoy sound of a certain quality, we recom-... - Página 72 Appendix Additional Information Display Character Display Character Ч Ш, Щ Ъ Ы Ь Э Ю Я...
-
Página 73: Terms
Appendix Additional Information Terms data. The contents can be freely edited using software with ID3 Tag editing functions. Bit rate Although the tags are restricted as to the num- This expresses data volume per second, or bps ber of characters, the information can be (bits per second) units. - Página 74 Appendix Additional Information MS ADPCM rate according to the needs of audio compres- This stands for Microsoft adaptive differential sion, it is possible to achieve compression- pulse code modulation, which is the signal re- priority sound quality. cording system used for the multimedia soft- ware of Microsoft Corporation.
-
Página 75: Specifications
Appendix Additional Information Specifications HPF: Frequency ......50/63/80/100/125 Hz Slope ........–12 dB/oct General Power source ......14.4 V DC (10.8 – 15.1 V al- Subwoofer: Frequency ......50/63/80/100/125 Hz lowable) Slope ........–18 dB/oct Grounding system ....Negative type Gain ........ - Página 76 Appendix Additional Information Signal-to-noise ratio ....65 dB (IEC-A network) Bluetooth Version .......... Bluetooth 1.2 certified Output power ......+4 dBm Max. (Power class 2) Laser diode characteristics Wavelength ......... 785 nm to 815 nm Maximum output ..... 1 190 um (Emitting period: unlimited) Note Specifications and the design are subject to pos-...
- Página 77 Contenido Gracias por haber comprado este producto Pioneer. Lea con detenimiento estas instrucciones sobre el funcionamiento del aparato, para que pueda dar el mejor uso posible a su modelo. Una vez que las haya leído, guarde este manual en un lugar seguro para consultarlo en el futuro.
- Página 78 Contenido – Uso de un teléfono móvil para iniciar Reproducción de las pistas en orden aleatorio 105 un registro 116 Exploración de carpetas y pistas 105 Conexión a un teléfono móvil 116 – Conexión manual a un teléfono Pausa de la reproducción de un MP3/WMA/ WAV 106 registrado 116 –...
- Página 79 Contenido Reproductor de CD múltiple Introducción a las funciones avanzadas del Reproducción de un CD 127 adaptador de iPod 136 Reproductor de CD múltiple de 50 Repetición de reproducción 136 discos 128 Reproducción de las canciones en un orden Introducción a las funciones avanzadas del aleatorio (selección aleatoria) 136 reproductor de CD múltiple 128 Para poner en pausa una canción 136...
- Página 80 Contenido Cambio de la búsqueda PI automática 147 Cambio del tono de advertencia 148 Cambio del ajuste de un equipo auxiliar 148 Ajuste de la salida posterior y del controlador de subgraves 148 Cambio del silenciador/atenuación de teléfono 149 Otras funciones Uso de la fuente AUX 150 –...
-
Página 81: Antes De Comenzar
Solicite a personal calificado que realice el servicio técnico. Las viviendas privadas en los 25 estados ! El CarStereo-Pass Pioneer es para usarse sólo miembros de la UE, en Suiza y Noruega pue- en Alemania. den devolver gratuitamente sus productos ! Conserve este manual a mano para que electrónicos usados en las instalaciones de re-... -
Página 82: Acerca De Este Manual
El sintonizador RDS de esta unidad recibe el rrectamente, comuníquese con su concesio- servicio de transmisión de datos de radio. nario o el Servicio técnico oficial Pioneer más próximo a su domicilio. Función de teléfono de manos libres Con esta unidad se puede utilizar sin proble- mas la función de teléfono de manos libres,... -
Página 83: Acerca De Wma
Microsoft Cor- piedad de Bluetooth SIG, Inc. y el uso de poration. Los datos WMA se pueden cifrar con estas marcas por parte de Pioneer Corpora- la versión 7 o posterior del Reproductor de tion se realiza bajo licencia. Las demás Windows Media. -
Página 84: Protección Del Producto Contra Robo
Sección Antes de comenzar Protección del producto Coloque la carátula en la carcasa pro- tectora provista para guardarla de manera contra robo segura. La carátula puede extraerse de la unidad prin- cipal y almacenarse en la carcasa protectora provista para evitar robos. Colocación de la carátula ! Si no se extrae la carátula de la unidad % Vuelva a colocar la carátula;... -
Página 85: Borrado De Toda La Memoria
Sección Antes de comenzar Pulse RESET con la punta de un lapicero teléfono son NO DATA, significa que los datos u otro instrumento con punta. han sido borrados por completo. Botón RESET Vuelva a colocar la carátula; para ello, hágala encajar en su lugar. Gire la llave de encendido a las posicio- nes ACC o de activación y espere unos se- gundos. -
Página 86: Qué Es Cada Cosa
Sección Qué es cada cosa Unidad principal disco al utilizar el reproductor de CD múlti- ple. 1 Indicador de estado de conexión Se enciende cuando su teléfono móvil está 7 Botón DISPLAY conectado a través de la tecnología inalám- Pulse este botón para seleccionar las dife- brica Bluetooth. -
Página 87: Mando A Distancia
Sección Qué es cada cosa c Botón ON HOOK nual, avance rápido, retroceso y búsqueda Pulse este botón para seleccionar el teléfo- de pista. También se usan para controlar las no como la fuente. Al utilizar una fuente te- funciones. lefónica, pulse este botón para terminar h Botones VOLUME una llamada, rechazar una llamada entran-... -
Página 88: Funciones Básicas
(consulte la página 148). ! Por unidad externa se entiende un producto Notas Pioneer (como el que pueda estar disponible en el futuro) que, si bien es incompatible ! El reproductor de CD incorporado tiene capa- como fuente, permite que este sistema con- cidad para un solo CD estándar de 12 cm u 8... -
Página 89: Ajuste Del Volumen
Sección Funciones básicas ! A veces se produce una demora entre el co- mienzo de la reproducción de un CD y la emi- sión del sonido. Durante la lectura inicial, se visualiza FORMAT READ. ! Si no se puede introducir un disco por com- pleto o si después de hacerlo el disco no se re- produce, compruebe que el lado de la etiqueta del disco esté... -
Página 90: Sintonizador
Sección Sintonizador 6 Indicador de estéreo (5) Para escuchar la radio Aparece cuando la frecuencia seleccionada se está transmitiendo en estéreo. 1 1 1 1 2 2 2 2 3 3 3 3 Pulse SOURCE para seleccionar el sinto- nizador. Pulse SOURCE hasta que visualice TUNER. -
Página 91: Introducción A Las Funciones Avanzadas Del Sintonizador
Sección Sintonizador Introducción a las funciones Almacenamiento y avanzadas del sintonizador recuperación de frecuencias Si se presiona cualquiera de los botones de 1 1 1 1 ajuste de presintonías 1–6, se pueden almace- nar con facilidad hasta seis frecuencias de emisoras para llamarlas con posterioridad pre- sionando un solo botón. -
Página 92: Almacenamiento De Las Frecuencias De Radio Más Fuertes
Sección Sintonizador Almacenamiento de las Presione FUNCTION para seleccionar LOCAL. frecuencias de radio más Presione FUNCTION hasta que LOCAL aparez- fuertes ca en el display. La función BSM (memoria de las mejores emi- Pulse MULTI-CONTROL arriba para acti- soras) permite guardar automáticamente las var la sintonización por búsqueda local. -
Página 93: Introducción A La Operación Rds
Sección 6 Indicador TA Introducción a la operación Aparece cuando la función TA (espera por anuncio de tráfico) está activada. 1 1 1 1 2 2 2 2 3 3 3 3 7 Indicador TP Aparece cuando una emisora TP está sinto- nizada. -
Página 94: Cambio De La Visualización Rds
Sección Cambio de la visualización Notas ! También se puede activar o desactivar la fun- ción AF en el menú que aparece presionando Cuando se sintoniza una emisora RDS, se vi- FUNCTION. sualiza el nombre del servicio de programa. ! Sólo se sintonizan las emisoras RDS durante Cambie al display para saber la frecuencia la sintonización por búsqueda o BSM cuando que está... -
Página 95: Limitación De Las Emisoras Para Programación Regional
Sección ! El ajuste predefinido de la función de bús- Recepción de anuncios de queda PI automática es desactivado. Con- tráfico sulte Cambio de la búsqueda PI automática La función TA (espera por anuncio de tráfico) en la página 147. le permite recibir anuncios de tráfico automá- ticamente, al margen de la fuente que esté... -
Página 96: Recepción De Transmisiones De Alarma Pty
Sección Específico Tipo de programa Notas Música “fácil de escuchar” EASY MUS ! También se puede activar o desactivar la fun- OTH MUS Música alternativa JAZZ Jazz ción TA en el menú que aparece presionando COUNTRY Música Country FUNCTION. NAT MUS Música nacional ! El sistema cambia de nuevo a la fuente origi- Música antigua y de la “Edad de Oro”... -
Página 97: Reproductor De Cd Incorporado
Sección Reproductor de CD incorporado Reproducción de un CD tor de CD incorporado). Coloque un disco en esta unidad. (Consulte la página 88.) 1 1 1 1 2 2 2 2 Para realizar el avance rápido o retroce- so, mantenga pulsado MULTI-CONTROL iz- quierda o derecha. -
Página 98: Introducción A Las Funciones Avanzadas Del Reproductor De Cd Incorporado
Sección Reproductor de CD incorporado Introducción a las funciones Presione FUNCTION para seleccionar RPT. avanzadas del reproductor Presione FUNCTION hasta que RPT aparezca de CD incorporado en el display. Pulse MULTI-CONTROL izquierda o de- 1 1 1 1 recha para seleccionar la gama de repeti- ción. -
Página 99: Exploración De Las Pistas De Un Cd
Sección Reproductor de CD incorporado Exploración de las pistas de Pulse MULTI-CONTROL arriba para acti- var la pausa. un CD Se detiene temporalmente la reproducción de La reproducción con exploración le permite la pista actual. # Para desactivar la pausa, pulse escuchar los primeros 10 segundos de cada pista de un CD. -
Página 100: Selección Del Método De Búsqueda
Sección Reproductor de CD incorporado Selección del método de pués de realizar una búsqueda cada 10 pistas, quedan menos de 10 pistas, al mantener pulsado búsqueda MULTI-CONTROL derecha se recupera la última Se puede cambiar el método de búsqueda pista del disco. # Si un disco tiene menos de 10 pistas, al man- entre las opciones de avance rápido/retroceso y búsqueda cada 10 pistas. -
Página 101: Visualización De Los Títulos
Sección Reproductor de CD incorporado Pulse MULTI-CONTROL arriba o abajo Visualización de los títulos para seleccionar una letra del alfabeto. Puede visualizar la información de texto en Cada vez que se pulse MULTI-CONTROL arri- cualquier disco al cual se le haya ingresado ba, se visualizarán las letras del alfabeto en el un título. -
Página 102: Visualización De Información De Texto De Discos Cd Text
Sección Reproductor de CD incorporado Visualización de información de texto de discos CD TEXT % Pulse DISPLAY. Pulse DISPLAY repetidamente para cambiar entre los siguientes ajustes: Tiempo de reproducción—DISC TITLE (título del disco)—DISC ARTIST (nombre del artista del disco)—TRACK TITLE (título de la pista)— TRACK ARTIST (nombre del artista de la pista) # Si determinada información no se grabó... -
Página 103: Reproductor De Mp3/Wma/Wav Reproducción De Ficheros Mp3/Wma/ Wav
Sección Reproductor de MP3/ WMA/WAV Reproducción de ficheros Pulse SOURCE para seleccionar el repro- ductor de CD incorporado. MP3/WMA/WAV Pulse SOURCE hasta que visualice COMPACT DISC. # Si no hay un disco cargado en la unidad, no 1 1 1 1 2 2 2 2 3 3 3 3 se podrá... -
Página 104: Introducción A Las Funciones Avanzadas Del Reproductor De Cd Incorporado (Mp3/ Wma/Wav)
Sección Reproductor de MP3/ WMA/WAV ! Si se cambia entre la reproducción de fiche- Introducción a las funciones ros MP3/WMA/WAV y datos de audio (CD- avanzadas del reproductor DA), la reproducción comienza en la primera de CD incorporado (MP3/ pista del disco. ! El reproductor de CD incorporado puede re- WMA/WAV) producir ficheros MP3/WMA/WAV grabados... -
Página 105: Reproducción De Las Pistas En Orden Aleatorio
Sección Reproductor de MP3/ WMA/WAV Presione FUNCTION para seleccionar Presione FUNCTION para seleccionar RPT. RDM. Presione FUNCTION hasta que RPT aparezca Presione FUNCTION hasta que RDM aparezca en el display. en el display. Pulse MULTI-CONTROL izquierda o de- Pulse MULTI-CONTROL arriba para acti- recha para seleccionar la gama de repeti- var la reproducción aleatoria. -
Página 106: Pausa De La Reproducción De Un Mp3/Wma/Wav
Sección Reproductor de MP3/ WMA/WAV Cuando encuentre la pista (o la carpeta) ducción de sonido de este reproductor. Cada deseada, pulse MULTI-CONTROL abajo para una de las funciones tiene un ajuste de dos desactivar la reproducción con exploración. pasos. La función COMP equilibra la salida de La pista (o carpeta) se continuará... -
Página 107: Búsqueda Cada 10 Pistas En La Carpeta Actual
Sección Reproductor de MP3/ WMA/WAV Pulse MULTI-CONTROL izquierda o de- Visualización de recha para seleccionar el método de bús- información de texto de un queda. disco MP3/WMA/WAV Pulse MULTI-CONTROL izquierda o derecha hasta que el método de búsqueda deseado Se puede visualizar la información de texto aparezca en el display. -
Página 108: Al Reproducir Un Disco Wav
Sección Reproductor de MP3/ WMA/WAV Al reproducir un disco WAV % Pulse DISPLAY. Pulse DISPLAY repetidamente para cambiar entre los siguientes ajustes: Tiempo de reproducción—FOLDER NAME (nombre de la carpeta)—FILE NAME (nombre del fichero)—frecuencia de muestreo # Si determinada información no se grabó en un disco WAV, se visualizará... -
Página 109: Teléfono Bluetooth
Sección Teléfono Bluetooth 1 Visualización del calendario Función de teléfono de manos Muestra la fecha, el mes y el año. libres con teléfonos móviles que tienen tecnología 2 Visualización del reloj inalámbrica Bluetooth Muestra la hora. 3 Indicador de potencia de la batería 1 1 1 2 2 2 Muestra la potencia de la batería del teléfo-... -
Página 110: Configuración De La Función De Teléfono De Manos Libres
Sección Teléfono Bluetooth # También puede seleccionar el teléfono presio- el ecualizador se restablecen automáticamen- nando ON HOOK en la unidad principal, o te a sus valores originales. PHONE en el mando a distancia. # No se puede usar ON HOOK del mando a dis- tancia. -
Página 111: Funciones Básicas Del Teléfono De Manos Libres
Sección Teléfono Bluetooth # Antes de desconectar el teléfono móvil de Consulte Asignación de números prefijados en esta unidad, no olvide ajustar el volumen a un la página 122 para ver cómo asignar un núme- nivel adecuado. Si el volumen ha sido silenciado ro a una memoria. -
Página 112: Aceptación De Una Llamada Telefónica
Sección Teléfono Bluetooth Presione BAND y mantenga presionado Rechazo de una llamada entrante hasta que VOICE WAIT aparezca en el dis- Puede rechazar una llamada entrante. Si play. desea hacer que esta unidad rechace automá- Al conectar, se visualizará VOICE WAIT. Si la ticamente todas las llamadas entrantes, con- conexión se establece mediante HFP (Perfil de sulte Ajuste del rechazo automático en la... -
Página 113: Introducción Al Uso Avanzado De La Función De De Teléfono De Manos Libres
Sección Teléfono Bluetooth Introducción al uso avanzado Nota de la función de de teléfono Si no se utiliza la función en unos 30 segundos, de manos libres el display volverá automáticamente a la visualiza- ción de espera. Uso del menú de funciones de teléfono de manos libres 1 1 1 1 1 Visualización de función... -
Página 114: Uso Del Menú De Detalles De Funciones De Teléfono De Manos Libres
Sección Teléfono Bluetooth Uso del menú de detalles de RING TONE (selección de tono del timbre)— R-COLOR (ajuste de color de iluminación)— funciones de teléfono de AUTO CONNECT (ajuste de conexión automá- manos libres tica)—DEVICE INFO (información del disposi- tivo) 1 1 1 1 # Si el teléfono de invitado está... -
Página 115: Búsqueda Y Registro De Teléfonos Móviles
(PIONEER BT UNIT) e ingrese el en primer lugar debe eliminar la asignación ac- código de enlace (1111) de su teléfono móvil. -
Página 116: Uso De Un Teléfono Móvil Para Iniciar Un Registro
Para completar el registro, verifique el nombre Después de visualizar el ajuste de usuario del del dispositivo (PIONEER BT UNIT) e ingrese teléfono, presione FUNCTION hasta que en el el código de enlace (1111) de su teléfono display se visualice el ajuste deseado de usua- rio del teléfono (por ejemplo, P1). -
Página 117: Conexión Automática A Un Teléfono Registrado
Sección Teléfono Bluetooth # Si AUTO CONNECT está activado, el teléfono Nota móvil registrado se conecta automáticamente. La conexión automática se realiza en el orden del Para obtener más información, consulte Cone- número de registro. xión automática a un teléfono registrado en esta página. -
Página 118: Uso Del Directorio De Teléfonos
Sección Teléfono Bluetooth Presione FUNCTION y mantenga presio- Transferencia de entradas al nado hasta que el ajuste del usuario del te- Directorio de teléfonos léfono (por ejemplo, PHONE 1, P1) se Si el teléfono de invitado está conectado a esta visualice en el display, y a continuación pre- unidad mediante tecnología inalámbrica Blue- sione FUNCTION para seleccionar uno de... -
Página 119: Cambio Del Orden De Transferencia Del Directorio De Teléfonos
Sección Teléfono Bluetooth Utilice el teléfono móvil para realizar la Llamada a un número del transferencia del Directorio de teléfonos. Directorio de teléfonos Realice la trasferencia del Directorio de teléfo- Puede seleccionar una entrada del Directorio nos utilizando el teléfono móvil. Para obtener de teléfonos y hacer la llamada. -
Página 120: Edición Del Nombre De Una Entrada Del Directorio De Teléfonos
Sección Teléfono Bluetooth # Esta unidad puede mostrar caracteres rusos, Edición del nombre de una entrada pero no el conjunto completo. Para ver más infor- del Directorio de teléfonos mación, consulte Tabla de caracteres rusos en la Puede editar los nombres de las entradas del página 156. -
Página 121: Uso Del Historial De Llamadas
Sección Teléfono Bluetooth Pulse MULTI-CONTROL izquierda o de- Visualización del Historial de recha para seleccionar el elemento desea- llamadas El Historial de llamadas se divide en tres gru- Cada vez que se pulsa MULTI-CONTROL iz- pos: Llamadas perdidas, Llamadas marcadas quierda o derecha, se seleccionan los elemen- y Llamadas recibidas. -
Página 122: Llamada A Un Número Desde El Historial De Llamadas
Sección Teléfono Bluetooth # Si un nombre y número de teléfono no han Presione OFF HOOK para hacer una lla- mada. sido almacenados en el Historial de llamadas, el display no puede cambiar al nombre y número de Mientras llama, parpadeará DIALLING. teléfono. -
Página 123: Realización De Una Llamada Ingresando El Número De Teléfono
Sección Teléfono Bluetooth Presione ON HOOK para finalizar la lla- Nota mada. Se puede almacenar en la memoria hasta 36 nú- El tiempo estimado de la llamada aparece en meros de teléfono (seis números de teléfono para el display (esto puede diferir ligeramente del cada uno de los teléfonos registrados y el teléfo- tiempo de llamada real). -
Página 124: Ajuste De La Respuesta Automática
Sección Teléfono Bluetooth ! El tono de llamada que seleccione para Presione FUNCTION y mantenga presio- nado hasta que el ajuste del usuario del te- esta unidad no tiene efecto en el tono de llamada utilizado por su teléfono. Si no léfono (por ejemplo, PHONE 1, P1) se desea que su teléfono y esta unidad sue- visualice en el display, y a continuación pre-... -
Página 125: Visualización De La Dirección Bd (Bluetooth Device)
FUNCTION hasta que se Visualización de la dirección BD visualice DEVICE INFO en el display. El nombre del dispositivo (PIONEER BT UNIT) de su teléfono móvil. de esta unidad se mostrará en el display. Presione FUNCTION y mantenga presio-... - Página 126 Sección Teléfono Bluetooth Pulse MULTI-CONTROL izquierda o de- recha para seleccionar el color de ilumina- ción deseado. Cada vez que se pulsa MULTI-CONTROL iz- quierda o derecha, se selecciona un color de iluminación en el siguiente orden: OFF (desactivado)—WHITE (blanco)— SKYBLUE (azul cielo)—O-BLUE (azul océano) —DEEPBLUE (azul marino)—PINK (rosa)—...
-
Página 127: Reproductor De Cd Múltiple
Sección Reproductor de CD múltiple Reproducción de un CD Pulse SOURCE para seleccionar el repro- ductor de CD múltiple. Pulse SOURCE hasta que visualice MULTI CD. 1 1 1 1 2 2 2 2 3 3 3 3 Seleccione el disco que desea escuchar con los botones 1–6. -
Página 128: Reproductor De Cd Múltiple De
Sección Reproductor de CD múltiple Reproductor de CD Introducción a las múltiple de 50 discos funciones avanzadas del reproductor de CD múltiple Sólo las funciones descritas en este manual son compatibles con los reproductores de CD múltiple de 50 discos. 1 1 1 1 ! Esta unidad no está... -
Página 129: Reproducción De Las Pistas En Orden Aleatorio
Sección Reproductor de CD múltiple Pulse MULTI-CONTROL izquierda o de- Pulse MULTI-CONTROL arriba para acti- recha para seleccionar la gama de repeti- var la reproducción aleatoria. ción. Las pistas se reproducirán en un orden aleato- Pulse MULTI-CONTROL izquierda o derecha rio en la gama de repetición RPT :MCD o RPT :DSC seleccionada con anterioridad. -
Página 130: Pausa De La Reproducción De Un Cd
Sección Reproductor de CD múltiple # Si el display vuelve automáticamente a la vi- Creación de una lista de sualización de reproducción, seleccione SCAN reproducción con la de nuevo presionando FUNCTION. programación ITS Puede utilizar la función ITS para ingresar y re- Notas producir hasta 99 pistas por disco desde hasta ! Una vez finalizada la exploración de pistas o... -
Página 131: Reproducción De La Lista De Reproducción Its
Sección Reproductor de CD múltiple Reproducción de la lista de Presione FUNCTION y mantenga presio- nado hasta que TITLE IN aparezca en el dis- reproducción ITS play, y presione FUNCTION para seleccionar La reproducción ITS le permite escuchar las ITS. pistas que ha ingresado en su lista de repro- Después de que visualice TITLE IN, presione ducción ITS. -
Página 132: Borrado De Un Cd De La Lista De Reproducción Its
Sección Reproductor de CD múltiple Borrado de un CD de la lista de Reproduzca el CD cuyo título desea in- gresar. reproducción ITS Pulse MULTI-CONTROL arriba o abajo para Puede borrar todas las pistas de un CD de la seleccionar el CD. lista de reproducción ITS, si la función de re- producción ITS está... -
Página 133: Visualización De Los Títulos
Sección Reproductor de CD múltiple Mueva el cursor a la última posición Selección de discos de la lista pulsando MULTI-CONTROL derecha des- de títulos de los discos pués de ingresar el título. Esta función le permite ver la lista de los títu- Al pulsar MULTI-CONTROL derecha una vez los de los discos que se han ingresado en el más, el título ingresado se almacena en la me-... -
Página 134: Visualización De Información De Texto De Discos Cd Text
Sección Reproductor de CD múltiple Visualización de información veles de graves para proporcionar un sonido de reproducción más completo. Escuche cada de texto de discos CD TEXT uno de los efectos a medida que los seleccio- % Pulse DISPLAY. na y utilice la función que realce mejor la re- Pulse DISPLAY repetidamente para cambiar producción de la pista o del CD que está... -
Página 135: Para Reproducir Canciones En El Ipod
Sección Para reproducir canciones en el iPod Para escuchar canciones en Para realizar el avance rápido o retroce- so, mantenga pulsado MULTI-CONTROL iz- su iPod quierda o derecha. Para saltar y retroceder o avanzar hasta 1 1 1 1 2 2 2 2 otra pista, pulse MULTI-CONTROL izquierda o derecha. -
Página 136: Introducción A Las Funciones Avanzadas Del Adaptador De Ipod
Sección Para reproducir canciones en el iPod Introducción a las Pulse MULTI-CONTROL izquierda o de- recha para seleccionar la gama de repeti- funciones avanzadas del ción. adaptador de iPod Pulse MULTI-CONTROL izquierda o derecha hasta que la gama de repetición deseada apa- rezca en el display. -
Página 137: Para Buscar Una Canción
Sección Para reproducir canciones en el iPod Presione FUNCTION para seleccionar Pulse MULTI-CONTROL derecha para de- PAUSE. terminar la lista. Presione FUNCTION hasta que PAUSE aparez- Se visualizan las listas de la lista selecciona- ca en el display. Pulse MULTI-CONTROL arriba para acti- Repita los pasos 4 y 5 para encontrar var la pausa. -
Página 138: Uso Del Televisor
Sección Sintonizador de TV Uso del televisor Pulse SOURCE para seleccionar el sinto- nizador de TV. Pulse SOURCE hasta que visualice 1 1 1 1 2 2 2 2 3 3 3 3 TELEVISION. Pulse BAND para seleccionar una banda. Pulse BAND hasta que visualice la banda de- seada: TV1 o TV2. -
Página 139: Almacenamiento Consecutivo De Las Emisoras Con Las Señales Más Fuertes
Sección Sintonizador de TV % Cuando encuentre la emisora que Almacenamiento desea almacenar en la memoria, presione consecutivo de las emisoras uno de los botones de ajuste de presinto- con las señales más fuertes nías 1–6 y manténgalo presionado hasta que el número de presintonía deje de des- tellar. -
Página 140: Ajustes De Audio
Sección Ajustes de audio Introducción a los ajustes subgraves activado/desactivado)—S/W (ajus- te de subgraves)—HPF (filtro de paso alto)— de audio BASS (intensificación de graves)—FIE (mejora de imagen frontal)—SLA (ajuste del nivel de 1 1 1 1 fuente) # Cuando el ajuste del controlador de subgraves es P/O :FUL, no se podrá... -
Página 141: Uso Del Ecualizador
Sección Ajustes de audio Pulse MULTI-CONTROL arriba o abajo ofrece una lista de estas curvas de ecualiza- para ajustar el balance entre los altavoces ción: delanteros/traseros. Visualización Curva de ecualización Cada vez que se pulsa MULTI-CONTROL arri- ba o abajo, se mueve el balance entre los alta- SUPER BASS Supergraves voces delanteros/traseros hacia adelante o... -
Página 142: Ajuste De Las Curvas De Ecualización
Sección Ajustes de audio Ajuste de las curvas de Ajuste preciso de la curva de ecualización ecualización Puede configurar el ajuste de la curva de Se puede ajustar la frecuencia central y el fac- ecualización seleccionado según lo desee. Los tor Q (características de las curvas) de cada ajustes de la curva de ecualización configura- banda de curvas seleccionada (EQ-L/EQ-M/... -
Página 143: Ajuste De La Sonoridad
Sección Ajustes de audio Pulse MULTI-CONTROL arriba para acti- Nota var la salida de subgraves. Si realiza ajustes, la curva CUSTOM se SUB W:NOR aparece en el display. Se activa actualizará. la salida de subgraves. # Para desactivar la salida de subgraves, pulse MULTI-CONTROL abajo. -
Página 144: Uso Del Filtro De Paso Alto
Sección Ajustes de audio Pulse MULTI-CONTROL arriba o abajo Sólo las frecuencias más altas que aquéllas para ajustar el nivel de salida del altavoz en la gama seleccionada se generan a través de subgraves. de los altavoces delanteros o traseros. Cada vez que se pulsa MULTI-CONTROL arri- ba o abajo, se aumenta o disminuye el nivel de subgraves. -
Página 145: Ajuste De Los Niveles De La Fuente
Sección Ajustes de audio Ajuste de los niveles de la Precaución fuente Cuando se desactiva la función F.I.E., los altavo- ces traseros emiten el sonido de todas las fre- La función SLA (ajuste del nivel de fuente) le cuencias, no sólo los sonidos graves. Disminuya permite ajustar el nivel de volumen de cada el volumen antes de desactivar la F.I.E. -
Página 146: Ajustes Iniciales
Sección Ajustes iniciales Configuración de los Ajuste de la fecha ajustes iniciales Puede ajustar la visualización de calendario, que se puede mostrar cuando las fuentes están desactivadas. 1 1 1 1 Presione FUNCTION para seleccionar el calendario. Presione FUNCTION repetidamente hasta que el calendario aparezca en el display. -
Página 147: Activación Y Desactivación De La Visualización Del Reloj De Apagado
Sección Ajustes iniciales Pulse MULTI-CONTROL izquierda o de- Ajuste del paso de sintonía recha para seleccionar el segmento de la vi- de FM sualización del reloj que desea ajustar. Normalmente, el paso de sintonía de FM que Al pulsar MULTI-CONTROL izquierda o dere- utiliza la sintonización por búsqueda es de 50 cha se seleccionará... -
Página 148: Cambio Del Tono De Advertencia
Sección Ajustes iniciales Pulse MULTI-CONTROL arriba para acti- Pulse MULTI-CONTROL arriba para acti- var la función de búsqueda PI automática. var AUX1/AUX2. A-PI :ON aparece en el display. AUX1 :ON/AUX2 :ON aparece en el display. # Para desactivar la función de búsqueda PI # Para desactivar la función AUX, pulse automática, pulse MULTI-CONTROL abajo. -
Página 149: Cambio Del Silenciador/Atenuación De Teléfono
Sección Ajustes iniciales # Cuando el ajuste de la salida posterior es Pulse MULTI-CONTROL izquierda o de- R-SP :S/W, no se puede utilizar el procedimiento recha para cambiar el silenciador/atenua- siguiente. ción de teléfono. Al pulsar MULTI-CONTROL izquierda o dere- Pulse MULTI-CONTROL izquierda o de- cha se cambiará... -
Página 150: Otras Funciones
Sección Otras funciones Uso de la fuente AUX Selección de AUX como la fuente % Presione SOURCE para seleccionar AUX Esta unidad puede controlar hasta dos equi- (AUX1 o AUX2) como la fuente. pos auxiliares, como VCR o dispositivos portá- Pulse SOURCE hasta que AUX aparezca en el tiles (se venden por separado). -
Página 151: Cambio De La Iluminación Del Display
Sección Otras funciones Mueva el cursor a la última posición Presione ILLUMINATION y mantenga pulsando MULTI-CONTROL derecha des- presionado hasta que KEY aparezca en el pués de ingresar el título. display. Al pulsar MULTI-CONTROL derecha una vez Presione ILLUMINATION para seleccio- más, el título ingresado se almacena en la me- moria. -
Página 152: Información Adicional
Al comunicarse con su concesionario o con el PROTECT Todos los fiche- Reemplace el ros del disco disco. Servicio Técnico Oficial de Pioneer más próxi- están protegidos mo a su domicilio, asegúrese de anotar el con DRM mensaje de error. Mensaje Causa Acción... -
Página 153: Discos Cd-R/Cd-Rw
Apéndice Información adicional ! No fije etiquetas, no escriba ni aplique sus- ! Puede resultar imposible reproducir los dis- tancias químicas en la superficie de los cos CD-R/CD-RW en caso de exposición a discos. la luz solar directa, altas temperaturas o de- ! Para limpiar un CD, pásele un paño suave bido a las condiciones de almacenamiento desde el centro hacia afuera. -
Página 154: Información Adicional Sobre Mp3
Apéndice Información adicional ! Esta unidad permite reproducir ficheros Importante MP3/WMA/WAV en discos CD-ROM, CD-R ! Al escribir el nombre de un fichero MP3, y CD-RW. También se pueden reproducir WMA o WAV, añada la extensión correspon- grabaciones de discos compatibles con los diente (.mp3, .wma o .wav). -
Página 155: Información Adicional Sobre Wma
Apéndice Información adicional Información adicional sobre WMA Acerca de las carpetas y los ! Esta unidad reproduce ficheros WMA codi- ficheros MP3/WMA/WAV ficados con Windows Media Player versión ! A continuación se ilustra un esquema de 7, 7.1, 8, 9 y 10. un CD-ROM con ficheros MP3/WMA/WAV. -
Página 156: Tabla De Caracteres Rusos
Apéndice Información adicional ! No se pueden revisar las carpetas que no tie- Carác- Visualización Carácter Visualización nen ficheros MP3/WMA/WAV. (Se saltarán estas carpetas sin mostrar su número.) Ь Э ! Se pueden reproducir ficheros MP3/WMA/ WAV en carpetas de hasta 8 niveles. Sin em- Ю... -
Página 157: Glosario
Apéndice Información adicional Glosario fichero). Cada carpeta contiene menos de 8 je- rarquías. Bluetooth Formatos extendidos Bluetooth es una tecnología inalámbrica de Joliet: conectividad por radio de corto alcance, desa- Los nombres de los ficheros pueden tener rrollada para sustituir los cables de los teléfo- hasta 64 caracteres. - Página 158 Apéndice Información adicional MS ADPCM pulso) y representa el sistema de grabación de Esta sigla significa “Microsoft Adaptive Diffe- señal que se utiliza para discos DVD y CD de rential Pulse Code Modulation” (modulación música. adaptativa diferencial de códigos de impulso SDAP Microsoft) y representa el sistema de graba- ción de señal que se utiliza para los progra-...
- Página 159 Apéndice Información adicional Windows Media y el logo de Windows son marcas comerciales o registradas de Micro- soft Corporation en los EE.UU. y/o en otros países.
-
Página 160: Especificaciones
Apéndice Información adicional Especificaciones Alto ........+11 dB (100 Hz), +11 dB (10 kHz) (volumen: –30 dB) Generales Fuente de alimentación ..14,4 V CC (10,8 – 15,1 V per- HPF: Frecuencia ......50/63/80/100/125 Hz misible) Pendiente ......–12 dB/oct Sistema de conexión a tierra Altavoz de subgraves: ............. - Página 161 Apéndice Información adicional Sintonizador de MW Gama de frecuencias .... 531 kHz a 1 602 kHz (9 kHz) Sensibilidad utilizable ... 18 µV (Señal/ruido: 20 dB) Relación de señal a ruido ..65 dB (red IEC-A) Sintonizador de LW Gama de frecuencias .... 153 kHz a 281 kHz Sensibilidad utilizable ...
- Página 162 TEL: (03) 9586-6300 PIONEER ELECTRONICS OF CANADA, INC. 300 Allstate Parkway, Markham, Ontario L3R OP2, Canada TEL: 1-877-283-5901 PIONEER ELECTRONICS DE MEXICO, S.A. de C.V. Blvd.Manuel Avila Camacho 138 10 piso Col.Lomas de Chapultepec, Mexico, D.F. 11000 TEL: 55-9178-4270 先鋒股份有限公司...