Craftsman 139.53919D Manual Del Propietário
Tabla de contenido
Idiomas disponibles
Idiomas disponibles
Enlaces rápidos
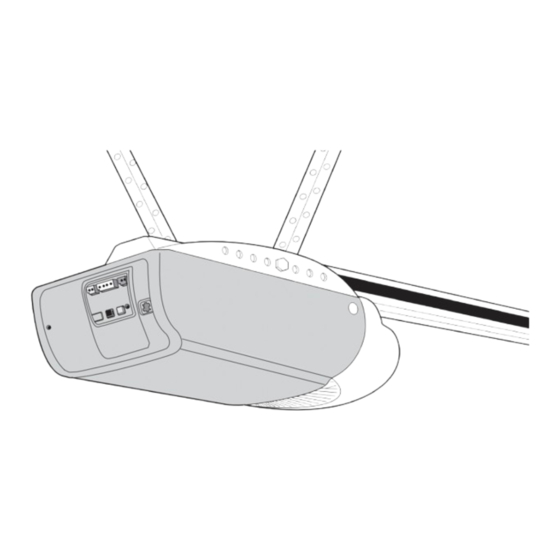
Owner's Manual/Manual Del Propietario
GARAGE DOOR OPENER
ABRIDOR DE PUERTA DE COCHERA
For Residential Use Only/Sólo para uso residencial
Model/Modelo 139.53919D
Read and follow all safety rules and
operating instructions before first use
of this product.
Fasten the manual near the garage
door after installation.
Periodic checks of the opener are
required to ensure safe operation.
Sears, Roebuck and Co., Hoffman Estates, IL 60179 U.S.A
www.sears.com/craftsman
Leer y seguir todas las reglas de
seguridad y las instrucciones de
operación antes de usar este
producto por primera vez.
Guardar este manual cerca de la
puerta de la cochera.
Se deben realizar revisiones
periódicas del abridor de puertas
para asegurar su operación segura.
1
Capítulos
Tabla de contenido

Manuales relacionados para Craftsman 139.53919D


Resumen de contenidos para Craftsman 139.53919D
- Página 42 CONTENIDO Introducción Ajustes 27-29 Revisión de los símbolos y términos de seguridad ..2 Ajuste el límite del recorrido ......27 Preparación de la puerta de su cochera .
-
Página 43: Preparación De La Puerta De Su Cochera
Preparación de la puerta de su cochera ADVERTENCIA ADVERTENCIA Antes de comenzar: Para evitar una LESIÓN GRAVE o INCLUSO LA MUERTE: • Quite los seguros. • SIEMPRE llame a un técnico profesional para que le dé servicio a • Retire cualquier cuerda o cable que esté conectado su puerta de cochera si ésta se atora, se pandea o está... -
Página 44: Planificación
Planificación • Observe el punto donde la puerta hace contacto con el piso. El espacio entre la base de la puerta y el piso no debe Identifique la altura y el tipo de su puerta de cochera. Revise el exceder 6 mm (1/4 de pulgada). Si no es así, se corre el área de su cochera y observe si alguna de las siguientes riesgo de que el sistema de retroceso de emergencia no instalaciones corresponden a la suya. -
Página 45: Planificación (Continúa)
Planificación (continúa) ADVERTENCIA ADVERTENCIA INSTALACIÓN CON PUERTAS DE UNA SOLA PIEZA Sin un sistema de retroceso de seguridad que funcione debidamente, al cerrar la puerta de la cochera se corre el riesgo de • Generalmente una puerta de una sola pieza no requiere que las personas (y en particular los niños pequeños) sufran refuerzos adicionales. -
Página 46: Inventario De La Caja De Cartón
Inventario de la caja de cartón Su abridor viene empacado en una caja de cartón que contiene la tornillería y las piezas necesarias para el montaje e el motor y las piezas que se muestran en la siguiente instalación de su puerta se ilustran en la siguiente página. ilustración. -
Página 47: Inventario De Piezas
Inventario de piezas Antes de la instalación, organice todas las piezas en grupos como se muestra en la siguiente ilustración. TORNILLERÍA Y PIEZAS PARA EL MONTAJE Tuerca de Arandela de Tuerca de Resorte / tuerca del trole (1) 1/4-20 de pulg. (2) 3/8 de pulg. -
Página 48: Montaje
PRECAUCI PRECAUCIÓN MONTAJE, PASO 1 Monte el riel e instale el trole Para evitar QUE SE PELLIZQUE, conserve los manos y dedos lejos de las juntas cuando monte el reil. No encienda ni use el abridor hasta que llegue al paso de la instalación correspondiente, de otra manera corre el del riel encima. -
Página 49: Fije El Riel A La Unidad Del Motor
PRECAUCI PRECAUCIÓN MONTAJE, PASO 2 Fije el riel a la unidad del motor Use SÓLO el perno y la tuerca que vienen montados en la parte superior del abridor para evitar que el abridor de la puerta de • Coloque un perno de 1/4-20x1-3/4 de pulg. dentro del orificio cochera se dañe SERIAMENTE. -
Página 50: Instale La Banda Y Sujete El Retén De La Cubierta De La Banda
ADVERTENCIA ADVERTENCIA MONTAJE, PASO 4 Instale la banda y sujete el retén de la Para evitar posibles LESIONES GRAVES en los dedos causadas por cubierta de la banda las partes móviles del abridor de puerta de cochera: • SIEMPRE mantenga las manos lejos de la rueda dentada mientras 1. -
Página 51: Fije La Tensión De La Banda
MONTAJE, PASO 5 Fije la tensión de la banda • Ponga la punta de un destornillador dentro de una de las ranuras del anillo de la tuerca y sujételo firmemente contra el trole. • Ponga una llave abierta de 7/16 de pulg en el extremo Ranura del anillo de la tuerca cuadrado. -
Página 52: Instalación, Paso
INSTALACIÓN, PASO 1 INSTALACIÓN OPCIONAL DE LA MÉNSULA DEL CABEZAL Determine dónde va a instalar la ménsula EN EL CIELO RASO del cabezal Cielo raso sin acabado ADVERTENCIA ADVERTENCIA ADVERTENCIA Pared Para evitar una posible LESIÓN GRAVE o INCLUSO LA MUERTE: delantera •... -
Página 53: Instale La Ménsula Del Cabezal
Montaje en la pared INSTALACIÓN, PASO 2 Instale la ménsula del cabezal La ménsula del cabezal se puede fijar a la pared justo por encima de la puerta de la cochera o en el cielo raso. Siga las instrucciones que sean más adecuadas para su cochera. No instale la ménsula del cabezal en un muro falso. -
Página 54: Coloque El Riel En La Ménsula Del Cabezal
INSTALACIÓN, PASO 3 Coloque el riel en la ménsula del cabezal NOTA: (Opcional) Con algunas instalaciones anteriores puede reutilizar la antigua ménsula del cabezal con los dos espaciadores de plástico que se incluyen en la bolsa de componentes. Coloque los espaciadores en el interior de la ménsula, a cada lado del riel, tal y como se muestra en la ilustración. -
Página 55: Coloque El Abridor En Posición
PRECAUCI PRECAUCIÓN INSTALACIÓN, PASO 4 Coloque el abridor Para evitar que la puerta de cochera sufra daños, apoye el riel del abridor de la misma sobre un pedazo de madera de 5x10 cm (2x4 Siga las instrucciones correspondientes al tipo de puerta de su pulg.) colocado en la sección superior de la puerta. -
Página 56: Cuelgue El Abridor
ADVERTENCIA ADVERTENCIA INSTALACIÓN, PASO 5 Cuelgue el abridor Para evitar la posibilidad de una LESIÓN GRAVE si se cae el abridor de la puerta de cochera, sujételo FIRMEMENTE a los soportes Aquí se muestran tres ejemplos distintos para la instalación; sin estructurales de la cochera. -
Página 57: Instale La Control De La Puerta
ADVERTENCIA ADVERTENCIA ADVERTENCIA ADVERTENCIA INSTALACIÓN, PASO 6 Instale la unidad de control de la puerta Para evitar la posibilidad de una LESIÓN GRAVE o INCLUSO LA MUERTE por electrocución: Ubique el control de la puerta de manera que quede a la •... -
Página 58: Instale Las Luces
PRECAUCI PRECAUCIÓN INSTALACIÓN, PASO 7 Instale las luces y lentes Para evitar un posible SOBRECALENTAMIENTO del • Instale un foco de 100 vatios (máximo) en cada socket del portabombillas: abridor. Los bombillos deben ser de A19 cuello standard • NO utilice bombillas de cuello corto ni de tipo especial. sólo. -
Página 59: Requisitos Para La Instalación Eléctrica
ADVERTENCIA ADVERTENCIA ADVERTENCIA INSTALACIÓN, PASO 9 Requisitos para la instalación eléctrica Para evitar la posibilidad de una LESIÓN GRAVE o INCLUSO LA MUERTE por electrocución o incendio: ADVERTENCIA Para evitar dificultades con la instalación, no encienda ni • Cerciórese de que el abridor no esté conectado a la energía use el abridor en este momento. -
Página 60: Instale La Sistema De Protección
ADVERTENCIA ADVERTENCIA INSTALACIÓN, PASO 10 Instale la Sistema de Protección ® Cerciórese de que la energía eléctrica no esté conectada al abridor de la puerta de la cochera ANTES de instalar el sensor del sistema El sensor del sistema de retroceso de seguridad debe de retroceso de seguridad. -
Página 61: Instalación De Las Ménsulas
INSTALACIÓN DE LAS MÉNSULAS Figura 1 INSTALACIÓN EN EL CARRIL DE LA PUERTA (LADO DERECHO) Asegúrese de que el abridor no esté conectado a la corriente eléctrica. Instale y alinee las ménsulas de manera que los sensores Carril de la puerta estén uno frente al otro en los lados opuestos de la puerta, a una distancia máxima de 15 cm (6 pulg.) del piso. -
Página 62: Montaje Y Cableado De Los Sensores Del Sistema De Retroceso De Seguridad De Reversa
Figura 5 MONTAJE Y CABLEADO DE LOS SENSORES DEL Tuerca de mariposa SISTEMA DE RETROCESO DE SEGURIDAD DE REVERSA 1/4-20 de pulg. • Deslice la cabeza de un perno de coche de 1/4-20x1/2 de pulgada dentro de la ranura de los sensores. Use tuercas de mariposa para sujetar los sensores a las ménsulas, con las Perno de coche lentes de cada sensor frente a frente a ambos lados de la... -
Página 63: Fije La Ménsula De La Puerta
INSTALACIÓN, PASO 11 PRECAUCI PRECAUCIÓN Fije la ménsula de la puerta En el caso de puertas de fibra de vidrio, aluminio o acero ligero, ES NECESARIO colocar un refuerzo ANTES de instalar el marco de la Siga las instrucciones que correspondan al tipo de puerta de puerta. -
Página 64: Puertas De Una Sola Pieza
PUERTAS DE UNA SOLA PIEZA Lea y respete todas las advertencias e instrucciones respecto a los refuerzos, contenidas en la página anterior, Instalación de puertas seccionales, ya que todos los refuerzos para su puerta de una sola pieza son los mismos. •... -
Página 65: Conecte El Brazo De La Puerta Al Trole
INSTALACIÓN, PASO 12 Conecte el brazo de la puerta al trole Polea Lo menos 20 cm (8 pulg.) Siga las instrucciones que correspondan al tipo de puerta de cochera que usted tenga, como se muestra a continuación y en la página siguiente. Trole Perno de tope SÓLO PARA PUERTAS SECCIONALES... -
Página 66: Todas Las Puertas De Una Sola Pieza
TODAS LAS PUERTAS DE UNA SOLA PIEZA Figura 4 1. Arme el brazo de la puerta: Ménsula de la puerta • Sujete las dos secciones de los brazos de la puerta Anillo sujetador (recto y curvo) a la mayor distancia posible, de manera Tuerca de que dos o tres de los orificios se sobrepongan uno al otro Arandela de... -
Página 67: Ajustes
ADVERTENCIA ADVERTENCIA AJUSTES PASO 1 Programar los límites de recorrido Si el sistema de retroceso de seguridad no se ha instalado debidamente, las personas (y los niños pequeños en particular) Los límites de recorrido regulan los puntos en que la podrían sufrir LESIONES GRAVES o INCLUSO LA MUERTE cuando puerta debe parar cuando se desplaza hacia arriba o hacia se cierra la puerta de la cochera. -
Página 68: Ajustar La Fuerza
ADVERTENCIA ADVERTENCIA AJUSTES PASO 2 Ajustar la fuerza Si el sistema de retroceso de seguridad no se ha instalado debidamente, las personas (y los niños pequeños en particular) El botón de ajuste de la fuerza se encuentra en el panel podrían sufrir LESIONES GRAVES o INCLUSO LA MUERTE cuando trasero de la unidad del motor. -
Página 69: Pruebe El Sistema De Retroceso De Seguridad
ADVERTENCIA ADVERTENCIA AJUSTES, PASO 3 Pruebe el sistema de retroceso de seguridad Si el sistema de retroceso de seguridad no se ha instalado debidamente, las personas (y los niños pequeños en particular) PRUEBA podrían sufrir LESIONES GRAVES o INCLUSO LA MUERTE cuando •... -
Página 70: Operación
OPERACIÓN INSTRUCCIONES IMPORTANTES DE SEGURIDAD ADVERTENCIA ADVERTENCIA Para reducir el riesgo de LESIONES GRAVES o la MUERTE: 1. LEA Y SIGA TODAS LAS ADVERTENCIAS Y LAS 9. Si ajusta uno de los controles (límites de la fuerza o del INSTRUCCIONES DE OPERACIÓN. recorrido), es posible que sea necesario ajustar también el otro control. -
Página 71: Cómo Usar La Unidad De Control De Pared
Cómo usar la unidad de control de pared Además de la operación de la puerta, también puede programar el control remoto para el funcionamiento de las luces. LA CONSOLA DE CONTROL DE DETECCIÓN DE MOVIMIENTO 1. Con la puerta cerrada, oprima y mantenga oprimido un botón pequeño del control Oprima el botón iluminado para abrir o remoto que desee usar para el control de... -
Página 72: Unidad De Respaldo De Batería
ADVERTENCIA ADVERTENCIA ADVERTENCIA UNIDAD DE RESPALDO DE BATERÍA Para evitar una posible LESIÓN GRAVE o MUERTE por electrocución, desconecte la energía a la unidad de motor ANTES de El montaje de la unidad de respaldo de batería (BBU, por ADVERTENCIA proceder. -
Página 73: Indicador Led Verde
Diagnóstico de la Unidad de respaldo de baterías (BBU) ADVERTENCIA ADVERTENCIA Para reducir el riesgo de INCENDIO o LESIONES a las personas, use solamente la parte Craftsman #41A5948 para las baterías de ADVERTENCIA reemplazo. (Indicador LED amarillo) (Indicador LED rojo) (Indicador LED verde) INSTRUCCIONES DE OPERACIÓN... -
Página 74: La Batería Del Control Remoto
LA BATERÍA DEL CONTROL REMOTO MANTENIMIENTO DE SU ABRIDOR ADVERTENCIA ADVERTENCIA DE PUERTA DE COCHERA Para evitar la posibilidad de LESIONES GRAVES O INCLUSO LA MUERTE: CALENDARIO DE MANTENIMIENTO • NUNCA permita que los niños pequeños estén cerca de Una vez al mes las baterías. -
Página 75: Si Tiene Algún Problema
TIENE ALGÚN PROBLEMA NOTA: Siempre desenchufar la BBU antes de diagnóstico de fallas. Cable de campana 1. La puerta no se cierra y la luz del motor está destellando: El sensor para reversa de seguridad se debe conectar y alinear correctamente antes de activar el abre- puertas para bajar la puerta de garaje. -
Página 76: Tabla De Diagnóstico
Cable de campana Diagnóstico Sensor de seguridad situado en de reversa instalada unidad del motor El sistema de apertura de la puerta cuenta con una función de LED o Diagnóstico LED autodiagnóstico. El botón “Aprender”/LED de diagnóstico parpadeará Botón “Aprender” varias veces antes de detenerse, indicando que ha encontrado un Sensor de seguridad de reversa posible problema. -
Página 77: Cómo Programar El Abridor
CÓMO PROGRAMAR EL ABRIDOR AVISO: Si utiliza este abre puertas de garaje Security ✚ ® con un transmisor no dotado de un sistema de códigos de salto (código aleatorio), se verán circunvenidas las medidas técnicas incorporadas en el receptor del abridor para proteger contra los aparatos de captura de códigos. -
Página 78: Cómo Agregar, Reprogramar O Cambiar Uncódigo De Entrada Sin Llave
Cómo agregar, reprogramar o cambiar un código de entrada sin llave NOTA: Su nueva Entrada sin llave debe programarse para que opere el abridor de la puerta de su cochera. CÓMO USAR EL BOTÓN LEARN (APRENDER) CÓMO USAR LA CONSOLA DE CONTROL DE DETECCIÓN DE MOVIMIENTO NOTA: Este método requiere dos personas si la Entrada sin 1. -
Página 79: Accesorios
Restriccion de la garantía Este garantía limitada del abridor de puerta de cochera de Craftsman no cubre las bombillas ni la reparación despiden necesario a causa del abuso de operario ni negligencia, inclusive el fracaso para instalar, ajustar y operar este abridor de puerta de cochera según instrucciones contenidas en el manual. Este garantía limitada también no cubre ningún problema causado por interferencia.