Singer XL-580 Manual De Instrucciones
Tabla de contenido
Idiomas disponibles
Idiomas disponibles
Enlaces rápidos
Tabla de contenido

Manuales relacionados para Singer XL-580


Resumen de contenidos para Singer XL-580
- Página 1 INSTRUCTION MANUAL MANUEL D’INSTRUCTION MANUAL DE INSTRUCCIONES...
-
Página 71: Préparatifs Pour La Broderie
3. PRÉPARATIFS POUR LA BRODERIE 3. PREPARACION PARA BORDADO AVANT DE FIXER L’UNITÉ DE BRODERIE ANTES DE COLOCAR LA UNIDAD DE BORDADO antes de cambiar el prensatelas. de la machine avant de changer le pied presseur. ATTENTION PRECAUCION * Levante el levantador de prensatelas. sa position la plus haute. - Página 72 transmitting a design to the machine for embroidery. 1. Turn off power to machine.
- Página 73 1. Eteindre la machine. 2. Faites glisser la table de rallonge vers la gauche pour la retirer de la machine.
-
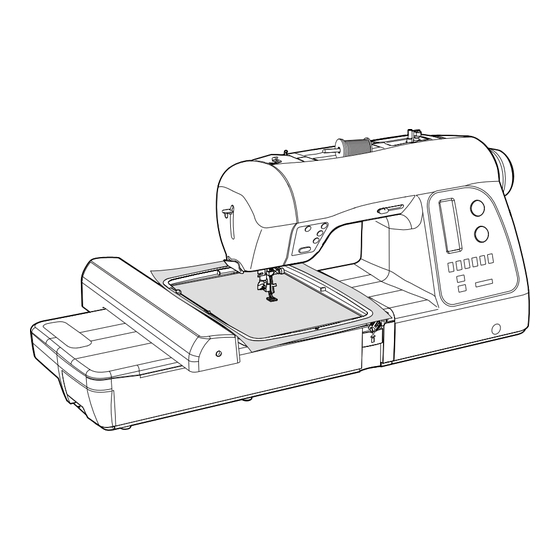
Página 74: Attaching Embroidery Unit
ATTACHING EMBROIDERY UNIT Connector cap Couvercle de connecteur Tapa de conector before installing embroidery unit. CAUTION 1. Turn off the machine. Turn connector cap to the right to open. Connector Connecteur Carriage Conector Chariot Carro unit as far as it will go until it clicks into place. 3. -
Página 75: Colocando La Unidad De Bordado
FIXATION DE L’UNITÉ DE BRODERIE COLOCANDO LA UNIDAD DE BORDADO unidad de bordado. ATTENTION PRECAUCION vers la droite pour ouvrir. clic en su lugar. completamente enganchada, sostenga el asa de la unidad en place. unidad de bordado no se separe. unidad de bordado entre tanto como sea posible. - Página 76 page 72 - 73. 1. Loosen hoop adjusting screw and place fabric between inner and outer frame. Pull fabric edges to remove slack. edges to remove slack. Fit the two frames together by pressing down on the inner frame. a. Tighten hoop adjusting screw. Tornillo de ajuste de aro with no slack, securely tighten the screw.
-
Página 77: Installer Le Tissu Dans Le Cerceau De Broderie
apropiado, consulte la página 72 - 73. interior y exterior. page 72 - 73. páginas 72 - 73. bords du tissu pour bien le tendre. interior. b. Empuje hacia abajo el marco interior para estirar el dans le cadre de broderie, serrer solidement la vis. material dentro del marco exterior, y luego volver a apretar el tornillo. -
Página 78: Using Fabric And Stabilizer
USING FABRIC AND STABILIZER FABRIC Use stabilizer to produce best results when embroidering. cotton can pull in when being embroidered. This can result in problems such as shrinkage and puckering of the fabric around the embroidery area. the hoop, and the result may be uneven embroidery. Furthermore, when the fabric is removed from the hoop after embroidery is completed, the fabric may shrink and cause the embroidered pattern to become distorted. -
Página 79: Usando El Material Yestabilizador
UTILISATION DU TISSU ET DE USANDO EL MATERIAL Y L’ENTOILAGE ESTABILIZADOR TISSU MATERIAL Use el estabilizador para lograr terminaciones de bordado attrayantes. más atractivas. Les tissus moins fermes ou moins solides, comme le coton ligero pueden jalarse cuando se bordan. Esto puede resultar en problemas como arrugas y fruncidos en la tela alrededor del área bordada. - Página 80 Embroidery surface at fabric edge WHEN EMBROIDERING ALONG THE EDGE OF FABRIC SUCH AS A HANDKERCHIEF Entoilage Estabilizador Interior del marco del aro Entoilage Estabilizador WHEN EMBROIDERING A NARROW PIECE OF Ribbon tape FABRIC SUCH AS RIBBON TAPE Ruban Cinta Entoilage Estabilizador unless it is clamped in the hoop along with the fabric being...
-
Página 81: Cuando Se Borda A Lo Largo Del Borde Del Material Como En Caso De Un Pañuelo
CUANDO SE BORDA A LO LARGO DEL BORDE DEL BRODERIE LE LONG DU BORD D’UN TISSU TEL QU’UN MOUCHOIR MATERIAL COMO EN CASO DE UN PAÑUELO BRODERIE SUR UN TISSU ÉTROIT TEL QU’UN RUBAN CUANDO SE BORDA EN UN MATERIAL ANGOSTO COMO EN UNA CINTA La entretela se puede comprar normalmente en una tienda un magasin vendant des tissus. -
Página 82: Preparing The Machine Before Installing The Hoop
PREPARING THE MACHINE BEFORE INSTALLING THE HOOP needle comes to its highest position. ATTACHING AND REMOVING EMBROIDERY HOOP under it. To remove, pull the hoop forward to slide it out from underneath the embroidery foot. Carriage Chariot until it clicks into place. Carro To remove, press the release lever and slide the hoop towards you. -
Página 83: Préparation De La Machine Avant D'installer Le Cerceau
PRÉPARATION DE LA MACHINE AVANT PREPARANDO LA MAQUINA ANTES DE D’INSTALLER LE CERCEAU INSTALAR EL ARO la plus haute. FIXATION ET RETRAIT DU CERCEAU DE COLOCANDO Y RETIRANDO EL ARO BRODERIE PARA BORDAR del pie de bordado con su dedo y pase el aro de bordado cerceau de broderie sous le pied. -
Página 84: Installation Of Software
INSTALLATION OF SOFTWARE refered to as In most personal computers the default drive setting for a in your PC. will start automatically. start the installation process, you may start the installation software begins with the Welcome window. and again click and then select the directory where the software should be installed. -
Página 85: Installation Du Logiciel
INSTALLATION DU LOGICIEL INSTALACIÓN DEL SOFTWARE Para comenzar a utilizar el software en su PC deberá instalar denomina del software comenzará a funcionar de forma automática. usted puede poner en funcionamiento el procedimiento de comenzará con la ventana de Bienvenida. Puede suspender estándar seleccionado. - Página 86 Now you are prompted to select the where the shortcut for the software will be stored. to continue. during the installation set-up. Pressing the button will finally to the given directory on the hard disk. will indicate the stage at which the installation 100%.
- Página 87 Dossier de en la pour continuer. para continuar. Enfoncer le bouton finalmente en el directorio dado del disco duro. barre aura atteint 100%. haya llegado al 100%. forma automática. Rogamos, espere durante un poco hasta cela se produise. d’erreur usted. vous.
-
Página 88: Function Buttons When Embroidering
FUNCTION BUTTONS WHEN EMBROIDERING Thread Cutter Cortador de hilo THREAD CUTTER Press Thread Cutter to automatically cut the top and bobbin threads whenever the machine is stopped. Forward stitch button machine will automatically cut the top and bobbin thread every Interruptor de puntadas time the machine stops at the end of a color block. -
Página 89: Fonction Des Boutons En Mode Broderie
FONCTION DES BOUTONS EN MODE FUNCIONES DE BOTONES AL BORDAR BRODERIE. COUPE FIL CORTADOR DE HILO bobina se corten automáticamente al momento de parar la color de hilo. DÉMARRAGE/ARRÊT DE LA MACHINE ARRANCANDO/PARANDO LA MAQUINA comenzará a funcionar lentamente, y cuando presione el interruptor una vez más, la aguja se moverá... -
Página 90: Troubleshooting
TROUBLESHOOTING Needle tip is broken. Thread path is incorrect. Refer to page 16 - 19. Replace needle. Needle is bent. Thread is tangled around spool holder. Replace needle. Refer to page 10 - 11. Needle is not installed correctly. Thread or fabric bits have collected under the needle plate. -
Página 91: Localizacion De Averias
DÉPANNAGE LOCALIZACION DE AVERIAS La pointe de l’aiguille La punta de la El hilo está mal incorrectement. est épointée aguja está rota. pasado. Reportez-vous Consulte la Remplacez Cambie la aguja. aux page 16 - 19. página 16 - 19. La aguja está L e f i l e s t e m m ê... - Página 92 No stabilizer attached Embroidering is when using light or continuing when stretch fabric. thread is tangled. If the thread remains tangled, the fabric the fabric. may pucker and Refer to page 72 - embroidering, remove the hoop and untangle the thread. Fabric is not tight enough in the hoop.
- Página 93 LADO DE LA MAQUINA Estabilizador sin La broderie continue colocar cuando usa cuando el hilo está la luz o se estira el enredado. ou extensible. material. le tissu pourra être enredado, el material la tela. se podría arrugar y sur le tissu. Consulte la página Reportez-vous aux 72 - 75.
- Página 94 Embroidered section Embroidering direction 1. If stitches are missing. If the embroidery machine detects that the thread has broken, it may continue to embroider up to about eight automatically stops. In this case, use the following procedure to step back though the embroidery design to the area where you automatically stop want to resume stitching.
- Página 95 roto, podría continuar bordando hasta aprox. ocho automáticamente. En esos casos, use el siguiente procedimiento para moverse hacia atrás en los datos de bordado al punto broderie. 1. Presione el interruptor de puntada hacia atrás los datos de bordado. El aro se moverá hacia atrás una puntada a la vez. pasado completamente por el área en blanco.
- Página 96 4. Will the density of a design be adjusted when resizing design ? resize within the hoop area on screen, and the stitch in order to change the stitch count. 5. Resizing individual letters You can resize individual letters after you have brought them into the hoop and exited the text window.
- Página 97 redimensionarlo? points. puntadas. 5. Redimensionner une lettre una caja alrededor de la letra deseada, y dimensiona integradas, la letra conservará la densidad apropiada. deseada. Para seleciconar áreas adicionales, mantener siguiente área. Una vez seleccionada, tocar la tecla 7.- Existe alguna forma de incrementar la densidad de las letras? cual es un estándar usado para Letras.
- Página 98 There are many different types of images or formats of using vector type images, such as .wmf. The software impractical for use. but it may lose detail, depending on the image. It is Vector Art / Vector Art (mode vectoriel) / Vector Art essential to understand about the type of artwork or saved when scanning.
- Página 99 al usar imágenes tipo vector, tales como .wmf. El software Clipart propose deux modes, le mode vectoriel et le mode point. pero puede perder detalle, dependiendo de la imagen. Es Le programme peut vectoriser les images .bmp, mais en utilizar con autopunch. billones de pixeles.
- Página 100 Multi-hooping is a special feature in the software that will allow Fig. 1 embroidery data which is larger than a single embroidery hoop Fig. 1 to be sent to the machine to stitch out, while making it easy to Fig. 1 rehoop the fabric so that each part of the design lines up exactly.
-
Página 101: Cerceau Multiple
en cuatro partes diferentes; y luego los cose de forma precisa ligeramente sesgada en el aro. dans le cerceau. para el aro, puede ser difícil volver a colocar la tela en el aro sont saisis, ils informent la machine du positionnement exact du tissu dans le cerceau et ainsi la machine pourra coudre le dessin sesgada, este sistema compensará... - Página 102 and arrange them in the hoop area on the screen. The example shown uses lettering and designs from the 4. The design data is sent to the machine for sewing one on the tool bar. data that is sent to the machine for sewing. Línea guía Fig.
- Página 103 dessin de broderie individuel et placer-les dans le secteur individuales y acomodelos en el area del aro en la machine pour la couture. líneas de cruce de los datos 1 con las marcas de la línea cual indica el centro exacto del aro. cerceau.
- Página 104 6. The next screen prompts you to input the first of three will inform the machine exactly where the crosslines are positioned in the hoop. It is extremely important that the points are accurately input on the cross lines. 7. Use the shift buttons on the machine to move the hoop, Note: If a mistake is made when entering the points, press the Left Right...
- Página 105 6. La siguiente pantalla le pide ingresar el primero de donde están colocadas las lineas de cruce. y las líneas cruzadas para los datos 1 con punto de clignotera.
- Página 106 will prompt you to enter in points B and C. Follow the same procedures for inputting points B and C. In a case where the three points were input wrong, and they do not form an exact right angle, the software will show the following error message and give you an opportunity to enter the alignment points again.
- Página 107 B y C. En el caso de haber ingresado mal los tres puntos, y no le message d'erreur suivant et vous donnera une occasion forman un ángulo derecho exacto, el software mostrará d'entrer les points d'alignement de nouveau. el siguiente mensaje de error dando una oportunidad de ingresar los puntos nuevamente.
-
Página 108: Control Panel When Embroidering
CONTROL PANEL WHEN EMBROIDERING couture When embroidering, the dials on the control panel are used to step through the design color by color and within a color block. puntada and embroidery machine, the display shows number of current color block and total number of color blocks as illustrated. color blocks blocs de couleurs block is stitched out, a progress bar on the right side of the... -
Página 109: Panel De Control Al Bordar
PANNEAU DE CONFIGURATION EN PANEL DE CONTROL AL BORDAR MODE BRODERIE couleur. position actuelle dans le bloc de couleur. el centro del selector inferior. En el tablero se muestras las el centro del selector superior. La línea horizontal en el tablero le bloc de couleur. -
Página 110: Mensajes Utiles Cuando Se Borda
HELPFUL MESSAGES MESSAGES UTILES EN MENSAJES UTILES WHEN EMBROIDERING BRODANT CUANDO SE BORDA Condition displayed for a few seconds, and then changed back to normal display. The transferred embroidery data is still available in the machine. Embroidery data is being transferred. -
Página 111: Messages Utiles Pour La Broderie
Condition Embroidery data has been completely transferred. Los datos de bordado se han transferido completamente. pantalla. Embroidery in progress. machine has embroidered. Broderie en cours. El bordado está en progreso. When last block or one unit of endless hoop is completed. -
Página 112: Other Things You Should Know
4. OTHER THINGS YOU SHOULD KNOW PRESSER FOOT LIFTER There are three positions for your presser foot. 1. Lower the presser foot to sew. 2. Raise the lifter to the middle position to insert or remove fabric. 3. Lift it to its highest position to change the presser foot or to remove thick fabric. -
Página 113: D'autres Choses Que Vous Devriez Savoir
4. D'AUTRES CHOSES QUE VOUS 4. OTRAS COSAS QUE USTED DEVRIEZ SAVOIR DEBE SABER LEVIER DU PIED PRESSEUR PALANCA PIE PRENSATELAS Il y a 3 positions pour votre Pied Presseur : 1. Bajar el prensatelas para coser. enlever le tissu. mover la tela. -
Página 114: Performance Checklist
PERFORMANCE CHECKLIST GENERAL PROBLEMS Machine does not sew. * Power switch is turned off. * Buttonhole lever is not raised when sewing stitch patterns. * Buttonhole lever is not lowered when sewing buttonhole. Machine jams/knocks. Fabric does not move. STITCHING PROBLEMS Machine skips stitches. -
Página 115: Vérification Des Petits Problèmes De Couture
VÉRIFICATION DES PETITS PROBLÈMES CUADRO DE VERIFICACION DE DE COUTURE RENDIMIENTO PROBLÈMES GENERAUX PROBLEMAS GENERALES La machine ne coud pas: * El interruptor de energía no está conectado. - Esperar entre * La palanca de ojal no está levantada cuando se cosen patrones cousez des motifs de points. -
Página 116: Cleaning Hook Area And Feed Dogs
CLEANING HOOK AREA AND FEED DOGS supply by removing the plug from the wall-outlet. CAUTION 1. Raise the needle to its highest position. needle plate toward you as illustrated for removal. 4. Clean the feed dogs and hook area with the lint brush. Put one drop of sewing machine oil on the hook race as 6. -
Página 117: Nettoyage Des Griffes Et Du Crochet
NETTOYAGE DES GRIFFES ET DU LIMPIAR EL AREA DEL CROCHET TRANSPORTADOR Y LA LANZADERA tomacorriente de la pared. ATTENTION PRECAUCION 2. Quitar dos tornillos en la placa de la aguja y resbalar la 4. Nettoyer les griffes et le crochet avec le pinceau. 4. -
Página 118: Oiling Inside The Face Cover
OILING INSIDE THE FACE COVER 1. Remove two screws and face cover. Face cover 2. Put one drop of sewing machine oil to the points indicated Cubierta frontal by arrows. oiled before it is used. CAUTION:... -
Página 119: Aceitando La Cubierta
HUILAGE DE L’INTÉRIEUR DE LA ACEITANDO LA CUBIERTA PLAQUE FRONTALE 1.- Retire los tornillos de la cubierta frontal. Conseils utiles : PRECAUCION ATTENTION ! -
Página 120: Special Accessories
SPECIAL ACCESSORIES stitching to pass under it easily. It is most useful for sewing satin stitches. It can also be used as an alternative to the Closely spaced zig-zag stitches are called satin stitches. This Use a backing of stabilizer or interfacing to avoid puckering. NOTE on starting to sew with satin stitch foot: Pull both threads to the left of the foot before starting to sew in order to hold threads with the foot or top thread may be... -
Página 121: Accessoires Spéciaux
ACCESSOIRES SPÉCIAUX ACCESORIOS ESPECIALES dessous. Il convient bien pour la couture de points bourdon et comme remplacement pour le pied universel lors de la couture una alternativa al pie prensatelas universal cuando se cosen de points extensible. puntadas elásticas. arrugas. NOTE NOTA al iniciar a coser con el pie para puntada en satinados: a coser para sostener las hebras con el pie prensatelas o la... -
Página 122: Knee Lifter
KNEE LIFTER keep both hands on your project yet control the raising and lowering of the presser foot using your knee. To insert the knee lifter, first remove the socket cover from the front of the machine. Keeping the ribs of the knee lifter sideways, insert toward the knee lifter socket until it ends. -
Página 123: Levier Au Genou
LEVIER AU GENOU ELEVADOR DE RODILLA costura como pegado de aplicaciones y costura libre. Permite mantener ambas manos en su proyecto, puede incluso Para insertar el elevador de rodilla, retire primero la cubierta le devant de la machine. Tout en gardant le levier au genou costillas del elevador de rodilla en forma lateral, inserte hacia Mueva el elevador de rodilla a la derecha para levantar el prensatelas. - Página 124 the power switch to move the carriage to the embroidery standby position. Place a full bobbin in the bobbin case, then replace the bobbin case cover. Image 1 2. With the Futura program open, attach the Endless ‘File’, then scroll down to ‘New’. The screen will display a likeness of the endless hoop and the sewing feld.
- Página 125 canette remplie de fil dans le porte canette, ensuite replacez le couvercle de la canette. de Broderie en Continu sur la machine pour utiliser la votre PC. Clic derecho fuera del área en la pantalla. Cuando Vous pouvez charger un des dessins pour cerceau en Puede cargar los diseños para el Aro Continuo que continu qui vient de la ‘Librairie de Dessin’...
- Página 126 OK if no changes are desired, Cancel to cancel the procedure and move back to the Machine Navigator dialogue box, upper and lower designs closer or further away, allowing you to preview how you want your endless embroidery designs to be positioned relative to one another when they designs to be placed relative to one another as you sew them, click OK.
- Página 127 En este punto, tiene 3 opciones de las cuales elegir: OK si no desea hacer cambios, changement, Cancel para cancelar el procedimiento y Supprimer de la Machine, coserá, pulse en OK. reposicionamiento del aro cuando une los segmentos de de datos, no hay necesidad de volverlos a enviar a de la pantalla de la PC para una referencia rápida sobre la pantalla de su PC.
- Página 128 Reposition the fabric by pulling it toward the back. Place of the bottom left alignment stitches of the completed securing the inner hoop again, check to be sure that the Left Right Clear 10. It may be necessary to move the needle slightly after Borrar the bottom left-hand alignment stitches of the completed use the shift buttons on the control panel to move the...
- Página 129 está ahora encima del área donde bordará el siguiente esto, use los botones de cambio en el panel de control prochain dessin en continu. Astuce! ¡Consejo! Lorsque vous débutez une couture, les points de référence Cuando comience a coser, las puntadas de alineación desde au bas (gauche et droit) du dessin précédent et les points la parte inferior (izquierda y derecha) del diseño previo y de référence (gauche et droit) dans la partie supérieure du...
- Página 130 Helpful Tips: When embroidering larger or heavier pieces of fabric, it is helpful to support the fabric on a table in front and back of the machine. recommended that you lower the embroidery speed. Be sure to deactivate the Thread Cutter Mode when doing endless embroidery.
- Página 131 Astuces Utiles: Consejos Útiles: de tissu, soutenez le tissu sur la table sur le devant et broderie. mode de broderie en continu. Ceci empêchera le fil puntadas saltadas largas. la aguja girando el volante hacia usted. Levante el la tela restante en el aro. Quite la placa cubierta de la en place dans le cerceau.
-
Página 132: Helpful Messages
HELPFUL MESSAGES MESSGES D’AIDE MENSAJES DE AYUDA Los mensajes se muestran en el display lamps above stitch pattern numbers on control panel and/or PC screen. When pantalla de la PC. Cuando se exhiba un mensaje, solucione el problema siguiendo following the instruction in the message. suivant les instructions du message. - Página 133 Correction Sewing Correction Couture Broderie Breakage of top thread is detected. La rotura del hilo superior se detecta. Unable to start with needle lowered. Raise needle and restart. No se puede iniciar con la aguja abajo. Eleve la aguja y reinicie. Unable to start with presser foot lifted.
- Página 135 To sew out the sequence that you have entered, press the foot controller or the Start/Stop button. Please note that when the ABC Program Mode button is illuminated in red, the machine will sew out one sequence of the program and then stop. The programmed data will sew one cycle and stop automatically. To repeat the sequence repeatedly, press the Start/Stop button every time it stops.
- Página 137 Pour coudre la séquence que vous avez mémorisée, appuyez sur le rhéostat ou sur le bouton de marche/arrêt (Start/Stop). Notez bien que lorsque le bouton Mode de Programme ABC est illuminé en rouge, la séquence que vous avez mémorisée sera cousue et la machine s'arrêtera ensuite. L’information programmée va coudre un cycle et s’arrêtera automatiquement.
- Página 139 Para coser la secuencia que ha ingresado, presione el pedal controlador o el botón de Inicio/Paro. Note por favor que cuando se ilumina el botón ABC Program Mode (Modo de Programa ABC) en rojo, la máquina coserá una secuencia del programa luego se detendrá. La información programada se coserá durante un ciclo y se detendrá...
- Página 140 ENGLISH / FRANÇAIS / ESPAÑOL 11/13 9/14 3 19342-D03-8254...