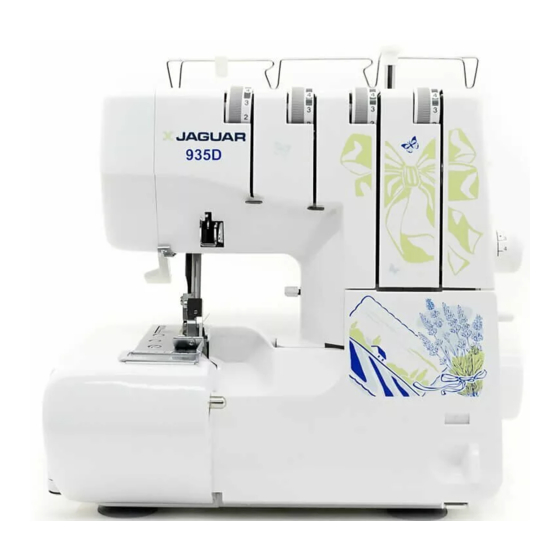
Brother 940D Manual De Instrucciones
Tabla de contenido
Tabla de contenido

Manuales relacionados para Brother 940D


Resumen de contenidos para Brother 940D
- Página 1 HANDBOOK FOR COMPACT OVERLOCK MACHINE MANUAL DE INSTRUCCIONES DE LA MAQUINA COMPACTA OVERLOCK...
- Página 2 "IMPORTANT SAFETY INSTRUCTIONS" When using the sewing machine, basic safety precautions should always be followed, including the following. "Read all instructions before using." DANGER – To reduce the risk of electric shock. 1. The sewing machine should never be left unattended when plugged in. Always unplug this sewing machine from the electrical outlet immediately after using and before cleaning.
- Página 3 • • When leaving this sewing machine unattended, When servicing the sewing machine, or when the mains switch of the machine must be switched removing covers or changing lamps, the ma- off or the plug must be removed from the socket- chine or the electrical set must be disconnected outlet.
-
Página 4: Felicitaciones Por Haber Elegido Esta Compacta Maquina Overlock
FELICITACIONES POR HABER CONGRATULATIONS ON ELEGIDO ESTA COMPACTA CHOOSING THIS COMPACT MAQUINA OVERLOCK OVERLOCK MACHINE Your machine is a high quality, easy-to-use Su máquina es de una eficacia y calidad exce- lentes; así pues, a fin de disfrutar completa- product. To fully enjoy all the features, we suggest that you study this booklet. - Página 5 Notes on the motor NOTAS SOBRE EL MOTOR • • The normal operating speed of this sewing ma- La velocidad normal de funcionamiento de esta chine is 1,300 stitches per minute, which is quite máquina de coser es de 1.300 puntadas por fast compared to the normal operating speed of minuto, lo que resulta bastante rápido compara- 300 to 800 stitches per minute for the ordinary...
-
Página 6: Tabla De Contenido
TABLE OF CONTENTS Chapter 1 Names of parts and their functions ................1 Accessories included with your serger ..................3 Needle ............................5 Turning direction of motor ......................7 Opening and closing the front cover ..................7 Chapter 2 Operating .......................... - Página 7 INDICE Capítulo 1 Nombres de las partes y sus funciones ............... 1 Accesorios incluidos con la máquina de coser ................ 3 Aguja ............................5 Para cambiar la dirección del motor ..................7 Abre y cierre de la tapa delantera .................... 7 Capítulo 2 Funcionamiento ........................
-
Página 8: Chapter 1 Names Of Parts And Their Functions
Names of parts and Nombres de las partes their functions y sus funciones... - Página 9 1 Thread tree 1 Arbol del hilo 2 Handle 2 Asa 3 Tornillo de ajuste de la presión del prensatelas 3 Presser foot pressure adjustment screw 4 Portabobina 4 Spool pin 5 Spool support 5 Soporte de la bobina 6 Thread take-up cover 6 Tapa de toma de hilo 7 Needles 7 Agujas...
-
Página 10: Accessories Included With Your Serger
Accesorios incluidos con Accessories included with your serger la máquina de coser X77871-000 X75902001 X75906001 X75904000 X77128001 X77260000 X75917001 122991002 X75437001 OPTION / OPTATIVO X76590002 X77767-001 X76663001 ;, A, B OPTATIVO ;, A, B OPTION... - Página 11 The number represents the parts code El número corresponde al código de los elementos 1 Soft cover 1 Funda 2 Accessory bag 2 Bolsa de accesorios 3 Tweezers 3 Pinzas 4 Thread net 4 Malla Two-needle models (4) Modelos de dos agujas (4) One-needle models (3) Modelos de una aguja (3) 5 Thread spool cap...
-
Página 12: Needle
Aguja Needle This machine uses a standard home sewing ma- Está máquina funciona con una aguja normal para máquinas domésticas. Así mismo, se recomienda el chine needle. uso de una aguja SCHMETZ 130/705H. The recommended needle is SCHMETZ 130/705H. To remove the needle Para sacar la aguja (1) Turn the main power switch to the OFF position. - Página 13 NOTE: NOTA: Modelos de dos agujas Two-needle models • • On two-needle models, we suggest you hold the En los modelos de dos agujas, le sugerimos two needles with one hand and then insert them sujetar ambas agujas en una sola mano e inser- tarlas simultáneamente.
-
Página 14: Turning Direction Of Motor
Para cambiar la dirección Turning direction of motor del motor • • El motor y la ruedecilla de esta máquina funcio- The motor and hand wheel of this machine turn in nan en el sentido contrario al de las manecillas a counterclockwise direction (direction of arrow). -
Página 15: Chapter 2 Operating
2 Foot Controller: Model N 2 Pedal Note (For U.S.A. only): This foot controller can be used for sewing machine models 940D, 939D, 935D, 929D 925D, 925, 915D and 915. Pantalla electrónica Electronic Display (Only for models installed with a (Sólo para los modelos provistos... - Página 16 Electronic Display (Only for models installed with a 1-line LCD) LCD Display Thickness of the fabric Thick Normal LCD Display Thin SELECT Stitch selection key Eight stitches can be chosen. Information about the selected stitch, its operation Information key and the appropriate thread tension settings are displayed.
- Página 17 The numbers indicate the thread tension dial settings. Upper right thread Upperlooper thread Upper left thread Lowerlooper thread Stronger tension 3–5 3–5 3–5 3–5 Weaker tension The black squares indicate that it is not necessary to adjust this thread tension dial. SELECT The thread tension dial The thread tension dial...
-
Página 18: Pantalla Electrónica
Pantalla electrónica (sólo para los modelos provistos con pantalla de una línea) Pantalla de cristal líquido (LCD) Espesor del tejido Gruesa Pantalla de cristal líquido Normal (LCD) Fina SELECT Tecla de selección de Pueden seleccionarse ocho puntadas. puntada Se visualiza la información sobre la puntada Tecla de información seleccionada, su operación y los ajustes apropiados de tensión del hilo. - Página 19 Los números indican los ajustes del disco de tensión del hilo. Hilo superior derecho Hilo de áncora superior Hilo superior Hilo de áncora superior izquierdo Tensión más fuerte 3–5 3–5 3–5 3–5 Tensión más floja Los recuadros negros indican que no es necesario ajustar este disco de tensión del hilo. SELECT Se visualizan los ajustes de Se visualizan los ajustes de...
-
Página 20: Removing The Bed Extension For Free-Arm Sewing
Extraiga el suplemento Removing the para la mesa para reali- Bed Extension for zar la costura sin brazo Free-Arm Sewing Removing the Extraiga el suplemento bed extension para la mesa Free-arm sewing enables tubular pieces to be sewn La costura sin brazo permite coser trozos tubulares more easily. -
Página 21: Chapter 3 Stitch Length
Largo de puntada Stitch Length Para cambiar el largo de las puntada: To change the stitch length, (1) Busque el disco de ajuste del largo de las punta- (1) Locate the stitch length adjustment dial on the left das en al lado izquierdo de la máquina. side of the machine. -
Página 22: Chapter 4 Instructions For The Differential Feed Mechanism (Models With Differential Feed)
Instructions for the Instrucciones para el Differential Feed mecanismo de alimenta- Mechanism (Models ción con diferencial with Differential Feed) (Modelos con alimentador diferencial) Esta máquina de coser está provista de dos series This serger is equipped with two sets of feed dogs de alimentadores debajo del prensatelas para guiar under the presser foot to move the fabric through the el tejido por la máquina. - Página 23 Feed ratio Main feed (rear) Differential feed (front) Effect Application Material is pulled Prevents thin mate- 0.7 – 1.0 tight. rials from puckering Without differential Normal sewing feed. Prevents stretch ma- Material is gath- terials from stretch- ered or pushed 1.0 –...
- Página 24 • • An example where adjustment is required Ejemplo en que se requiere ajuste When stretch material is sewn without using the Al coser tejidos extensibles sin utilizar una alimenta- differential feed, the edge will be wavy. ción con diferencial, su borde va a ser oleado. Para remediar al problema y mejorar la apariencia To make the edge more smooth, adjust the feed ratio del borde, ajuste la velocidad de alimentación de 1,0...
-
Página 25: Chapter 5 Before Threading
Antes del enhebrado Before Threading Preparación antes del Preparation before threading enhebrado Levante el árbol telescópico del hilo hasta su posi- Raise the telescoping thread tree to its highest position. Make sure that the thread holders are in ción más alta. Compruebe que los corchetes de hilos alignment above the spool pins as illustrated below. -
Página 26: How To Use The Thread Spool Cap
Como utilizar el tope del How to use the thread spool cap carrete When using sewing thread spools, the thread spool Cuando utilice carretes de hilo de coses, el tope del cap should be used as illustrated below. carrete debe emplearse tal como se ilustra abajo. Asegúrese de que la muesca del carrete quede Make sure that the spool notch is on the bottom. -
Página 27: Before Threading
Antes de enhebrar Before threading (1) Turn off the main power switch for safety. (1) Apagar el interruptor principal por seguridad. (2) Raise the presser foot using presser foot lever. (2) Levantar el prensatelas con la palanca. CAUTION PRECAUCION When threading the needle, always be sure Al enhebrar la aguja, se debe asegurar de levantar la palanca del prensatelas, y tam- to lift the presser foot lever, and also take... -
Página 28: Threading The Upperlooper
Enhebrado del áncora Threading the upperlooper superior • • Enhebre el hilo según ilustrado en la secuencia, Run the thread in the sequence illustrated, follow- ing the green color and the numbers next to each siguiendo el color verde y los números inscritos al threading point. - Página 29 NOTA: NOTE: If the upperlooper thread breaks during sewing Si el hilo del áncora superior se rompe al coser. This may be caused by the lowerlooper thread El hilo del áncora inferior se engancha a veces con el hilo del áncora superior. En este caso, baje el getting caught on the upperlooper.
-
Página 30: Threading The Lowerlooper
Enhebrado del áncora Threading the lowerlooper inferior • • Enhebre el hilo según lo ilustrado en la secuen- Run the thread in the sequence illustrated, follow- ing the blue color and the numbers next to each cia, observando el color azul y los números threading point. - Página 31 5 Slide and hold the thread tension release 5 Deslice y retenga el botón de liberación de button to the right, then pass the thread la tensión del hilo hacia la derecha, y pase through the tension disc which is in the el hilo por el disco de tensión que es el canal situado al lado del disco de ajuste de channel next to the blue tension adjust-...
-
Página 32: Threading The Right Needle (On Two-Needle Models)
(2) (3) Threading the right Enhebrado de la aguja derecha (los modelos de needle (on Two-needle models) dos agujas) • • Run the thread in the sequence illustrated on Enhebre la aguja tal como está ilustrado en la page 26, following the red color and the numbers secuencia (en la página 26), respetando el color next to each threading point. -
Página 34: Threading The Left Needle
Enhebrado de la aguja Threading the left needle izquierda • • Enhebre la aguja tal como ilustrado en la secuen- Run the thread in the sequence illustrated, follow- ing the orange color and the numbers next to each cia, respetando el color naranja y los números threading point. -
Página 36: Chapter 6 Comparison Chart Of Sewing Materials, Threads And Needles
Comparison Chart of Sewing Materials, Threads and Needles Stitch Length Needle Material Stitch Thread (mm) Crepe de chine SCHMETZ Georgette Spun : #80 Light 130/705H Lawn Overlock stitch 2.0-3.0 Cotton : #80·100 materials Organdy Silk : #80·100 Tricot Needle thread Polyester : #80 Crepe de chine SCHMETZ... -
Página 37: Capítulo 6 Tabla De Relación Entre Los Distintos Tejidos, Hilos Y Agujas
Tabla de relación entre los distintos tejidos, hilos y agujas Largo de Aguja Tejido Puntada Hilo puntada (mm) Crepe de China Hilo de SCHMETZ Georgette Puntadas hilvanar : n ° 80 Tejidos 130/705H Lino 2,0 - 3,0 Overlock Algodón : n ° 80 - 100 n °... -
Página 38: Chapter 7 Thread Tension
Tensión del hilo Thread Tension Disco de tensión del hilo Thread tension dial Desde la izquierda a la derecha: From the left to right: 1 El disco de tensión con marca naranja es 1 Orange marked tension disc is for left para la aguja izquierda. - Página 39 Tension control Para controlar la tensión Se puede coser en la posición “4”, en la mayoría de Sewing is possible at position “4” for most circum- stances. If improper stitching occurs, adjust the los casos. Si las puntadas resultan inadecuadas, tension according to the drawing below.
-
Página 40: Chart Of Thread Tension Adjustment Two-Needle (Four-Thread)
Chart of Thread Tension Adjustment Two-needle (Four-thread) Left needle thread is loose. El hilo de la aguja izquierda está suelto. Reverse Revés Surface Derecho Left needle thread Hilo de la aguja izquierda Right needle thread Hilo de la aguja derecha Upperlooper thread Hilo del áncora superior Lowerlooper thread Hilo del áncora inferior Right needle thread is loose. -
Página 41: Tabla De Ajuste De Tensión De Los Hilos Dos Agujas (Cuatro Hilos)
Tabla de ajuste de tensión de los hilos Dos agujas (cuatro hilos) Tighten left needle thread. (orange) Tienda el hilo de la aguja izquierda. (Naranja) NOTE: Order of thread tension adjustment When you adjust the thread tension, do it in the following order: (1) Left needle thread Tighten right needle thread. - Página 42 One-needle (Three-thread) Needle thread is loose. El hilo de la aguja está suelto. Reverse Revés Surface Derecho Needle thread Hilo de la aguja Upperlooper thread Hilo del áncora superior Lowerlooper thread Hilo del áncora inferior Fabric puckers Frunces Upperlooper thread is tight. El hilo del áncora superior está...
-
Página 43: Una Aguja (Tres Hilos)
Una aguja (tres hilos) Tighten needle thread. (orange) Tienda el hilo de la aguja. (Naranja) NOTE: Order of thread tension adjustment When you adjust the thread tension, do it in the following order: (1) Needle thread (2) Upperlooper thread (3) Lowerlooper thread This is the easiest way to obtain the correct thread tension. -
Página 44: Chapter 9 Test-Sewing
Costura de prueba Test-sewing • • Haga una prueba después de enhebrar. Test-sew after threading. (1) Coloque el trozo de tejido debajo del prensatelas. (1) Place a piece of scrap material under the presser foot for test sewing. NOTA: Levante siempre el prensatelas antes de colocar el NOTE: Always lift the presser foot before placing the fabric tejido debajo. -
Página 45: Chaining-Off
Cadeneta Chaining-off • • After test-sewing, continue to depress the foot Después de la costura de prueba, siga apretando controller slightly and chain off 4 inches. The el pedal y haga una cadeneta de unos 10 cm. Los hilos van a engancharse automáticamente en threads will entwine themselves into a chain automatically. -
Página 46: Chapter 10 Sewing
Sewing Costura To start sewing Para empezar a coser • • Thread the machine and pull the threads out Enhebre la máquina y saque unos 15 cm de hilo about 15 cm (6 inches) behind the presser foot. detrás del prensatelas •... -
Página 47: To Remove Work
Para retirar el trabajo To remove work • • When the seam is finished, keep the machine Una vez terminada la costura, siga cosiendo a running at a low speed to obtain chaining-off. baja velocidad para formar una cadeneta. Luego, corte las puntadas a unos 5 cm del trabajo. -
Página 48: To Sew Heavy Materials
Para coser tejidos gruesos To sew heavy materials • • Place the material underneath the presser foot Coloque el tejido debajo del prensatelas hasta until it touches the front of the upper knife. que toque la parte delantera de la cuchilla supe- rior. -
Página 49: Presser Foot Pressure
Presión del prensatelas Presser foot pressure • • The pressure of the presser foot can be adjusted La presión del prensatelas puede ajustarse al by turning the pressure adjustment screw at the girar el tornillo de ajuste de presión, en la parte superior izquierda de la máquina. -
Página 50: Chapter 11 Troubleshooting
Troubleshooting This sewing machine is designed for trouble-free operation. However, the following chart indicates trouble which may occur if basic adjustments are not made properly. Trouble Cause Remedy Turn the pressure adjustment screw clock- 1. Does not feed Presser foot pressure too loose wise to increase the presser foot pressure. -
Página 51: Capítulo 11 Guía De Localización De Fallas
Guía de localización de fallas Esta máquina de coser ha sido concebida para un funcionamiento sin problemas. Sin embargo, la siguiente tabla le indica los problemas que podrían presentarse si los ajustes básicos no fueron realizados correctamente. Problema Causa Remedio Gire el tornillo de ajuste de la presión en el 1. -
Página 52: Chapter 12 Stitch Selection
Stitch Selection Selección de las distintas puntadas Modelos de dos agujas Two-needle models • • This sewing machine can sew five different stitches Esta máquina de coser puede realizar 5 puntadas by following the simple steps below: distintas en unas operaciones simples, tales como se indican a continuación. -
Página 53: Narrow Overlock Stitch/Rolled Edge Stitch
Puntada overlock estrecha/ Narrow overlock stitch/ rolled edge stitch puntada de borde enrollado La puntada overlock estrecha/de borde enrollado The Narrow overlock/Rolled edge stitche is a deco- rative finish for lightweight to midweight fabrics. It is constituye un acabado decorativo para tejidos finos often used to complete the edge of a fabric. - Página 54 Press the stitch finger release lever to remove Apriete la palanca de liberación de la uñeta de puntadas para retirar la uñeta. the stitch finger. Storage for the stitch finger is provided on the El alojamiento de la uñeta de puntada se inside of the front cover illustrated.
- Página 55 (6) Adjust the stitch length. (6) Ajuste el largo de las puntadas. Coloque la palanca de ajuste del largo de las Set the stitch length adjustment lever to “R” position as shown in the illustration. This adjust- puntadas en la posición “R” tal como lo muestra ment is suitable for either Narrow Overlock stitch la ilustración.
-
Página 56: Chapter 13 Chart Of Narrow Overlock/Rolled Edge Stitch
Chart of Narrow Overlock/Rolled Edge Stitch Rolled edge stitch Narrow overlock stitch Stitch Style Underside of material Underside of material Top of material Top of material Fabrics Light material Light material Crepe de chine Crepe de chine Georgette Georgette Lawn Lawn Organdie Organdie... -
Página 57: Capítulo 13 Tabla Para Puntadas Overlock Estrechas/De Borde Enrollado
Tabla para puntadas overlock estrechas/de borde enrollado Puntada de borde enrollado Puntada overlock estrecha Estilo de puntada Revés del tejido Revés del tejido Derecho Derecho Tejidos Tejidos finos Tejidos finos Crepe de China Crepe de China Georgette Georgette Lino Lino Organdí... -
Página 58: Chapter 14 Examples Of Sewing Applications For This Serger
Ejemplos de Examples of Sewing aplicaciones de Applications for this costuras para estas Serger máquinas de coser Características Features • • When using the blind stitch presser foot (multi Al usar el prensatelas para puntadas invisibles (prensatelas multipropósito), se pueden coser purpose foot), you can sew blind stitches and puntadas invisibles al mismo tiempo que punta- overlock at the same time. -
Página 59: Blind Stitching With Blind Stitch Presser Foot
Blind stitching with blind Puntadas invisibles con stitch presser foot prensatelas multipropósito The Blind hem stitch is used for putting a near- Las puntadas de dobladillo invisibles sirven a colo- invisible hem in garments or home decoration car un dobladillo invisible en ropa o en obras de projects. - Página 60 NOTE: NOTA: Los ajustes recomendados son los siguientes: The following are the recommended setting. Stitch Width :5 mm (Two-needle models) Ancho de puntada :5 mm (Modelos de dos agujas) 3.5 mm (One-needle models) 3,5 mm (Modelos de una aguja) Largo de puntada :3 - 4 mm Stitch Length :3 ~ 4 mm Needle Thread Tension :Slightly Slackened (0-2) Tensión del hilo de la aguja :bastante floja (0-2)
-
Página 61: Flatlock Stitching With Blind Stitch Presser Foot
Costura Overlock plana Flatlock stitching with blind stitch presser foot con prensatelas multipropósito The Flatlock stitch is primarily used as a decorative Las puntadas overlock planas se usan principal- finish on a project. The finished stitch can look like a mente para lograr un finiquito decorativo en una ladder or small parallel lines when the fabric is pulled obra. - Página 62 • • This method is not suitable for thin fabrics. Este método no conviene para tejidos finos. Los ajustes recomendados son los siguientes: The following are the recommended setting. Stitch Width :5 mm (Two-needle models) Ancho de puntada :5 mm (Modelos de dos agujas) 3.5 mm (One-needle models) 3,5 mm (Modelos de una aguja) Largo de puntada :2 ~ 4 mm...
-
Página 63: Pin Tuck Stitching With Blind Stitch Presser Foot
Costuras de pliegues pe- Pin tuck stitching with blind stitch presser foot queños con prensatelas multipropósito The Pin tuck stitch uses a rolled edge to add shape Las puntadas de pliegues pequeños usan un borde and decoration to any sewing project. Fold the fabric enrollado para agregar cierta forma y decoración a on a line where the pin tuck is to be located and guide cualquier obra de costura. - Página 64 Test sew on a scrap of the fabric to adjust the fabric Haga una costura de peueba en un pedazo del tejido para poder ajustar adecuadamente la guía de tejido guide and the thread tension. 1 On Two-needle models y la tensión de los hilos. 2 Upperlooper 1 En los modelos de dos agujas 3 Stitch finger...
-
Página 65: Decorative Stitching
Puntadas decorativas Decorative stitching Attractive decorative stitches can be made through Se pueden hacer bonitas puntadas decorativas usan- different combinations of fabric and thread. Decora- do distintas combinaciones de tejidos e hilos. En el áncora superior se pueden usar hilos gruesos o tive thread with a high thread count or extremely fine thread can be used in the upperlooper to produce extremadamente finos para lograr puntadas decora-... -
Página 66: Chapter 15 Upper Knife And Lower Knife
Cuchillas superior e Upper Knife and Lower Knife inferior Worn or blunt knives will cause the material to Si las cuchillas están gastadas o desafiladas, pueden ocasionar arrugas o puntadas desigua- pucker or stitches to be uneven. • les. If one strand of thread can be cut off in front of or •... -
Página 67: Replacing The Knives
Replacing the knives Cambio de las cuchillas Replacing the upper knife Cambio de la cuchilla superior (1) To remove the knife, loosen the upper knife set (1) Para quitar la cuchilla, afloje el tornillo de instala- screw and pull up the upper knife. ción de la cuchilla superior y levante dicha cuchilla. -
Página 68: Chapter 16 Oiling
Oiling Engrasado Para conseguir un funcionamiento suave y silencio- For smooth and silent operation, the moving parts of the machine should be oiled periodically. (See dia- so de la máquina, sus partes móviles deberán ser gram below.) engrasadas periódicamente (Véase la ilustración a continuación). -
Página 69: Chapter 17 Changing The Light Bulb
Changing the Light Cambio de la bombilla Bulb de luz PRECAUCION CAUTION Asegúrese siempre de desconectar la ali- Always be sure to turn off the power before mentación antes de realizar la operación carrying out the following operation. siguiente. Changing the light bulb. Cambio de la bombilla de luz. -
Página 70: Chapter 18 Machine Specifications
Especificaciones técni- Machine Specifications cas de la máquina Light- to heavy-weight materials Tejidos finos a gruesos Sewing speed Velocidad de costura 1,300 stitches per minute 1.300 puntadas por minuto Stitch width Ancho de puntada 2.3 mm to 7 mm (5/64 to 9/32 inch) (Two-needle 2,3 mm a 7 mm (Modelos de los agujas) models) 3,0 mm a 3,5 mm (Modelos de una aguja) -
Página 71: Chapter 19 Setting Record
SETTING RECORD THREAD TENSION NOTE FABRIC THREAD NEEDLE left right upper- lower- STITCH needle looper looper needle TYPE on Two-needle models... -
Página 72: Capítulo 19 Notas De Ajustes
NOTAS DE AJUSTES TENSION DE HILO NOTA TEJIDO HILO AGUJA aguja aguja áncora áncora Tipo de izquier- derecha superior inferior puntada en los modelos de dos agujas...