LiftMaster LMWEKITU Manual De Instrucciones
Juego de borde inalámbrico monitoreado
Ocultar thumbs
Ver también para LMWEKITU:
- Manual de instrucciones (21 páginas) ,
- Manual del usuario (21 páginas) ,
- Manual del usuario (13 páginas)
Tabla de contenido
Idiomas disponibles
Idiomas disponibles
Enlaces rápidos
INTRODUCTION
The LiftMaster Wireless Edge Kit provides a Bluetooth
resistive edge (not included) and the gate operator. Maximum range is 130 ft. (39.6 m.) (for best
results install with a clear line of sight between transmitter and receiver, objects in the path may
reduce range). You can program up to 4 transmitters to the receiver. The kit works with LiftMaster
monitored resistive edge sensors ONLY. Contact closure edge sensors are NOT supported.
Refer to your gate operator manual to ensure compatibility (LMWEKITU and LMWETXU is listed
under Monitored Entrapment Protection devices of the Accessories section). Transmitter and
receiver are UL Recognized Components and meet UL 325 requirements. A monitored entrapment
protection device MUST be installed in each entrapment zone.
Compatible LiftMaster
Gate Operators:
®
• CSW24U/UL
• HDSL24UL
• RSW12U/UL
• CSL24U/UL
• SL585U/UL
• RSL12U/UL
• LA400U/UL
• SL5959U/UL
Illustrations in manual are for reference only, your application may look different.
CARTON INVENTORY
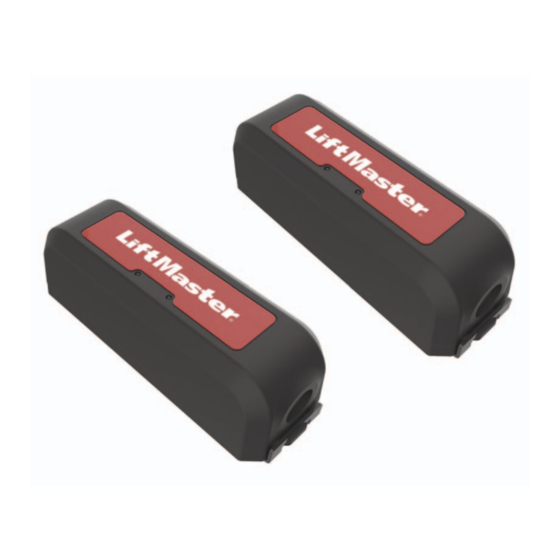
Transmitter Model LMWETXU
AA Lithium Batteries (2)
Energizer
Ultimate Lithium AA L91
®
REQUIRED as replacements
Cable ties (3)
Single hole Heyco connector
6-32 x 1" Screw (for metal)
I2C Interface Board
connection between a LiftMaster monitored
®
• LA412U/UL
• HDSW24UL
• LA500U/UL
• IHSL24UL
• CSW200U/UL
• INSL24UL
• SL300U/UL
Receiver
Mounting Bracket (2)
4-40 x 1/4" Screw (2)
8-32 x 3/8" Screw (2)
Wire Clip
10-16 x 3/4" Screw (4)
Double hole Heyco connector
or
6-19 x 1" Screw (for plastic)
Spacer
WIRELESS EDGE KIT
Models LMWEKITU and LMWETXU
To prevent possible SERIOUS INJURY or DEATH from a closing gate or door:
• Be sure to DISCONNECT ALL POWER to the operator BEFORE installing the wireless
edge kit.
• The gate or door MUST be in the fully opened or closed position BEFORE installing the
LiftMaster
Monitored Entrapment Protection device.
®
• Correctly install and connect the wireless edge kit.
• LiftMaster
®
Monitored Entrapment Protection devices are for use with LiftMaster
compliant Gate and Commercial Door Operators ONLY. Use with ANY other product voids
the warranty.
• Monitored external entrapment protection devices MUST be installed per the operator
installation manual for each Entrapment Zone.
WARNING: This product can expose you to chemicals including lead, which are
known to the State of California to cause cancer or birth defects or other reproductive
harm. For more information go to www.P65Warnings.ca.gov.
WIRE THE RECEIVER
1
IMPORTANT: Disconnect ALL power to the operator.
1. Find your operator diagram on pages 5-7 to see the mounting location for
the receiver and wire routing.
2. Open the receiver housing.
3. Route the wire harness from the receiver to the operator. Connect the wire harness
to one of the following locations depending on your operator and application:
• The EXP. BOARD or EXPANSION terminal on the control board.
• The WIRELESS EDGE terminal on the expansion board (if installed).
• One of the data bus terminals on the relay adapter board: Models HDSL24UL,
and HDSW24UL ONLY.
• The I2C interface board: Required ONLY when using an expansion board with
a single terminal labeled TO MAIN BOARD. Install and connect as
shown below (if installed).
4. Tighten the Heyco connector with 25 in. lbs. of torque to make receiver watertight.
5. Reconnect power to the operator. The receiver blue power LED will come on.
Receiver
Expansion Board
Control Board
(if applicable)
OR
To Control Board
To Receiver
I2C Interface Board
(if applicable)
MONITORED
®
UL 325
Tighten Heyco nut
to 25 in. lbs. torque
Relay Adapter Board
(if applicable)
OR
OR
Expansion Board
OR
6-32 x 1"
(for metal)
6-19 x 1"
(for plastic)
TO MAIN BOARD terminal
Tabla de contenido

Manuales relacionados para LiftMaster LMWEKITU


Resumen de contenidos para LiftMaster LMWEKITU
- Página 17 • Los dispositivos de protección contra atrapamiento monitoreados LiftMaster están ® diseñados para el uso con los operadores de portón y puerta de uso comercial LiftMaster ® que cumplen con la norma UL 325 ÚNICAMENTE. El uso con CUALQUIER otro producto anula la garantía.
-
Página 18: Instalar Las Baterías Del Transmisor Yestablecer La Dirección Del Borde
INSTALAR LAS BATERÍAS DEL TRANSMISOR Y CONEXIÓN Y MONTAJE DE LOS TRANSMISORES ESTABLECER LA DIRECCIÓN DEL BORDE Para obtener mejores resultados, instalar con una línea de visión clara entre el transmisor y el operador. El transmisor puede conectarse a 1 o 2 sensores de borde. 1. -
Página 19: Instalación De Portón Doble
El modo de diagnóstico agotará el tiempo de espera después de 2 minutos de inactividad o presione o suelte el botón STOP (detener) para salir del modo de diagnóstico. Tarjeta de control DIAGNOSTICS LED de estado Códigos de diagnóstico para LMWEKITU Batería baja del borde Cambie las baterías del borde inalámbrico. inalámbrico Borde inalámbrico activado Revise si en la conexión de entrada hay un problema de... - Página 20 Códigos de diagnóstico avanzados Resolución de problemas del transmisor y el receptor Los códigos de diagnóstico avanzados para el LMWEKITU están disponibles en el firmware del • Pruebe la programación de los transmisores al receptor, consulte 6 PRUEBA página 2.
-
Página 21: Ubicación De Montaje Del Receptor
Resolución de problemas de comunicación Bluetooth UBICACIÓN DE MONTAJE DEL RECEPTOR ® • Verifique si hay interferencias electromagnéticas de dispositivos electrónicos cercanos que Perfore orificios de 3.8 mm (0.15”) con una broca nro. 25 para montar la ménsula. puedan estar transmitiendo a las frecuencias utilizadas por el transmisor. Modelos LA400/UL, LA412/UL, y LA500/UL - Caja de control estándar - Sistemas de iluminación LED y fluorescente: Apague las luces para ver si el rendimiento mejora. - Página 22 Modelos RSW12U/UL, y CSW24U/UL Instale la ménsula en el lado de frente al portón. Conector Heyco Conector Heyco 21.3 cm (8-3/8 pulg.) 11.3 cm (4-7/16 pulg.) 4.4 cm (1-3/4 pulg.) Modelos CSW200U/UL Instale la ménsula en el lado de frente al portón. 21.4 cm 26.4 cm (8-7/16 pulg.)
- Página 23 Modelos SL585U, SL585UL - UBICACIÓN DE MONTAJE DEL RECEPTOR Modelo HDSL24UL Perfore orificios 3.8 mm (0.15 pulg.) con un taladaro N.° 25 para montar la ménsula. 10.3 cm (4-1/16 pulg.) 11.3 cm (4-7/16 pulg.) 2.5 cm (1 pulg.) Conector Heyco Conector Heyco Modelos SL595U, SL595UL, INSL24UL, IHSL24UL - UBICACIÓN DE MONTAJE DEL RECEPTOR...
-
Página 24: Garantía
• Conectar el equipo en una salida de un circuito distinto del circuito al que está conectado el receptor. • Consultar con el distribuidor o con un técnico de radio/TV experimentado para pedir ayuda. For parts and accessories visit LiftMaster.com Pour les pièces et accessoires, aller à LiftMaster.com Para ver partes y accesorios, visite LiftMaster.com LiftMaster ®...