SICK WLL80 Manual De Instrucciones
Ocultar thumbs
Ver también para WLL80:
- Manual de instrucciones (18 páginas) ,
- Instrucciones de uso (90 páginas) ,
- Instrucciones de uso (80 páginas)
Tabla de contenido
Idiomas disponibles
Idiomas disponibles
Enlaces rápidos
8027404 / 19.01.2022
SICK AG
Erwin-Sick-Straße 1
D-79183 Waldkirch
www.sick.com
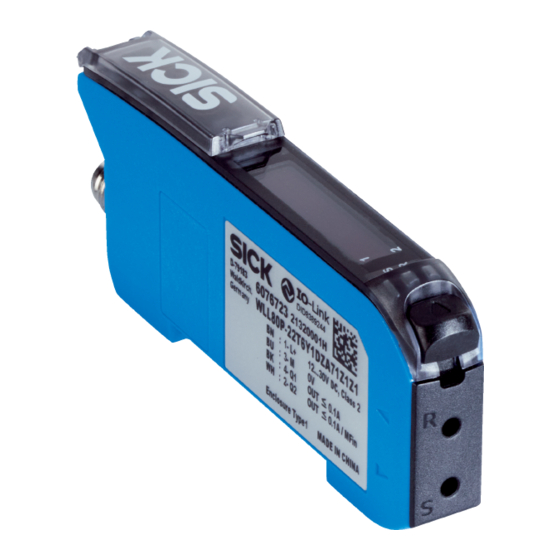
WLL80
NO
2006/42/EC
SAFETY
UL Environmental Rating: Enclosure Type 1.
Q U I C K S T A R T
These instructions are only valid in connection with operating instructions
8026879. You can find the operating instructions at www.sick.com.
There may be additional commissioning-related requirements for WLL80-xxxxxSxx
devices. These can be found in the operating instructions.
Connection, mounting, and configuration may only be performed by trained spe‐
cialists.
Not a safety component in accordance with the EU Machinery Directive.
Do not install the sensor in places exposed to direct sunlight or other weather
conditions unless this is expressly permitted in the operating instructions.
1
Operating and status indicators
1 2
5
6
7 8
1
S
R
2
4 3
1 Fiber optic interlock
2 Yellow LED: Status of received light beam Q1
3 Green LED: supply voltage active, IO-Link-Kommunikation
4 Yellow LED: Status of received light beam Q2
5 Indicator for correctly inserted fibers
6 Display
7 + 8 +/- button
9 Menu / OK pushbutton
ß Teach-in / escape pushbutton
2
Mounting
2.1 Ambient temperature, operation
–25°C ... +55 °C
–13°F ... +131 °F
2.2 Connecting fibers
6
3
1
4
2
5
8027404 / 19.01.2022/de, en, es, fr, it, pl, pt, ru
Operating Instruction
8026879:
9
ß
OK
ESC
MENU TEACH
1.
Open the fiber locking mechanism 1.
2.
Insert the fibers 4 into the openings provided (see receiver and sender
symbol on the housing) 2+5 as far as they will go (check the indicator for
correctly inserted fibers 6).
3.
Close the fiber locking mechanism 3.
NOTICE
When using a fiber optic proximity variant with a coaxial fiber arrangement,
connect the single-core optical fiber to the sender. Connect the multi-core
optical fiber (fiber bundle) to the receiver.
2.3 Mounting the sensor
1
2.4 Expanding the bus modules
e n
2
4
1.
Mount the 2 base unit on the mounting rail.
2.
Mount the 4 end piece on the mounting rail directly behind the base unit.
3.
Close the female connector of the expansion unit using the protective cover
3.
4.
Mount the expansion unit 1 on the mounting rail.
5.
Push the expansion unit against the base unit 2 until the female connector
of the base unit and the bus male connector 5 of the expansion unit make
firm contact.
3
Electrical installation
The sensors must be connected in a voltage-free state.
3.1 DC
Stand-alone device: U
: 12 ... 30 V DC
B
Base unit + expansion unit: U
WLL80-
x2xxxxxZxx
xxxxx
1 = BN
+ (L+)
2 = WH
MFIO
(default:
Q2 / QL2)
3 = BU
- (M)
4 = BK
Q1 / QL1/C
(IOLink)
5 = GY
-
3
4
2
1
5
: 12 ... 24 V DC
B
x2xxxxxMx
x2xxxxxExx
xFxxxxxExx
xxxxxx
xxxxx
xxxxx
+ (L+)
n. c.
MFIO
MFIO
MFIO
(Default: Q2)
(Default: Q2)
(Default: Q2)
- (M)
n. c.
Q1
Q1
Q1
-
-
1
0.18 mm
2
3
xGxxxxxEx
xxxxxx
-
-
MFIn (Default:
Teach-in)
-
-
Q1
-
MFOut
(Default: Q2)
0.18 mm
2
2
WLL80 | SICK
1
Tabla de contenido

Manuales relacionados para SICK WLL80


Resumen de contenidos para SICK WLL80
-
Página 4: Elementos De Mando Y Visualización
Estas instrucciones únicamente son válidas junto con las instrucciones de uso 8026879. Puede encontrar las instrucciones de uso en www.sick.com. Para los dispositivos WLL80-xxxxxSxx puede haber más información relevante para la puesta en servicio. La encontrará en las instrucciones de uso. -
Página 5: Ajuste De La Lógica De Conmutación
Para más información consulte las instrucciones de uso. Enlace al vídeo de Youtube: El sensor está operativo. | To run mode Enlace al vídeo de Youtube: Función de contador Enlace al vídeo de Youtube: 8027404 / 19.01.2022/de, en, es, fr, it, pl, pt, ru WLL80 | SICK... -
Página 6: Estructura De Datos De Proceso
(=valor de histéresis) dema‐ siado baja, o fluctuación de la luz reflejada por el objeto demasiado grande para el valor de histéresis definido. 8027404 / 19.01.2022/de, en, es, fr, it, pl, pt, ru WLL80 | SICK...