Electrolux ESF5533LOX Manual De Instrucciones
Ocultar thumbs
Ver también para ESF5533LOX:
- Manual de instrucciones (48 páginas) ,
- Manual de instrucciones (73 páginas)
Tabla de contenido
Idiomas disponibles
Idiomas disponibles
Enlaces rápidos
Capítulos
Tabla de contenido
Solución de problemas

Manuales relacionados para Electrolux ESF5533LOX


Resumen de contenidos para Electrolux ESF5533LOX
- Página 1 ESF5533LOX Dishwasher User Manual Lavavajillas Manual de instrucciones...
-
Página 24: Atención Y Servicio Al Cliente
14. INFORMACIÓN TÉCNICA ADICIONAL............45 PENSAMOS EN USTED Gracias por adquirir un aparato Electrolux. Ha escogido un producto que contiene décadas de experiencia e innovación profesionales. Ingenioso y elegante, se ha diseñado pensando en usted. Así pues, siempre que lo utilice, puede tener la seguridad de que conseguirá... -
Página 25: Información Sobre Seguridad
ESPAÑOL INFORMACIÓN SOBRE SEGURIDAD Antes de instalar y utilizar el aparato, lea atentamente las instrucciones facilitadas. El fabricante no se hace responsable de lesiones o daños producidos como resultado de una instalación o un uso incorrectos. Conserve siempre estas instrucciones en lugar seguro y accesible para futuras consultas. -
Página 26: Instrucciones De Seguridad
– entornos de tipo residencial. No cambie las especificaciones de este aparato. • La presión de agua de funcionamiento (mínima y • máxima) debe estar entre 0.5 (0.05) / 8 (0.8) bares (MPa) Siga el máximo número de ajustes de 13 cubiertos. -
Página 27: Conexión De Agua
ESPAÑOL compatibles con los valores eléctricos del suministro eléctrico. • Utilice siempre una toma con aislamiento de conexión a tierra correctamente instalada. • No utilice adaptadores de enchufes múltiples ni cables prolongadores. • Asegúrese de no provocar daños en el enchufe ni en el cable de red. Si es necesario cambiar el cable de alimentación del aparato, debe hacerlo el centro de servicio técnico... -
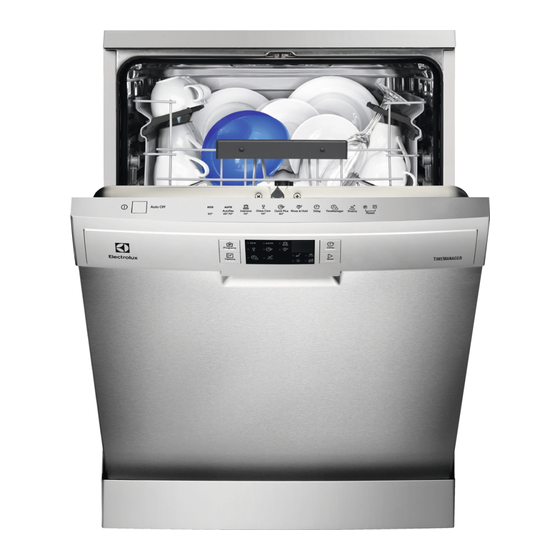
Página 28: Descripción Del Producto
2.6 Desecho • Corte el cable de conexión a la red y deséchelo. ADVERTENCIA! • Retire el pestillo de la puerta para Existe riesgo de lesiones o evitar que los niños y las mascotas asfixia. queden encerrados en el aparato. -
Página 29: Panel De Control
ESPAÑOL 4. PANEL DE CONTROL Botón de encendido/apagado Tecla Start Tecla Programs Indicadores Indicadores de programa Tecla Options Pantalla Tecla Delay 4.1 Indicadores Indicador Descripción Fase de lavado. Se enciende durante la fase de lavado. Fase de secado. Se enciende durante la fase de secado. Indicador TimeManager. -
Página 30: Valores De Consumo
Programa Grado de sucie‐ Fases del programa Opciones Tipo de carga • Suciedad nor‐ • Prelavado • TimeManager • Lavado a 50 ºC • XtraDry • Vajilla y cubier‐ • Aclarados • Secado • Todo • Prelavado • XtraDry •... -
Página 31: Información Para Los Institutos De Pruebas
ESPAÑOL Agua Energía Duración Programa (kWh) (min) 13 - 14 1.0 - 1.1 75 - 85 1) La presión y temperatura del agua, las variaciones del suministro de energía, las opcio‐ nes y la cantidad de platos pueden alterar los valores. 5.2 Información para los En su solicitud, incluya el código de número de producto (PNC) que se... -
Página 32: Cómo Ajustar El Nivel Del Descalcificador De Agua
Cuanto mayor sea el contenido de El ablandamiento del agua dichos minerales, más dura será el agua. dura aumenta el consumo La dureza del agua se mide en escalas de agua y energía, así como equivalentes. la duración del programa. -
Página 33: La Notificación De Abrillantador Vacío
ESPAÑOL 6.3 La notificación de abrillantador vacío El abrillantador permite que la vajilla se seque sin rayas ni franjas. El abrillantador se añade automáticamente durante la fase de aclarado caliente. Cuando el depósito de abrillantador está vacío, el indicador se enciende para solicitar que se rellene. -
Página 34: Opciones
2. Pulse Delay para cambiar el ajuste: 3. Pulse encendido/apagado para confirmar el ajuste. = AirDry desactivado. 7. OPCIONES y no es necesario seleccionarla en cada Cada vez que inicie un ciclo. programa debe activar las En los otros programas, el ajuste de opciones que desee. -
Página 35: Antes Del Primer Uso
ESPAÑOL 8. ANTES DEL PRIMER USO 1. Asegúrese de que el nivel actual 4. Agite cuidadosamente el embudo por del descalcificador coincide con la el asa para hacer que entren los dureza de su suministro de agua. últimos granos. De lo contrario, ajuste el nivel del 5. -
Página 36: Uso Diario
1. Pulse la tecla de apertura (D) para abrir la tapa (C). 2. Vierta el abrillantador en el dosificador (A) hasta que el líquido alcance el nivel 'max'. 3. Limpie las salpicaduras de abrillantador con un paño absorbente para evitar que se forme demasiada espuma. -
Página 37: Ajuste E Inicio De Un Programa
ESPAÑOL 9.2 Ajuste e inicio de un Apertura de la puerta mientras programa está funcionando el aparato Si abre la puerta mientras se realiza un La función Auto Off programa, el aparato se detiene. Puede afectar al consumo de energía y a la Esta función reduce el consumo de duración del programa. -
Página 38: Fin Del Programa
1. Pulse la tecla de encendido/apagado Fin del programa o espere a que la función Auto Off desactive automáticamente el Cuando haya finalizado el programa de aparato. lavado, la pantalla mostrará 0:00. Los Si se abre la puerta antes de la Indicadores luminosos de fase están... -
Página 39: Descarga De Los Cestos
ESPAÑOL • No lave en el aparato objetos que • La tapa del depósito de sal está puedan absorber agua (esponjas, apretada. paños de limpieza, etc.). • Los brazos aspersores no están • Quite los restos de alimentos grandes obstruidos. de los platos. -
Página 40: Limpieza De Los Brazos Aspersores
7. Vuelva a montar los filtros (B) y (C). 8. Vuelva a colocar el filtro (B) en el filtro plano (A). Gírelo hacia la derecha hasta que encaje. 2. Extraiga el filtro (C) del filtro (B). 3. Retire el filtro plano (A). -
Página 41: Limpieza Del Interior
ESPAÑOL 11.4 Limpieza del interior larga duración al menos dos veces al mes. • Limpie cuidadosamente el aparato, • Para mantener el funcionamiento incluida la junta de goma de la puerta, óptimo del aparato, se recomienda con un paño húmedo. utilizar un producto específico de •... - Página 42 Problema y código de Causa y soluciones posibles alarma El aparato no desagua. • Compruebe que el desagüe no esté obstruido. • Asegúrese de que el filtro de la manguera de salida La pantalla muestra no está obstruido. • Compruebe que el filtro de desagüe no está obstrui‐...
-
Página 43: Los Resultados Del Lavado Y El Secado No Son Satisfactorios
ESPAÑOL vuelve a producir, póngase en contacto Consulte otras posibles con un Centro de servicio técnico. causas en "Antes del Para los códigos de alarma no descritos primer uso", "Uso diario" en la tabla, póngase en contacto con un o "Consejos". Centro de servicio técnico. - Página 44 Problema Causa y soluciones posibles Espuma inusual durante el • Utilice solo detergentes adecuados para lavavaji‐ lavado. llas. • Hay una fuga en el dosificador de abrillantador. Póngase en contacto con un servicio técnico auto‐ rizado. Rastros de óxido en los cu‐...
-
Página 45: Ficha De Información Del Producto
13. FICHA DE INFORMACIÓN DEL PRODUCTO Marca registrada Electrolux Modelo ESF5533LOX 911516303 Capacidad asignada (número de cubiertos tipo) Clase de eficiencia energética Consumo de energía en kWh al año, basado en 280 ciclos de lavado normal, utilizando agua fría y el consumo de los modos de bajo consumo. -
Página 46: Aspectos Medioambientales
Suministro de agua máx. 60 °C Agua fría o caliente 1) Consulte los demás valores en la placa de características. 2) Si el agua caliente procede de una fuente de energía alternativa (por ejemplo, paneles solares), utilice la toma de agua caliente para reducir el consumo de energía. - Página 47 ESPAÑOL...
- Página 48 www.electrolux.com/shop...