Uline H-4455 Manual Del Usuario
Idiomas disponibles
Idiomas disponibles
π
H-4455
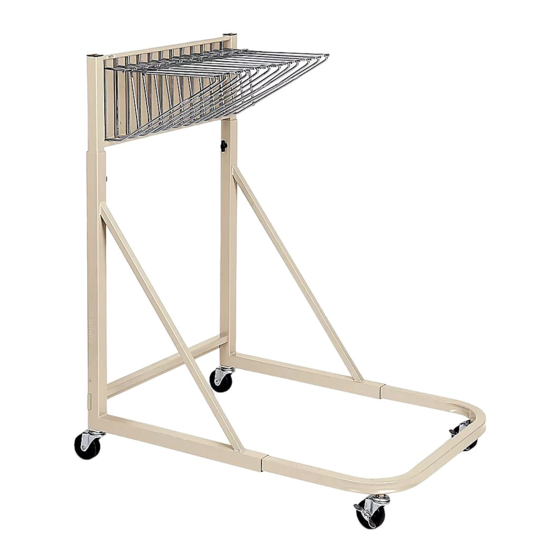
MOBILE BLUEPRINT RACK
TOOLS NEEDED
11mm Wrench
Pivot Hanger x 12
Upper Rack x 1
Lower Spreader
PAGE 1 OF 6
1-800-295-5510
uline.com
Allen Wrench (Included)
Side Frame x 2
Bar x 1
ASSEMBLY
Figure 1
PARTS
End Cap x 2
Frame
Extension x 1
1.
Position Frame Extension with holes toward the floor.
Insert Frame Extension into the short end of the Side
Frame tubes. (See Figure 1)
2. Slide posts of Upper Rack into the long end of the
Side Frame tubes. (See Figure 1)
3. Insert Knobs into upper part of Side Frames and
adjust to desired height. Insert Set Screws into lower
part of Side Frames and adjust to desired depth. Use
Allen Wrench to lock in position. (See Figure 1)
4. Attach Lower Spreader Bar to Side Frames using two
Screws. Fully tighten screws to secure bar in position.
(See Figure 1)
5. Install Casters to underside of frame by carefully
screwing them in. Position both Locking Casters at
the front of the frame by inserting into the frame
extension. (See Figure 1)
6. Insert End Caps into the Upper Rack. (See Figure 1)
Para Español, vea páginas 3-4.
Pour le français, consulter les pages 5-6.
Knob x 2
Swivel
Caster x 2
Screw x 2
Locking Swivel
Set Screw x 2
Caster x 2
0521 IH-4455
Tabla de contenido

Manuales relacionados para Uline H-4455


Resumen de contenidos para Uline H-4455
-
Página 3: Rack Móvil Para Planos
π H-4455 800-295-5510 uline.mx RACK MÓVIL PARA PLANOS HERRAMIENTAS NECESARIAS Llave de 11 mm Llave Allen (Incluida) PARTES 2 Tapas 2 Perillas 2 Ruedas 12 Ganchos Giratorias Colgantes 2 Tornillos 1 Rack Superior 2 Armazones 1 Extensión 2 Ruedas 1 Barra... -
Página 4: Continuación De Ensamble
NOTA: Un extremo de la perilla posterior debe Gancho Colgante descansar sobre la placa para instalación. (Vea Diagrama 5) Diagrama 5 Placa para Instalación 15° Diagrama 3 Poste Superior con Resorte Placa para Instalación Diagrama 4 800-295-5510 uline.mx PAGE 4 OF 6 0521 IH-4455...