LG DLE1310W Guía Del Usuario E Instrucciones De Instalacion
Tabla de contenido
Idiomas disponibles
Idiomas disponibles
Enlaces rápidos
To contact LG Electronics, 24 hours a day,
7 days a week:
1-800-243-0000
Or visit us on the Web at: us.lge.com
Pour contacter LG Electronics, 24 heures
par jour, 7 jours par semaine :
1-800-243-0000
ou visitez notre site Web à l'adresse :
us.lge.com
Before beginning installation, read these
instructions carefully. This wll simplify installation
and ensure that the dryer is installed correctly and
safely. Leave these instructions near the dryer
after installation for future reference.
Antes de comenzar la instalación, lea atentamente
estas instrucciones. Esto simplificará la instalación
y asegurará que la secadora está instalada
en forma correcta y segura. Conserve estas
instrucciones cerca de la secadora luego de la
instalación para futuras consultas.
DLE1310W
DLG1320W
P/No. 3828EL3004L
Capítulos
Tabla de contenido

Manuales relacionados para LG DLE1310W


Resumen de contenidos para LG DLE1310W
- Página 38 Felicitaciones por su compra y Instrucciones de conexión a tierra .......41 Instrucciones importante para la instalación..41, 42 Instrucciones importante para conectar bienvenido a la familia LG. Su la electricidad ............43 PIEZAS Y CARACTERÍSTICAS nueva Secadora LG combina la Piezas y componentes clave ........ 44 tecnología de sensor de secado más...
-
Página 39: Qué Hacer Si Huele Gas
LEA TODAS LA INSTRUCCIONES ANTES DE USAR wADVERTENCIA Por su seguridad, debe seguir la información indicada en este manual para minimizar el riesgo de incendio o explosión, descarga eléctrica, o para prevenir daños a la propiedad, lesiones personales o muerte. Su Seguridad y la de los demás son de suma importancia. -
Página 40: Precauciones Básicas De Seguridad
LEA TODAS LA INSTRUCCIONES ANTES DE USAR wADVERTENCIA Por su seguridad, se debe seguir la información indicada en este manual para minimizar el riesgo de incendio o explosión, descarga eléctrica, o para prevenir daños a la propiedad, lesiones personales o muerte. PRECAUCIONES BáSICAS DE SEGURIDAD wADVERTENCIA Para minimizar el riesgo de incendio o explosión, descarga eléctrica,... -
Página 41: Instrucciones De Conexión A Tierra
LEA TODAS LA INSTRUCCIONES ANTES DE USAR wADVERTENCIA Por su seguridad, se debe seguir la información indicada en este manual para minimizar el riesgo de incendio o explosión, descarga eléctrica, o para prevenir daños a la propiedad, lesiones personales o muerte. INSTRUCCIONES DE CONExIÓN A TIERRA Este electrodoméstico deberá... -
Página 42: Instrucciones Importante Para La Instalación
LEA TODAS LA INSTRUCCIONES ANTES DE USAR wADVERTENCIA Por su seguridad, se debe seguir la información indicada en este manual para minimizar el riesgo de incendio o explosión, descarga eléctrica, o para prevenir daños a la propiedad, lesiones personales o muerte. INSTRUCCIONES IMPORTANTE PARA LA INSTALACIÓN Conducto de escape/Tubería: • Las secadoras a gas DEBEN tener un... -
Página 43: Instrucciones Importante Para Conectar La Electricidad
LEA TODAS LA INSTRUCCIONES ANTES DE USAR wADVERTENCIA Por su seguridad, se debe seguir la información indicada en este manual para minimizar el riesgo de incendio o explosión, descarga eléctrica, o para prevenir daños a la propiedad, lesiones personales o muerte. INSTRUCCIONES IMPORTANTE PARA CONECTAR LA ELECTRICIDAD wADVERTENCIA Para reducir el riesgo de incendio, descargas eléctricas o... -
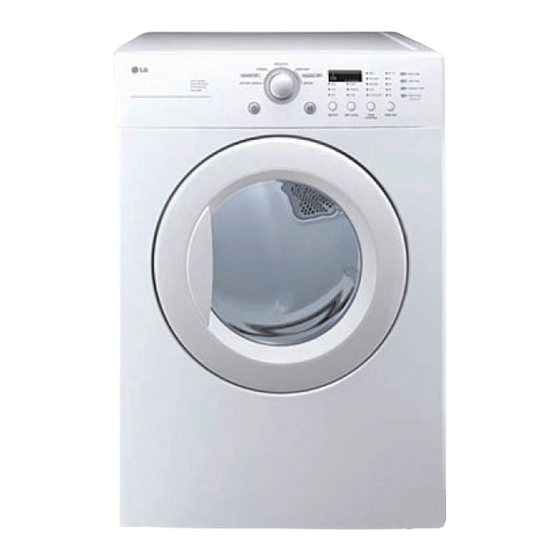
Página 44: Piezas Y Componentes Clave
PIEZAS Y COMPONENTES CLAvE PANEL DE CONTROL FáCIL PARA USAR Gire la perilla selectora de ciclos al ciclo de secado deseado. Añada los ajustes de ciclo o programe las opciones con el toque de un botón. PANTALLA DE LED La pantalla LED de fácil lectura muestra las opciones e información de ciclo e indica mensajes de estado durante el funcionamiento. -
Página 45: Importante: ¡Lea Todas Las Instrucciones De In- Stalacion Completamente Antes De Instalar Y Hacer Funcionar Su Secadora
IMPORTANTE: ¡Lea todas las instrucciones de instalación completamente antes de instalar y hacer funcionar su secadora! Es importante que revise todo este manual antes de instalar y usar su secadora. Se proporcionan instrucciones detalladas pertinentes a las conexiones eléctricas, de gas, y los requisitos de escape en las siguientes páginas. -
Página 46: Instalaciones Con La Base Pedestalo Kit De Apilado Opcionales
Dimensiones requeridas para la instalación con pedestal la instalación con el kit de apilado ACCESORIOS OPCIONALES Para estos y otros productos LG, llame a su distribuidor LG local, o visite nuestro sitio Web en us.lge.com. kit de apilado Pedestal (Adquirido por separado) -
Página 47: Nivelación De La Secadora
NIvELACIÓN DE LA SECADORA • Las 4 patas niveladoras deberán apoyarse wADVERTENCIA firmemente en el piso. Empuje suavemente las esquinas superiores de la secadora para • Use guantes durante la instalación. asegurarse de que su secadora no se mece • Si no se cumple con esta advertencia se podrán de esquina a esquina. producir heridas. Si está instalando la secadora sobre el accesorio Para asegurar que la secadora brinde un de pedestal opcional, deberá... -
Página 48: Cómo Cambiar La Ubicación Del Conducto De Ventilación De La Secadora
Quite el tornillo de seguridad del conducto Puede adquirirse el kit adaptador, número de de ventilación trasero. Tire del conducto de pieza 383EEL9001B, de su distribuidor LG. ventilación hacia afuera. Este kit contiene los componentes de conducto necesarios para cambiar la ubicación de la ventilación de la secadora. -
Página 49: Conexión Del Conducto De Ventilación De La Secadora
CONExIÓN DEL CONDUCTO DE vENTILACIÓN DE LA SECADORA wADVERTENCIA Para reducir el riesgo de incendio, descargas eléctricas o heridas al usar su electrodoméstico, siga las precauciones básicas, incluyendo lo siguiente: • No aplaste ni doble el sistema de conducto. • Se recomiendan conductos rígidos o semirígidos para usar entre la secadora Si no se siguen estas instrucciones se podrá... - Página 50 CONExIÓN DEL CONDUCTO DE vENTILACIÓN DE LA SECADORA (cont.) Sistema de conducto Long. máx. de conducto metálico Tipo de tapa de pared Número de Codos de 90° flexible de diám. 4" 65 pies (19,8 m) Recomendado 55 pies (16,8 m) 47 pies (13,7 m) 36 pies (11,0 m) 4"...
-
Página 51: Conexión De Secadoras A Gas
CONExIÓN DE SECADORAS A GAS wADVERTENCIA: Para reducir el riesgo de incendio, descargas eléctricas o heridas al usar su electrodoméstico, siga las precauciones básicas, incluyendo lo siguiente: • Requisitos de suministro de gas: • Conecte la secadora al tipo de gas indicado en Como enviado de fábrica, si configura la secadora la placa del nombre. - Página 52 CONExIÓN DE SECADORAS A GAS (cont.) wADVERTENCIA: Para reducir el riesgo de incendio, descargas eléctricas o heridas al usar su electrodoméstico, siga las precauciones básicas, incluyendo lo siguiente: • La instalación y el mantenimiento deben se usará (gas natural o petróleo líquido, LP). proveerse por un instalador calificado, agencia Si no se cumple con esto se podrá...
-
Página 53: Cómo Conectar Las Secadoras Eléctricas
CÓMO CONECTAR LAS SECADORAS ELÉCTRICAS wADVERTENCIA: Para ayudar a evitar incendios, descargas eléctricas, heridas graves, o muerte, el cableado e instalación a tierra deben cumplir con la última edición del Código Eléctrico Nacional, ANSI/NFPA 70 y todas las regulaciones locales aplicables. Por favor comuníquese con un electricista calificado para que controle el cableado y los fusibles y así... - Página 54 CÓMO CONECTAR LAS SECADORAS ELÉCTRICAS (cont.) wADVERTENCIA: • Conecte el cable de suministro de corriente al bloque terminal. Cada cable se debe conectar al tornillo del mismo color. El color del cable que figura en el manual se conecta el tornillo del mismo color en el bloque. De otro modo se podrá producir un flujo de corriente corto o excesivo.
- Página 55 CÓMO CONECTAR LAS SECADORAS ELÉCTRICAS (cont.) wADVERTENCIA: • Conecte el cable de suministro de corriente al bloque terminal. Cada cable se debe conectar al tornillo del mismo color. El color del cable que figura en el manual se conecta el tornillo del mismo color en el bloque. De otro modo se podrá producir un flujo de corriente corto o excesivo.
- Página 56 CÓMO CONECTAR LAS SECADORAS ELÉCTRICAS (cont.) wADVERTENCIA: • Conecte el cable de suministro de corriente al bloque terminal. Cada cable se debe conectar al tornillo del mismo color. El color del cable que figura en el manual se conecta el tornillo del mismo color en el bloque. De otro modo se podrá producir un flujo de corriente corto o excesivo.
- Página 57 CÓMO CONECTAR LAS SECADORAS ELÉCTRICAS (cont.) wADVERTENCIA: • Conecte el cable de suministro de corriente al bloque terminal. Cada cable se debe conectar al tornillo del mismo color. El color del cable que figura en el manual se conecta el tornillo del mismo color en el bloque. De otro modo se podrá producir un flujo de corriente corto o excesivo.
-
Página 58: Requisitos Especiales Para Viviendas Móviles O Prefabricadas
REQUISITOS ESPECIALES PARA vIvIENDAS MÓvILES O PREFABRICADAS Cualquier instalación en una vivienda móvil o • El conducto de escape de la secadora debe prefabricada debe realizarse de conformidad con estar bien fijado a la estructura de la vivienda los Estándares de seguridad y construcción de móvil o prefabricada, y el conducto de escape viviendas prefabricadas, Título 24 CFR, Parte debe estar fabricado de un material resistente 32-80 o estándar CAN/CSA0Z240 MH y con los... -
Página 59: Clasificación De Cargas
A continuación encontrará instrucciones para comenzar a usar su secadora nueva. Para más información por favor consulte las secciones específicas de este manual. Advertencia importante: Para reducir el riesgo de incendios, descargas eléctricas, o heridas, lea este manual en su totalidad, incluyendo las Instrucciones Importantes de Seguridad, antes de operar la secadora. -
Página 60: Características Del Panel De Control
CARACTERÍSTICAS DEL PANEL DE CONTROL A continuación encontrará instrucciones para comenzar a usar su secadora nueva. Para más información por favor consulte las secciones específicas de este manual. Advertencia importante: Para reducir el riesgo de incendios, descargas eléctricas, o heridas, lea este manual en su totalidad, incluyendo las Instrucciones Importantes de Seguridad, antes de operar la secadora. -
Página 61: Guía De Ciclos
Los ciclos de secado por sensor utilizan el sistema Use los ciclos de secado manual para exclusivo de sensor doble de LG para detectar y seleccionar una cantidad específica de tiempo y comparar el nivel de humedad en las prendas y en temperatura de secado. -
Página 62: Funcionamiento De La Secadora
FUNCIONAMIENTO DE LA SECADORA Una vez que ha cargado la secadora: Apriete el botón de inicio/pausa (START/ Apriete el botón encendido/apagado (ON/ PAUSE) para iniciar el ciclo. La OFF) para encender la secadora. pantalla cambiará, y la secadora Las luces alrededor de la perilla mostrará... -
Página 63: Botones De Ajuste De Ciclos
BOTONES DE AjUSTE DE CICLOS Los ciclos de secado por sensor tienen NOTA: Para proteger las prendas, no todos los ajustes preprogramados que se seleccionan niveles de secado, temperatura, u opción están automáticamente y no pueden cambiarse. disponibles en todos los ciclos. Vea la Guía de Los ciclos de secado manual tienen ajustes ciclos para obtener más detalles. -
Página 64: Botones De Opción De Ciclo
BOTONES DE OPCIÓN DE CICLO Su secadora dispone de varias opciones de ciclo adicionales, las cuales personalizan los ciclos para satisfacer sus necesidades individuales. Ciertos botones de opción también incorporan una función especial (vea la siguiente página para obtener mayor información) que puede activarse apretando y manteniendo apretado ese botón de opción por 3 segundos. -
Página 65: Limpieza Regular
LIMPIEZA REGULAR wADVERTENCIA: Para reducir el riesgo de incendio, descargas eléctricas, o heridas al usar su electrodoméstico, siga las precauciones básicas, incluyendo lo siguiente: • Desenchufe la secadora antes de limpiar la misma para evitar el riesgo de descargas eléctricas. Si no se cumple con esta advertencia se podrán producir heridas graves, incendios, descargas eléctricas, o muerte. -
Página 66: Antes De Llamar A Mantenimiento
ANTES DE LLAMAR A MANTENIMIENTO Su secadora está equipada con un sistema de monitoreo de errores automático para la detección y el diagnóstico de problemas en una etapa temprana. Si su secadora no funciona adecuadamente o no funciona en lo absoluto, revise lo siguiente antes de llamar a mantenimiento. Problema Causas posibles Soluciones... - Página 67 ANTES DE LLAMAR A MANTENIMIENTO (cont.) Problema Causas posibles Soluciones • El tiempo de secado para una carga variará dependiendo El tiempo de • Los ajustes de calor, el secado no es del ajuste de calor, tipo de calor utilizado (eléctrico, tamaño de la carga, o la natural, o gas LP), el tamaño de la carga, el tipo de tela, constante humedad de las prendas el nivel de humedad de las prendas, y la condición de los...
-
Página 68: Dimensiones Y Especificaciones Clave
IEC 7,0 pies cúbicos (22,5 lb/10,2 kg) *Consulte la placa de clasificación colocada en su secadora. ACCESORIOS OPCIONALES Para estos y otros productos LG, llame a su distribuidor LG local, o visite nuestro sitio Web en us.lge.com. kit de apilado... -
Página 69: Instalación Del Pedestal
INSTALACIÓN DEL PEDESTAL Para asegurar la instalación segura, siga El accesorio de pedestal incluye: cuidadosamente las siguientes instrucciones. • D ivisor de cajón (1) • L lave (1) • Tornillos (18) † • S ujetadores (4) †† wADVERTENCIA • L a instalación incorrecta puede causar accidentes graves. • L os electrodomésticos son muy pesados. Se requiere de dos o más personas para instalar del pedestal. - Página 70 INSTALACIÓN DEL PEDESTAL (cont.) Para la secadora Para la lavadora/combinación Coloque el electrodoméstico encima del Asegúrese de que los orifi cios del pedestal. Asegúrese que los pies frentes y pedestal se alinean con los orifi icios de los traseros se encuentren en las posiciones sujetadores, luego instale 2 tornillos en cada correctas.
-
Página 71: Instalación Del Kit De Apilado
INSTALACIÓN DEL kIT DE APILADO Para asegurar la instalación segura, siga las siguientes instrucciones. Este kit de apilado incluye: wADVERTENCIA • D os (2) rieles laterales. • L a instalación incorrecta puede causar • U n (1) riel frontal. accidentes graves. - Página 72 INSTALACIÓN DEL kIT DE APILADO Secadora Lavadora Coloque la secadora sobre la lavadora Inserte el riel frontal entre la parte inferior haciendo coincidir las patas en las de la secadora y la parte superior de la abrazaderas laterales como se indica. lavadora.
-
Página 73: Garantía
GARANTÍA LIMITADA DE LA SECADORA LG – EE. UU. Su secadora LG será reparada o reemplazada, a discreción de LG, si se comprueba que existe un defecto en el material o la mano de obra bajo condiciones de uso normales, durante el período de garantía (“Período de garantía”) establecido más abajo, vigente desde la fecha (“Fecha de compra”) de la compra del cliente original de producto. - Página 76 P/No. 3828EL3004L...