
Manuales relacionados para Kalorik HUVI


Resumen de contenidos para Kalorik HUVI
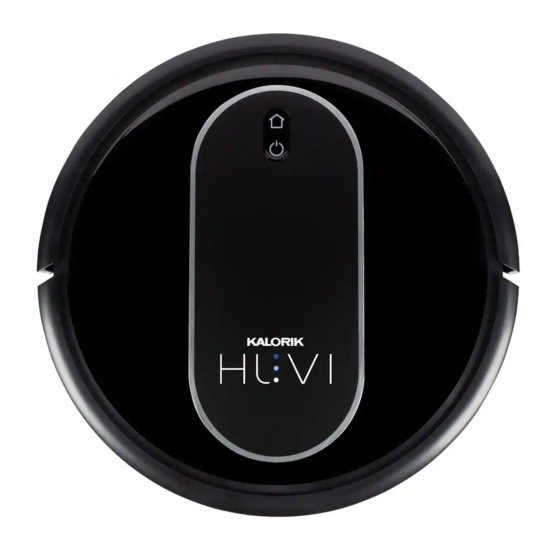
- Página 1 ROBOT VACUUM R1 EN……..2 ROBOT ASPIRADOR R1 ES…..33 211104 www.KALORIK.com...
-
Página 2: Technical Specifications
THANK YOU Thank you for choosing HUVI! We hope you’re delighted with your HUVI. If you are, we’d love it if you’d shout it from the rooftops, tell your friends or leave us a review. We’d love to hear from you, so tag @kalorik on social media to share. -
Página 3: Tabla De Contenido
To Connect in AP Mode ….……………………………………..…………….. 14 Connecting with Amazon Alexa……………………………..………….…… 15 Connecting with Google Home……………………………………………… 16 USING YOUR HUVI – HOME & POWER BUTTONS .......... 17 USING YOUR HUVI – APP CONTROLS ............17 AUTO CLEANING ……………………………….…………………………….…. 17 WALL FOLLOW ……………………………………………………………..……. 18 SPOT ….………………………………………………………….……..…..……... - Página 4 CLEANING THE FILTERS ………………………………………..…..……………. 23 CLEANING THE SENSORS ….…………………………………………….….….. 24 CLEANING THE ROLLER BRUSH & SUCTION INTAKE ………………..……… 24 CLEAING THE SIDE BRUSHES …………………………………………………… 25 REPLACING THE BATTERY ………………………………………………………. 25 AVAILABLE ACCESSORIES ................26 TROUBLESHOOTING ..................28 WARRANTY ..................... 31 211104 www.KALORIK.com...
-
Página 5: Parts
21. Socket for adapter bin)/LED lights (outside bottom 22. Charging pins of dust bin) 23. Adapter 10. Dust bin 24. Cleaning brush 11. Virtual wall sensors 25. 6-arm side brushes 12. Dust bin latch 26. 3-arm side brushes www.KALORIK.com 211104... - Página 6 Solid blue: HUVI is running HOME BUTTON • Short press to send HUVI to recharge. Flashes white when charging. Long press to connect HUVI to your WiFi network. Flashes blue while • connecting. See CONNECTING TO THE HUVI APP section for more details.
-
Página 7: Important Safeguards
16. If the room to be cleaned has a balcony, a physical barrier should be used to prevent access to the balcony and to ensure safe operation. 17. Do not place anything on top of this device. 211104 www.KALORIK.com... -
Página 8: Know Your Huvi
23. Check the dustbin regularly for signs of damage. Do not use HUVI with a damaged or broken dustbin. If any signs of damage, look for immediate replacement. -
Página 9: Hepa Filter
HUVI features a built-in aroma diffuser. Simply place a few drops of the aroma included with HUVI, or any essential oil of your choosing, on the aroma pad and load it inside HUVI. While HUVI runs, the aroma is dispersed into the air, misting your home with soothing fragrance. Since the HUVI’s... -
Página 10: Before The First Use
Plug the power cord into the charging station, then into the outlet. • Place the remaining cord behind the charging dock to prevent it from getting in the way of HUVI as it cleans. NOTE: Always keep the charging base plugged in, otherwise the vacuum will not automatically return to •... -
Página 11: Power Button
The three-arm design makes it easier for HUVI to climb over these surfaces and move freely across the floor. It is recommended to use this set to avoid HUVI getting stuck on the sides of your carpets or from moving your rugs around while cleaning. -
Página 12: Connecting To The Huvi App
Place physical barriers in front of fireplaces or any other areas that could damage HUVI. ― Keep HUVI away from spaces lower than 3.57 in. / 8 cm to prevent it from getting stuck. If necessary, place physical barriers to block problem areas. -
Página 13: To Connect Using Bluetooth
(Fig. C), then select the “Go to add” (Fig. D). • Input your WiFi information, then select “Next” (Fig. E). • Wait about 30 seconds while HUVI connects to the app (Fig. F). • Once the connection is successful, select “Next” to complete. •... -
Página 14: To Connect In Ez Mode
Make sure “EZ Mode” is selected in the upper right corner (Fig. H). • Press and hold the HOME button on top of HUVI (Fig. B) until the HOME button light turns light blue Fig. G Fig. H and begins to flash rapidly while HUVI says “connecting to... -
Página 15: Connecting With Amazon Alexa
Amazon Echo. Make sure you have downloaded and successfully connected HUVI to the HUVI app. Make sure it is connected to the same WiFi signal as the Alexa app. In the HUVI app, go to the HUVI’s control screen and select the icon in the upper right corner (Fig. -
Página 16: Connecting With Google Home
Select the “Alexa” icon and follow the instructions to connect (Fig. N). Fig. N Fig. M NOTE: The name of your HUVI will be the same as the name set in the HUVI app. If you change the device's name on the HUVI app, your Echo must re- discover it. -
Página 17: Using Your Huvi - Home & Power Buttons
If you change the device's name on the HUVI app, your Google Home must re-discover it. USING YOUR HUVI – HOME & POWER BUTTONS HUVI can be directed to clean and recharge by using the POWER and HOME buttons located on the top of HUVI. HOME Button HOME BUTTON •... -
Página 18: Wall Follow
Fig. B ensure the edge is cleaned thoroughly (Fig. C). SPOT • Place HUVI by the area you wish to spot clean. • Press the icon to select Spot mode. • After selected, press the ON button to start. -
Página 19: Uv Function
HUVI is in use, then select “Suction Strength” to choose between the settings (Fig. F). NOTE: ― The suction setting can be changed during any of the other operating functions. ― The more powerful the setting the more battery power that will be used. - Página 20 Fig. I Fig. J Fig. K • After setting a condition, select a task for HUVI (Fig. L) and follow the onscreen instructions. “Run the device” allows you to select which HUVI functions to enable when automating. “Select Smart” allows you to select an Automation or Tap-to- Launch that you have previously created.
-
Página 21: Aroma Diffuser
Remove the tray and pad inside. Tray • Once the aroma diffuser compartment is released, place a few drops of the aroma included with HUVI or an essential oil of your choice on the pad within. 211104 www.KALORIK.com... -
Página 22: Cleaning And Maintenance
Place the pad inside of the tray, then reinsert the tray into the aroma diffuser compartment until it clicks in place. • The diffuser will disperse the aroma whenever the HUVI is running, until the oil is used up. NOTE: Do not reuse or clean pads. A fresh pad should be used whenever oil needs to be replenished. -
Página 23: Cleaning The Filters
Clean the dust bin and filters with the included cleaning brush or by hand. • Put the filters back together in the dust bin, then reinsert the dust bin into your HUVI. NOTE: It is not recommended to clean the HEPA filter under running water or get it wet. www.KALORIK.com... -
Página 24: Cleaning The Sensors
• Reinstall the roller brush by inserting the fixed protruding end first so that the brush clicks into place. • Reattach the sweep guard. Press down to snap it into place. 211104 www.KALORIK.com... -
Página 25: Cleaing The Side Brushes
NOTE: the side brushes may slightly deform with regular use. REPLACING THE BATTERY • Use a screwdriver to remove the screws from the battery cover under HUVI. Remove the battery from the compartment. • Disconnect the battery from the connector, then fully remove the battery. -
Página 26: Available Accessories
Fully charge the new battery before use. ― Please recycle the replaced battery in an environmentally friendly way to avoid pollution. AVAILABLE ACCESSORIES Enhance your HUVI experience with the accessories outlined in this section. Visit kalorik.com/products/HUVI for more information. ITEM NUMBER INCLUDES •... - Página 27 Replacement Filters – 3 Pack (3 HEPA + 3 Copper Filters) RVC 50229 - VCP 51016 Roller Brush + Sweep Guard RVC 50229 - VCS 51017 HUVI Home Base (with adapter) RVC 50229 - VCP 51018 Replacement Battery RVC 50229 - VCS 51019 Self-Cleaning Station RVC 50229 - VCP 51020 Mopping Pads –...
-
Página 28: Troubleshooting
USE section of this manual for return to correct placement. charging base. HUVI gets HUVI has been HUVI will try to free itself. If stuck while obstructed by unsuccessful, remove the running something on the floor obstacles by hand and... - Página 29 HUVI does Schedule function has Use the HUVI app to schedule not clean been cancelled. specific cleaning times. at the scheduled HUVI has finished the This behavior is normal, no time. scheduled cleaning. action needed. HUVI is switched off. Switch on HUVI.
- Página 30 Your devices need to be Restart your smart device, rebooted. reboot HUVI, and restart your router before connecting again. If additional assistance is needed, please contact our Customer Assistance at 1-888-525-6745. 211104...
-
Página 31: Warranty
You can also fill out this warranty card online, at the following address: www.KALORIK.com This KALORIK product is warranted in the U.S.A. and in Canada for 1 year from the date of purchase against defects in material and workmanship. - Página 32 If this is the case, bring the product, or send it, postage prepaid by the user (all Kalorik customers are responsible for the initial shipment back to the warranty center), along with proof of purchase and a return authorization number indicated on the outer package, given by our Customer Service Representatives.
-
Página 33: Especificaciones Técnicas
Nos encantaría saber qué ha estado cocinando, así que etiquete a @kalorik en las redes sociales con sus obras maestras culinarias. REGISTRE SU COMPRA Para registrar su producto, simplemente complete el formulario incluido, visite Kalorik.com/register o escanee el código QR a... - Página 34 Para conectarse en modo AP …..…………………..…………………...….. 46 Conexión con Amazon Alexa…………………..……..……………………… 47 Conexión con el Asistente de Google………………..…..………………… 48 USANDO SU HUVI – BOTONES DE HOME Y POWER ........49 USANDO HUVI – CONTROLES DE LA APLICACIÓN ........49 LIMPIEZA AUTO …………………………….….…………………………………. 49 SEGUIMIENTO DE PARED ………………………………………………..…….
- Página 35 LIMPIANDO LOS SENSORES ….…………………….………………………..56 LIMPIAR EL CEIPLLO GIRATORIO Y LA ENTRADA DE SUCCIÓN……….…. 56 LIMPIANDO LOS CEPILLOS LATERALES ………………..……………….….… 57 REEMPLAZANDO LA BATERÍA …………………….…………….…………..…. 57 ACCESORIOS DISPONIBLES ................58 SOLUCIÓN DE PROBLEMAS ................62 GARANTÍA ...................... 63 211104 www.KALORIK.com...
-
Página 36: Partes
24. Cepillo de limpieza 10. Contenedor de polvo 25. Cepillos laterales de 6 brazos 11. Sensores de pared virtual 26. Cepillos laterales de 3 brazos 12. Pestillo del contenedor de polvo 13. Cepillo lateral www.KALORIK.com 211104... -
Página 37: Indicador Ion
• Presione brevemente para enviar HUVI para recargar. Parpadea en blanco mientras se carga. Mantenga pulsado para conectar HUVI a su red Wifi. Parpadea en • azul mientras se conecta. Consulte la sección CONEXIÓN A LA APLICACIÓN HUVI para obtener más información. -
Página 38: Medidas Importantes De Seguridad
15. Antes de usar este aparato, recoja artículos como ropa y restos de papel. Levante los cables de las persianas / cortinas y los cables de alimentación y retire los artículos frágiles. Si este aparato arrastra un cable de alimentación, puede provocar la caída de un objeto de los muebles. www.KALORIK.com 211104... -
Página 39: Conozca Su Huvi
Compruebe periódicamente si el depósito de polvo está dañado. No utilice el HUVI si su contenedor de polvo está dañado. Si hay algún signo de daño, reemplácelo de inmediato. El uso regular puede causar cierta decoloración, esto es normal. -
Página 40: Filtro Hepa
FILTRO HEPA HUVI tiene un filtro HEPA H13 de grado médico. Un filtro HEPA estándar normal elimina al menos el 99,97% de las partículas en el aire con un tamaño de 0,3 micrones (µm). Más allá de eso, los filtros HEPA se clasifican por su nivel. El nivel HEPA de un filtro indica su eficacia para eliminar todas las partículas de 0,2... -
Página 41: Antes Del Priemr Uso
DIFUSOR DE AROMA HUVI tiene un difusor de aroma integrado. Simplemente coloque unas gotas del aroma incluido con su HUVI o aceite esencial de su elección en la almohadilla de aroma y colóquelo dentro de HUVI. Mientras HUVI está funcionando, el aroma se dispersará en el aire, llenándolo con su aroma. A medida que el difusor HUVI funciona mientras HUVI se está... -
Página 42: Botón De Encendido
NOTA: HUVI es adecuada para pisos de madera, losas y alfombras de pelo bajo. HUVI incluye 2 juegos únicos de cepillos de laterales, cada uno diseñado para hacer frente a diferentes tipos de piso y manejar cualquier cuarto de su hogar. -
Página 43: Conexión A La Aplicación Huvi
• Deje que HUVI se recargue en la base de carga. Durante la carga, las luces de los botones POWER y HOME parpadean en blanco. Cuando está completamente cargada, las luces dejan de parpadear. • Descargue la aplicación HUVI y siga las instrucciones para completar la instalación. -
Página 44: Para Conectarse Usando La Conexión Bluetooth
Fig. A Hay 3 formas de conectarse a HUVI a través de la aplicación: Asistido por Bluetooth (predeterminado, recomendado): utiliza la ‒ conexión Bluetooth de su teléfono inteligente para conectarse a WiFi. Modo EZ: utiliza su red WiFi directamente para comunicarse entre HUVI ‒... -
Página 45: Para Conectarse En Modo Ez
“Modo EZ” (Fig. H). • Mantenga presionado el botón de Fig. G Fig. H INICIO de HUVI (Fig.B) hasta que el LED se vuelva azul claro y comience a parpadear rápidamente mientras HUVI dice "conectando a la red". • Presione el círculo pequeño frente a “Confirme que el indicador... -
Página 46: Para Conectarse En Modo Ap
En su teléfono inteligente, regrese a la aplicación. La aplicación mostrará "Agregando dispositivo ..." mientras el dispositivo se conecta. • Una vez que tenga éxito, podrá nombrar su HUVI. Seleccione "Listo" en la aplicación para finalizar. • Ahora puede controlar HUVI a través de la aplicación HUVI. -
Página 47: Conexión Con Amazon Alexa
Seleccione el icono "Alexa" y siga las instrucciones para conectarse (Fig Fig. M Fig. N NOTA: El nombre de su HUVI será el mismo que el definido en la aplicación HUVI. Si cambia el nombre del dispositivo en la aplicación HUVI, su Echo debería redescubrirlo. -
Página 48: Conexión Con El Asistente De Google
HUVI. Asegúrese de que esté conectado a la misma señal WiFi que la aplicación Google Home. En la aplicación HUVI, vaya a la pantalla de control de HUVI y seleccione el icono en la esquina superior derecha (Fig. M). -
Página 49: Usando Su Huvi - Botones De Home Y Power
USANDO SU HUVI – BOTONES DE HOME Y POWER Dirija el HUVI para limpiar o recargar usando los botones de ENCENDIDO e INICIO ubicados en la parte superior del HUVI. Botón de INICIO INICIO • Presione una vez para enviar a HUVI a la base de carga. -
Página 50: Localizado
(Fig. A) • Deje presionadas las flechas en la dirección en la que desee dirigir su HUVI (Fig. E). • El control manual le permite dirigir su HUVI a Fig. D usted mismo. CARGANDO •... -
Página 51: Función Uv
"Guardar" en la esquina superior derecha (Fig. H). Fig. H AUTOMATIZACIÓN • Con la función “Automatización”, puede configurar su HUVI para que funcione automáticamente de acuerdo a los parámetros que seleccione en la aplicación. • Presione el ícono (Fig. - Página 52 ― "Cuando cambia el estado del dispositivo" le permite configurar comandos para HUVI, dependiendo del estado de HUVI. Por ejemplo, puede indicarle a HUVI que regrese a la base de carga dependiendo de la vida útil del filtro. Fig. J Fig.
-
Página 53: Difusor De Aroma
Fig. M Fig. L Fig. N Fig. O DIFUSOR DE AROMA HUVI tiene un compartimento difusor de aroma, ubicado sobre el respiradero en el costado de la aspiradora. Compartimiento difusor de Aroma • Para acceder al compartimiento del difusor de aroma, presione el compartimiento hacia abajo hasta que haga clic y se abra suavemente. -
Página 54: Limpieza Y Mantenimiento
• Una vez que se suelte el compartimento del difusor de aroma, coloque unas gotas del aroma incluido con HUVI o un aceite esencial de su elección en la almohadilla interior. • Coloque la almohadilla dentro de la bandeja, luego vuelva a insertar la bandeja en el compartimiento del difusor de aroma hasta que encaje en su lugar. -
Página 55: Limpiando Los Filtros
Limpiar el contenedor de polvo y los filtros con el cepillo de limpieza o con la mano. • Vuelva a colocar los filtros en el contenedor de polvo, vuelva a insertar el contenedor de polvo en su HUVI. NOTA: No se recomienda limpiar el filtro HEPA con agua corriente ni mojarlo. www.KALORIK.com 211104... -
Página 56: Limpiando Los Sensores
Para un rendimiento óptimo, limpie el cepillo giratorio después de una semana de uso regular. Siga las instrucciones a continuación para limpiar el cepillo giratorio. • Empuje las dos pestañas para desbloquear la protección de barrido. Levante el cepillo giratorio para quitarlo. www.KALORIK.com 211104... -
Página 57: Limpiando Los Cepillos Laterales
NOTA: los cepillos laterales pueden deformarse levemente con el uso regular. REEMPLAZANDO LA BATERÍA • Utilice un destornillador para quitar los tornillos de la tapa de la batería debajo de HUVI. Retire la batería del compartimento. www.KALORIK.com 211104... -
Página 58: Accesorios Disponibles
Cargue completamente la batería nueva antes de usarla. ― Recicle la batería reemplazada de forma respetuosa con el medio ambiente para evitar la contaminación. ACCESORIOS DISPONIBLES Mejore su experiencia HUVI con los accesorios descritos en esta sección. Visite kalorik.com/products/HUVI para obtener más información. MODELO INCLUYE •... - Página 59 2 juegos de cepillos laterales de 3 brazos (cepillos izquierdo y derecho) RVC 50229 - VCP 51014 Filtros de repuesto - Paquete de 3 (3 HEPA + 3 filtros de cobre) RVC 50229 - VCP 51016 Cepillo de rodillo + protector de barrido www.KALORIK.com 211104...
-
Página 60: Solución De Problemas
RVC 50229 - VCS 51017 Home Base HUVI (con adaptador) RVC 50229 - VCP 51018 Batería de repuesto RVC 50229 - VCS 51019 Estación de autolimpieza RVC 50229 - VCP 51020 Almohadillas de microfibra – Paquete de 2 RVC 50229 - VCP 51015... - Página 61 HUVI se HUVI ha sido obstruido HUVI intentará liberarse. Si no atasca y por algo en el piso tiene éxito, retire los obstáculos deja de (cordones, cortinas, con la mano y reinicie. funcionar. flecos de alfombra, etc.) HUVI vuelve Cuando la batería está...
- Página 62 Retire cualquier obstrucción y limpia toda piso que impiden la objetos pequeños del área el área . limpieza del HUVI. . antes de que HUVI comience a limpiar. HUVI no Nombre de usuario o Ingrese el nombre de usuario y puede contraseña de WiFi...
-
Página 63: Garantía
Durante este período, si el producto KALORIK después de una inspección por parte de KALORIK, se manifiesta defectuoso, será reparado o remplazado, según lo que decida KALORIK, sin gastos para el consumidor. Si se envía un producto de remplazo, se aplicará la garantía que queda del producto original. - Página 64 Si fuera el caso, traiga el producto (o envíelo, correctamente franqueado) con la prueba de compra que mencione el número de autorización de devolución indicado por nuestro Servicio al Cliente, al servicio post-venta KALORIK más próximo. (Visite nuestra web www.KALORIK.com o llame al Servicio al Consumidor para obtener la dirección del Servicio post-venta KALORIK...
- Página 65 211104...
- Página 66 211104...
- Página 67 211104...
- Página 68 For questions please contact: Para preguntas contacte a: KALORIK Customer Service / Servicio al Cliente Team International Group of America Inc. 16175 NW 49th Avenue Miami Gardens, FL 33014 USA Toll Free / Numero Gratiuto: +1 888-521-TEAM / +1 888-KALORIK RVC 50229 BK www.KALORIK.com...