Kalorik USK VC 16107 Manual De Instrucciones
Tabla de contenido
Idiomas disponibles
Idiomas disponibles
Enlaces rápidos
Fax +32 2 359 95 50
Bagless Vacuum Cleaner
Aspirador sin bolsa
www.KALORIK.com
Copies of the I/B. Please reproduce them without any
changes except under special instruction from Team
International BELGIUM. The pages must be reproduced
and folded in order to obtain a booklet A5 (+/- 148.5 mm
width x 210 mm height). When folding, make sure you
keep the good numbering when you turn the pages of
the I/B. Don't change the page numbering. Keep the
language integrity.
Front cover page (first page)
Assembly page 1/28
USK VC 16107
120V~ 1200W
Tabla de contenido

Manuales relacionados para Kalorik USK VC 16107


Resumen de contenidos para Kalorik USK VC 16107
-
Página 15: Consejos De Seguridad
Mantenga el cordón eléctrico lejos de superficies calientes. 8. No lo desconecte tirando del cordón eléctrico. Para desconectarlo, tome la clavija, no el cordón eléctrico. 9. No tome la clavija o el aparato con las manos mojadas. USK VC 16107 - 080409 Assembly page 15/28... - Página 16 Si aún así no calza, consulte a un servicio técnico cualificado. No intente anular esta característica de seguridad. Para los aparatos provistos con un enchufe clásico, basta con insertar el enchufe en la toma de corriente. USK VC 16107 - 080409 Assembly page 16/28...
-
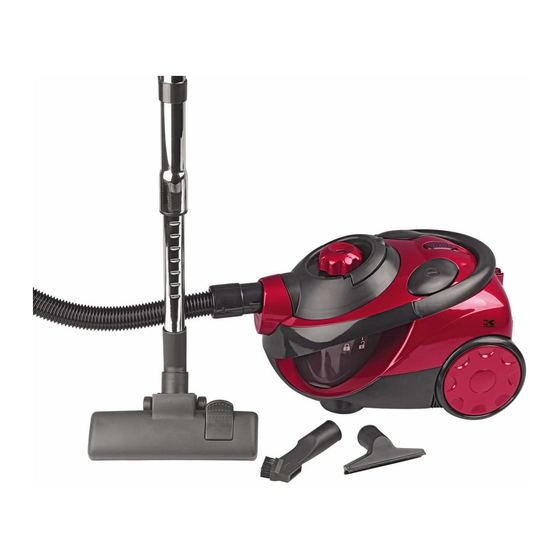
Página 17: Componentes
4. Botón para el reglaje manual de la potencia de aspiración 5. Empuñadura 6. Manguera 7. Indicador del nivel de polvo 8. Botón de enrollador de cable automático 9. Asa de transporte 10. Cable de alimentación 11. Interruptor 12. Depósito de polvo USK VC 16107 - 080409 Assembly page 17/28... -
Página 18: Asemblaje Del Aparato
Para quitar la manguera, desconecte el aparato. Presione los botones situado en el acoplamiento y estire • Conecte el tubo telescópico a la empuñadura. • Conecte el cepillo universal a la extremidad del tubo telescópico. USK VC 16107 - 080409 Assembly page 18/28... - Página 19 Accesorio para muebles blandos Utilice el cepillo pequeño para limpiar colchones, sofás y otras superficies delicadas. Estos accesorios se pueden sujetar en el soporte para accesorios en el tubo. USK VC 16107 - 080409 Assembly page 19/28...
- Página 20 La potencia de aspiración, se regula electrónicamente con el • regulador de potencia. Puede utilizar una potencia suave para aspirar tejidos delicados y muebles tapizados y una potencia superior o fuerte para aspirar el suelo. USK VC 16107 - 080409 Assembly page 20/28...
- Página 21 Pare el aparato presionando el interruptor ( • Desconecte el aspirador y presione el botón recogecables ( para enrollarlo automáticamente. Si se atasca y no entra totalmente, desenrolle de nuevo unos 2ft de cordón y repita la operación. USK VC 16107 - 080409 Assembly page 21/28...
-
Página 22: Limpieza Y Mantenimiento
Cada filtro tiene su función y debe ser imperativamente vigilado, limpiado o cambiado respetando las siguientes consignas: Vaciamiento y limpieza del depósito de polvo • Saque el depósito de polvo del aparato levantándolo por su asa. USK VC 16107 - 080409 Assembly page 22/28... - Página 23 • Ponga el filtro de nylon alrededor del filtro HEPA, y fija el conjunto a la tapa del depósito girándolo en el sentido de las agujas del reloj. USK VC 16107 - 080409 Assembly page 23/28...
- Página 24 Vd. contacte el Servicio Postventa más cercano a su domicilio para comprar nuevos filtros de repuesto. USK VC 16107 - 080409 Assembly page 24/28...
-
Página 25: Problemas Y Soluciones
La cubierta no está depósito no está Cierre la tapa del instalada cerrada depósito correctamente correctamente correctamente Si el problema persiste, nunca intente reparar o desmontar el producto usted-mismo. Contacte el próximo servicio técnico. USK VC 16107 - 080409 Assembly page 25/28... -
Página 26: Garantía
KALORIK, o a un uso con fines comerciales. No existe garantía por las partes de cristal, jarras de cristal, filtros, cestos, hojas y accesorios en general. - Página 27 Servicio al Consumidor, al servicio post-venta KALORIK lo más próximo. (Visite nuestro sitio internet www.KALORIK.com o llame al Servicio al Consumidor para obtener la dirección del Servicio post-venta KALORIK exclusivo lo más próximo).