Whirlpool YWFE775H0HW Manual De Instrucciones
Tabla de contenido
Idiomas disponibles
Idiomas disponibles
Enlaces rápidos
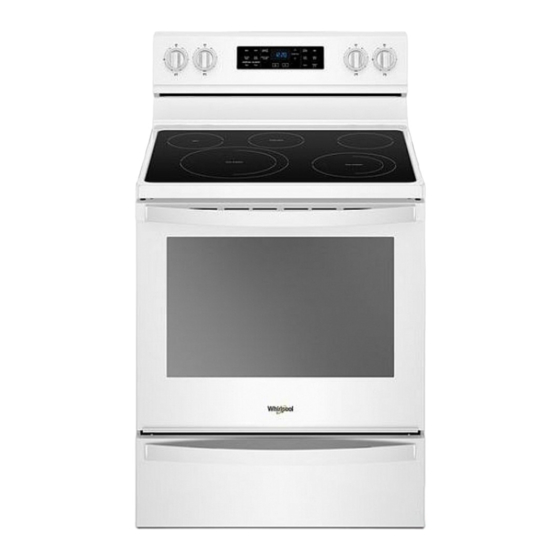
Freestanding Electric Range Control Guide
WARNING: To reduce the risk of fire, electric shock, or injury to persons, read the IMPORTANT SAFETY INSTRUCTIONS, located in
your appliance's Owner's Manual, before operating this appliance.
These instructions cover several models. Your model may have some or all of the items listed. Refer to these instructions or the
Frequently Asked Questions (FAQs) section of our website at www.whirlpool.com for more detailed instructions. In Canada, visit our
website at www.whirlpool.ca.
KEYPAD
CLOCK
LIGHT
TIMER SET/OFF
START
CANCEL
TEMP/TIME
FEATURE GUIDE
Do not let food sit for more than one hour before or
after cooking.
Doing so can result in food poisoning or sickness.
FEATURE
INSTRUCTIONS
Clock
This clock uses a 12 hour cycle.
1. Check that the oven is OFF.
2. Press CLOCK.
3. Press the Temp/Time "up" or "down" keypad to set the hours. Press CLOCK to switch
to the minutes. Press the Temp/Time "up" or "down" keypad to set the minutes.
4. Press CLOCK or START.
Oven cavity
While the oven door is closed, press LIGHT to turn the light on and off. The oven light will
light
come on when the oven door is opened. The oven light will not come on during the Self-
Cleaning cycle.
Oven timer
The Timer can be set in hours or minutes up to 9 hours and 59 minutes.
1. Press TIMER SET/OFF.
2. 2. Press the Temp/Time up or down keypad to set the length of time.
3. Press START to begin the countdown. If enabled, end-of-cycle tones will sound at end
of countdown.
4. Press TIMER SET/OFF to cancel the Timer and return to the time of day. Do not press
cancel because the oven will turn off.
Cooking start
The Start keypad begins any oven function. If Start is not pressed within 10 seconds, a
tone will sound, and Start will blink until pressed or canceled. If Start is not pressed within
30 seconds after pressing a keypad, the function is canceled and the time of day is
displayed.
Range
The Cancel keypad stops any oven function except the Oven Control Lockout and Timer.
function
Temperature
The Temp/Time up or down arrow keypads are used to adjust time and temperature
and time
settings.
adjust
WARNING
Food Poisoning Hazard
1
Tabla de contenido

Manuales relacionados para Whirlpool YWFE775H0HW


Resumen de contenidos para Whirlpool YWFE775H0HW
-
Página 20: Estufas Eléctricas Independientes Guía De Control
Estas instrucciones describen varios modelos; Su modelo puede contar con algunos o todos los elementos enumerados. Consulte estas instrucciones o la sección de Preguntas frecuentes (FAQ) de nuestro sitio web en www.whirlpool.com para obtener instrucciones más detalladas. En Canadá, visite nuestro sitio web en www.whirlpool.ca. - Página 21 TECLADO CARACTERÍSTICA INSTRUCCIONES BAKE (Hornear) Cómo hornear y 1. Presione BAKE (Hornear). asar 2. Presione las teclas con las flechas hacia arriba o hacia abajo de Temp/Time (temperatura/hora) hasta alcanzar la temperatura que desee. Se emite un sonido cuando se alcanza la temperatura mínima o máxima. 3.
- Página 22 TECLADO CARACTERÍSTICA INSTRUCCIONES KEEP WARM Mantenimiento Los alimentos deberán estar a la temperatura para ser servidos antes de colocarlos (Mantener caliente) caliente en el horno calentado. 1. Presione KEEP WARM (mantenimiento caliente). 2. Presione las teclas con las flechas hacia arriba o hacia abajo de Temp/Time (temperatura/hora) hasta alcanzar la temperatura que desee.
-
Página 23: Tecnología Autolimpiante Aqualift
® Tecnología autolimpiante AquaLift Superficie de cocción ADVERTENCIA La tecnología autolimpiante AquaLift ® es una solución de limpieza de primera clase diseñada para minimizar el tiempo, la Peligro de Incendio temperatura y los olores que comúnmente conllevan los métodos Apague todos los controles cuando haya terminado de autolimpiantes tradicionales. - Página 24 Luz indicadora de superficie caliente � Para evitar que se dañe la superficie de cocción, no deje que los objetos de materiales que puedan derretirse, como plástico En los modelos con vidrio de cerámica, la luz indicadora de o papel de aluminio, toquen ninguna parte de toda la superficie caliente está...
-
Página 25: Utensilios De Cocina
Utensilios de cocina UTENSILIOS DE CARACTERÍSTICAS COCINA IMPORTANTE: No deje un utensilio de cocina vacío sobre un área, elemento o quemador caliente de la superficie de cocción. Cobre � Se calienta de manera muy El utensilio de cocina ideal debe tener fondo plano, lados rectos y rápida y uniforme. -
Página 26: Envasado Casero
Envasado casero Para cambiar: Presione la tecla Cancelar, la tecla Cancelar, la tecla con la flecha hacia arriba de Temp/Time (Temperatura/ El envasado puede realizarse sobre una superficie de cocción de Hora), TIMER SET/OFF (Fijar/apagar el temporizador). Repítalo vidrio con la parte superior lisa o en una superficie de cocción para regresarlo al ajuste anterior y terminar el modo de tradicional con un elemento de bobina. -
Página 27: Mantener Caliente
con los elementos de horneado apagados, hasta que se presione Para fijar Delayed Timed Bake (Horneado programado el botón de Cancel (Anulación). diferido) utilizando el modo Sabbath (Día de descanso) (en algunos modelos): Al presionar la tecla Cancel (Cancelar) en cualquier momento, el 1. -
Página 28: Colocación De Las Parrillas Y Los Utensilios Para Hornear
Colocación de las parrillas y los Cómo hornear y asar utensilios para hornear Sistema de control de temperatura El sistema de control de temperatura regula electrónicamente los Para ubicar una parrilla, retírela hasta la posición de tope, levante niveles de calor del horno durante el precalentamiento y el el borde delantero y luego sáquela. -
Página 29: Asar A La Parrilla
Funcionará nuevamente cuando la puerta del horno se cierre. ® ©2020 Whirlpool. All rights reserved. Used under license in Canada. ™ Tous droits réservés. Utilisé sous licence au Canada. Todos los derechos reservados. Se usa bajo licencia en Canadá.