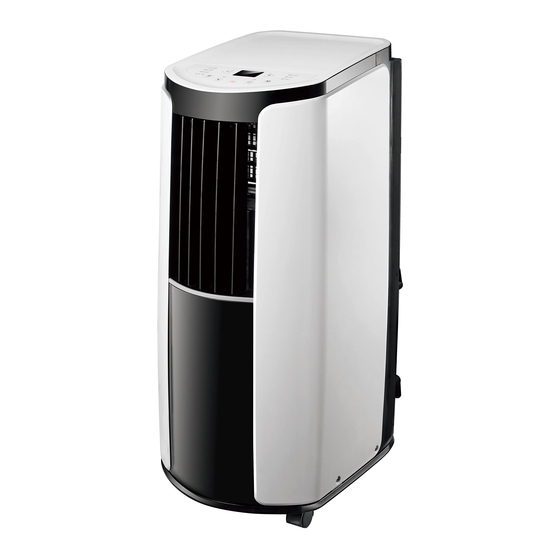
Gree GPC07AK-K3NNA1A Manual Del Propietário
Tabla de contenido
Idiomas disponibles
Idiomas disponibles
Enlaces rápidos
Local air conditioner
Models: GPC07AK-K3NNA1A
GPC07AK-K3NNA2A
ModelPC08AH-A3NNC4D
GPC08AK-K3NNA1A
GPC08AK-K3NNA2A
GPC08AK-K3NNA3A
Thank you for choosing our product.
For proper operation, please read and keep this manual carefully .
If you have lost the Owner's Manual, please contact the local agent or visit
www.greeproducts.es or sent email to info@greeproducts.es for electronic version.
Copyright 2018. This translation is property of GREE PRODUCTS SL. All rights reserved. Total or partial reproduction without its express authorization is prohibited.
I
Capítulos
Tabla de contenido

Manuales relacionados para Gree GPC07AK-K3NNA1A


Resumen de contenidos para Gree GPC07AK-K3NNA1A
- Página 29 Éstos se encargarán de reciclar su producto de modo seguro para el medio ambiente. R410A(R32/125: 50/50): 2087.5 Copyright 2018. This translation is property of GREE PRODUCTS SL. All rights reserved. Total or partial reproduction without its express authorization is prohibited.
-
Página 30: Explicación De Los Símbolos
Indica un peligro al que podría asignársele la palabra de señalización ADVERTENCIA o PRECAUCIÓN. Copyright 2018. This translation is property of GREE PRODUCTS SL. All rights reserved. Total or partial reproduction without its express authorization is prohibited. -
Página 31: Condiciones Ambientales De Uso
● Proteja su acondicionador frente a la radiación solar directa. 30cm 30cm Copyright 2018. This translation is property of GREE PRODUCTS SL. All rights reserved. Total or partial reproduction without its express authorization is prohibited. -
Página 32: Advertencia De Seguridad
● No salpique ni rocíe con agua el acondicionador. De lo contrario, podría sufrir cortocircuitos o daños. Copyright 2018. This translation is property of GREE PRODUCTS SL. All rights reserved. Total or partial reproduction without its express authorization is prohibited. - Página 33 ● No repare o desmonte el acondicionador. ● Se prohíbe insertar objetos en el acondicionador. Copyright 2018. This translation is property of GREE PRODUCTS SL. All rights reserved. Total or partial reproduction without its express authorization is prohibited.
-
Página 34: Nombres De Las Piezas
Mando a distancia NOTA: El tubo de descarga de calor y otros accesorios de instalación no pueden tirarse. Copyright 2018. This translation is property of GREE PRODUCTS SL. All rights reserved. Total or partial reproduction without its express authorization is prohibited. -
Página 35: Funcionamiento Del Panel De Control
1°C (°F). El rango de temperatura de consigna es de 16°C (61°F) a 30°C (86°F). En los modos automático, de deshumidificación o ventilación, este botón no tiene ninguna función. Copyright 2018. This translation is property of GREE PRODUCTS SL. All rights reserved. Total or partial reproduction without its express authorization is prohibited. - Página 36 Si la función de sueño está activada, el indicador superior lo indicará. De lo contrario, no lo indicará. Copyright 2018. This translation is property of GREE PRODUCTS SL. All rights reserved. Total or partial reproduction without its express authorization is prohibited.
-
Página 37: Botones Del Mando A Distancia
Modo Cool Modo Sleep Modo Dry Bloqueo Modo Fan Ajuste de velocidad Temperatura de consigna Ajustar tiempo Copyright 2018. This translation is property of GREE PRODUCTS SL. All rights reserved. Total or partial reproduction without its express authorization is prohibited. -
Página 38: Botones Del Mando A Distancia
● Al configurar TIMER, pulse “+/-” para ajustar la hora. Copyright 2018. This translation is property of GREE PRODUCTS SL. All rights reserved. Total or partial reproduction without its express authorization is prohibited. - Página 39 TIMER para comprobar el temporizador. Presiónelo otra vez en menos de 5 segundos para cancelar esta función. Copyright 2018. This translation is property of GREE PRODUCTS SL. All rights reserved. Total or partial reproduction without its express authorization is prohibited.
-
Página 40: Introducción A Las Funciones De Botones Combinados
Con la unidad apagada, pulse los botones MODE ["Modo"] y "-" a la vez para cam- biar de ºC a ºF. Copyright 2018. This translation is property of GREE PRODUCTS SL. All rights reserved. Total or partial reproduction without its express authorization is prohibited. -
Página 41: Cambio De Pilas Del Mando A Distancia
● Si la pantalla del mando a distancia está borrosa o no muestra nada, cambie las pilas. Copyright 2018. This translation is property of GREE PRODUCTS SL. All rights reserved. Total or partial reproduction without its express authorization is prohibited. -
Página 42: Limpieza Y Mantenimiento
● No seque el filtro con fuego ni secadores de pelo. De lo contrario, podría deformarse o incendiarse. Copyright 2018. This translation is property of GREE PRODUCTS SL. All rights reserved. Total or partial reproduction without its express authorization is prohibited. -
Página 43: Limpieza Del Tubo De Descarga De Calor
Copyright 2018. This translation is property of GREE PRODUCTS SL. All rights reserved. Total or partial reproduction without its express authorization is prohibited. -
Página 44: Análisis De Fallos
● Aproxime el mando a distancia ● ¿Hay una lámpara fluorescente al aire acondicionado. en la habitación? ● Apague la lámpara fluorescente y vuelva a intentarlo. Copyright 2018. This translation is property of GREE PRODUCTS SL. All rights reserved. Total or partial reproduction without its express authorization is prohibited. - Página 45 ● El equipo, ¿está recién encendido del panel debido a cambios crujidos. o apagado? de temperatura causa ruidos de fricción. Copyright 2018. This translation is property of GREE PRODUCTS SL. All rights reserved. Total or partial reproduction without its express authorization is prohibited.
-
Página 46: Código De Fallo
● Si el aire acondicionado se opera en condiciones anómalas, existe riesgo de averías, electrocución o incendio. Copyright 2018. This translation is property of GREE PRODUCTS SL. All rights reserved. Total or partial reproduction without its express authorization is prohibited. -
Página 47: Precauciones De Instalación
9. La resistencia de puesta a tierra deberá cumplir las normas nacionales de seguridad eléctrica. 10. El equipo deberá instalarse en cumplimiento de las normas nacionales de cableado. Copyright 2018. This translation is property of GREE PRODUCTS SL. All rights reserved. Total or partial reproduction without its express authorization is prohibited. -
Página 48: Preparación De La Instalación
Mando a distancia Herramientas necesarias para la instalación Destornillador de estrella Destornillador plano Sierra Metro Tijeras Lápiz Copyright 2018. This translation is property of GREE PRODUCTS SL. All rights reserved. Total or partial reproduction without its express authorization is prohibited. -
Página 49: Instalación Del Gancho Para Cable
● Enrolle el cable de alimentación en torno al gancho para cable. Copyright 2018. This translation is property of GREE PRODUCTS SL. All rights reserved. Total or partial reproduction without its express authorization is prohibited. -
Página 50: Retirada Del Agua Acumulada
4. Introduzca el tapón de goma en el extremo opuesto del tubo de drenaje, fíjelo con una abrazadera y, a continuación, fíjelo en el clip del tubo de drenaje. Copyright 2018. This translation is property of GREE PRODUCTS SL. All rights reserved. Total or partial reproduction without its express authorization is prohibited. - Página 51 ● Una vez eliminada la protección de bastidor lleno de agua, y de que el compresor se haya detenido durante 3 minutos, el equipo reanudará su funcionamiento. Copyright 2018. This translation is property of GREE PRODUCTS SL. All rights reserved. Total or partial reproduction without its express authorization is prohibited.
- Página 52 14 mm de diámetro interior (no incluida). 1. Retire cubierta de drenaje continuo 1 girándola en el sentido de las agujas del reloj, y después retire el bloqueo de goma 2 del orificio de desagüe. Copyright 2018. This translation is property of GREE PRODUCTS SL. All rights reserved. Total or partial reproduction without its express authorization is prohibited.
- Página 53 Si se apaga el equipo, vacíe el agua del bastidor, y compruebe a continuación el emplazamiento del equipo y la manguera, para ver si está correctamente instalada. Copyright 2018. This translation is property of GREE PRODUCTS SL. All rights reserved. Total or partial reproduction without its express authorization is prohibited.
-
Página 54: Instalación Y Desmontaje Del Tubo De Descarga De Calor
3. Apunte con la marca de referencia de la junta B del tubo de descarga a la aber- tura de la junta C; gírelo ligeramente para conectar firmemente las juntas B y C. Abertura Marca de referencia Juntas Ajustado Copyright 2018. This translation is property of GREE PRODUCTS SL. All rights reserved. Total or partial reproduction without its express authorization is prohibited. -
Página 55: Indicaciones Sobre La Instalación Del Tubo De Descarga
● Al instalarlo, el tubo de descarga deberá estar todo lo nivelado que sea posible. No prolongue el tubo ni lo conecte a otro tubo de descarga de calor. Copyright 2018. This translation is property of GREE PRODUCTS SL. All rights reserved. Total or partial reproduction without its express authorization is prohibited. -
Página 56: Desmontaje Del Tubo De Descarga De Calor
Pulse la lengüeta y eleve la junta A para retirarla. Lengüeta Hacia arriba Desmontar Junta A Juntas Copyright 2018. This translation is property of GREE PRODUCTS SL. All rights reserved. Total or partial reproduction without its express authorization is prohibited. -
Página 57: Prueba De Funcionamiento
TUBO TUBO DE SALIDA REC. PLACA BASE HIGH-WP VENTILADOR PLACA DE PANTALLA MOTOR INTERRUPTOR VENTI- DE NIVEL LADOR DE AGUA Copyright 2018. This translation is property of GREE PRODUCTS SL. All rights reserved. Total or partial reproduction without its express authorization is prohibited.