LG LWHD1200R Manual De Instrucciones
Tabla de contenido
Idiomas disponibles
Idiomas disponibles
Enlaces rápidos
LG
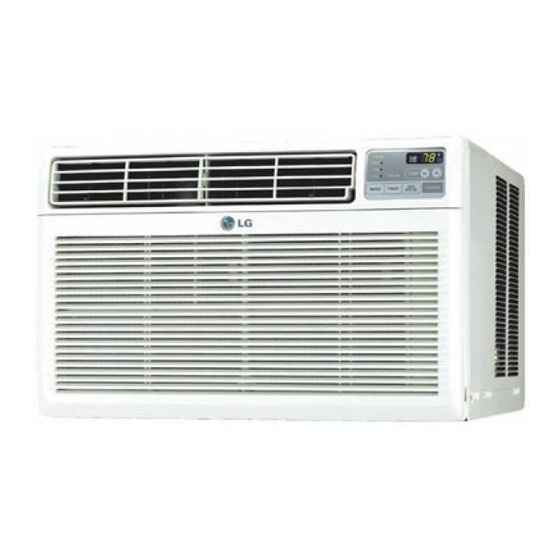
Window-Type Air Conditioner
MODELS: LWHD1200R
http://www.lgappliances.com
IMPORTANT
• Please read this owner's manual carefully and thoroughly
before installing and operating your room air conditioner.
• Please retain this owner's manual for future reference after
reading it thoroughly.
PRECAUTIONS
• Antes de instalar y poner en marcha su ventilador de
casa, haga el favor de leer cuidadosamente esta
instrucción de Usuario.
• Luego de su lectura, guarde este manual para el futuro
usuario para las referencias.
LG
Capítulos
Tabla de contenido
Solución de problemas

Manuales relacionados para LG LWHD1200R


Resumen de contenidos para LG LWHD1200R
- Página 25 Memo Owner’s Manual 25...
- Página 27 Manual del usuario del acondicionador de aire tipo Ventana TABLA DE CONTENIDOS PARA SUS ARCHIVOS Precauciones de Seguridad ..28 Escriba aquí el modelo y número de serie: Antes de poner en marcha...32 Modelo n°: Serie n°: Introducción ........33 Puede encontrar los números en la etiqueta de la parte Símbolos Utilizados en lateral del producto.
-
Página 28: Precauciones De Seguridad
Precauciones de Seguridad Precauciones de Seguridad Para prevenir tanto lesiones al usuario u otras personas como daños materiales, es preciso seguir estas instrucciones. La incorrecta operación del aparato como consecuencia de ignorar las instrucciones provocará daños o lesiones. A cause del peso pesado del producto, se recomienda que usted tenga a un ayudante a participa en la instalación. -
Página 29: Funcionamiento
Precauciones de Seguridad Funcionamiento Enchufe la corriente No haga funcionar o detenga No dañe ni use un cable no adecuadamente. la unidad insertando o especificado. tirando del enchufe. • De otro modo, causará • Causará descarga eléctrica o • Causará descarga eléctrica o descarga eléctrica o incendio. - Página 30 Precauciones de Seguridad Cierre todas las puertas, ventanas y otras Ventile antes de hacer funcionar el aberturas de la sala. acondicionador de aire cuando sale el gas. • El aparato de aire acondicionado debe • Puede causar explosión, incendio, operarse en un área cerrada para ser más quemaduras.
- Página 31 No ponga un animal No ponga un animal domestico una planta de domestico una planta de la casa en donde sera la casa en donde sera expuesto al flujo de aire expuesto al flujo de aire directo directo...
-
Página 32: Antes De Poner En Marcha
Precauciones de Seguridad Antes de poner en marcha Preparar para el funcionamiento 1. Coloque el enchufe correctamente. 2. Use un único circuito para este aparato. Recargar el circuito podría provocar un riesgo de incendios. 3. No utilice un alargador. Consulte la página 36 para más detalles. 4. -
Página 33: Introducción
Precauciones de Seguridad Introducción Símbolos Utilizados en Este Manual Este símbolo lo advierte de un peligro de accidente por corriente eléctrica. Este símbolo lo adiverte de un peligro que pueda causar un daño del ventliador. Este símbolo significa condicciones especiales. CONSEJO Características ADVERTENCIA : Este aparato debería instalarse de acuerdo con las... -
Página 34: Seguraidad Electrica
Precauciones de Seguridad Seguraidad Electrica Aire Acondicionador... -
Página 35: Seguridad Eléctrica
Precauciones de Seguridad Seguridad Eléctrica Este equipo debe estar puesto a tierra debidamente. El cable de alimentación está equipado de una toma de tierra con tres pins. Para minimizar el peligro de una lesión por corriente eléctrica, utilice una toma con enchufe de tierra estándar con tres contactos. -
Página 36: Uso Transitorio De Un Adaptador
Precauciones de Seguridad Uso Transitorio de un Adaptador Debido a eventuales peligros de seguridad no recomendamos en absoluto el uso de un adaptador. Sólo para una conexión transitoria se puede usar el adaptador clasificado como UL que está a disposición en la mayoría de las tiendas de productos eléctricos. -
Página 37: Instalación
Instalación Instalación Cómo instalar la unidad Para prevenir la vibración y el ruido, asegúrese que la Cerco unidad esté instalada con seguridad y firmeza. Protección Instale la unidad donde la luz del sol no caiga Aire fresco directamente en la misma. Radiación de calor La parte exterior del gabinete debe extenderse hacia... -
Página 38: Contenidos De Los Conjuntos De Instalación
Instalación Contenidos de los conjuntos de instalación Nº NOMBRE DE LA PARTE Cantidad MARCO DE LA CORTINA DINTEL DE SOPORTE PERNO TUERCA TORNILLO (TIPO A) TORNILLO (TIPO B) TORNILLO (TIPO C) BURLETE DE ESPUMA CAÑO DE DRENAJE 10 BURLETE de ESPUMA-PE 11 GUÍA DEL MARCO 12 ABRAZADERA DE FIJACIÓN A LA VENTANA 13 BURLETE de ESPUMA-PE... -
Página 39: Instalación Del Gabinete
Instalación Instalación del gabinete Abra la ventana. Marque una línea en el centro del asiento de la ventana. Coloque cuidadosamente el gabinete sobre el asiento de la ventana alinee la marca central de la parte inferior frontal con la línea marcada en el centro del asiento de la Guía superior ventana. - Página 40 Instalación Tornillo(Tipo B) El gabinete debe ser instalado con una ligera inclinación (aproximadamente 1/2") de modo que el lado externo quede hacia abajo Ajuste el perno y la tuerca del soporte al dintel para equilibrar el gabinete. Soporte del dintel Carril de la hoja de ventana Agregue el gabinete al asiento de la ventana...
- Página 41 Instalación Agregue la abrazadera de fijación con un tornillo Abrazadera de fijación Tipo C de la ventana Agregue la parrilla frontal al gabinete insertando las pestañas en la parrilla dentro de las pestañas del frente del gabinete. Empuje la parrilla hasta que se fije en el lugar.
-
Página 42: Instrucciones De Funcionamiento
Instrucciones de funcionamiento Cool F1 LOW F2 MED Energy F3 HIGH Saver TEMP Timer MODE TIMER POWER SPEED POWER (encendido) El funcionamiento se inicia cuando se pulsa esta tecla y se detiene cuando se la presiona nuevamente. SELECTOR DE VELOCIDAD DEL VENTILADOR (FAN SPEED) Para aumentar la capacidad mientras se refresca, seleccione una mayor velocidad del ventilador. -
Página 43: Control Remoto
Instrucciones de funcionamiento Control Remoto POWER (encendido) El funcionamiento se inicia cuando se pulsa esta tecla y se detiene cuando se la presiona nuevamente. CONTROL DE TEMPERATURA Power El termostato monitorea la temperatura de la habitación para mantener la temperatura deseada. El termostato puede ser colocado entre 60 F~86 Temp... -
Página 44: Ajustar La Dirección Del Flujo De Aire
Instrucciones de funcionamiento Ajustar la dirección del flujo de aire El flujo de aire puede ser ajustado cambiando la dirección de las rejillas de ventilación del acondicionador deaire. Esto puede también incrementar la eficacia del acondicionador de aire. Ajustar la dirección del flujo de aire horizontal. Ajustar las rejillas verticales hacia la izquierda yderecha cambiará... -
Página 45: Adicionales E Características
Operating Instr uctions Adicionales e Características Tubo de Desagüe En climas húmedos, es posible que la Bandeja Evaporadora se llenne de agua. Para quitar el agua acumulado, es preciso conectar el tubo de desagüe. Quite la Tapa del Desagüe y conecte el Drain Pipe Drain Cap Tubo a la Bandeja Evaporadora. -
Página 46: Mantenimiento Y Servicio
Mantenimiento y servicio Mantenimiento y servicio Filtro de Aire Revise por lo menos dos veces al mes si no es necesario limpiar el filtro de aire. Las partículas detenidad se pueden acumular en el filtro impidiendo el flujo del aire, limitando el rendimiento de enfriamiento y causando la acumulación de hielo en el evaporador. -
Página 47: Como Remover La Parilla Frontal
Mantenimiento y servicio Como Remover la Parilla Frontal 1. Tire de la rejilla de entrada hacia delante agarrando ambas lengüetas y tire del filtro del aire hasta sacarlo. 2. Saque el tornillo que asegura la Parrilla Frontal. 3. Suelte el lado izquierdo primero. Cool F1 LOW Energy... -
Página 48: Problemas Y Soluciones Habituales
Mantenimiento y servicio Problemas y Soluciones habituales Antes de Llamar el Servicio de Asistencia Técnica Si tiene problemas con su ventilador, lea las informaciones siguientes y trate de resolver el problema. Si no puede encontrar la solución, desconecte el ventilador y diríjase a su suministrador. - Página 50 Nota 50 Aire Acondicionador...
- Página 51 GARANTÍA LIMITADA DEL AIRE ACONDICIONADOR LG - EE.UU. LG Electronics Inc. reparará o sustituirá, gratuitamente, su producto si resulta defectuoso en materiales o mano de obra bajo condiciones normales de uso durante el período de garantía mencionado más abajo, efectivo a partir de la fecha de compra del producto original por parte del consumidor.