Philips NORELCO S5090 Instrucciones Importantes De Seguridad
Tabla de contenido
Idiomas disponibles
Idiomas disponibles
Enlaces rápidos
Capítulos
Tabla de contenido

Manuales relacionados para Philips NORELCO S5090


Resumen de contenidos para Philips NORELCO S5090
- Página 1 Tripleheader shaver Tripleheader shaver S5090...
- Página 5 English 6 Español 28...
-
Página 28: Instrucciones Importantes De Seguridad
Español Contenido INSTRUCCIONES IMPORTANTES DE SEGURIDAD_________ Descripción general (Fig. 1)__________________________________ Introducción_________________________________________________ La pantalla___________________________________________________ Carga________________________________________________________ Uso del producto____________________________________________ Afeitado_____________________________________________________ Uso de los accesorios de ajuste de clic.____________________ Limpieza y mantenimiento_________________________________ Almacenamiento____________________________________________ Sustitución___________________________________________________ Accesorios___________________________________________________ Asistencia____________________________________________________ Desecho_____________________________________________________ Garantía Total de Dos Años________________________________ GARANTÍA DE DEVOLUCIÓN DE SU DINERO POR 45 DÍAS INSTRUCCIONES IMPORTANTES DE... - Página 29 - Use este producto para su uso previsto en el hogar, según se describe en este manual. No use accesorios o los cartuchos de limpieza que no estén recomendados por Philips North America LLC.
- Página 30 Español - Nunca utilice este producto si el cable o el enchufe de carga están dañados, si no funciona correctamente, si se cayó, si está dañado o si se sumergió en agua mientras estaba conectado a la alimentación eléctrica. Para solicitar asistencia, comuníquese al 1-800-243-3050.
-
Página 31: Importante
Philips de su localidad. - No coloque los productos y sus baterías en hornos microondas ni en ollas de inducción. -
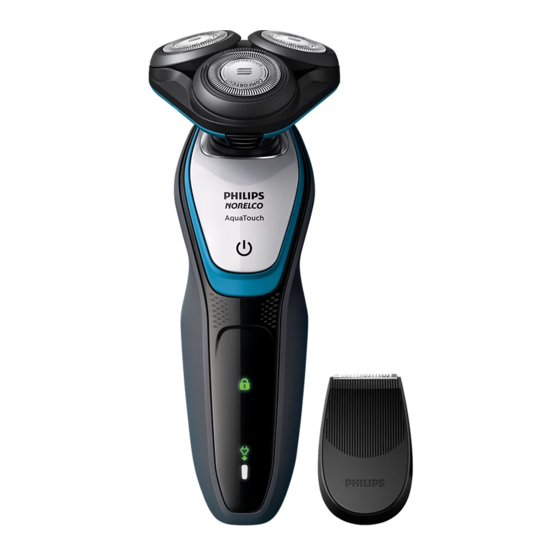
Página 32: Descripción General (Fig. 1)
Español - Cuando manipule las baterías, asegúrese de que sus manos, el producto y las baterías estén secas. - Para evitar que las baterías se calienten o liberen sustancias tóxicas o peligrosas, no las modifique, perfore ni dañe los productos y las baterías y no las desarme, ponga en cortocircuito, las sobrecargue ni las invierta. -
Página 33: Introducción
12 Cable de alimentación Introducción ¡Felicitaciones por su compra y bienvenido a Philips Norelco! Para obtener el máximo beneficio del soporte que ofrece Philips Norelco, registre el producto en www.philips.com/register. La pantalla Carga Carga rápida: Cuando la afeitadora no tiene suficiente energía para un afeitado, el indicador de carga de la batería destella... -
Página 34: Batería Baja
Español Batería baja Cuando la batería está casi agotada, el indicador de carga de batería destella en color naranja. Recordatorio 'Desconecte para usar' El símbolo 'desconecte para usar' destella para recordarle desconectar el producto del tomacorriente de pared antes de que pueda encenderlo. -
Página 35: Carga
Español - Cuando desactiva el bloqueo de viaje, la afeitadora emite un sonido y el símbolo de bloqueo de viaje se ilumina.La afeitadora se enciende y ya está lista para usarse de nuevo. Carga Antes de usarla por primera vez, cargue la rasuradora durante un mínimo de 2.5 horas sin interrupción y hasta que el indicador de nivel de batería indique carga total. -
Página 36: Uso Del Producto
- Prueba de 21 días y proceso de adaptación. Es un hecho que la piel y la barba tardan algún tiempo en acostumbrarse al nuevo sistema de arreglo personal. - Utilice su nueva afeitadora únicamente 3 semanas para disfrutar completamente de un afeitado Philips Norelco al ras. -
Página 37: Encendido Y Apagado De La Afeitadora
- Sea perseverante. Si alterna entre métodos de afeitado durante el período de adaptación, será más difícil acostumbrarse al sistema de afeitado de Philips Norelco. - Si después de 21 días todavía no está satisfecho con los resultados, Philips Norelco le reembolsará el precio total de la compra, siempre que la solicitud de reembolso se reciba dentro de los 45 días... -
Página 38: Afeitado Seco
Español de seguridad, no es posible usar la afeitadora mientras está conectada al enchufe de pared para cargarse. Para obtener los mejores resultados de confort sobre la piel, recorte su barba si no se ha afeitado durante 3 días o más. Afeitado seco 1 Encienda la afeitadora. - Página 39 Español 2 Aplique espuma o gel de afeitar sobre la piel. 3 Enjuague la unidad de afeitado con agua tibia para asegurar que se deslice suavemente sobre su piel. 4 Encienda la afeitadora. 5 Mueva los cabezales de afeitado sobre la piel con movimientos circulares para llegar a todos los vellos en las diferentes direcciones de crecimiento.
-
Página 40: Uso De Los Accesorios De Ajuste De Clic
Español Uso de los accesorios de ajuste de clic. Quitar y poner los accesorios de ajuste de clic 1 Asegúrese de que la afeitadora esté apagada. 2 Extraiga el accesorio directo de la afeitadora. Nota: No gire el accesorio mientras lo extrae de la afeitadora. -
Página 41: Limpieza Y Mantenimiento
Español 3 Sostenga la cortadora de precisión perpendicular a la piel y muévala hacia abajo ejerciendo una presión suave. 4 Apague y limpie la cortadora después de cada uso. Limpieza y mantenimiento Una limpieza frecuente garantiza los mejores resultados de afeitado. Nunca limpie, retire ni reemplace la unidad de afeitado cuando la afeitadora esté... - Página 42 Español afeitadora quede protegida contra el daño del agua. Precaución: Revise siempre si el agua no está muy caliente, para evitar quemarse las manos. 1 Encienda la afeitadora. 2 Enjuague la unidad de afeitado con agua caliente. 3 Apague la afeitadora.Presione el botón de liberación para abrir la unidad de afeitado.
-
Página 43: Método De Limpieza A Fondo
Español Nota:Nunca seque la unidad de afeitado con una toalla o pañuelo desechable, ya que esto puede dañar los cabezales de afeitado. 1 Cierre el sostenedor del cabezal ("clic") Método de limpieza a fondo Nota: Le aconsejamos que limpie los cabezales de afeitado a fondo una vez al mes o cuando la afeitadora ya no afeite tan bien como antes. - Página 44 Español 4 Gire los anillos de retención a la izquierda y retírelos. 5 Quite los cabezales de afeitado del soporte del cabezal de afeitado. Cada cabezal de afeitado consiste de un cortador y un protector. Nota: No limpie más de un cortador y protector a la vez, ya que todos son pares.
- Página 45 Español Nota: Asegúrese de que los salientes de los cabezales de afeitado encajen exactamente en las ranuras del sostenedor del cabezal de afeitado. 9 Coloque los anillos de retención de nuevo en el cabezal de afeitado y gírelos hacia la derecha ("clic").
-
Página 46: Limpieza Del Accesorio De Recorte De Precisión
Español 10 Reinserte la bisagra del sostenedor de afeitado en la ranura de la unidad de afeitado. Cierre los sostenedores del cabezal. Limpieza del accesorio de recorte de precisión Precaución: Nunca seque el accesorio de recorte de precisión con una toalla o paño, ya que esto puede dañar el dentado. -
Página 47: Almacenamiento
Español Almacenamiento Almacenamiento Coloque la tapa protectora de la afeitadora para proteger los cabezales. Nota: Siempre deje que el aparato se seque al aire antes de colocar la tapa. - Asegúrese de que el producto esté apagado. Retire el cable del enchufe eléctrico y del producto antes de guardarlo en un lugar seguro y seco donde no pueda aplastarse, golpearse o dañarse. -
Página 48: Accesorios
"Limpieza a fondo" para ver las instrucciones sobre cómo remover los anillos de retención y los cabezales de afeitado. Siempre reemplace los cabezales de afeitado con cabezales originales de Philips Norelco solamente (ver 'Accesorios'). Este producto no contiene otras piezas que requieran mantenimiento. Para solicitar asistencia, comuníquese al 1-800-243-3050. -
Página 49: Desecho
Garantía Total de Dos Años Philips North America LLC garantiza este producto nuevo (excepto los cabezales de afeitado) contra defectos en los materiales o en la mano de obra por un período de dos años desde la fecha de compra y acepta... - Página 50 Cualquier daño que ocurra durante el envío no será cubierto por esta garantía. NOTA: Philips Personal Health, una división de Philips North America LLC no extienden ninguna otra garantía, escrita ni oral. Esta garantía le proporciona derechos legales específicos;...
-
Página 51: Garantía De Devolución De Su Dinero Por
El paquete del producto debe contar con matasellos que no supere los 45 días a partir de la fecha de compra. Philips se reserva el derecho a verificar el precio de compra del producto y limita los reembolsos al precio de venta minorista sugerido.