Tabla de contenido
Publicidad
Idiomas disponibles
Idiomas disponibles
Enlaces rápidos
Publicidad
Tabla de contenido

Manuales relacionados para Philips AJ 3936/17


Resumen de contenidos para Philips AJ 3936/17
- Página 1 AJ 3936 CD Clock Radio 5 3 0 6 3 0 1 0 0 1 0 0 1 0 4 1 3 0 1 0 8 M H z 1 7 0 0 k H z Toll Free Help Line Ligne d'assistance en service libre Linea de ayuda telefónica sin cargo 800-531-0039...
- Página 2 Return your Warranty Registration card today to ensure you receive all the benefits you’re entitled to. • Once your Philips purchase is • So complete and return the Warranty registered, you’re eligible to receive all Registration Card enclosed with your the privileges of owning a Philips purchase at once.
- Página 3 & 67 8 9 5 3 0 6 3 0 1 0 0 1 0 0 1 0 4 1 3 0 1 0 8 M H z 1 6 0 0 k H z...
- Página 4 CAUTION Use of controls or adjustments or performance of procedures other than herein may result in hazardous radiation exposure. ATTENTION L’utilisation des commandes ou réglages ou le non-respect des procédures ci- incluses peuvent se traduire par une exposition dangereuse à l’irradiation. ATENCIÓN El uso de mandos o ajustes o la ejecucción de métodos que no sean los aquí...
-
Página 5: Tabla De Contenido
INDEX English Safety instructions..2, 4 + 6 Radio ........12 Limited warranty .......7 Setting the alarm....12-14 Controls ........8 Weekendsleeper .....15 Installation and general Slumber ........15 features ........9 Maintenance ......16 Clock........10 Troubleshooting.......17 CD operation ......11 Français Conseils de sécurité ..4, 18 + 19 Radio ........25 Garantie limitée ......20 Réglage de l’alarme...25-27... -
Página 6: Safety Instructions
SAFETY INSTRUCTIONS – Read before operating equipment This product was designed and manufactured to 11. Grounding or Polarization meet strict quality and safety standards. There are, The precautions that should however, some installation and operation be taken so that the precautions which you should be particularly aware grounding or polarization means of an appliance is not defeated. - Página 7 Adjustments of the controls discussed there may save you a trip. This warranty gives you specific legal rights.You may have other rights which vary from state/province to state/province. Philips Service Solutions Group, P.O. Box 2976, Longview,Texas 75606, USA, (903) 242-4800 EL6095T002 / MAC5433 / 1-97...
-
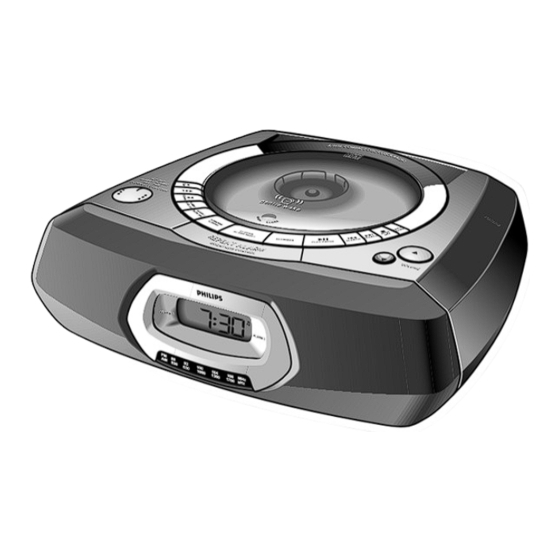
Página 8: Controls
CONTROLS 9 PLAY•PAUSE ); 1 Clock control – to set the time for the clock/ALARM 1/ – to start/pause CD playback. ALARM 2. 0 SEARCH ∞, § 2 SET DAY – to skip CD tracks/search for a particular – to set the day for weekend sleeper passage. -
Página 9: Power Supply
INSTALLATION AND GENERAL FEATURES POWER SUPPLY 1. Check if the power voltage, shown on the type plate on the bottom of the set, corresponds to your local power supply. If it does not, consult your dealer or service center. 2. Connect the power plug into the wall outlet. The power supply is now switched on and the numbers on the display will start to flash. -
Página 10: Clock
CLOCK SETTING THE CLOCK The time is displayed using the 12 hour clock where the PM indicator lights up (on = PM, off = AM). 1. Adjust the clock control to SET TIME. 2. Press UP7 or DOWN8 to adjust both the hours and minutes: –... -
Página 11: Cd Operation
– The display returns to clock time. CD OPERATION... - Página 12 CD PLAYBACK 1. Press OPEN•CLOSE to open the CD door. 2. Insert a CD with the printed side facing up, and press the door close. 3. Press PLAY•PAUSE ); to start playback. • The display shows in sequence briefly: CD indicator , 'Cd:--' ;...
-
Página 13: Setting The Alarm
RADIO SETTING THE ALARM... -
Página 14: Radio Reception
RADIO RECEPTION 1. Press RADIO•BAND to switch on the radio mode. – and the last waveband selected appears in the display. RADIO 2. Press RADIO•BAND again if you wish to select another waveband. 3. Turn the TUNING wheel to find your station. To improve reception: FM: uses a built-in antenna in the power cord. - Página 15 SETTING THE ALARM The alarm mode displays are shown briefly in sequence: - alarm volume low, 'Lo:' and number (0-32); - alarm volume high, ' ' and number (0-32); - Buzzer melody alarm 'AL:', number (1-4) and indicator; - Radio alarm indicator - 'Cd' alarm track number (0-99) and indicator.
-
Página 16: Switching Off The Alarm
SETTING THE ALARM SWITCHING OFF THE ALARM Gentle wake volume A sure way of getting up in the mornings, the gentle wake volume for the alarm begins from zero volume (Lo:00) and gradually increases to a high of 14 ‘ ’. - Página 17 SWITCHING OFF THE ALARM There are three ways of switching off the alarm. Unless you cancel the alarm completely, the 24- HOUR ALARM RESET will be automatically selected after 59 minutes, from the time your alarm time goes off. 24-HOUR ALARM RESET If you want the alarm to be WEEKENDSLEEPE REPEAT ALARM...
-
Página 18: Vérification Confirmation De Garantie
• Dès que l’achat de votre appareil • Remplissez et renvoyez votre carte Philips est enregistré, vous avez droit à d’enregistrement de garantie jointe à tous les avantages dont bénéficient les votre appareil sans tarder.Vous... -
Página 19: Conseils De Sécurité
CONSEILS DE SÉCURITÉ – À lire avant de faire marcher le matériel Ce produit a été conçu et fabriqué en conformité 11. Mise à terre ou avec des normes strictes de qualité et de polarisation sécurité. Il y a, cependant, certains précautions Précautions à... -
Página 20: Garantie Limitée
Cette garantie vous donne des droits légaux spécifiques et vous pourriez avoir d’autres droits qui varient d’état en état et de province en province. Philips Service Solutions Group, P.O. Box 2976, Longview,Texas 75606, É.-U., (903) 242-4800 EL6095T002 / MAC5433 / 1-97... -
Página 21: Commandes
COMMANDES 9 PLAY•PAUSE ); 1 Réglage de l’horloge – pour régler l’horloge, ALARM (l’alarme) 1 – lecture/arrêt d’un CD. ou 2. 0 SEARCH ∞, § 2 SET DAY – pour localiser une plage de CD et rechercher – pour régler le jour afin d’utiliser la un passage déterminé. -
Página 22: Installation Et Caractéristiques Principales
INSTALLATION ET CARACTÉRISTIQUES PRINCIPALES ALIMENTATION 1. Vérifiez si la tension d’alimentation locale correspond à celle indiquée sur la plaque signalétique située sur la partie inférieure de l’appareil. Si tel n’est pas le cas, consultez votre revendeur ou votre centre de service après-vente. 2. -
Página 23: Réglage De L'heure
HORLOGE RÉGLAGE DE L’HEURE L’heure est affichée selon le système à 12 heures lorsque l’indicateur PM s’allume (marche = PM, arrêt = AM). 1. Réglez la commande de l’horloge sur SET TIME. 2. Appuyez sur UP7 ou DOWN8 pour régler les heures et les minutes –... -
Página 24: Lecteur De Cd
LECTEUR DE CD LECTURE DE CD 1. Appuyez sur OPEN•CLOSE pour ouvrir le compartiment à CD. 2. Insérez un CD avec l’étiquette vers le haut, et appuyez sur le couvercle du compartiment pour le fermer. 3. Appuyez sur PLAY•PAUSE ); pour commencer la lecture. •... -
Página 25: Réception Radio
RADIO RÉGLAGE DE L'ALARME RÉCEPTION RADIO 1. Appuyez sur RADIO•BAND pour passer sur le mode radio. – et la dernière bande de fréquence sélectionnée est alors RADIO affichée. 2. Appuyez de nouveau sur RADIO•BAND si vous voulez sélectionner une autre bande de fréquences. 3. - Página 26 RÉGLAGE DE L'ALARME 5. Sélectionnez le type d'alarme désiré en appuyant sur ALARM 1 ou 2 MODE•OFF jusqu'a ce que la fenêtre d'affichage présente le type d'alarme désiré: sonnerie , radio ou CD associé à ALARM 1 ou ALARM 2. Les types d'alarme sont brièvement présentés par séquences: - alarme faible volume, 'Lo:' et niveau (0-32);...
- Página 27 RÉGLAGE DE L'ALARME COUPURE DE L'ALARME – Vous pourrez également entendre un extrait des différents types de sonneries en appuyant sur UP7 ou DOWN8. – La fenêtre affiche à nouveau l'heure. Volume d'alarme faible En fonction de vos besoins, vous pouvez régler le volume de l'alarme de zéro (Lo:00) à...
- Página 28 WEEKENDSLEEPER SLUMBER REPEAT ALARM Cette fonction déclenche la sonnerie toutes les 7 minutes. • Appuyez sur REPEAT ALARM/ pendant que le BRIGHTNESS CONTROL réveil sonne. • Recommencez au besoin. Remarques: – Le symbole associé au mode d'alarme que vous avez sélectionné et "...
- Página 29 ENTRETIEN Général – N’exposez pas l'appareil ou les CDs à l'humidité, à la pluie, au sable ou à une chaleur excessive provenant d'un équipement de chauffage ou du rayonnement direct du soleil. – Pour nettoyer l'appareil, utilisez une peau de chamois douce et légèrement humidifiée.
- Página 30 DÉPANNAGE En cas de panne, commencez par effectuer les vérifications qui figurent dans la liste ci-dessous avant d'amener votre appareil chez le réparateur. Si toutefois vous ne réussissez pas à remédier au problème, consultez votre revendeur ou votre service après-vente. AVERTISSEMENT: N'ouvrez jamais l'appareil car vous risquez de recevoir une décharge électrique.
-
Página 31: Verificación Confirmación De La Garantía Del Dueño
• Una vez que se registre la compra de • Sírvase llenar y devolver en seguida su aparato Philips, Ud. tiene derecho a la Tarjeta de Registro de la Garantía todas las ventajas correspondientes al empacada con su aparato. -
Página 32: Instrucciones Sobre Seguridad
INSTRUCCIONES SOBRE SEGURIDAD - Léalas antes de hacer funcionar el equipo Este producto fue diseñado para cumplir con 11. Puesta a tierra o normas rigurosas de calidad y seguridad. No polarización obstante, existen algunas medidas de precaución Tome las precauciónes utili- para la instalación y funcionamiento con las que zando los medios de puesta Ud. -
Página 33: Garantia Limitada
Esta garantía le otorga derechos legales específicos y usted podría gozar de otros derechos que varían de un estado a otro. Philips Service Solutions Group, P.O. Box 2976, Longview,Texas 75606, USA, (903) 242-4800 EL6095T002 / MAC5433 / 1-97... -
Página 34: Mandos
MANDOS 9 PLAY•PAUSE ); 1 Clock control – para ajustar la hora del reloj/ALARM 1/ – para iniciar/interrumpir la reproducción ALARM 2. del CD. 0 SEARCH ∞, § 2 SET DAY – para ajustar el día en caso de que se –... -
Página 35: Instalación Y Características Generales
INSTALACIÓN Y CARACTERÍSTICAS GENERALES... -
Página 36: Alimentación
ALIMENTACIÓN 1. Asegúrese de que la tensión de alimentación que figura en la placa de características en la parte inferior del aparato se corresponde con la alimentación local. Si éste no es el caso, ha de ponerse en contacto con su distribuidor o centro de asistencia. -
Página 37: Reloj
RELOJ AJUSTANDO EL RELOJ Cuando esté encendido el indicador PM (encendido = PM, apagado = AM), la hora se visualiza mediante el sistema de 12 horas. 1. Sitúe el mando del reloj en la posición SET TIME. 2. Pulse UP7 o DOWN8 para ajustar la hora y los minutos: –... -
Página 38: Ajustando El Día
AJUSTANDO EL DÍA Al programar el día puede anular la alarma durante el fin de semana (WEEKENDSLEEPER). Si intenta utilizar esta función antes de programar el día, el indicador comenzará a parpadear en la pantalla para recordarle que primero ha de fijar el día. -
Página 39: Lector De Cd
LECTOR DE CD... - Página 40 REPRODUCIENDO UN CD 1. .Pulse OPEN•CLOSE para abrir el compartimento de CD. 2. Inserte un CD con la cara impresa hacia arriba y cierre el compartimento. 3. Pulse PLAY•PAUSE ); para iniciar la reproducción. • La pantalla visualizará brevemente la siguiente secuencia de indicaciones: indicador CD , 'Cd:--' ;...
-
Página 41: Radio
RADIO AJUSTA DE LA ALARMA – Se reanuda la reproducción normal del CD y vuelve a aparecer la hora del reloj, que se hallaba en modo de espera. Observación: Las teclas UP7 y DOWN8 pueden ejercer la misma función que los mandos SEARCH ∞... -
Página 42: Ajuste De La Hora De Alarma
AJUSTE DE LA HORA DE ALARMA Observaciones generales Es posible seleccionar diferentes modos de funcionamiento para las dos horas de alarma, ALARM 1 ó 2. Ello puede ser útil en el caso de que necesite despertarse a una hora diferente entre semana y durante el fin de semana. -
Página 43: Ajuste De La Alarma
4. Vuelva a situar el mando del reloj en la posición CLOCK. 5. Seleccione el modo de alarma deseado pulsando una o varias veces la tecla ALARM 1 ó 2 MODE•OFF hasta que la pantalla muestre la alarma deseada: zumbido , radio or CD junto a ALARM 1 o... -
Página 44: Class 1 Laser Product
AJ 3936 - CD Clock Radio PHILIPS CONSUMER ELECTRONICS COMPANY A Division of Philips Electronics North America Corporation Knoxville, Tennessee 37914-1810, U.S.A. Meet Philips at the Internet: http//www.philipsusa.com CLASS 1 LASER PRODUCT 3140 115 2749.1 Printed in HongKong TCtext/RM/0002...