NORAUTO NS-412 BT MFI Manual De Uso
Ocultar thumbs Ver también para NS-412 BT MFI:
Tabla de contenido

Publicidad

Idiomas disponibles
  • ES

Idiomas disponibles

  • ESPAÑOL, página 62

Enlaces rápidos

NS-412 BT MFI
FR
ES
PT
FR
GB
NL
Ne pas refermer l'écran manuellement / Scherm niet manueel sluiten
No cerrar la pantalla manualmente / Non chiudere lo schemo manualmente
Não feche o monitor manualmente / Nie zamykać ręcznie ekranu
Nu închideţi ecranul manual
* Ecouter de la musique trop fort peut entraîner une baisse des capacités auditives.
ART:698359
ART:937133
1
NL
60
IT
119
GB
1
IT
55
PL
109
28
88
149
26
83

Publicidad

Tabla de contenido

Solución de problemas

loading

Resumen de contenidos para NORAUTO NS-412 BT MFI

  • Página 1 NS-412 BT MFI ART:698359 ART:937133 Ne pas refermer l’écran manuellement / Scherm niet manueel sluiten No cerrar la pantalla manualmente / Non chiudere lo schemo manualmente Não feche o monitor manualmente / Nie zamykać ręcznie ekranu Nu închideţi ecranul manual...
  • Página 3 Félicitations pour votre nouvel achat ! Ce produit est un autoradio/station multimédia de la marque Norauto sound. Cet appareil permet la lecture de plusieurs sources medias : - Lecture de la radio - Lecture de CD et DVD - Lecture de clés USB et cartes SD...
  • Página 4: Tabla De Contenido

    SOMMAIRE 1. CONSIGNES DE SECURITE……………………………………………………………....……3 2. PRESENTATION DE L’APPAREIL…………………………………… …………………....…...5 A. Informations techniques……………………………………………………………………....5 B. Description de l’appareil…………………………………………………………………....….6 1) Unité………………………………………………………………………………………....6 2) Télécommande………………………………………………………........…...7 C. Commandes………………………………………………………………………………....….8 3. INSTALLATION……………………………………………………………………......…9 4. UTILISATION ……………………………………………… ……………...........11 A. Démarrage…………………………………………………………… ……………......…...11 1) Réglage de la date et de l’heure ……………………..……..........11 2) Réglages sonores…......................12 B.
  • Página 5: Consignes De Securite

    CONSIGNES DE SECURITE - Avant d’utiliser votre appareil, veuillez lire attentivement ces précautions de sécurité et gardez- les pour les futures références. Si vous donnez cet appareil à des tiers, veuillez aussi leur donner ces consignes de sécurité. - Utilisez l’appareil comme décrit dans la notice d’emploi. Toute mauvaise manipulation et toute autre utilisation que celle prévue dans la notice d’emploi, n’engagera en aucun cas la responsabilité...
  • Página 6 CONSIGNES DE SECURITE - N’utilisez pas la fonction vidéo lorsque vous conduisez , les lois locales peuvent restreindre l’utilisation de cette fonction lors de la conduite (sauf pour l’utilisation de la camera). De plus, la vidéo peut affecter votre attention et votre concentration et avoir comme conséquence une perte de contrôle du véhicule et un accident.
  • Página 7: Presentation De L'appareil

    PRESENTATION DE L’APPAREIL A. Spécifications techniques Spécifications techniques générales Modèle NS-412 BT MFI Tension 12V DC Gamme de tension 10,5-15.8V DC Courant Dimensions 178X100X166.8mm Poids 2,0Kg Système Batterie sous pôle négatif Radio Signal ≥55dB Sensibilité: (S/N=30dB) 18dBμ Réponse de fréquence (±3dB)
  • Página 8: Description De L'appareil

    PRESENTATION DE L’APPAREIL Formats MP3 supportés ISO9660, Joliet- Fréquences d’échantillonnage 32kHz, 44.1kHz, 48kHz Débit binaire 32-320Kbps et débits variables Formats vidéo supportés DVD, MP4, Xvid (optionnel) Dossiers vides (albums sans fichiers mp3/WMA) Fichiers audio AAC, WMV, PCM Formats non supportés Fichiers Word Fichiers protégés DRM Toutes extensions non prises en charge par la...
  • Página 9: Télécommande

    PRESENTATION DE L’APPAREIL Télécommande Sélection de la source musicale Ouverture/fermeture du compartiment CD Menu du disque EJECT Menu des titres du disque Zoom +/- Bande radio Equaliseur Réglage du contraste du panneau d’affichage Sélection automatique d’une station de radio rechercher une piste ou un disque Retour/avance rapide Appel entrant Entrée...
  • Página 10: Commandes

    PRESENTATION DE L’APPAREIL Insertion des piles dans la télécommande : Appuyez sur le couvercle du compartiment puis faites glisser le couvercle vers l’extérieur. Installez 1 pile CR2025 (3V) dans la télécommande tout en respectant les polarités (+ & -). Seul ce type de pile devra être utilisé.
  • Página 11: Installation

    INSTALLATION Avant l’installation, coupez l’électricité et enlevez le câble de batterie (négatif -) afin d’éviter un choc électrique. Attention : si cet appareil doit être installé dans une voiture équipée d’un lecteur embarqué ou d’un ordinateur de bord, il faut dans ce cas laisser brancher le câble de batterie : Débrancher le câble pourrait effacer la mémoire de l’ordinateur.
  • Página 12: Schéma De Câblage

    INSTALLATION Schéma de câblage YELLOW VIDEO OUT BLACK Rear display WHITE YELLOW WHITE BLACK WHITE BLUE SUB OUT TEL. MUTE CAMERA IN YELLOW...
  • Página 13: Utilisation

    UTILISATION A. Démarrage Selon les opérations, vous pourrez soit utiliser les touches de l’appareil soit la télécommande pour effectuer des opérations. Appuyez sur le bouton POWER de la télécommande ou sur la touche de l’appareil. Appuyez sur la touche MENU de l’appareil ou sur le bouton SRC de la télécommande. L’écran MENU s’affiche sur l’écran.
  • Página 14: Réglages Sonores

    UTILISATION 2) Réglages sonores - Réglages du volume Pour modifier le volume, utilisez le bouton de l’appareil pour baisser ou augmenter le volume sonore ou utilisez la télécommande avec les touches VOL +/-. - Equaliseur Appuyez sur la touche de l’appareil le menu de l’équaliseur apparaîtra. Sélectionnez un mode d’équaliseur : USER, FLAT, POP, TECHNO, ROCK, CLASSIC, JAZZ, OPTIMAL.
  • Página 15 UTILISATION Appuyez pour voir le MENU SOURCE et sélectionner une nouvelle source AF: Système de frréquences alternatives. TA: Annonce du traffic routier. Indicateur de la distance du signal d’émission. Indicateur de la bande radio actuelle. Horloge Informations stockées lors du pré-réglage Sélection d’autres modes.
  • Página 16 UTILISATION - Enregistrement manuel Cherchez une station de radio. Appuyez sur pour afficher le second menu. Appuyez sur . Sélectionnez sur l’un des canaux disponibles (P1 à P6) pour enregistrer la radio selectionnée. Pour jouer une radio sélectionnée, sélectionnez le menu RADIO, et sélectionnez une des radios enregistrées.
  • Página 17: Lire Un Disque

    UTILISATION - Fonction TA (traffic Announcement) La fonction TA permet de recevoir des informations routières, quelque soit le média. Lorsque la fonction TA est activée : une information routière est reçue, la source qui est en train d’être jouée est remplacée par information routière si la bande de radio est FM. L’appareil revient à...
  • Página 18: Lire Une Clé Usb Et Une Carte Sd

    UTILISATION 3) Lecture d’une clé USB et d’une carte SD Ouvrez le compartiment de l’appareil ou se trouvent les ports de branchement. Insérez la clé USB ou la carte SD dans le port adéquat. La lecture est automatique. Pour enlever la clé USB ou la carte SD, sortez du menu pour une autre source. Ensuite : - Pour la clé...
  • Página 19: Fonctions

    UTILISATION D. Fonctions 1) Fonction REPEAT Pour les DVD : Si nécessaire, touchez l’écran pour afficher le menu. Appuyez sur pour ouvrir le second menu. Touchez l’icone répétitivement pour sélectionner le type de répétition : Pour les CD Répétition du chapitre. Le chapitre joué sera répété. Répétion T: Tous les chapitres seront répétés.
  • Página 20: Réglage De La Vidéo

    UTILISATION 6) Réglage de la vidéo Appuyez sur pour activer ce mode. Vous pouvez régler le contraste, la luminosité et la saturation. Utilsez les touches pour modifier ces effets. 7) Sélectionner directement une piste Pour sélectionner directement une piste, touchez Sélectionnez la piste désirée avec le clavier et appuyez sur OK pour confirmer votre choix.
  • Página 21: Déonnexion Des Dispositifs Bluetooth

    UTILISATION 2) Déconnexion du dispositif Bluetooth Touchez l’icone pour déconnecter le Bluetooth. Si vous souhaitez déconnecter définitivement le dispositif Bluetooth ( le dispositif ne sera plus connectee automatiquement), Appuyez sur la touche (reglages Bluetooth) et mettez le réglage sur OFF. Note: Des interférences peuvent altérer la connexion Bluetooth.
  • Página 22: Mode Musique

    UTILISATION 6) Mode musique Les dispositifs Bluetooth transmettront seulement un son mono. Cependant, si le dispositif possède la fonction A2DP, les appareils pourront transmettre un son stéréo. Vérifiez si votre dispositif Bluetooth possède cette fonction. Les dispositifs Bluetooth qui possèdent la fonction AVRCP peuvent contrôler la lecture d’un lecteur Bluetooth.
  • Página 23: Calibrage

    UTILISATION 1) Calibrage Lorsque vous appuyez sur l’écran mais qu’il n’y a pas de réponses, il se peut que l’écran soit mal calibré. Il faut donc recalibrer l’écran. Dans le menu REGLAGES, sélectionnez l’option CALIBRAGE. Appuyez Start pour commencer : Maintenez le enfoncé...
  • Página 24: Réglage Par Defaut (Réglage Usine)

    UTILISATION 3) Réglage par défaut (réglage usine) Pour rétablir les réglages d’origine, appuyez sur RESET. Appuyez sur les options disponibles pour remettre les réglages par defaut. Réglages Description Réglages usine Remet l’option au réglage usine d’origine Volume par défaut Vidéo par défaut Appuyez sur le coin gauche de l’écran pour sortir du menu.
  • Página 25: Ipod/Iphone Operations

    UTILISATION H.iPod/iPhone Operations 3) Réglage par défaut (réglage usine) Pour rétablir les réglages d’origine, appuyez sur RESET. ATTENTION ! L’appareil peut connecter les modèles d’iPod et iPhone suivants : Appuyez sur les options disponibles pour remettre les réglages par defaut. ·...
  • Página 26 UTILISATION 3) Mise en Pause 9) Ipod video 3) Réglage par défaut (réglage usine) 1. Touchez le bouton ( ) pour mettre en Pause Pour lire une video depuis votre Ipod, Pour rétablir les réglages d’origine, appuyez sur RESET. touchez le coin en haut à gauche de l’écran, et ( ) devient ( ).
  • Página 27: Nettoyage, Maintenance Et Rangement

    NETTOYAGE, MAINTENANCE ET RANGEMENT Suivez ces instructions pour garder votre appareil dans un bon état de propreté. Un appareil propre et en bon état de marche amènent de meilleurs résultats et préservent la durée de vie de l’appareil. A. Nettoyage ATTENTION ! N’utilisez pas de produits qui peuvent endommager l’appareil ( produits abrasifs, corrosifs, alcools, nettoyants vapeur, chiffons rêches, grattoirs, etc.).
  • Página 28: Guide Depannage

    GUIDE DEPANNAGE Si vous rencontrez des problèmes avec l’autoradio, le tableau ci-dessous peut vous aider à régler votre problème. Si les solutions ci-dessous ne résolvent pas votre problème, veuillez rapporter l’appareil à votre agent de service pour inspection. Ne portez aucune réparation ou maintenance par vous-même.
  • Página 29: Mise En Rebut

    GUIDE DEPANNAGE PROBLEMES CAUSES POSSIBLES SOLUTIONS Les disques sont sales Manipulez et nettoyez correctement les disques (voir section nettoyage) Les disques sont rayés ou N’utilisez pas de disques rayés ou endommagés endommagés Les CD, DVD ou N’utilisez pas ces disques et utilisez VCD ne Les disques sont vides des disques pouvant être lus...
  • Página 30: Veiligheidsvoorzorgen

    Veiligheidsvoorzorgen Dank u voor de aankoop van dit product. Lees Stel dit toestel, zijn versterker en luidsprek- deze gebruiksinstructies aandachtig om te weten ers nooit bloot aan vochtigheid of water om hoe u dit model op correcte wijze kunt bedienen. elektrische vonken of brand te voorkomen.
  • Página 31: Uitbreidingssystemen

    Veiligheidsvoorzorgen 1. Demonteer het toestel niet en voer er ook geen aanpassingen aan uit zonder professionele hulp. Voor verdere details kunt u best raad vragen aan een autoshop/dealer. 2. Als het frontpaneel of de TFT-monitor vuil is, gebruik dan een schone siliconendoek en neutraal detergent om de vlek schoon te vegen.
  • Página 32: Inhoud

    Inhoud Veiligheidsvoorzorgen......... 28 Weergave/Pauze..........Uitbreidingssystemen......... Vorige/Volgende..........Een map zoeken..........Inhoud..............Herhalen............A-B herhalen............ Voor ingebruikname..........Shuffle (in willekeurige volgorde) afspelen..Frontpaneel............Audiomodus selecteren........Afstandsbediening..........Ondertitelstaal selecteren......... Nota’s over gebruik afstandsbediening....Kijkhoek aanpassen......... Batterij uitnemen..........Video-instelling..........Batterij inzetten..........Weergave-informatie........Directe trackinvoer........... Basisbedieningselementen.........
  • Página 33: Voor Ingebruikname

    Voor ingebruikname Frontpaneel Mededeling: De grafische weergave in deze handleiding dient alleen ter referentie en kan verschillen van de werkelijke eenheid. De verwijzingen naar het werkelijke toestel zijn slechts een suggestie. 1. [ ] -knop Knop voor openen van het frontpaneel. ] -knop 2.
  • Página 34: Afstandsbediening

    Voor ingebruikname Afstandsbediening 1. Selecteer afspeelmodus 2. De disk uitwerpen 3. Naar het hoofdmenu van de disk gaan EJECT 4. Naar het titelmenu van de disk gaan 5. In/uitzoomen op een afbeelding 6. Radioband selecteren 7. EQ-instelling 8. Dimmerregeling 9. Versnelde weergave voor/achteruit 10.
  • Página 35: Nota's Over Gebruik Afstandsbediening

    Voor ingebruikname Nota’s over het gebruik van de afstandsbediening 1. Richt de afstandsbediening naar de afstandsbedieningssensor op het toestel. 2. Vervang de batterij van de afstandsbediening of zet een batterij-isolator in als de batterij een maand of nog langer niet werd gebruikt. 3.
  • Página 36: Basisbedieningselementen

    Basisbedieningen Parkeerremverbod • Als de “BRAKE” (rem)-kabel is aangesloten op de remschakelaar, zal het display op de TFT-monitor alleen video weergeven als de handrem is aangetrokken. • Parkeerremfunctie wordt uitgeschakeld als de videobron op REVERSE wordt ingesteld. • Als het parkeerremverbod actief is, geeft de frontmonitor “WARNING Do not watch video while driving!”...
  • Página 37: Voorkeuze Equalizer Selecteren

    Basisbedieningen Voorkeuze van equalizer selecteren 1. Ga naar de EQ-instellingsmodus Raak het [ ]-icoontje in de gebruikerinterface aan en de EQ-instellingsinterface zal worden weerge- geven op het scherm. 2. Selecteer EQ-modus ∙ [User] [Flat] ∙ [POP] [Techno] ∙ [Rock] [Class] ∙...
  • Página 38: Datum/Tijd Instellen

    Basisbedieningen Datum/Tijd instellen 1. Raak [ ] aan. 2. Raak [ Time ] aan. Het datum/tijdinstelmenu wordt weergegeven. Datum instellen 1. Raak [ Date ] aan. 2. Raak de datuminformatie op het scherm aan. Een submenu wordt weergegeven. 3. Raak [ ] of [ ] om jaar, maand en dag in te stellen.
  • Página 39: Radiomodus

    Radiomodus Tuner TFT-display 1. Aanraken om het SOURCE MENU (bronmenu) te bekijken en een nieuwe weergavebron te selecteren 2. AF: “Alternative Frequency”-indicator 3. TA: “Traffic Announcement”-indicator 4. Indicator zendsignaal op afstand 5. Indicator huidige radioband 6. KIok 7. Zenderinformatie bewaard onder voorkeuzeknop 8.
  • Página 40: Zenders Voorkiezen

    Radiomodus Zenders voorkiezen Het toestel heeft 5 frequentiebanden, zijnde FM1, FM2, FM3, AM1, AM2, en elke band kan 6 zenders opslaan; het toestel kan in totaal dan ook 30 zenders bewaren. Intro/Scan Druk op het [ ]-icoontje om naar intro te gaan. Elke opgeslagen zender wordt automatisch 5 seconden afgespeeld.
  • Página 41: Rds (Radio Data System)

    Radiomodus RDS (Radio Data System) Het toestel verschaft basisfuncties van RDS. AF-functie Alternatieve-frequentieslijsten worden gebruikt voor dezelfde programmaservice en gebruikt in combinatie met de PI code (Program Identification code) ter ondersteuning van automatische afstemming.Met behulp van deze informatie kan een radio automatisch een andere zener zoeken die hetzelfde materiaal afspeelt.
  • Página 42: Weergavemodus

    Weergavemodus Een disk inzetten U kunt video, audio of beelden opgeslagen op de volgende disks afspelen: • DVD Video, DVD-R, DVD-RW • VCD • Audio CD, CD-R, CD-RW Nota: Zorg dat de disk afspeelbare inhoud bevat. Een disk uitwerpen Druk op de [ ] - toets op het frontpaneel of afstandsbediening om te disk uit te werpen.
  • Página 43: Vorige/Volgende

    Weergavemodus ingestoken, start het afspelen automatisch. Voor DVD-film, als een menu verschijnt, druk dan op [ om weergave te starten. 2. Om te pauseren [ ] aanraken. Om weergave te hernemen [ ] aanraken. Overspringen naar vorige / volgende track / hoofdstuk, druk op [ ] / [ ]-toets.
  • Página 44: A-B Herhalen

    Weergavemodus Voor CD/MP3/WMA-bestanden: 1. Op willekeurige plaats scherm aanraken behalve linker bovenhoek om menu op het scherm weer te geven, indien nodig. 2. Raak [ ] meermaals aan. ] Single herhalen: De huidige single meermaals afspelen. ] Alles herhalen: Alles op de disk herhaald afspelen. ] Hoofdstuk herhalen: Alles in de huidige map afspelen.
  • Página 45: Video-Instelling

    Weergavemodus Video-instelling ] aanraken om toegang te krijgen tot video-instellingsmodus, ] of [ ] aanraken om het gewenste effect in te stellen. U kunt de helderheid, het contrast en de intensiteit van de videoweer- gave instellen van 0 tot 16. ] Helderheid: bereik voor 0 tot 16.
  • Página 46: Ipod/Iphone-Bedieningen

    iPod/iPhone-bedieningen Dit toestel ondesteunt alleen de volgende iPod/iPhone-modellen: • iPhone 5 • iPod touch (5a generazione) • iPhone 5S • iPod touch (4a generazione) • iPhone 5C • iPod classic • iPhone 4S • iPod nano (7a generazione) • iPhone 4 •...
  • Página 47 iPod/iPhone-bedieningen 4. Raak een optie aan om deze te selecteren. - Shuffle Albums (albums in willekeurige volgorde afspelen) Weergave pauzeren [Repeat]: (herhalen) - Repeat off (herhalen uit) 1. Raak de [ ]-knop aan om de weergave te - Repeat One (één track herhalen) pauzeren.
  • Página 48: Bluetooth-Modus

    Bluetooth-modus U kunt bellen of gebeld worden met Bluetooth-geactiveerde telefoons via dit toestel. U kunt ook muziek beluisteren van een Bluetooth- geactiveerd toestel. De Bluetooth-geactiveerde toestellen koppelen Om uw Bluetooth-toestel op het toestel aan te sluiten moet u dit koppelen aan het toestel. Het koppelen hoeft slechts één maal te gebeuren.
  • Página 49: Een Inkomende Oproep Beantwoorden

    Bluetooth-modus Een inkomende oproep beantwoorden Standaard worden alle inkomende oproepen automatisch ontvangen. 1. Als er een inkomende oproep is, zal op het scherm “Incoming” (inkomend) verschijnen. 2. U kunt het scherm aanraken om [ Hang up ] (ophangen) of [ Answer ] (beantwoorden) te selecteren. Spreek in de Bluetooth-microfoon.
  • Página 50: Displaysysteem

    INSTELLINGEN Displaysysteem 1. Raak de linker bovenhoek aan om het hoofdmenu weer te geven. 2. [ Settings ] aanraken. Het instellingenmenu wordt weergegeven. Algemene instellingen aanpassen 1. [ General ] aanraken, indien nodig. 2. Aanraken om een instelling te selecteren. 3.
  • Página 51: Geluidsinstellingen Aanpassen

    INSTELLINGEN Tijdinstellingen Opties Beschrijving Datum Jaar/Maand/Dag Raak [ ] of [ ] om jaar, maand en dag in te stellen. Tijdmodus 12u/24u Raak [12H] of [24H] aan om de tijdmodus om te schakelen. Tijd Raak [ ] of [ ] om uur en minuten in te stellen. Desktimer Raak [ Simulate Timer ] of [ Numeral Timer ] aan om deze functie te selecteren.
  • Página 52: Diskrating Aanpassen

    INSTELLINGEN Diskrating aanpassen 1. [Disc] aanraken. 2. Raak een optie meermaals aan om deze te selecteren. 3. Raak de linker bovenhoek van het scherm aan om de optie te verlaten. DVD rating Opties Beschrijving Wachtwoord Wachtwoord instellen om de weergave van disks te beperken. instellen Het standaard wachtwoord is 0000.
  • Página 53: Andere Modi

    ANDERE MODI Andere toestellen beluisteren U kunt een extern audio/videotoestel aansluiten op het toestel. 1. Sluit het externe toestel aan met de meegeleverde A/V-kabel. 2. Raak de linker bovenhoek aan om het hoofdmenu weer te geven. 3. [AV-IN 2] aanraken om toegang te krijgen tot het aux-toestel vooraan. [AV-IN 1] aanraken om toegang te krijgen tot het aux-toestel achteraan.
  • Página 54: Specificaties

    SPECIFICATIES Algemeen Type NS-412 BT MFI Referentievoedingsspanning 12V DC Bedrijfsspanningsbereik. 10,5-15.8V DC Max bedrijfsstroom. Afmetingen(BxHxD) 178X100X166.8mm Gewicht (hoofdeenheid) 2,0Kg Aardingssysteem Negatieve pool aan autobatterij Radio Signaal/ruisverhouding ≥55dB Restruisgevoeligheid (S/R=30dB). 18dBμV Frequentiekarakteristiek (±3dB). 20Hz~7KHz Zenderzoekniveau 20~28dBμV Vervorming ≤1.0% Stereoscheiding (1KHz) ≥25dB Antenne-iImpedantie 75Ω...
  • Página 55 SPECIFICATIES Ondersteunde formaten USB of geheugenbestandsformaat FAT16, FAT32 Mp3 bit rate(datasnelheid) 32-320 Kbps en variabele bitrate v9 of vroegere versie ID3 tag v2.0 of later Bestandsnaam in Unicode UTF8(maximum lengte:128 bytes) Aantal albums/mappen maximum 99 Aantal tracks/titels maximum 999 Ondersteund MP3-diskformaat ISO9660,Joliet Ondersteunde samplingfrequenties 32kHz, 44.1kHz, 48kHz...
  • Página 56: Problemen Verhelpen

    PROBLEMEN VERHELPEN Wat er uitziet als een probleem is niet altijd ernstig. Controleer de volgende punten vooraleer u naar een service center belt. PROBLEEM OORZAAK CORRIGERENDE ACTIE Toestelzekering doorgebrand. Installeer nieuwe zekering met correcte stroomsterkte. Toestel kan Installeer nieuwe zekering met Autobatterijzekering doorgebrand.
  • Página 57 PROBLEMEN VERHELPEN PROBLEEM OORZAAK CORRIGERENDE ACTIE Controleer bedrading en corrigeer. Waarschuwingsin Parkeerrembedrading is niet -formatie wordt correct. voortdurend getoond Het kleursysteem van DVD-disk is Pas het kleursysteem aan van de DVD-disk Knipperend beeld niet geschikt voor de monitor. die op de gebruikte monitor wordt afgespeeld. of interferentie verschijnt op Piraatdisk wordt gebruikt.
  • Página 58: Installatie

    INSTALLATIE De batterij loskoppelen Om een kortsluiting te voorkomen moet u de ontsteking uitzetten en de negatieve (-) batterijkabel verwijderen vooraleer u installatie uitvoert. Nota:Als het toestel moet worden geïnstalleerd in een auto uitgerust met een drive aan boord of een navigatiecomputer, koppel de batterijkabel dan niet los.
  • Página 59: De Sierafwerkingsrand Gebruiken

    INSTALLATIE a. Sluit de bedradingsadaptor aan op de bestaande bedrading. b. Sluit antennedraad aan. c. Schuif de radio voorzichtig in de halve huls en zorg ervoor dat de juiste kant naar boven zit. Gebruik de meegeleverde schroeven om de radio vast te maken op de halve toestelhuls. De sierafwerkingsrand gebruiken Het hoofdtoestel wordt geleverd met een sierafwerkingsrand in de verpakking voor de nodige installatieflexibiliteit.
  • Página 60 INSTALLATIE...
  • Página 61: Draadverbindingen

    DRAADVERBINDINGEN YELLOW VIDEO OUT Rear display WHITE YELLOW WHITE BLACK WHITE BLUE SUB OUT TEL . MUTE CAMERA IN YELLOW...
  • Página 62 Le invitamos a leer en su totalidad estas instrucciones para un uso y mantenimiento correctos del producto. ¡Felicidades por su nueva compra! Este producto es un autorradio/estación multimedia de la marca Norauto sound. Este aparato permite leer varias fuentes: -Lectura de la radio -Lectura de CD y DVD...
  • Página 63 ÍNDICE 1. INFORMACIÓN DE SEGURIDAD.................62 2. PRESENTACIÓN DEL APARATO.................64 A. Especificaciones técnicas ..................... 64 B. Descripción del aparato .......................66 3. INSTALACIÓN ......................69 4. UTILIZACIÓN .........................71 A. Puesta en marcha......................71 1) Ajuste de fecha y hora ....................71 2) Ajuste sonoros ......................72 B.
  • Página 64: Información De Seguridad

    INFORMACIÓN DE SEGURIDAD -Antes de utilizar el aparato, lea atentamente estas instrucciones de seguridad y guárdelas para futuras consultas. Si le da este aparato a alguien, entréguele también las instrucciones. -Utilice el aparato siguiendo las instrucciones. El fabricante no se hace responsable de un uso incorrecto o de una manipulación errónea.
  • Página 65 INFORMACIÓN DE SEGURIDAD del vídeo y aparece un mensaje en la pantalla, de tipo: «¡No mire el vídeo cuando está conduciendo!». Esto no afecta a la función «vídeo trasero». No está activada cuando la fuente vídeo está ajustada en REVERSE (para ver la parte trasera del vehículo). -No utilice el aparato cuando no se reúnen las condiciones de seguridad para la conducción.
  • Página 66: Presentación Del Aparato

    PRESENTACIÓN DEL APARATO A. Especificaciones técnicas Especificaciones técnicas generales Modelo NS-412 BT MFI Tensión 12V DC Gama de tensión 10,5-15.8V DC Corriente Medidas 178X100X166.8mm Peso 1,9 Kg Sistema Batería a polo negativo Radio Señal ≥ 55dB Sensibilidad: (S/N=30dB) 18dBµ Respuesta de frecuencia (±3dB) 20Hz~12.5KHz Nivel de Búsqueda de emisora...
  • Página 67 PRESENTACIÓN DEL APARATO Formatos soportados USB/Disco duro externo FAT16, FAT32 32-320 Kbps y débito variable V9 y más recientes ID3 tag V2.0 o más antiguos Nombre de los ficheros Unicode UTF8 (tamaño máximo 128 bits) Número de carpetas/álbums Máximo 99 Número de pistas/títulos Máximo 999 Formatos MP3 soportados...
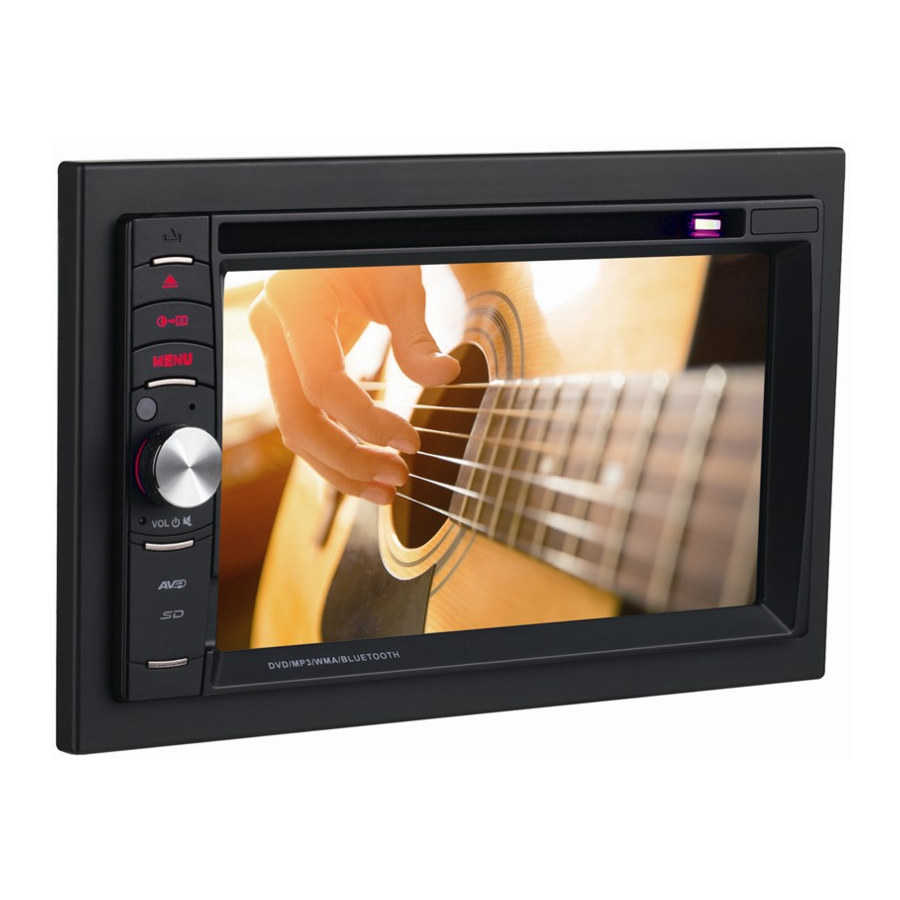
  • Página 68: Descripción Del Aparato

    PRESENTACIÓN DEL APARATO B. Descripción del aparato Apertura frontal Eject Ajuste de contraste y luminosidad Menú Sensor para el mando a distancia Volumen Reset Puerto USB Ranura para tarjeta SD Entrada A/V Ranura del lector Ranura de actualización del software. La tarjeta SD sólo se utiliza para la actualización de software, no para música o mapas de navegación.
  • Página 69: Mando A Distancia

    PRESENTACIÓN DEL APARATO Mando a distancia 1.Selección de la fuente musical 2. Apertura/cierre del compartimento CD 3. Menú del disco EJECT 4.Menú de los títulos del disco 5. Zoom +/- 6. Banda de radio 7. Ecualizador 8. Ajuste del contraste de la pantalla 9.
  • Página 70: Poner Las Pilas Al Mando

    PRESENTACIÓN DEL APARATO Poner las pilas al mando: Presione la tapa del compartimento y deslícela hacia el exterior. Ponga 1 pila CR2025 (3V) en el mando respetando las polaridades (+ & -). Sólo se puede utilizar este tipo de pila. Vuelva a colocar la tapa en su sitio, presionando sobre ella y deslizándola hacia el interior.
  • Página 71: Instalación

    INSTALACIÓN Corte la corriente antes de la instalación y quite el cable de batería (negativo -) para evitar una descarga eléctrica. Cuidado: si se instala este aparato en un coche equipado con lector u ordenador de a bordo, en ese caso hay que dejar enchufado el cable de batería: si se desconecta el cable se podría borrar la memoria del ordenador.
  • Página 72: Esquema De Cableado

    INSTALACIÓN Esquema de cableado YELLOW VIDEO OUT BLACK Rear display WHITE YELLOW WHITE BLACK WHITE BLUE SUB OUT TEL . MUTE CAMERA IN YELLOW...
  • Página 73: Utilización

    UTILIZACIÓN A. Puesta en marcha Según las operaciones que realice, podrá o bien utilizar las teclas del aparato o bien el mando. Presione la tecla POWER del mando o la tecla del aparato. Presione a tecla MENÚ del aparato o la tecla SRC del mando. La pantalla MENÚ aparece en la pantalla.
  • Página 74: Ajuste Sonoros

    UTILIZACIÓN 2) Ajustes de sonido -Ajustes del volumen Para modificar el volumen, utilice el botón del aparato para bajar o subir el volumen sonoro o utilice el mando con las teclas VOL +/-. -Ecualizador Presione la tecla X del aparato y se mostrará el menú del ecualizador. Seleccione un modo de ecualizador: USER, FLAT, POP , TECHNO, ROCK, CLASSIC, JAZZ, OPTIMAL.
  • Página 75 UTILIZACIÓN 1. Toque la vista FUENTE MENU y seleccione una nueva fuente de reproducción 2. AF: Indicador de frecuencia alternativa 3. TA: Indicador información de tráfico 4. Indicador de transmisión de señal a distancia 5. Indicador de la actual banda de radio 6.
  • Página 76 UTILIZACIÓN -Memorización manual Busque una emisora de radio. Toque [ ] para mostrar el segundo menú. Toque [ ].. Seleccione uno de los canales disponibles (P1 a P6) para memorizar la emisora de radio seleccionada. Para escuchar una radio memorizada, hágalo desde el menú RADIO.
  • Página 77: Leer Un Disco

    UTILIZACIÓN 2) Lectura de un disco Formatos de disco leídos: DVD, DVD-R, DVD-RW, VCD, CD audio, CD-R y CD-RW audio. A Retorno al menú principal B Se inicia el vídeo y se muestra información C Muestra en pantalla el menú del control D Muestra el tiempo Presione [ ] (mando o aparato) para introducir y sacar un disco.
  • Página 78: Funciones

    UTILIZACIÓN Búsqueda de una pista Búsqueda de un vídeo: Toque el icono [ ] para ver los vídeos disponibles. Abra una carpeta y toque dos veces sobre el vídeo que se quiere ver. Búsqueda de un fichero de audio Toque el icono [ Abra una carpeta y toque dos veces sobre la canción que desea escuchar.
  • Página 79: Lectura Aleatoria

    UTILIZACIÓN 2) Lectura aleatoria Toque, si es necesario, [ ] para abrir el segundo menú. Toque [ ] en la pantalla o pulse la tecla RANDOM del mando para activar y desactivar la función lectura aleatoria. 3) Selección del modo audio Durante la lectura de un VCD, puede seleccionar el modo audio (R/L/estéreo).
  • Página 80: Información Durante La Lectura

    UTILIZACIÓN E. Información durante la lectura Toque la pantalla durante la lectura de un DVD/VCD y aparecerá información en la parte superior de la pantalla. Para DVD -El tipo de disco -Información título: indica el número de títulos y el título en curso. -Información capítulo: indica el número de capítulos y el capítulo en curso.
  • Página 81: Contestar A Una Llamada

    UTILIZACIÓN ]: Agenda ]: Lista de llamadas Missed calls: Llamadas perdidas Received calls: Llamadas recibidas Dialed calls: Llamadas realizadas 4) Contestar a una llamada Todas las llamadas son contestadas automáticamente. Cuando entra una llamada, la pantalla del aparato muestra un mensaje. Para contestar seleccione Hang up (descolgar) o Answer (contestar).
  • Página 82: Operaciones Ipod/Iphone

    UTILIZACIÓN G.Operaciones iPod/iPhone Esta unidad soporta únicamente los siguientes modelos de iPod/iPhone: · iPhone 5 · iPod touch (4th generation) · iPhone 5S · iPod classic · iPhone 5C · iPod nano (7th generation) · iPhone 4S · iPod nano (6th generation) ·...
  • Página 83 UTILIZACIÓN 3. Tocar para seleccionar una categoría, los [Repeat]: contenidos de la categoría se muestran. - Repetición apagada - Repetir una Tocar [ ] o [ ] para navegar. - Repetir todas 4. Tocar una opción para seleccionarla. 9) Reproducción video iPod 3) Parar la reproducción Para reproducir un video desde el iPod, tocar 1.
  • Página 84: Otros Ajustes

    UTILIZACIÓN H. Ajustes generales Toque la pantalla arriba a la izquierda. Seleccione el menú de ajustes «Setting». Se muestra el menú. Presione sobre GENERAL si es necesario. Seleccione la opción que desea modificar. Para salir del menú ajustes, presione en la esquina derecha de la pantalla. Principales ajustes Opciones Descripción...
  • Página 85: Ajustes De Las Opciones De Vídeo

    UTILIZACIÓN Ajuste de vídeo Opciones Descripción Normal Aparece la imagen en la pantalla cuando se hace marcha atrás Vista trasera Espejo Se muestra la imagen en espejo cuando se hace marcha atrás Noche Oscuro Ajuste de Seleccione para cambiar la luminosidad luminosidad Normal Brillante...
  • Página 86: Opción Control Desde El Volante

    UTILIZACIÓN Presione la esquina izquierda de la pantalla para salir del menú. Si el aparato se bloquea, hay que ponerlo a cero para que se reinicie. Introduzca un pequeño dispositivo puntiagudo (una aguja o un bolígrafo) en el orificio de la función RESET.
  • Página 87: Limpieza, Mantenimiento Y Almacenamiento

    LIMPIEZA, MANTENIMIENTO Y ALMACENAMIENTO Siga estas instrucciones para guardar su aparato en buen estado de limpieza. Un aparato limpio y en buen estado de funcionamiento da mejores resultados y dura más tiempo. A. Limpieza ¡CUIDADO! No utilice productos que puedan dañar el aparato (productos abrasivos, corrosivos, alcoholes, limpiadores de vapor, trapos ásperos, rasquetas, etc.).
  • Página 88: Solución De Problemas

    SOLUCIÓN DE PROBLEMAS Si tiene problemas con el aparato, esta tabla puede ayudarle a solucionarlos. Si estas soluciones no resuelven su problema, lleve el aparato a un especialista. No repare o haga usted mismo el mantenimiento. Problemas Posiblescausas Soluciones Compruebe el cableado y El aparato no estáenchufado o siesnecesariovuelva a montar el está...
  • Página 89: Gestión De Residuos

    GESTIÓN DE RESIDUOS No se deben desechar en el mismo contenedor los productos eléctricos y los residuos caseros. Según la Directiva Europea 2002/96/EC sobre residuos de aparatos eléctricos y electrónicos, los equipos eléctricos usados se deben llevar a puntos de recogida selectiva para su reciclado. Puede dirigirse a las autoridades locales o a su vendedor para obtener consejos sobre reciclaje.
  • Página 90 PRECAUZIONI D’USO Grazie per aver acquistato questo prodotto. Non esporre mai il prodotto, amplificatori e Leggete attentamente le istruzioni per capire altoparlanti a umidità o acqua per prevenire bene come funziona il vostro prodotto. Dopo scintille o incendi. aver letto le istruzioni, conservate questo manuale per future esigenze.
  • Página 91 PRECAUZIONI D’USO 1. Non smontare o aggiustare il prodotto senza l’aiuto di un professionista.Per dettagli e domande, consultare professionisti dell’auto o il venditore. 2. Se il pannello frontale o monitor TFT è sporco, usare un panno pulente in silicone e detergente naturale per togliere lo sporco.
  • Página 92 Contenuti Precauzioni d’uso..........88 Play/Pause............101 Sistemi opzionali..........89 Precedente/Successivo........101 Ricerca di una cartella........101 Contenuti............89 Ripetizione............101 Ripetizione A-B..........102 Prima dell’uso..........90 Riproduzione casuale........102 Pannello frontale..........91 Selezionare modalità Audio......102 Telecomando............92 Selezionare lingua sottotitoli......102 Note sull’uso del telecomando......93 Cambiare angolo di visuale......102 Togliere la batteria..........93 Impostazioni Video...........103 Inserire la batteria..........93 Informazioni di riproduzione......103...
  • Página 93: Prima Dell'uso

    PRIMA DELL’USO Pannello frontale Istruzioni: Le immagini di questo manuale sono solo di riferimento e possono essere diverse dal prodotto a vostre mani. 1. Pulsante [ Rilascio pannello pulsanti. 2. Pulsante [ Premere per togliere il disco. 3. Pulsante [ Premere per entrare in modalità...
  • Página 94 PRIMA DELL’USO Telecomando 1. Selezionare modalità di riproduzione 2. Togliere il disco 3. Entrare nel menu principale del disco EJECT 4. Enter nel menu titoli del disco 5. Ingrandire/Ridurre un’ immagine 6. Selezionare una banda radio 7. Impostazione EQ 8. Regolazione Luminosità 9.
  • Página 95 PRIMA DELL’USO Annotazioni sull’uso del telecomando 1. Dirigere il telecomando verso il sensore del prodotto. 2. Sostituire la batteria del telecomando o inserire un isolante se la batteria non è stata usata per oltre un mese. 3. NON LASCIARE il telecomando alla luce diretta del sole o ad alte temperature perchè potrebbe non funzionare più...
  • Página 96: Operazioni Di Base

    OPERAZIONI DI BASE Inibizione visione video con freno a mano inserito • Quando il cavo del freno a mano è collegato al commutatore, lo schermo mostra video solo quando il veicolo è fermo. • La funzione freno a mano è ignorata quando la sorgente video è impostata su REVERSE. •...
  • Página 97 OPERAZIONI DI BASE Selezionare Equalizzatore preimpostato 1. Entrare in modalità Impostazioni EQ Toccare l’icona [ ] sull’interfaccia utente e l’interfaccia di impostazioni EQ appare sullo schermo. 2. Selezionare la modalità EQ · [User] [Flat] · [POP] [Techno] · [Rock] [Class] ·...
  • Página 98 OPERAZIONI DI BASE Impostare Data / Ora 1. Toccare [ 2. Toccare [ Ora ]. Il menù di impostazione data/ora viene visualizzato. Impostare Data 1. Toccare [ Date ]. 2. Toccare l’informazione Data sullo schermo. Viene visualizzato un sottomenù. 3. Toccare [ ] o [ ] per impostare anno, mese e giorno.
  • Página 99: Modalità Radio

    MODALITÀ RADIO Visualizzazione del Sintonizzatore sullo schermo 1. Premere per accedere al MENU SORGENTE e selezionare una nuova sorgente di riproduzione 2. AF: Indicatore Frequenza Alternativa 3. TA: Indicatore Informazioni sul Traffico 4. Indicatore di segnale radio remoto 5. Indicatore della banda radio corrente 6.
  • Página 100 MODALITÀ RADIO Stazioni memorizzate L’unità ha 5 bande, che sono FM1, FM2, FM3, AM1, AM2, e ogni banda può memorizzare 6 stazioni. Quindi si possono memorizzare in totale 30 stazioni. Introduzione/Esplorazione Premere l’icona [ ] per l’introduzione di ogni stazione. Ogni stazione memorizzata viene riprodotta automaticamente per 5 secondi.Tenere premuta l’icona [ ] per la ricerca.
  • Página 101 MODALITÀ RADIO RDS ( Radio Data System ) Il prodotto fornisce le funzioni base dell’RDS. Funzione AF La Lista di Frequenze Alternative utilizza lo stesso programma insieme al codice PI (codice di identificazione programma) per assistere la sintonizzazione automatica. Usando questa informazione, una radio può ricercare automaticamente un’altra stazione radio che sta riproducendo la stessa cosa.
  • Página 102: Modalità Riproduzione

    MODALITÀ RIPRODUZIONE Caricare un disco E’ possibile riprodurre video, audio o immagini presenti nei seguenti dischi: • DVD Video, DVD-R, DVD-RW • VCD • Audio CD, CD-R, CD-RW Nota: Assicurarsi che i dischi contengano contenuti riproducibili. Togliere un Disco Premere il pulsante [ ] sul pannello frontale o telecomando per togliere un disco.
  • Página 103 MODALITÀ RIPRODUZIONE riproduzione comincia automaticamente. Per film su DVD, se appare un menu, premere [ ] per cominciare la riproduzione. 2. Per mettere in pausa, toccare [ Per tornare alla riproduzione, toccare [ Per andare alla traccia / capitolo precedente/successiva, premere i pulsanti [ ] / [ Precedente / Successivo...
  • Página 104 MODALITÀ RIPRODUZIONE Per files CD/MP3/WMA: 1. Toccare ovunque eccetto l’angolo in alto a sinistra per visualizzare il menu sullo schermo, se necessario. 2. Toccare [ ] ripetutamente: ] Ripetizione singolo: Riproduce il singolo corrente ripetutamente. ] Ripetizione tutti: Riproduce tutto il disco ripetutamente. ] Ripetizione cartella: riproduce tutta la cartella corrente.
  • Página 105 MODALITÀ RIPRODUZIONE Impostazioni Video Toccare [ ] per accedere alla modalità di impostazioni video, toccare [ ] o [ ] per impostare l’effetto desiderato.E’ possibile impostare luminosità, contrasto e saturazione dell’uscita video da 0 a 16. ] Luminosità: livello da 0 a 16. ] Contrasto: livello da 0 a 16.
  • Página 106 Funzionamento con iPod/iPhone Questa unità è compatibile solo con i seguenti modelli iPod/iPhone:: • iPhone 5 • iPod touch (5a generazione) • iPhone 5S • iPod touch (4a generazione) • iPhone 5C • iPod classic • iPhone 4S • iPod nano (7a generazione) •...
  • Página 107 Funzionamento con iPod/iPhone Pausa riproduzione [Repeat]: - Ripeti off 1. Premere il tasto [ ] per interrompere la - Ripeti Una riproduzione. - Ripeti Tutte E il tasto [ ] diventa [ ] . 2. Premere il tasto [ ] per riprendere la Riproduzione video iPod riproduzione.
  • Página 108: Modalità Bluetooth

    MODALITÀ BLUETOOTH E’ possibile fare o ricevere chiamate con il sistema Bluetooth tramite il prodotto. E’ anche possibile ascoltare la musica tramite un dispositivo Bluetooth abilitato. Accoppiamento Bluetooth – Dispositivo abilitato Per collegare il dispositivo Bluetooth al prodotto, è necessario accoppiare il dispositivo al prodotto.
  • Página 109 MODALITÀ BLUETOOTH Rispondere ad una chiamata entrante Di default, una chiamate entrante viene accettata automaticamente. 1. Se c’è una chiamata entrante, sullo schermo appare “Incoming”. 2. E’ possibile toccare lo schermo per selezionare [ Hang up ] o [ Answer ].Parlare nel microfono Bluetooth. ·...
  • Página 110 IMPOSTAZIONI Visualizzazione Sistema 1. Toccare l’angolo in alto a sinistra per visualizzare il menu principale. 2. Toccare [ Settings ]. Il menu impostazioni viene visualizzato. Regolazione impostazioni generali 1. Toccare [ General ], se necessario. 2. Toccare per selezionare un’impostazione. 3.
  • Página 111 IMPOSTAZIONI Impostazioni ora Opzioni Descrizione Date Anno/Mese/Giorno Toccare [ ] o [ ] per impostare anno, mese e giorno Time Mode 12H/24H Toccare[12H] o [24H] per scegliere la modalità di visualizzazione Time Toccare [ ] o [ ] per impostare ora e minuti Desk Timer Toccare per selezionare [ Simulate Timer] o [ Numeral Timer ] Time Zone...
  • Página 112 IMPOSTAZIONI Regolazione impostazioni disco 1. Toccare [Disc]. 2. Toccare ripetutamente un’opzione per selezionare. 3. Toccare l’angolo in alto a sinistra dello schermo per uscire. DVD rating Opzioni Descrizione Impostare la password per restringere la possibilità di Set password visionare il disco ad alcune persone. La password di default è...
  • Página 113: Altre Modalità

    ALTRE MODALITÀ Ascoltare altri dispositivi E’ possibile collegare al prodotto un dispositivo audio/video esterno. 1. Collegare un dispositivo esterno con il cavo AV fornito. 2. Toccare l’angolo in alto a sinistra dello schermo per visualizzare il menu principale. 3. Toccare [AV-IN 2] per collegare il dispositivo all’Aux frontale. Toccare [AV-IN 1] per collegare il dispositivo all’Aux posteriore.
  • Página 114 SPECIFICHE Generali Modello NS-412 BT MFI Voltaggio richiesto 12V DC Range di voltaggio 10,5-15.8V DC Potenza massima Dimensioni(WxHxD) 178X100X166.8mm Peso (unità centrale) 2,0Kg Sistema terra Batteria Auto Polo Negativo Radio Segnale rumore ≥55dB Sensibilità rumore residuo (S/N=30dB) 18dBμ Frequenza (±3dB).
  • Página 115 SPECIFICHE Formato supportati dischi MP3 ISO9660, Joliet- Esempi di Frequenze supportate 32kHz, 44.1kHz, 48kHz Bit-rates supportati 32-320Kbps e bit rate variabili Formati Video supportati DVD, MP4, Xvid (opzionale) Album vuoti: un album vuoto è un album che non contiene file MP3/WMA e non viene mostrato sullo schermo.
  • Página 116: Soluzione Problemi

    SOLUZIONE PROBLEMI Quello che appare come un problema, non sempre è serio. Prima di chiamare un professionista, leggere l’elenco di problemi seguente con le possibili soluzioni. PROBLEMA CAUSA SOLUZIONE Fusibile prodotto bruciato Sostituire il fusibile con uno nuovo dello stesso amperaggio Il prodotto non Sostituire il fusibile con uno nuovo Fusibile della batteria auto bruciato...
  • Página 117 SOLUZIONE PROBLEMI PROBLEMES CAUSES POSSIBLES SOLUTIONS Collegamento freno a mano non Controllare collegamento e correggere Vengono sempre corretto visualizzate informazioni sbagliate Il sistema di colore del DVD non è Regolare il sistema di colore del DVD Immagini compatibile con lo schermo in accordo con il monitor lampeggianti o Si sta usando un disco pirata...
  • Página 118 INSTALLAZIONE Disconnessione della Batteria Per prevenire un corto circuito, occorre essere certi, prima dell’installazione, di aver spento l’igniezione e tolto il cavo negativo (-) della batteria. Nota:Se l’unità deve essere installata su un’auto dotata di un computer di bordo o sistema di navigazione, non disconnettere il cavo batteria.
  • Página 119 INSTALLAZIONE...
  • Página 120 Collegamento cavi WIRE CONNECTIONS YELLOW VIDEO OUT BLACK Rear display WHITE YELLOW WHITE BLACK WHITE BLUE SUB OUT TEL. MUTE CAMERA IN YELLOW...
  • Página 121: Precauções De Segurança

    Precauções de segurança Agradecemos a sua preferência por O fusível do cabo de ligação deve ser este produto. Leia atentamente este substituído por um técnico qualificado. manual de instruções para saber utilizar A utilização de fusíveis não adequados corretamente o equipamento. O manual pode provocar danos na unidade ou deve ser guardado para possíveis mesmo um incêndio.
  • Página 122 Precauções de segurança 1. A unidade deve ser sempre desmontada ou reparada por um profissional. Para mais informações, consulte uma loja ou técnico especializado. 2. Para limpar o painel frontal ou o monitor TFT, use um pano com silicone limpo e um detergente neutro.
  • Página 123 Índice Precauções de segurança ....119 Ligar um Dispositivo USB ....131 Remover um Dispositivo USB ....131 Antes da utilização .......122 Inserir um Cartão SD ......131 Painel Frontal........122 Remover um Cartão SD .....131 Controlo Remoto.........123 Play/Pausa..........132 Notas sobre a utilização do Controlo Anterior/Seguinte ........132 Remoto ..........124 Procurar uma Pasta ......132...
  • Página 124: Antes Da Utilização

    Antes da utilização Painel Frontal Observação: As imagens deste manual são apenas uma referência e podem diferir das da unidade em questão. O cliente deve utilizar a unidade adquirida como referência. 1. [ Botão de abertura do painel frontal. 2. [ Pressionar para ejetar o disco.
  • Página 125: Controlo Remoto

    Antes da utilização Controlo Remoto 1. Seleção modo de reprodução 2. Ejeção do disco 3. Menu principal do disco EJECT 4. Menu de raiz do disco 5. Zoom in /out de imagem 6. Seleção estações de rádio 7. Configuração do EQ 8.
  • Página 126: Retirar A Pilha

    Antes da utilização Notas sobre a utilização do Controlo Remoto 1. Apontar o controlo remoto para o sensor remoto da unidade. 2. Substituir a pilha do controlo remoto, se a pilha não tiver sido usada durante um mês ou mais. 3.
  • Página 127: Funcionamento Básico

    Funcionamento Básico Inibição do Travão de Mão • Se o cabo “BRAKE” estiver ligado ao interruptor do travão, o monitor TFT apenas exibirá um vídeo quando o veículo estiver imobilizado. • A função do travão de mão é ignorada sempre que a fonte de vídeo estiver definida para REVERSE.
  • Página 128: Selecionar Equalizador Pré-Definido

    Funcionamento Básico Selecionar Equalizador Pré-definido 1. Entrar no modo de configuração do EQ Tocar no ícone [ ] no interface do utilizador e o interface de configuração do EQ surge no ecrã. 2. Selecionar modo EQ ∙ [User] [Flat ∙ [POP] [Techno] ∙...
  • Página 129: Configurar Fuso Horário

    Funcionamento Básico Configurar Data /Hora 1. Tocar em [ 2. Tocar em [ Time ]. Surge no ecrã o menu de configuração de data/hora. Configurar a Data 1. Tocar em [ Date ]. 2. Tocar na informação sobre a data presente no ecrã; surge um submenu. 3.
  • Página 130: Modo De Rádio

    Modo de Rádio Configurar o ecrã TFT 1. Toque para aceder ao menu e selecionar uma nova fonte de reprodução 2. AF: Indicador de frequência alternativa 3. TA: indicador Informações sobre o trânsito 4. Indicador da distância de difusão do sinal 5.
  • Página 131: Estação Predefinida

    Modo de Rádio Estação Predefinida A unidade tem 5 bandas, por exemplo FM1, FM2, FM3, AM1, AM2, e cada banda permite memorizar 6 estações; pelo que a unidade permite memorizar um total de 30 estações. Introdução/Busca Pressionar [ ] para introdução. Cada estação memorizada toca automaticamente durante 5 segundos.
  • Página 132: Função Pty

    Modo de Rádio RDS ( Radio Data System ) A unidade inclui funções básicas de RDS. Função AF As Listas de Frequências Alternativas são usadas para o mesmo programa e em conjugação com o código PI (Program Identification code) para facilitar a sintonização automática. Ao usar esta informação, um rádio pode procurar automaticamente outra estação que esteja a emitir o mesmo material.
  • Página 133: Modo De Reprodução

    Modo de Reprodução Inserir um Disco É possível reproduzir vídeos, áudio ou imagens armazenadas nos seguintes discos: vídeo DVD, DVD-R, DVD-RW • VCD • Áudio CD, CD-R, CD-RW Nota: É importante verificar se o disco contém conteúdos que possam ser reproduzidos. Ejetar um Disco Pressionar[ ] no painel frontal ou no controlo remoto para ejetar...
  • Página 134: Procurar Uma Pasta

    Modo de Reprodução Play/Pausa 1. Após a inserção de um disco, USB ou cartão SD/MMC, a reprodução inicia-se automaticamente. No caso de um filme em DVD, após a visualização do menu, pressionar [ ] para iniciar a reprodução. 2. Para parar, tocar em [ Para retomar a reprodução, tocar em [ 3.
  • Página 135: Reprodução Aleatória

    Modo de Reprodução Ficheiros CD/MP3/WMA: 1. Tocar em qualquer zona do ecrã exceto no canto superior esquerdo para visualizar o menu, se necessário. 2. Tocar em [ ] repetidamente: ] Repetir uma vez: Reproduzir novamente a música actual. ] Repetir tudo: Reproduzir novamente todo o disco. ] Repetir pasta: Reproduzir toda a atual pasta.
  • Página 136: Informação De Reprodução

    Modo de Reprodução Configurar Vídeo Tocar em [ ] para aceder ao modo de configuração vídeo, tocar em [ ] ou em [ ] para definir o efeito desejado. É possível definir o brilho, o contraste e a saturação de cor (variação 0 a 16) ] Brilho: variação entre 0 e 16.
  • Página 137: Modo De Pesquisa

    Ligação iPod/iPhone Esta unidade suporta apenas os seguintes modelos de iPod / iPhone: · iPhone 5 · iPod touch (5ª geração) · iPhone 5S · iPod touch (4ª geração) · iPhone 5C · iPod classic · iPhone 4S · iPod nano (7ª geração) ·...
  • Página 138: Repetir A Reprodução

    Ligação iPod/iPhone Modo de Pausa Reprodução de vídeo iPod 1. Toque no botão [ ] para pausar a leitura do Para reproduzir o vídeo de iPod, toque arquivo. no canto superior esquerdo da tela, e em E no botão [ ] para [ ] . seguida, selecione um arquivo de vídeo.
  • Página 139: Modo Bluetooth

    Modo Bluetooth É possível fazer ou receber chamadas por Bluetooth através da unidade. É igualmente possível ouvir música a partir de um dispositivo equipado com Bluetooth. Emparelhar dispositivos com Bluetooth Para ligar um dispositivo com Bluetooth à unidade, é necessário emparelhar o dispositivo e a unidade.
  • Página 140: Atender Uma Chamada

    Modo Bluetooth Atender uma Chamada Por predefinição, todas as chamadas são automaticamente recebidas. 1. Se entrar uma chamada, aparece a indicação “Incoming” no ecrã. 2. É possível tocar no ecrã para selecionar [ Hang up ] ou [ Answer ]. Falar para o microfone Bluetooth.
  • Página 141: Visualizar O Sistema

    Configurações Visualizar o Sistema 1. Tocar no canto superior esquerdo para visualizar o menu principal. 2. Tocar em [ Settings ]. O menu de configurações torna-se visível. Configurações Gerais 1. Tocar em [ General ], se necessário. 2. Tocar para selecionar uma configuração. 3.
  • Página 142: Configurar Som

    Configurações Configurar Som 1. Tocar em [Sound]. 2. Tocar numa opção repetidamente para a selecionar. 3. Tocar no canto superior esquerdo do ecrã para sair. Configurar Som Opções Opções Flat 80Hz Sub Woofer Filter Tocar para selecionar a frequência de crossover. 120Hz 160Hz Sempre que estiver a ouvir música num volume baixo, esta característica vai...
  • Página 143: Configurar Volume

    Configurações Configurar Volume É possível configurar diferentes volumes para diferentes modos. 1. Tocar em [Volume]. É exibido o submenu de configuração do volume. 2. Tocar numa fonte. ∙ [Media] ∙ [Radio] ∙ [Bluetooth] ∙ [AV-IN1] ∙ [AV-IN2] 3. Tocar em [ ] ou [ ] para atribuir um valor: 0 a 12.
  • Página 144: Outros Modos

    Outros Modos Ouvir Outros Dispositivos YA unidade pode ser ligada a um dispositivo áudio/vídeo externo. 1. Ligar o dispositivo externo com o cabo AV fornecido. 2. Tocar no canto superior esquerdo para visualizar o menu principal. 3. Tocar em [AV-IN 2] para aceder ao dispositivo dianteiro auxiliar. Tocar em [AV-IN 1] para aceder ao dispositivo traseiro auxiliar.
  • Página 145 Especificações Geral Tensão de Alimentação de Referência ...............12V(DC) Amplitude de Tensão de Funcionamento............10.5 - 15.8V(DC) Corrente Máxima de Funcionamento..................15A Ligação à Terra..............Pólo Negativo da Bateria do Carro Dimensões (LxAxC)..................178X100X166,8 mm Peso (unidade principal)....................1,9kg Relação Sinal Ruído .....................≥55dB Sensibilidade ao Ruído Residual (S/R=30dB).............. 18dBìV Frequência de Resposta (±3dB)...............20Hz~12.5KHz Nível de Pesquisa de Estações................
  • Página 146: Especificações

    Especificações Supported Formats: ·USB ou formato de ficheiro de memória: FAT16, FAT32 ·Débito de bits Mp3 (taxa de débito de dados): 32-320 Kbps e débito variável de bits ·WMA v9 ou anterior ·Directório que pode alojar até 8 níveis ·Número de álbuns/pastas: máximo 99 ·Números de faixas/títulos: máximo 999 ·ID3 tag v2.0 ou posterior ·Nome do ficheiro em Unicode UTF8 (máximo:128 bytes)
  • Página 147: Resolução De Problemas

    Resolução de Problemas O que parece ser um problema nem sempre é grave. Por favor verifique os seguintes pontos antes de recorrer à assistência. Problema Possível causa Solução Geral Fusível da unidade queimado. Instalar novo fusível com a amperagem certa. A unidade não liga Fusível da bateria do veículo queimado.
  • Página 148: Instalação

    Instalação Desligar a Bateria Para evitar um curto-circuito, desligue a ignição e retire o cabo do pólo negativo (-) da bateria antes da instalação. Nota: Se a unidade se destinar a um veículo equipado com sistema de navegação, não desligue o cabo da bateria.
  • Página 149: Utilizar A Moldura

    Instalação Utilizar a Moldura A embalagem da unidade inclui uma moldura para maior flexibilidade de instalação. A moldura encaixa na maioria dos tabliers, exigindo muito poucas ou nenhumas modificações. Alguns tabliers norte-americanos permitem um módulo Double-DIN, mas é normal existir um pequeno espaço entre o rádio e o tablier após a conclusão da instalação.
  • Página 150 Ligações YELLOW VIDEO OUT Rear display WHITE YELLOW WHITE BLACK WHITE BLUE SUB OUT TEL . MUTE CAMERA IN YELLOW...
  • Página 151: Safety Precautions

    Safety Precautions Thank you for purchasing this product. P l e a s e d o n ' t c h a n g e t h e f u s e o n Please read through these operating the power cord without professional instructions so you will know how to guidance, using improper fuse may operate your model properly.
  • Página 152: Expanding Systems

    Safety Precautions 1. Never disassemble or adjust the unit without any professional guidance. For details, please consult any professional car shop / dealer for inquiry. 2. If the front panel or TFT monitor is dirty, please use a clean silicone cloth and neutral detergent to wipe off the spot.
  • Página 153 Contents Safety Precautions .......149 Previous/Next ........162 Search for a Folder ......162 Before Using .........152 Repeat ..........162 Front Panel .........152 Repeat A-B .........162 Remote Control........153 Shuffle (Random) Play......162 Notes on Remote Control Usage ..154 Select Audio Mode......162 Uninstall Battery........154 Select Subtitle Language ....163 Install Battery ........154 Video Setup ........163 Basic Operations ........155...
  • Página 154: Before Using

    Before Using Front Panel Notice: The graphic in this manual is for reference only, and may be different from the actual unit. Reference to actual unit is suggested. 1. [ ] Button Open front panel button combination. 2. [ ] Button Press to eject a disc.
  • Página 155: Remote Control

    Before Using Remote Control 1. Select playing mode 2. Eject the disc 3. Enter the main menu of the disc EJECT 4. Enter the title menu of the disc 5. Zoom in /out on an image 6. Select radio band 7.
  • Página 156: Notes On Remote Control Usage

    Before Using Notes on Remote Control Usage 1. Aim the remote control at the remote sensor on the unit. 2. Replace the battery from the remote control or insert a battery insulator if the battery has not been used for a month or longer. 3.
  • Página 157: Basic Operations

    Basic Operations Touch Screen Controls Playing Source Selection The touch key areas for DVD playback are Press the [ MENU ] button on the front outlined below: panel to change between available playing sources. The playing mode is displayed on A: Return to the main menu B: Play the video and display playback the screen.
  • Página 158: Select Preset Equalizer

    Basic Operations Select Preset Equalizer Adjust Fader/Balance 1. Enter the EQ setup mode You can adjust front/back/left/right balance of the speaker and the subwoofer volume to Touch the [ ] icon in the user interface get balanced listening effect according to the and the EQ setup interface will display on surroundings and your interest.
  • Página 159: Set Date /Time

    Basic Operations Set Date /Time · Set Time 1. Touch [ Time ]. 1. Touch [ 2. Touch the time on the screen, a submenu 2. Touch [ Time ]. is displayed. The date/time setup menu is displayed. 3. Touch [ ] or [ ] to set hour and minute.
  • Página 160: Radio Mode

    Radio Mode Tuner TFT Display Select Radio as Playing Source Open the Source Menu and then touch [Radio]. Select One Radio Band Press the [BAND] key on remote control or touch the [ ] icon on the user interface to select one radio band among FM1, FM2, FM3, AM1 and AM2.
  • Página 161: Local Seeking

    Radio Mode Intro/Scan RDS Basics Press the [ ] icon to intro. Each stored RDS transmits data to the radio which station will play for 5 seconds automatically. displays information such as name station, Hold down the [ ] icon to scan. Only song artist, and song title.
  • Página 162: Ta Function

    Radio Mode PTY Function Note: PTY is an abbreviation for the type of program • During auto switching radio frequency, defined by a code to define the program being some interference may be heard. broadcast (eg news or Rock). • Turning off AF function can settle this The Options of PTY is displayed on the screen.
  • Página 163: Playback Mode

    Playback Mode Load a Disc Connect a USB Device 1. Open the USB door. You can play video, audio or images stored 2. Insert the USB device to the connector. on the following discs: • DVD Video, DVD-R, DVD-RW Remove a USB Device •...
  • Página 164: Shuffle (Random) Play

    Playback Mode ] Repeat single: Play the current single repeatedly. ] Repeat all: Play all in the all repeatedly. Repeat off: Cancel repeat play. For CD/MP3/WMA files: 1. Touch anywhere except the upper left corner to display menu on the screen, if Previous/Next necessary.
  • Página 165: Playback Information

    Playback Mode For VCD screen to display menu on the screen, if necessary. 1. Disc type. 2. Touch [ ] to display the 2nd menu. 2. VCD Track information. “1/8” indicates Touch [ ] repeatedly until the audio that this VCD has 8 tracks and the track mode is selected.
  • Página 166: Ipod/Iphone Operations

    iPod/iPhone Operations This unit supports only the following iPod/iPhone models: · iPhone 5 · iPhone 5S · iPhone 5C · iPhone 4S · iPhone 4 · iPod touch (5th generation) · iPod touch (4th generation) · iPod classic · iPod nano (7th generation) ·...
  • Página 167 iPod/iPhone Operations 3. Touch to select a category, the contents of [Repeat]: the category are displayed. Touch [ ] or - Repeat off ] to browse. - Repeat One 4. Touch an option to select it. - Repeat All Pausing play iPod video playback 1.
  • Página 168: Bluetooth Mode

    Bluetooth Mode Disconnect Bluetooth Device You can make or receive phone calls with Bluetooth-enabled phones through the To disconnect one device, touch [ unit. You can also listen to music from a Bluetooth-enabled device. Pair the Bluetooth-enabled Devices To connect your Bluetooth device to the unit, you need to pair the device to the unit.
  • Página 169: Adjust Bluetooth Settings

    Bluetooth Mode connect” function. ∙ [Auto Answer]: To turn on or off “Auto answer” function. ∙ [Pair Password]: To set paring code. ∙ [Phone Book]: To synchronize phone book, touch [ Download ] on the sub-menu popped out. Phonebook sync may take several minutes to load on initial setup.
  • Página 170: Settings

    Settings Display System 1. Touch the upper left corner to display main menu. 2. Touch [ Settings ]. The settings menu is displayed. Adjust General Settings 1. Touch [ General ], if necessary. 2. Touch to select a setting. 3. Touch on the option to display/select an option. 4.
  • Página 171: Adjust Sound Settings

    Settings Adjust Sound Settings 1. Touch [Sound]. 2. Touch an option repeatedly to select. 3. Touch the upper left corner of the screen to exit. Sound settings Options Description Flat 80Hz Sub Woofer Filter Touch to select a crossover frequency. 120Hz 160Hz When listening to music at low volumes, this feature will selectively boost certain...
  • Página 172: Adjust Volume Settings

    Settings Adjust Volume Settings You can set different volume for different modes. 1. Touch [Volume]. The volume setting sub-menu is displayed. 2. Touch on a source. ∙ [Media] ∙ [Radio] ∙ [Bluetooth] ∙ [AV-IN1] ∙ [AV-IN2] 3. Touch [ ] or [ ] to assign value: 0 to 12.
  • Página 173: Other Modes

    Other Modes Listen to Other Devices Steering Wheel Control Programming You can connect an external audio/video device to the unit. 1. Touch the upper left corner to display 1. Connect the external device with the home menu. supplied AV cable. 2.
  • Página 174: Specifications

    Specifications General Reference Supply Voltage ..............12V(DC) Operating Voltage Range ............10.5 - 15.8V(DC) Grounding System ............ Car Battery Negative Pole Dimensions(WXHXD) ............178X100X166.8mm Weight(main unit) ..................2.0kg Signal Noise Ratio ................≥55dB Residual Noise Sensitivity (S/N=30dB) ..........18dBμV Frequency Response (±3dB) ............20Hz~7KHz Station Seeking Level ..............
  • Página 175: Region Code

    Specifications Supported Formats: ·USB or memory file format: FAT16, FAT32 ·Mp3 bit rate(date rate): 32-320 Kbps and variable bit rate ·WMA v9 or earlier ·Directory nesting up to a maximum of 8 levels ·Number of albums/folders: maximum 99 ·Number of tracks/titles: maximum 999 ·ID3 tag v2.0 or later ·File name in Unicode UTF8(maximum length:128 bytes) Unsupported Formates:...
  • Página 176: Troubleshooting

    Troubleshooting What appears to be trouble is not always serious. Please check the following points before calling a service center. Problem Cause Corrective action General Unit fuse blown. Install new fuse with correct rating. Unit can not power on Car battery fuse blown. Install new fuse with correct rating.
  • Página 177: Installation

    Installation Disconnecting the Battery To prevent a short circuit, be sure to turn off the ignition and remove the negative (-) battery cable prior to installation. Note: If the unit is to be installed in a car equipped with an on-board drive or navigation computer, do not disconnect the battery cable.
  • Página 178 Installation Using the Cosmetic Trim Ring One cosmetic trim rings is packaged with the head unit for installation flexibility. This unit will fit into most import dashes with little or no modification to the dash board/cavity. Some US domestic vehicle dashes will accept a Double-DIN chassis, but there is usually a small gap between the radio and dash piece after installation is complete.
  • Página 179: Wire Connections

    Wire Connections YELLOW VIDEO OUT Rear display WHITE YELLOW WHITE BLACK WHITE BLUE SUB OUT TEL . MUTE CAMERA IN YELLOW...
  • Página 180 Noroto España SAU Centre Comercial Alban Carretera de Ademuz km 2,9 46100 BURJASSOT Norauto Italia SPA Corso Savona 85/10024 MONCALIERI Norauto Portugal LDA Av. dos Cavaleiros, n°49 Alfragide 2794-057 CARNAXIDE Norauto Romania nr.7, corp Z, et.1, Sector 6, Bucuresti, 061072 Norauto Polska SP Z.O.O.

Este manual también es adecuado para:

937133

Tabla de contenido