Tabla de contenido
Publicidad
Idiomas disponibles
Idiomas disponibles
Enlaces rápidos
Cosmic Beam
Heizstrahler
Patio Heater
Radiador
Radiateur
Radiatore
10033698 10033699 10033700
Hinweis: Dieses Produkt ist nur für
gut isolierte Räume oder für den
gelegentlichen Gebrauch geeignet.
Note: This product is only suitable for
well insulated spaces or occasional use.
Advertencia: Este producto está
indicado únicamente en lugares
abrigados o para una utilización punctual.
Remarque : Ce produit ne peut être
utilisé que dans des locaux bien isolés ou
de manière occasionnelle.
Nota: Questo prodotto è adatto solo per
spazi ben isolati o uso occasionale.
Publicidad
Capítulos
Tabla de contenido

Manuales relacionados para Blumfeldt Cosmic Beam Serie


Resumen de contenidos para Blumfeldt Cosmic Beam Serie
- Página 1 Cosmic Beam Hinweis: Dieses Produkt ist nur für gut isolierte Räume oder für den gelegentlichen Gebrauch geeignet. Heizstrahler Note: This product is only suitable for well insulated spaces or occasional use. Patio Heater Advertencia: Este producto está Radiador indicado únicamente en lugares abrigados o para una utilización punctual.
-
Página 3: Tabla De Contenido
Sehr geehrter Kunde, wir gratulieren Ihnen zum Erwerb Ihres Gerätes. Lesen Sie die folgenden Hinweise sorgfältig durch und befolgen Sie diese, um möglichen Schäden vorzubeugen. Für Schäden, die durch Missachtung der Hinweise und unsachgemäßen Gebrauch entstehen, übernehmen wir keine Haftung. Scannen Sie den folgenden QR-Code, um Zugriff auf die aktuellste Bedienungsanleitung und weitere Informationen rund um das Produkt zu erhalten: INHALTSVERZEICHNIS... -
Página 4: Sicherheitshinweise
SICHERHEITSHINWEISE • Lesen Sie alle Anweisungen, bevor Sie dieses Gerät benutzen. • Lassen Sie das Gerät nicht unbeaufsichtigt, wenn es in Betrieb ist. • Diese Heizung wird während der Benutzung heiß. Berühren Sie nicht die heißen Oberfl ächen. VORSICHT Verbrennungsgefahr! Einige Teile dieses Produktes können sehr heiß... - Página 5 • Fassen Sie das Heizelement nicht mit bloßen Händen an. Wenn es versehentlich berührt wird, entfernen Sie Fingerabdrücke mit einem weichen Tuch, da sich diese sonst in das Element einbrennen und einen vorzeitigen Ausfall der Heizung verursachen. • Ersetzen Sie das Heizelement nicht oder versuchen Sie nicht, es zu entfernen.
-
Página 6: Geräteübersicht
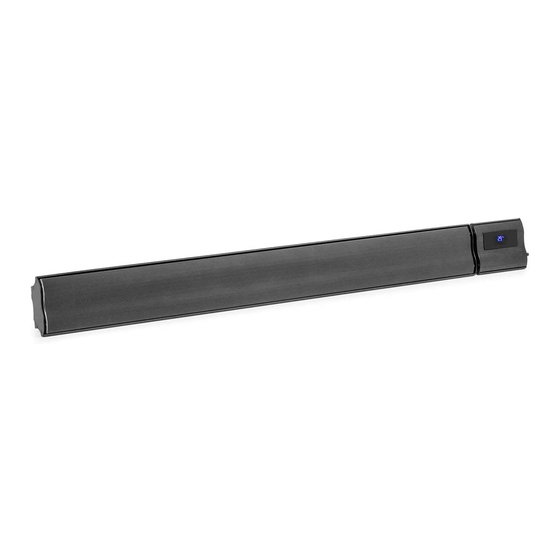
GERÄTEÜBERSICHT Heizelemente Steuerkasten Gehäuse Abmessungen: Modell Leistung Länge Breite Höhe Cosmic Beam Plus 2400 W 1540 mm 150 mm 65 mm Cosmic Beam Plus XXL 3000 W 1840 mm 150 mm 65 mm Fernbedienung SWITCH DISPLAY EIN/AUS-Taste AUF/AB-Tasten HOCH/NIEDRIG-Taste (Heizstufe) SWITCH-Taste (Umschalten) SET-Taste (Einstellungen) DISPLAY-Taste... -
Página 7: Installation
INSTALLATION Modell Länge 1 Länge 2 Cosmic Beam Plus 1307 mm 1540 mm Cosmic Beam Plus XXL 1607 mm 1840 mm Schritt 1: Bringen Sie, wie in Abbildung A dargestellt, zwei der Montagehalterungen mit Schrauben am oberen Teil des Gerätes an. Schritt 2: Bringen Sie, wie in Abbildung B dargestellt, zwei der Montagehalterungen mit Schrauben an der Decke oder der Wand an. - Página 8 1. Deckeninstallation: Der Abstand vom Gerät zu den umliegenden Wänden sollte, wie in Abbildung 1 dargestellt, mindestens 200 mm betragen. 2. Zweifach-Deckeninstallation: Zwei Geräte werden, wie in Abbildung 2 dargestellt, über einen an der Decke fixierten Verbindungsrahmen miteinander verbunden. Hinweis: Die zur Zweifach-Installation benötigten Teile sind nicht im Lieferumfang enthalten und müssen separat gekauft werden.
- Página 9 3. Für Geräte, die an der Wand angebracht werden: Wie in Abbildung 3 gezeigt, muss der Abstand zum Boden mindestens 220 cm betragen. Der Mindestabstand zur Decke sollte bei 20 cm liegen. Decke ≥ 200 mm Wand ≥ 200 mm Boden 4. Installationserweiterung: Die Geräteerweiterungen werden wie in Abbildung 4 gezeigt, an der Decke eingehakt und hängen herunter.
-
Página 10: Bedienung
Hinweis: Die zur Installationserweiterung benötigten Teile sind nicht im Lieferumfang enthalten und müssen separat gekauft werden. BEDIENUNG Bitte lesen Sie diese Bedienungsanleitung vor dem ersten Gebrauch des Geräts sorgfältig durch. • Nehmen Sie das Heizgerät vorsichtig aus dem Karton. Bitte heben Sie den Karton auf, da Sie das Gerät in den warmen Jahreszeiten darin lagern können. - Página 11 Bildschirm an- und ausschalten Display • Wenn Sie die DISPLAY-Taste drücken, schaltet sich der Bildschirm aus, die Kontrollleuchte bleibt aber an. • Drücken Sie erneut die DISPLAY-Taste , um den Bildschirm wieder Display einzuschalten. Temperatureinstellung • Drücken Sie zunächst die SET-Taste und dann die AUF-Taste oder AB-Taste , um die Temperatur einzustellen.
-
Página 12: Reinigung Und Pflege
VORSICHT Gefahr einer Verbrennung! Das Heizgerät heizt sich stark auf, wenn es in Gebrauch ist. Berühren Sie die Oberfl äche nicht, um Verbrennungen zu vermeiden. Wartung und Reparatur Wenn Sie eine Wartung oder Reparatur des Geräts benötigen, kontaktieren Sie bitte den Kundendienst oder hierfür qualifi ziertes Fachpersonal. Austausch des Stromkabels Wenn das Netzkabel beschädigt ist, muss es vom Hersteller oder einer qualifi zierten Fachkraft ersetzt werden, um eine Gefährdung zu vermeiden. -
Página 13: Hinweise Zur Entsorgung
HINWEISE ZUR ENTSORGUNG Befindet sich die linke Abbildung (durchgestrichene Mülltonne auf Rädern) auf dem Produkt, gilt die Europäische Richtlinie 2012/19/EU. Diese Produkte dürfen nicht mit dem normalen Hausmüll entsorgt werden. Informieren Sie sich über die örtlichen Regelungen zur getrennten Sammlung elektrischer und elektronischer Gerätschaften. -
Página 14: Produktdatenblatt
PRODUKTDATENBLATT Modellkennung(en) 10033698 10033699 Angabe Symbol Wert Einheit Angabe Einheit Wärmeleistung Nur bei elektrischen Speicher-Einzelraumheizgeräten: Art der Regelung der Wärmezufuhr Nennwärmeleistung Manuelle Regelung der Wärmezufuhr mit nein integriertem Thermostat Mindestwärmeleistung Manuelle Regelung der Wärmezufuhr nein (Richtwert) mit Rückmeldung der Raum- und/oder Außentemperatur Maximale Elektronische Regelung der Wärmezufuhr... - Página 15 PRODUKTDATENBLATT Modellkennung(en) 10033700 Angabe Symbol Wert Einheit Angabe Einheit Wärmeleistung Nur bei elektrischen Speicher-Einzelraumheizgeräten: Art der Regelung der Wärmezufuhr Nennwärmeleistung Manuelle Regelung der Wärmezufuhr mit nein integriertem Thermostat Mindestwärmeleistung Manuelle Regelung der Wärmezufuhr nein (Richtwert) mit Rückmeldung der Raum- und/oder Außentemperatur Maximale Elektronische Regelung der Wärmezufuhr...
-
Página 17: Technical Data
Dear Customer, Congratulations on purchasing this equipment. Please read this manual carefully and take care of the following hints to avoid damages. Any failure caused by ignoring the items and cautions mentioned in the instruction manual is not covered by our warranty and any liability. Scan the QR code to get access to the latest user manual and other information about the product: CONTENT... -
Página 18: Safety Instructions
SAFETY INSTRUCTIONS • Read all instructions before using this unit. • Do not leave this unit unattended when in use. • This heater will get hot when in use. Do not touch hot surfaces. CAUTION Risk of burns! Some parts of this product can become very hot and cause burns. - Página 19 • Do not handle the element with bare hands. If it is inadvertently touched, remove finger marks with a soft cloth and methylated spirits or alcohol, otherwise the marks will burn into the element causing premature heater failure. • Do not replace or attempt to replace the element in this product. •...
-
Página 20: Device Overview
DEVICE OVERVIEW Heating Plate Control Box Out Covering Dimensions: Modell Power Length Width Height Cosmic Beam Plus 2400 W 1540 mm 150 mm 65 mm Cosmic Beam Plus XXL 3000 W 1840 mm 150 mm 65 mm Remote Control SWITCH DISPLAY ON/OFF button UP/DOWN button... -
Página 21: Installation
INSTALLATION Modell Length 1 Length 2 Cosmic Beam Plus 1307 mm 1540 mm Cosmic Beam Plus XXL 1607 mm 1840 mm Step 1: Use the screws to install two of the mounting brackets to the top part of the appliance, as shown in figure A. Step 2: Use the screws to install two of the mounting brackets on the wall or ceiling, as shown in figure B. -
Página 22: Ceiling Installation
1. Ceiling installation: The distance from the electrical appliance to the surrounding walls should be at least 200 mm, as shown in figure 1. 2. Double hanging ceiling installation: Two electrical appliances are connected through a connecting frame installed on the ceiling, as shown in Figure 2. Note: The parts required for double installation are not included and must be purchased separately. - Página 23 3. Wall mounted appliances: As shown in Figure 3, the distance to the floor must be at least 220 cm. The minimum distance to the ceiling should be 20 cm. Ceiling ≥ 200 mm Wall ≥ 200 mm Floor 4. Extended installation: The slings will be hooked in and are hanging from the ceiling, as shown in figure 4.
-
Página 24: Operation
Note: The parts required for the installation extension are not included and must be purchased separately. OPERATION Before first use, please read this manual thoroughly. • Take out the heater from the carton carefully. Please save the carton for off-season storage, •... -
Página 25: Temperature Setting
Temperature setting • First press the SET button , than press the UP button or the DOWN button , to adjust the temperature. Each time the button is pressed, the temperature is increased or decreased by 1 °C. • The maximum temperature setting is 45 °C and the minimum temperature setting is 5 °C. -
Página 26: Cleaning And Care
Maintenance and repair If you require maintenance or repair of the appliance, please contact customer service or qualified personnel. Replacement of power cord If the power cord is damaged, it must be replaced by the manufacturer or a qualified technician in order to prevent a hazard. Child supervision Do not leave children and infirm persons unattended when operating the appliance. -
Página 27: Hints On Disposal
HINTS ON DISPOSAL According to the European waste regulation 2012/19/EU this symbol on the product or on its packaging indicates that this product may not be treated as household waste. Instead it should be taken to the appropriate collection point for the recycling of electrical and electronic equipment. -
Página 28: Product Data Sheet
PRODUCT DATA SHEET Model identifier(s): 10033698 10033699 Unit Item Symbol Value Unit Item Heat output Type of heat input, for electric storage local space heaters only Nominal heat output manual heat charge control, with integrated thermostat Minimum heat output manual heat charge control with room and/ or outdoor temperature feedback (indicative) Maximum continuous... - Página 29 PRODUCT DATA SHEET Model identifier(s): 10033700 Unit Item Symbol Value Unit Item Heat output Type of heat input, for electric storage local space heaters only Nominal heat output manual heat charge control, with integrated thermostat Minimum heat output manual heat charge control with room and/ (indicative) or outdoor temperature feedback Maximum continuous...
-
Página 31: Datos Técnicos
Estimado cliente, Le felicitamos por la adquisición de este producto. Lea atentamente las siguientes instrucciones y sígalas para evitar posibles daños. No asumimos ninguna responsabilidad por los daños causados por el incumplimiento de las instrucciones y el uso inadecuado. Escanee el siguiente código QR para obtener acceso a la última guía del usuario y más información sobre el producto: ÍNDICE... -
Página 32: Indicaciones De Seguridad
INDICACIONES DE SEGURIDAD • Lea atentamente estas indicaciones antes de utilizar este aparato. • No deje el aparato en marcha si no se encuentra bajo supervisión. • Este radiador alcanza temperaturas muy elevadas durante su uso. No toque las superfi cies calientes. ATENCIÓN Existe riesgo de quemaduras. - Página 33 • No toque la resistencia con las manos mojadas. Si se ha tocado por accidente, retire las manchas de dedos con un paño suave; de lo contrario, estas se quedarán marcadas en la resistencia y provocarán una merma anticipada del radiador. •...
-
Página 34: Visión General Del Aparato
VISIÓN GENERAL DEL APARATO Elementos calefactores Caja de control Carcasa Dimensiones: Modelo Potencia Largo Ancho Alto Cosmic Beam Plus 2400 W 1540 mm 150 mm 65 mm Cosmic Beam Plus XXL 3000 W 1840 mm 150 mm 65 mm Mando a distancia SWITCH DISPLAY Botón ON/OFF... -
Página 35: Instalación
INSTALACIÓN Modelo Longitud 1 Longitud 2 Cosmic Beam Plus 1307 mm 1540 mm Cosmic Beam Plus XXL 1607 mm 1840 mm Paso 1: Como se indica en la ilustración A, monte los dos soportes de montaje en la parte superior del aparato utilizando tornillos. Paso 2: Como se indica en la ilustración B, monte los dos soportes de montaje en el techo o pared utilizando tornillos. -
Página 36: Instalación En Techo
1. Instalación en techo: La distancia desde el aparato a las paredes colindantes debe ser como mínimo de 200 mm tal y como se indica en la ilustración 1. 2. Instalación doble en techo: Dos aparatos se unen entre sí mediante un marco de conexión fijado al techo, tal y como se representa en la ilustración 2. - Página 37 Para montar el aparato en pared: Como se muestra en la ilustración 3, la distancia hacia el suelo debe ser como mínimo de 220 cm. La distancia mínima hacia el techo debe ser de 20 cm. Techo ≥ 200 mm Pared ≥ ...
- Página 38 Nota: Las piezas necesarias para la ampliación no están incluidas en el envío y deben adquirirse por separado. MANEJO Lea atentamente este manual de instrucciones antes del primer uso del aparato. • Retire el calefactor de la caja de cartón con cuidado. Conserve la caja para guardar el aparato en la época cálida del año.
- Página 39 Apagar y encender pantalla Display • Si pulsa el botón DISPLAY se apaga la pantalla pero el indicador luminoso permanece encendido. Display • Pulse de nuevo el botón DISPLAY para encender la pantalla. Configuración de temperatura • Pulse primero el botón SET y a continuación el botón ARRIBA o ABAJO para regular la temperatura.
-
Página 40: Limpieza Y Cuidado
ATENCIÓN Riesgo de quemaduras. El calefactor se calienta mucho cuando está en funcionamiento. No toque las superfi cies para evitar quemaduras. Reparación y mantenimiento Si el aparato necesita mantenimiento o reparación, contacte con el servicio de atención al cliente o con personal técnico especializado. Sustitución del cable de alimentación Si el cable de alimentación está... -
Página 41: Retirada Del Aparato
RETIRADA DEL APARATO Si el aparato lleva adherida la ilustración de la izquierda (el contenedor de basura tachado) entonces rige la normativa europea, directiva 2012/19/UE. Este producto no debe arrojarse a un contenedor de basura común. Infórmese sobre las leyes territoriales que regulan la recogida separada de aparatos eléctricos y electrónicos. -
Página 42: Hoja De Datos Del Producto
HOJA DE DATOS DEL PRODUCTO Denominación del modelo 10033698 10033699 Dato Símbolo Valor Unidad Dato Unidad Potencia térmica Solo con dispositivos de acumulación de calor eléctricos para abastecimiento local: Tipo de regulación del abastecimiento de calor Potencia térmica nominal Regulación manual del abastecimiento de calor con termostato integrado: Potencia térmica mínima Regulación manual de abastecimiento de... - Página 43 HOJA DE DATOS DEL PRODUCTO Denominación del modelo 10033700 Dato Símbolo Valor Unidad Dato Unidad Potencia térmica Solo con disposítivos de acumulación de calor eléctricos para abastecimiento local: Tipo de regulación del abastecimiento de calor Potencia térmica nominal Regulación manual del abastecimiento de calor con termostato integrado: Potencia térmica mínima Regulación manual de abastecimiento de...
-
Página 45: Fiche Technique
Chère cliente, cher client, Toutes nos félicitations pour l’acquisition de ce nouvel appareil. Veuillez lire attentivement les instructions suivantes de branchement et d’utilisation afin d’éviter d’éventuels dommages. Le fabricant ne saurait être tenu pour responsable des dommages dus au non-respect des consignes de sécurité... -
Página 46: Consignes De Sécurité
CONSIGNES DE SÉCURITÉ • Lisez toutes les instructions avant d’utiliser cet appareil. • Ne laissez pas l’appareil en fonctionnement sans surveillance. • Ce radiateur devient très chaud pendant le fonctionnement. Ne touchez pas les surfaces chaudes. ATTENTION Risque de brûlure ! Certaines parties de ce produit peuvent devenir très chaudes et causer des brûlures. - Página 47 • Ne touchez pas l’élément chauffant à mains nues. Si vous le touchez accidentellement, effacez les empreintes digitales avec un chiffon doux, sinon elles risquent de brûler dans l’élément et de provoquer une défaillance prématurée du radiateur. • Ne remplacez pas ou n’essayez pas de retirer l’élément chauffant. •...
-
Página 48: Aperçu De L'appareil
APERÇU DE L’APPAREIL Éléments chauffants Boîtier de commande Boîtier Dimensions : Modèle Puissance Longueur Largeur Hauteur Cosmic Beam Plus 2400 W 1540 mm 150 mm 65 mm Cosmic Beam Plus XXL 3000 W 1840 mm 150 mm 65 mm Télécommande SWITCH DISPLAY Touche marche/arrêt... -
Página 49: Installation
INSTALLATION Modèle Longueur 1 Longueur 2 Cosmic Beam Plus 1307 mm 1540 mm Cosmic Beam Plus XXL 1607 mm 1840 mm Étape 1 : Fixez deux des supports de montage sur le dessus de l’appareil à l’aide de vis, comme indiqué à la Figure A. Étape 2 : Fixez deux des supports de montage au plafond ou au mur à... - Página 50 1. Installation au plafond : La distance entre l’appareil et les murs environnants doit être d’au moins 200 mm, comme le montre la figure 1. 2. Double installation au plafond : Deux appareils sont reliés entre eux grâce à un cadre fixé au plafond comme illustré...
- Página 51 3. Pour les appareils en installation murale : Comme le montre la figure 3, la distance au sol doit être d’au moins 220 cm. La distance minimale au plafond devrait être de 20 cm. Plafond ≥ 200 mm Muir ≥ 200 mm 4.
-
Página 52: Utilisation
Remarque : Les pièces nécessaires à l’extension d’installation ne sont pas incluses dans la livraison et doivent être achetées séparément. UTILISATION Veuillez lire attentivement ce mode d’emploi avant d’utiliser l’appareil pour la première fois. • Retirez délicatement le radiateur de son emballage. Veuillez conserver l’emballage pour y ranger l’appareil pendant la saison chaude. - Página 53 Pour allumer et éteindre l’écran Display • Lorsque vous appuyez sur la touche DISPLAY , l’écran s’éteint mais le voyant reste allumé. • Appuyez à nouveau sur la touche DISPLAY pour rallumer l’écran. Display Réglage de la température • Appuyez d’abord sur la touche SET puis sur la touche HAUT ou BAS pour régler la température.
-
Página 54: Entretien Et Réparation
ATTENTION: Risqué de brûlure ! Le radiateur devient très chaud lorsqu’il est en fonctionnement. Ne touchez pas la surface pour éviter les brûlures. Entretien et réparation Si l’appareil a besoin de maintenance ou de réparation, veuillez contacter le service clientèle ou un personnel de service qualifi é. Remplacement du câble d’alimentation Si le cordon d’alimentation est endommagé, il doit être remplacé... -
Página 55: Informations Sur Le Recyclage
INFORMATIONS SUR LE RECYCLAGE Vous trouverez sur le produit l’image ci-contre (une poubelle sur roues, barrée d‘une croix), ce qui indique que le produit se trouve soumis à la directive européenne 2012/19/UE. Renseignez-vous sur les dispositions en vigueur dans votre région concernant la collecte séparée des appareils électriques et électroniques. -
Página 56: Fiche De Données Produit
FICHE DE DONNÉES PRODUIT Référence (s) du produit 10033698 10033699 Donnée Symbole Valeur Unité Donnée Unité Puissance calorifique Uniquement pour les radiateurs électriques à accumulation : Type de régulation de l'apport de chaleur Puissance calorifique Régulation manuelle de l'apport de chaleur nominale avec thermostat intégré... - Página 57 FICHE DE DONNÉES PRODUIT Référence (s) du produit 10033700 Donnée Symbole Valeur Unité Donnée Unité Puissance calorifique Uniquement pour les radiateurs électriques à accumulation : Type de régulation de l'apport de chaleur Puissance calorifique Régulation manuelle de l'apport de chaleur nominale avec thermostat intégré...
- Página 59 Gentile cliente, La ringraziamo per aver acquistato il dispositivo. La preghiamo di leggere attentamente le seguenti istruzioni per l’uso e di seguirle per evitare possibili danni. Non ci assumiamo alcuna responsabilità per danni scaturiti da una mancata osservazione delle avvertenze di sicurezza e da un uso improprio del dispositivo.
-
Página 60: Avvertenze Di Sicurezza
AVVERTENZE DI SICUREZZA • Leggere tutto il manuale prima di utilizzare il dispositivo. • Non lasciare il dispositivo privo di controllo mentre è in funzione. • Questo radiatore diventa estremamente caldo mentre è in funzione. Non toccare le superfi ci bollenti. ATTENZIONE Pericolo di ustione! Alcuni componenti di questo prodotto possono diventare estremamente caldi e causare ustioni. - Página 61 • Non toccare l’elemento riscaldante a mani nude. Se viene toccato per sbaglio, rimuovere subito le impronte delle dita con un panno umido, altrimenti si imprimono nell’elemento e causano un guasto prematuro del radiatore. • Non sostituire l’elemento riscaldante e non cercare di rimuoverlo. •...
-
Página 62: Descrizione Del Dispositivo
DESCRIZIONE DEL DISPOSITIVO Elementi riscaldanti Scatola di controllo Alloggiamento Dimensioni: Modello Potenza Lunghezza Larghezza Altezza Cosmic Beam Plus 2400 W 1540 mm 150 mm 65 mm Cosmic Beam Plus XXL 3000 W 1840 mm 150 mm 65 mm Telecomando SWITCH DISPLAY Tasto ON/OFF Tasto SU/GIÙ... - Página 63 INSTALLAZIONE Modello Lunghezza 1 Lunghezza 2 Cosmic Beam Plus 1307 mm 1540 mm Cosmic Beam Plus XXL 1607 mm 1840 mm 1° passaggio: Montare due dei supporti di montaggio alla parte superiore del dispositivo con le viti, come indicato in immagine A. 2°...
-
Página 64: Montaggio A Soffitto
1. Montaggio a soffitto: La distanza tra dispositivo e pareti circostanti deve essere di almeno 200 mm, come indicato in immagine 1. 2. Doppio montaggio a soffitto: Due dispositivi vengono collegati l’uno all’altro e fissati al soffitto tramite un telaio di collegamento, come indicato in immagine 2. Nota: per il doppio montaggio a soffitto sono necessari componenti non inclusi in consegna e da acquistare separatamente. - Página 65 3. Per dispositivi che devono essere montati alla parete: La distanza dal pavimento deve essere di almeno 220 cm, come indicato in immagine 3. La distanza minima dal soffitto deve essere di 20 cm. Soffitto ≥ 200 mm Parete ≥ 200 mm Pavimento 4.
- Página 66 Nota: i componenti necessari all’installazione estesa non sono inclusi in consegna e devono essere acquistati separatamente. UTILIZZO Leggere attentamente il presente manuale prima del primo utilizzo. • Togliere il dispositivo dal cartone facendo attenzione. Conservare il cartone, in modo da potervi riporre il dispositivo durante la stagione calda. •...
- Página 67 Impostare la temperatura • Premere SET e poi SU o GIÙ per impostare la temperatura. Ogni volta che si preme uno dei tasti, la temperatura aumenta o diminuisce di 1 °C. • La massima temperatura impostabile è di 45 °C e quella minima di 5 °C.
-
Página 68: Manutenzione E Riparazioni
Manutenzione e riparazioni Se sono necessarie opere di manutenzione o riparazione, contattare il servizio di assistenza ai clienti o un tecnico qualificato. Sostituire il cavo di alimentazione Se il cavo è danneggiato, deve essere sostituito dal produttore o da un tecnico qualificato, in modo da evitare pericoli. -
Página 69: Smaltimento
SMALTIMENTO Se sul prodotto è presente la figura a sinistra (il cassonetto mobile sbarrato), si applica la direttiva europea 2012/19/UE. Questi prodotti non possono essere smaltiti con i rifiuti normali. Informarsi sulle disposizioni vigenti sulla raccolta separata di dispositivi elettrici ed elettronici. Non smaltire i vecchi dispositivi con i rifiuti domestici. -
Página 70: Scheda Informativa Del Prodotto
SCHEDA INFORMATIVA DEL PRODOTTO Identificazione del modello (i) 10033698 10033699 Indicazione Simbolo Valore Unità Indicazione Unità Potenza termica Solo per gli apparecchi per il riscaldamento d'ambiente locale elettrici ad accumulo: Tipo di controllo dell´apporto termico Potenza termica nominale Controllo manuale del carico termico con termostato integrato Potenza termica minima Controllo manuale del carico termico con... - Página 71 SCHEDA INFORMATIVA DEL PRODOTTO Identificazione del modello (i) 10033700 Indicazione Simbolo Valore Unità Indicazione Unità Potenza termica Solo per gli apparecchi per il riscaldamento d'ambiente locale elettrici ad accumulo: Tipo di controllo dell´apporto termico Potenza termica nominale Controllo manuale del carico termico con termostato integrato Potenza termica minima Controllo manuale del carico termico con...