Nuna Stokke PIPA Manual Del Usuario
Silla de auto
Tabla de contenido
Idiomas disponibles
Idiomas disponibles
Enlaces rápidos
Capítulos
Tabla de contenido

Manuales relacionados para Nuna Stokke PIPA


Resumen de contenidos para Nuna Stokke PIPA
-
Página 42: Objetos Incluidos
Objetos incluidos Stokke® PIPA™ by Nuna®... - Página 43 Parts list ....................52 Descripción de las funciones ..............54 Necesidades del niño ................56 Cambiar la posicióndel arnés ..............57 La seguridad del niño en un cargador .............61 Instrucciones sobre la instalación ............64 Limpieza y mantenimiento ..............81 Garantía y servicios ..................82 Stokke® PIPA™ by Nuna®...
-
Página 44: Informaciones
70 Thousand Oaks Blvd Morgantown, PA, 19543 o llame a 1-855-NUNA-USA (1-855-686-2872) o regístrese en línea a: nuna.eu/USA/product-registration-car-seat Informaciones de retirada Para informaciones de retirada, llame a la Línea de Ayuda para la Seguridad Vehicular del Gobierno de EE.UU. a 1-888-327-4236 (TTY: 1-800-424-9153) o vaya a http://www.NHTSA.gov... -
Página 45: Advertencia
• La parte superior sobre la cabeza del niño es de por lo menos 1’’ bajo la parte superior del cargador. • Use la inserción para bebés solamente si es necesaria para obtener un mejor ajuste. Stokke® PIPA™ by Nuna®... - Página 46 Verifique siempre la hebilla y otras piezas si hay superficies calientes. Un cargador expuesto al sol sin cubierta podría ocasionar quemaduras al niño. Cubra con una manta si lo deja en el coche. Stokke® PIPA™ by Nuna®...
- Página 47 No use el sistema de retención del niño si la base o el cargador se han averiado de alguna manera. Para averiguar si las piezas averia- das se pueden sustituir, llame a 1-855-686-2872 (Nuna). Remplace este sistema de retención del niño si ha sido involucrado en un accidente automovilístico, aunque no ha sido uno grave y...
-
Página 48: Riesgo De Caida
Este asiento del niño se puede instalar de manera adecuada en la mayoría de los vehículos. De todas maneras, hay algunos cinturo- nes de seguridad del vehículo y asientos de vehículo que no son seguros para el uso con este sistema de retención. Stokke® PIPA™ by Nuna®... - Página 49 Los cinturones de seguridad de 2 puntos en la parte inferior del asiento (justo en la intersección del cojín del asiento y el respaldo) no pueden usarse para instalar este asiento de seguridad para niño. Stokke® PIPA™ by Nuna®...
- Página 50 Instale este sistema de retención del niño solamente en asientos de vehículos orientados hacia adelante. Nunca instale en un asiento orientado hacia la parte trasera o hacia un lado del vehículo. Stokke® PIPA™ by Nuna®...
- Página 51 Ante cualquier duda, puede consultar tanto al fabricante como a su distribuidor. • La silla de coche Nuna® de Stokke® PIPA™ también es compatible con la base Nuna PIPA para aquellos que buscan la conveniencia de una base para cada vehículo. Para más información visita www.nuna.eu.
-
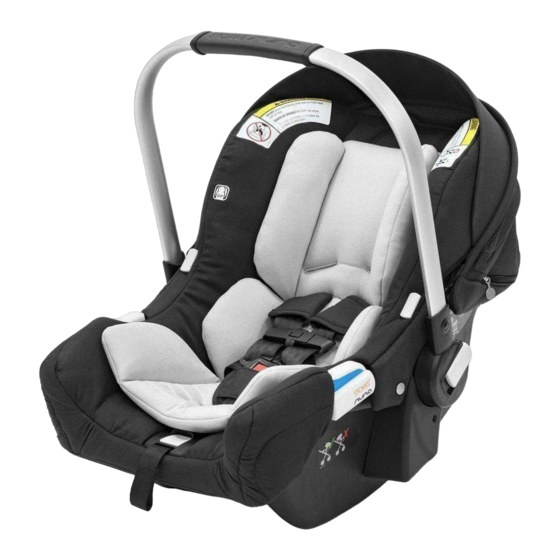
Página 52: Lista De Partes
Botones de desbloqueo (blanco) Inserción para bebés Hombreras Broche de pecho Cubierta del asiento Hebilla y cinturón de seguridad de Mango entrepierna Guía para el cinturón para hombro Botón ajustador (Blanco) Correa ajustadora Cubierta del arnés (red) Stokke® PIPA™ by Nuna®... - Página 53 Almacenamiento del manual de Cerradura (Azul) instrucciones LATCH rígido (sistemas de anclaje Almacenamiento de la pierna de inferiores) estabilidad Guías del LATCH rígido Ajuste de la reclinación Pierna de estabilidad Broche de cierre Indicador de la pierna de estabilidad Stokke® PIPA™ by Nuna®...
-
Página 54: Descripción De Las Funciones
Retiro del cojín de asiento 1. Retire las piezas de sujeción bajo de la borde del asiento. 2. Retire los arneses desde la placa de separación. Stokke® PIPA™ by Nuna®... - Página 55 * Utilizado solo con adaptadores para sillas de coche para niños. Los adaptadores de las sillas de coche para niños se venden de manera separada. Las hombreras • Las hombreras se pueden retirar y no son necesarios para la seguridad. Stokke® PIPA™ by Nuna®...
-
Página 56: Necesidades Del Niño
• Peso: 4 hasta 32 libras (2 hasta 14,5 kg). • Altura: menos de 32 pulgadas (81 cm). • La parte superior sobre la cabeza del niño es de por lo menos 1’’ bajo la parte superior del cargador. Stokke® PIPA™ by Nuna®... -
Página 57: Cambiar La Posicióndel Arnés
2. Cuando se retira el niño, afloje el arnés. Vol- tee el cargador y retire la presilla del arnés desde la placa de separación de metal. Continúa en la siguiente página Stokke® PIPA™ by Nuna®... - Página 58 PELIGRO DE ESTRANGULACIÓN: El niño puede estrangularse con las correas sueltas del arnés. Utilice siempre esta cubierta de arnés. Evite sujetar mal a la base: Asegúrese que siempre esté la cubierta del arnés sujeta al asiento del bebé Stokke® PIPA™ by Nuna®...
- Página 59 4. Repita el proceso por la segunda correa del arnés para hombro. Cinturones de seguridad de entrepierna • Identifica a la ranura del cinturón de seguridad de entrepierna que permitirá una sujeción cómoda. Cambie la ranura del cinturón de seguridad de entrepierna si es necesario. Stokke® PIPA™ by Nuna®...
- Página 60 El cinturón de seguridad de entrepierna se pasa por la ranura trasera como se presenta. 3. Los bebés mas grandes usan esta posición. El cinturón de seguridad de entrepierna se para por la ranura delantera tal como se presenta. Stokke® PIPA™ by Nuna®...
-
Página 61: La Seguridad Del Niño En Un Cargador
Separe las brochas de pecho y las correas del arnés. 3. Ponga el niño en el cargador en la posición de sentado, descansando el niño en contra de la parte trasera y la parte inferior del asiento. Stokke® PIPA™ by Nuna®... - Página 62 Las correas del arnés no están retorcidas. c) El arnés es ajustado – Un arnés ajustado no se puede apretar, y no debería permitir ninguna distensión. d) Los broches de pechero están al nivel con las axilas. Stokke® PIPA™ by Nuna®...
- Página 63 Si el niño no usa en cinturón de seguridad de manera adecuada, el niño puede ser expulsado al frenar repentinamente o al chocar, causando heridas graves o el fallecimiento Stokke® PIPA™ by Nuna®...
-
Página 64: Instrucciones Sobre La Instalación
• Posicione la base en un asiento de vehículo orientado hacia adelante. Use el dispositivo de ajuste de la reclinación para posicionar la burbuja en el indicador. Ajuste la base de tal manera que la burbuja toque la línea. Stokke® PIPA™ by Nuna®... - Página 65 (Página 72). • Si es necesario, instales los dispositivos de guía con conectores de plástico en las barras de anclaje inferiores LATCH del vehículo. Stokke® PIPA™ by Nuna®...
- Página 66 Y también vea si está indicado el color verde sobre los conectores. The Rigid LATCH (lower attachments) must be attached and locked onto the vehicle vehicle anchor points. click Stokke® PIPA™ by Nuna®...
- Página 67 • Después de poner de manera adecuada el cinturón de seguridad en el niño dentro del click cargador, presione el cargador en la base y espere hasta que se oiga un clic. Tire del cargador para comprobar la instalación. Stokke® PIPA™ by Nuna®...
- Página 68 • Para retirar la base, presione primero la base contra el asiento del vehículo sin demasiada fuerza presionando al mismo tiempo los botones rígidos de desbloqueo del seguro y tirando a continuación de la base hacia afuera. Stokke® PIPA™ by Nuna®...
- Página 69 • Posicione la base en un asiento del vehículo orientado hacia adelante. Use el dispositivo de ajuste de la reclinación para posicionar la burbuja en el indicador. Ajuste la base de tal manera que la burbuja toque la línea. Stokke® PIPA™ by Nuna®...
- Página 70 1. Direccione el cinturón del vehículo a través de la apertura en la base etiquetada con “Guía del cinturón” y abroche el cinturón del vehículo. Los ambos cinturones para hombro Y deregazo deben ser bajo la cerradura azul. 2. Ajuste el cinturón mientras presionando la base en el asiento del vehículo. click Stokke® PIPA™ by Nuna®...
- Página 71 • Después de poner el cinturón de seguridad de manera adecuada al niño en el cargador, presione el cargador en la base y espere que se oiga un clic. • Tire del cargador para comprobar la instalación adecuada.. check click click Stokke® PIPA™ by Nuna®...
- Página 72 No use la pierna de estabilidad para la reclinación de la base. La función de ajuste de la reclinación es concebida para la reclinación de a base. • Siempre almacene la pierna de estabilidad cuando no se usa. Stokke® PIPA™ by Nuna®...
- Página 73 Asegúrese que la pierna de estabilidad esta fija al presionando sobre la parte frontal de la base. El indicador de la pierna de estabilidad es de color verde cuando se encuentra en una posición vertical y toca de manera adecuada el piso del vehículo. Stokke® PIPA™ by Nuna®...
- Página 74 • Estacione el vehículo en un aparcamiento y en un suelo nivelado. • Posicione el cargador de tal manera que el niño sea orientado hacia atrás del vehículo. Instale solamente en un asiento de vehículo orientado hacia adelante. (Página 64) Stokke® PIPA™ by Nuna®...
- Página 75 Permita que el cinturón para hombro se quede en contra el respaldo del asiento del vehículo tal como se presenta. • Si su vehículo tiene solamente un cinturón de regazo, el cinturón para hombro no se usará. Stokke® PIPA™ by Nuna®...
- Página 76 • Hale el cinturón de seguridad del vehículo todo lo posible, comprobando que no sea aflojado o retorcido. • Este cinturón DEBE ser bloqueado para prevenir el movimiento del área del regazo del cinturón. Revise los siguientes puntos para el uso del Broche de bloqueo (Página 77). Stokke® PIPA™ by Nuna®...
- Página 77 Si el cinturón se afloja o se alarga, repita el procedimiento. El broche de bloqueo debe ser a distancia de 1/2 pulgadas (12,5 mm) de la hebilla. 1/2 in. (12.5 mm) Stokke® PIPA™ by Nuna®...
- Página 78 Este sistema de retención del niño es certificado para el uso en los aviones comerciales. Ase- gúrese de contactar su línea aérea antes de viajar para hablar sobre su política con respeto al sistema de retención del niño. Stokke® PIPA™ by Nuna®...
- Página 79 Instalación en carritos de paseo • Alinee el enganche de la silla Stokke® PIPA™ by Nuna® con el del carrito de paseo y desplácelo en línea recta y hacia abajo hasta que haga “clic” dos veces. Los puntos verdes a ambos lados indican que el asiento ha sido correctamente colocado.
- Página 80 • La silla de auto debe estar siempre orientada hacia los padres. Extracción del carrito de paseo • Coloque el asa de transporte en la posición de transporte. • Pulse el botón de desbloqueo del carrito de paseo a ambos lados mientras levanta el asiento verticalmente.. Stokke® PIPA™ by Nuna®...
-
Página 81: Limpieza Y Mantenimiento
Para limpiar la hebilla: enjuague con agua tibia. NO use ningún tipo de jabón, solventes o lubrificantes. Al usar cualquier otra cosa que el agua puede causar el fallo de la hebilla. Secar al aire. Stokke® PIPA™ by Nuna®... -
Página 82: Garantía Y Servicios
Garantía y servicios Gracias por elegir Nuna. Este producto está cubierto por una garantía limitada de un año. Si este producto presenta un defecto en los materiales o en la fabricación durante el periodo de garantía, por favor póngase en contacto con Nuna. Por favor tenga disponible la prueba de la adquisición, el número del modelo y el número de serie cuando nos contacte. - Página 83 Stokke® PIPA™ by Nuna®...