Tabla de contenido
Publicidad
Idiomas disponibles
Idiomas disponibles
Enlaces rápidos
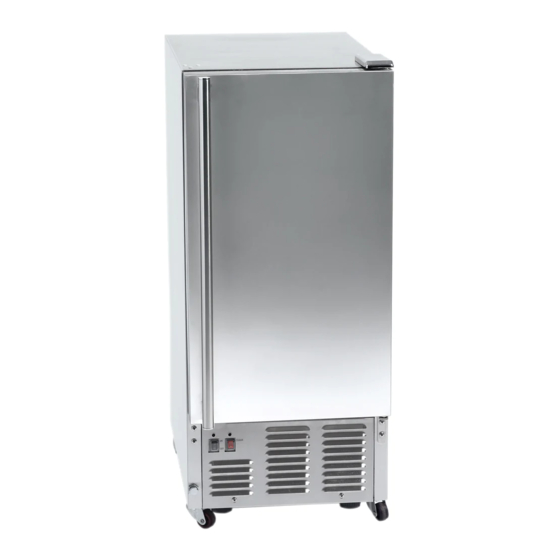
Automatic Outdoor Ice Maker
Máquina automática para hacer hielo
al aire libre
User's Manual
Manual del usuario
Be sure ice maker is standing upright 24 hours prior to plug-in.
Asegúrese que la máquina esté parada en posición vertical
24 horas antes que sea conectada.
Model/Modelo: FS-50IMOD
Orien USA, LLC
921 General Hill Drive
Virginia Beach, VA23454
Tel.: 1-757-486-2099
E-mail: ORIENUSA@COX.NET
Publicidad
Capítulos
Tabla de contenido

Manuales relacionados para Orien FS-50IMOD


Resumen de contenidos para Orien FS-50IMOD
- Página 1 Manual del usuario Be sure ice maker is standing upright 24 hours prior to plug-in. Asegúrese que la máquina esté parada en posición vertical 24 horas antes que sea conectada. Model/Modelo: FS-50IMOD Orien USA, LLC 921 General Hill Drive Virginia Beach, VA23454 Tel.: 1-757-486-2099...
-
Página 2: Tabla De Contenido
Table of Contents Page ICE MAKER SAFETY....................... 2 IMPORTANT SAFEGUARDS....................3 - 5 TECHNICAL INFORMATION ....................5 INTRODUCTION ........................6 COMPONENT LOCATIONS ....................7 ICEMAKER INSTALLATION ................... 8 - 16 Unpacking ......................... 8 Location Requirements ....................8 - 9 Electrical Requirements ....................10 Installation of Casters ......................11 Leveling the Ice Maker .................... -
Página 3: Ice Maker Safety
Ice Maker Safety Your safety and the safety of others are very important. We have provided many important safety messages in this manual and on your appliance. Always read and obey all safety messages. This is the Safety Alert Symbol. This symbol alerts you to potential hazards that can injure or kill you and others. -
Página 4: Important Safeguards
IMPORTANT SAFEGUARDS Before the ice maker is used, it must be properly positioned and installed as described in this manual, so read the manual carefully. Orien USA, L.L.C. Industries strongly recommends that you have a professional install your new machine. The warranty may be affected or voided by an incorrect installation .To reduce the risk of fire, electrical shock or injury when using... - Página 5 Use two or more people to move and install ice maker. Failure to do so can result in back or • other injury. To ensure proper ventilation for your ice maker, the front of the unit must be completely • unobstructed.
-
Página 6: Technical Information
Extension Cord Because of potential safety hazards under certain conditions, it is strongly recommended that you do not use an extension cord with this ice maker. Technical Information Model: FS-50IMOD Electrical power: 115VAC ~ 60Hz Power consumption: 13.2kWh/100 lbs of ice Ice-making/Ice-harvest rated current: 3.7A/4.8A... -
Página 7: Introduction
Orien USA, LLC, assumes no liability or responsibility of any kind for products manufactured by Orien USA, LLC, that have been altered in any way, including the use of any parts and/or other components not specifically approved by Orien USA, LLC. Orien USA, LLC, reserves the right to make design changes and/or improvements at any time. -
Página 8: Component Locations
Component Locations... -
Página 9: Icemaker Installation
Ice Maker Installation Unpacking Excessive Weight Hazard Use two or more people to move and install ice maker. Failure to do so can result in back or other injury. Remove packaging materials IMPORTANT: Do not remove any permanent instruction labels or the data label on your ice maker. - Página 10 This ice maker should be installed by qualified personnel. • To ensure proper ventilation for your ice maker, the front of the unit must be completely • unobstructed. When installing the ice maker under a counter, follow the recommended spacing dimensions •...
-
Página 11: Electrical Requirements
Electrical Requirements Electrical Shock Hazard Plug into a grounded 3- prong outlet. Never remove the ground prong from the plug. Never use an adapter. Never use an extension cord. Failure to follow these instructions can result in fire, electrical shock or death. Before you move your ice maker into its final location, be sure you have the proper electrical connection: A standard electrical supply (115V AC only, 60Hz, 15A), properly grounded in accordance with... -
Página 12: Installation Of Casters
Installation of Casters Casters are provided with the ice maker. They are ideal for rolling the unit from place to place outdoors. If a mobile installation is chosen, you must install the casters. Screw holes Use two or more people when installing or removing casters. Tip unit to the right so there is a 3/4-foot clearance at the left of the unit. -
Página 13: Reversing The Door Swing
1. Place a carpenter’s level on top of the product to see if the ice maker is level from front to back and side to side. 2. Adjust the height of the legs as follows: Turn the leveling legs to the right to lower that side of the ice maker. Turn the leveling legs to the left to raise that side of the ice maker. -
Página 14: Water Supply
To replace door on hinges: 1. Using a , remove the plug buttons from the screw holes opposite the door flat screwdriver hinges, top and bottom. Set aside. 2. Remove the bottom hinge and place it on the opposite side at the bottom of the door. 3. -
Página 15: Drain
Connecting the water line: 1. Turn off main water supply. Turn on the nearest faucet long enough to clear the line of water. 2. Find a 1/2” to 3/4” vertical cold water pipe near the installation location. The distance should be less than 9 feet. -
Página 16: Installation Types
Installation Types This ice maker has been designed for Mobile (free-standing), Enclosed (as under a cabinet) or Built-in (sealed) installation, indoor or outdoor. In any case, there must be adequate air space around the unit for proper ventilation. (See diagrams on page 8.) Mobile installation: A mobile installation will allow you to install the ice maker free-standing in any place you desire provided you have access to a water supply. -
Página 17: Operation
Operation Final Check List before Operation 1. Have all packing materials and tape been removed from the interior and exterior of the ice maker? 2. Did you clean the ice storage bin? 3. Have the installation instructions been followed, including connecting the machine to water and electricity? 4. -
Página 18: How The Machine Makes Ice
2. After three minutes, the machine will automatically go into the ice-making stage, and the sound of flowing water will be heard. 3. When the batch of ice has been fully formed ice will automatically be harvested to the ice , the storage bin. -
Página 19: How The Machine Uses The Water
How the Machine Uses the Water The ice maker begins with a fixed charge of water that is contained in the water trough. As the water flows to the freezing evaporator surface, the portion of water that does not contain mineral impurities will freeze and stick to the ice cube molds. -
Página 20: Normal Sounds
Normal Sounds Your new ice maker may make sounds that are unfamiliar to you. Most of the new sounds are normal. Hard surfaces like the floor and walls can amplify the sounds. The following describes the kinds of sounds that might be new to you and what may be causing them. Rattling noises may come from the flow of the refrigerant or the water line. -
Página 21: Cleaning And Maintenance
Cleaning and Maintenance If the ice maker is left unused for a long time, before the next use it must be thoroughly cleaned. Follow carefully any instructions provided for cleaning or use of sanitizing solution. Do not leave any solution inside the ice maker after cleaning. Periodic cleaning and proper maintenance will ensure efficiency, top performance, and long life. -
Página 22: Interior Cleaning
Interior Cleaning The ice storage bin should be sanitized occasionally. Clean the trough before the ice maker is used for the first time and reused after stopping for an extended period of time. It is usually convenient to sanitize the trough after the ice-making system has been cleaned and the storage bin is empty. -
Página 23: Water Distribution Tube Cleaning
DO NOT touch the condenser fins. They are sharp and can be damaged easily. Water Distribution Tube Cleaning When you find that the ice cubes are incompletely formed or the output of ice cubes is low, the water distribution tube may be blocked. Set the Power switch to OFF, rotate the water distribution tube, and locate the holes in the distribution tube. - Página 24 NOTE: The unit will automatically shut down the Cleaning program after 30 minutes, or you can stop it by pressing the Clean switch again, and the machine will automatically progress to the ice-making stage. 4. Allow 20 minutes for proper cleaning. After cleaning, turn the machine OFF at the Power switch.
-
Página 25: Major Functions
Major Functions 1. Completely automatic operation 2. When the ice storage bin is full of ice, the machine stops making ice and proceeds to the cold preservation stage automatically. It starts making ice again once the cubes are removed. 3. The fan motor responds to the ambient temperature. If it is cold, the motor will stop working to keep the cooling system in good working condition. -
Página 26: Troubleshooting
Troubleshooting Before Calling for Service If the unit appears to be malfunctioning, read through the OPERATION section of this manual first. If the problem persists, check the Troubleshooting Guide below and on the following page. The problem could be something very simple that can be solved without a service call. Troubleshooting Guide Problem Possible Cause... - Página 27 Problem Possible Cause Probable Correction Check if the water supply pressure is below 15 psig. Cubes are partially Not enough water in the Check water supply; filter may be formed or are white water trough. restricted. at the bottom. Check for a water leak at the water trough.
-
Página 28: Limited Warranty
Orien USA, LLC, warrants this product to be free from defects in materials and workmanship for a period of one year from the date of the original purchase. Orien also warrants the compressor for 5 years with a Parts-only warranty from the date of purchase. Any parts that are determined to be defective will be... - Página 29 Índice Página SÍMBOLOS DE SEGURIDAD....................30 ADVERTENCIAS DE SEGURIDAD ................31 - 33 INFORMACIÓN TÉCNICA ....................34 INTRODUCCIÓN ........................34 UBICACIÓN DE COMPONENTES DE LA MÁQUINA ............35 INSTALACIÓN DE LA MÁQUINA................36 - 44 Desembalaje ........................36 Requisitos del lugar de instalación ................ 36 - 37 Requisitos de alimentación eléctrica................
-
Página 30: Símbolos De Seguridad
Símbolos de Seguridad Su seguridad y la seguridad de los demás es de suma importancia. Tanto en este manual como en la máquina, encontrará varios mensajes de importantes de seguridad. Lea y observe siempre los mensajes de seguridad. Este es el símbolo de Alerta de Seguridad. Advierte sobre posibles riesgos que pueden causar accidentes lesivos e incluso fatales, tanto para usted como para los demás. -
Página 31: Advertencias De Seguridad
Leer atentamente este manual, ya que antes de poner en servicio la máquina para hacer hielo, es necesario ubicarla e instalarla tal como aquí se explica. Orien USA, L.L.C. Chef® recomiendan fuertemente que un mecánico profesional instala su máquina nueva. La garantía se puede afectar o anular por una instalación inexacta. - Página 32 ADVERTENCIA Mover e instalar la máquina entre dos personas como mínimo. Si lo hace una sola persona, • hay riesgo de que se lesione por el esfuerzo excesivo. Para que la máquina tenga ventilación adecuada, no debe haber ninguna obstrucción en el •...
-
Página 33: Conexión Eléctrica
NO tocar las aletas del condensador. Las aletas del condensador son filosas y además se • pueden dañar con facilidad. NO usar productos de limpieza abrasivos ni con solventes en el interior de la máquina. Estos • productos de limpieza pueden impregnar de olor los cubos de hielo y descolorar o dañar el interior de la unidad. -
Página 34: Información Técnica
Cada máquina para hacer hielo de Orien USA, LLC, fue diseñada y fabricada bajo las normas más exigentes de seguridad y tecnología. Cumple y supera las normas de seguridad UL563. -
Página 35: Ubicación De Componentes De La Máquina
Ubicación de componentes de la máquina... -
Página 36: Instalación De La Máquina
Instalación de la máquina Desembalaje ADVERTENCIA Peligro de peso excesivo Mover e instalar la máquina entro dos personas como mínimo. Si lo hace una sola persona, hay riesgo de que se lesione por el esfuerzo excesivo. Quitar los materiales de embalaje IMPORTANTE: No quitar las etiquetas fijas de instrucciones ni la etiqueta de datos de la máquina para hacer hielo. - Página 37 Esta máquina debe ser instalada por el personal calificado. • Para que la máquina tenga ventilación adecuada, no debe haber ninguna obstrucción en el • frente de la misma. Para que haya suficiente circulación de aire, dejar una distancia mínima de separación de 10 •...
-
Página 38: Requisitos De Alimentación Eléctrica
Requisitos de alimentación eléctrica PELIGRO Peligro de electrocución Enchufar la máquina a un tomacorriente de 3 patas con descarga a tierra. No eliminar la pata de conexión a tierra del enchufe. No usar un adaptador de 3 a 2 patas. No usar un cordón prolongador para enchufar la máquina. -
Página 39: Instalación De Las Rueditas
Instalación de las rueditas Cuatro rueditas son suministradas con la máquina para hacer hielo. Ellas son ideales para arrollar la unidad de lugar en lugar al aire libre. Si una instalación móvil (libre) se escoge, usted debe instalar las rueditas. Fondo de la Agujeros unidad... -
Página 40: Cambio Del Lado De Apertura De La Puerta
Coloque un nivel del carpintero encima de la máquina para ver si la máquina está nivelada de la frente hasta la parte trasera y de un lado al otro. Ajuste la altura de los pies de la siguiente manera: Gire a la derecha el pie para bajar ese lado de la máquina. Gire a la izquierda el pie para levantar ese lado. -
Página 41: Conexiones De Entrada De Agua
Para reemplazar la puerta en las bisagras: 1. Con el destornillador plano, quita los tapón-botones de los agujeros de tornillo frente a las bisagras de puerta, superior y inferior. Apártelos. 2. Quite la bisagra inferior, colóquela en el lado opuesto en el fondo de la puerta. 3. -
Página 42: Drenaje
Conexión de la línea de agua: 1. Cortar el paso de agua en la línea principal. Abrir la canilla más cercana para dejar salir toda el agua que haya quedado en la línea. 2. Buscar un tramo vertical de tubería de agua fría de ½" a ¾", que se encuentre a menos de 9 pies de distancia (unos 2,7 metros) del lugar de instalación, ya que el tubo de entrada de agua suministrado con la máquina tiene una longitud aproximada de 9 pies. -
Página 43: Tipos De Instalación
Tipos de instalación Esta máquina para hacer hielo es apta para ser instalada de tres maneras, adentro o al aire libre: Libre (sola, no empotrada), en cerramiento (insertada, pero no empotrada) y empotrada. En cada caso, debe tener el espacio aéreo adecuado alrededor de la unidad para ventilación (vea las esquemas en la página 36). -
Página 44: Uso De La Máquina
Uso de la máquina Lista de control final antes de la puesta en servicio 1. ¿Se han quitado todos los materiales de embalaje y cintas adhesivas del interior y exterior de la máquina? 2. ¿Se ha limpiado el recipiente de hielo? 3. -
Página 45: Ciclos De Funcionamiento De La Máquina
2. Después de 3 minutos, la máquina pasará automaticamente a la etapa de hacer hielo y se escuchará el sonido de agua corriente. 3. Cuando la partida de hielo se ha formado completamente, los cubos serán cosechados automáticament al recipiente de hielo. 4. -
Página 46: El Circuito De Agua En La Máquina
El circuito de agua en la máquina La máquina inicia su ciclo con el recipiente de agua cargado. Cuando el agua fluye a la superficie del evaporador, se congela y se adhiere a los moldes de cubos, a excepción contiene impurezas minerales, la cual vuelve a caer en el recipiente. -
Página 47: Sonidos Normales
Sonidos normales La máquina para hacer hielo emite algunos sonidos que aunque parezcan extraños, son parte de su funcionamiento normal. Algunas de las superficies duras que rodean la máquina, tal como el piso, las paredes y los gabinetes, contribuyen a que estos sonidos se perciban aún más fuerte de lo que realmente son. -
Página 48: Limpieza Y Mantenimiento
Limpieza y mantenimiento PRECAUCIóN Si la máquina no se ha usado por un período largo, limpiarla bien antes de volver a ponerla en servicio. Seguir las instrucciones de uso proporcionadas con el producto de limpieza o la solución desinfectante. Asegurarse de que no queden residuos de la solución de limpieza en el interior de la máquina. -
Página 49: Limpieza Interna
Limpieza interna Limpiar de vez en cuando el recipiente de cubos de hielo. Además, el recipiente de agua se debe limpiar antes de poner la máquina en servicio por primera vez y antes de volver a usarla después de un período prolongado de inactividad. Normalmente es conveniente limpiar el recipiente de agua después se ha limpiado el sistema de hacer hielo y el recipiente de hielo está... -
Página 50: Limpieza Del Tubo De Distribución Del Agua
5. Volver a colocar el filtro y la tapa frontal. 6. Volver a enchufar la máquina o conectar la alimentación eléctrica de la línea. ADVERTENCIA NO TOCAR las aleta del condensador, ya que son filosas y se pueden dañar con facilidad. - Página 51 Apriete al mismo tiempo el Interruptor CLEAN (Limpiar) a la frente de la unidad, y la luz indicador CLEAN encenderá, entonces se iniciará el ciclo de limpieza. Ahora la máquina funcionará en modo de limpieza automática. NOTA: La unidad cerrará automáticamente el programa de limpieza después de 30 minutos, o usted lo puede parar apretando el interruptor CLEAN otra vez, y la máquina progresará...
-
Página 52: Funciones Principales
Funciones principales 1. Activación de funcionamiento totalmente automático. 2. Cuando el recipiente de hielo está lleno, la máquina se detiene la fabricación de hielo y progresa automáticamente a la etapa de conservación del frío. Vuelve a arrancar cuando el nivel de cubos haya descendido. 3. -
Página 53: Diagnóstico De Fallas
Diagnóstico de fallas Antes de llamar al servicio de reparación Si la máquina manifestara síntomas de estar funcionando defectuosamente, leer atentamente la sección de USO DE LA MÁQUINA en este manual. Si el problema continuara, leer la GUÍA DE DIAGNÓSTICO DE FALLAS más abajo y en la página siguiente. A veces, el problema es simple y se puede resolver sin llamar a un servicio técnico. - Página 54 Problema Posible causa Solución probable Verificar que la presión de agua no sea inferior a 15 psig. Los cubos de hielo no se terminan de No hay suficiente agua en el formar o son de color blanco en la recipiente. Revisar el filtro de agua: podría estar parte inferior.
-
Página 55: Garantía Limitada
Orien USA, L.L.C. garantiza este producto contra defectos de materiales y fabricación, por un período de un año a partir de la fecha original de compra del producto. Orien garantiza también el compresor por 5 años con una garantía Piezas-solamente de la fecha de la compra. Toda pieza que se probara que es defectuosa será...