Tabla de contenido
Publicidad
Idiomas disponibles
Idiomas disponibles
Enlaces rápidos
Publicidad
Tabla de contenido

Manuales relacionados para Jata JVVP3060


Resumen de contenidos para Jata JVVP3060
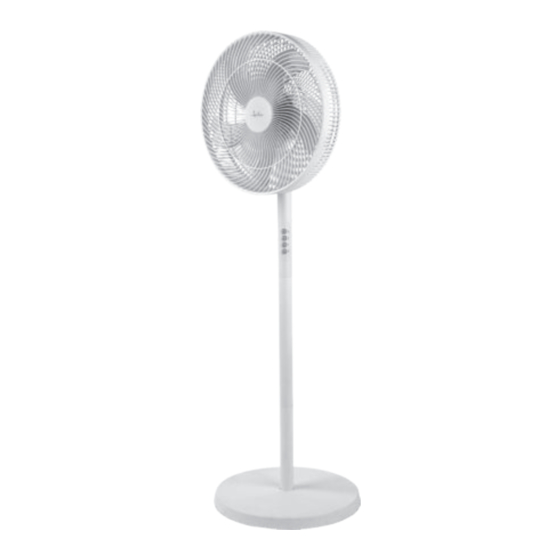
- Página 1 INSTRUCCIONES DE USO INSTRUÇÕES DE UTILIZAÇÃO • INSTRUCTIONS OF USE INSTRUCTIONS D’USAGE • ISTRUZIONI PER L’USO BEDIENUNGSANLEITUNG JVVP3060 VENTILADOR DE PIE VENTOINHA DE PÉ STAND FAN VENTILATEUR SUR PIED VENTILATORE DA PAVIMENTO STEHVENTILATOR...
- Página 3 11. Dadi a farfalla 11. Befestigungsteile. DATOS TÉCNICOS • DADOS TECNICOS • TECHNICAL DATA 202312 Mod. JVVP3060 220-240 V~ 50/60Hz 50 W Los textos, fotos, colores, figuras y datos corresponden al nivel técnico del momento en que se han impreso. Nos reservamos el derecho a...
-
Página 4: Muy Importante
ESPAÑOL ATENCIÓN • Lea atentamente estas instrucciones antes de poner el ventilador en funcionamiento y guárdelas para futuras consultas. • Este aparato pueden utilizarlo niños con edad de 8 o más años y personas con capacidades físicas, sensoriales o mentales reducidas o falta de experiencia y conocimiento, si se les ha dado la supervisión o instrucción apropiadas respecto al uso del aparato de una manera segura y comprenden los peligros... -
Página 5: Mantenimiento Y Limpieza
INSTRUCCIONES DE MONTAJE • Retire el tornillo en L del tubo (10) e introdúzcalo en la base, atornille posteriormente el tornillo en L. • Monte los tubos (10) asegurándolos con las palomillas (11) • Acople el cuerpo (6) al tubo y asegúrelo. •... -
Página 6: Muito Importante
que lhes seja dada a supervisão apropriada ou instruções para a utilização do aparelho de forma segura e de modo a que compreendam os perigos inerentes. • Não deixe sacos de plástico ou partes da embalagem ao alcance das crianças. Podem ser potenciais fontes de perigo. •... -
Página 7: Instruções De Utilização
• Coloque a grade frontal (5) combinando as saliências da grade traseira (4) com as ranhuras da grade frontal (5), rode-a levemente para a fechar e fixe-a com o parafuso de segurança lateral. INSTRUÇÕES DE UTILIZAÇÃO • Lembre-se que a ventoinha deve ser sempre colocada sobre uma superfície plana e estável. •... -
Página 8: Assembling Instructions
• VERY IMPORTANT: Do not immerse the fan in water or any other liquid. • This appliance has been designed for domestic only. Don’t allow children play with the appliance. Keep the fan out of the reach of children. • Make sure neither the appliance nor the cable are in direct contact with hot surfaces or objects. -
Página 9: Maintenance And Cleaning
MAINTENANCE AND CLEANING • Before you proceed to cleaning, make sure the appliance is unplugged from the mains. • Clean with a slightly damp cloth. • It is important to keep the frontal grid (5) and the back grid (4) clean of dust. •... -
Página 10: Conseils D'utilisation
• Ne pas utiliser si la grille avant n’est pas bien installée. • Ne pas mettre les doigts ni aucun objet entre les pales pour ne pas bloquer le moteur. • La manipulation ou le remplacement de tout composant doit être effectué... -
Página 11: Molto Importante
ITALIANO ATTENZIONE • Leggere attentamente le istruzioni prima di accendere il ventilatore e conservarle per eventuali future consultazioni. • Questo apparecchio puó essere utilizzato da bambini con etá uguale o maggiore a 8 anni, persone con discapacitá fisiche, sensoriali o mentali ridotte o mancanza di conoscenza tecnica, se consci dei pericoli che comporta l’apparecchio stesso e se ben istruiti sul funzionamento dello stesso. -
Página 12: Istruzioni Di Montaggio
ISTRUZIONI DI MONTAGGIO • Togliere la vite a L dal tubo (10) e inserirla nella base, quindi avvitare la vite a L. • Assemblare i tubi (10) fissandoli con i dadi a farfalla (11). • Collegare il corpo (6) al tubo e fissarlo. •... - Página 13 werden, wenn sie beaufsichtigt werden oder wenn sie entsprechend über die sichere Benutzung des Geräts informiert worden sind und die davon ausgehenden Gefahren verstanden haben. • Halten Sie Plastiktüten, -beutel und Verpackungselemente von Kindern fern, da sie eine potentielle Gefahrenquelle darstellen. •...
-
Página 14: Wartung Und Reinigung
INSTALLATIONSANLEITUNG: • Entfernen Sie die L-förmige Schraube aus dem Rohr (10) und stecken Sie sie in die Basis. L-förmige Schraube danach festziehen. • Rohre (10) mithilfe der Befestigungsteile (11) montieren. • Platzieren Sie den Körper (6) auf dem Rohr und befestigen Sie ihn. •... - Página 16 www.jata.es...