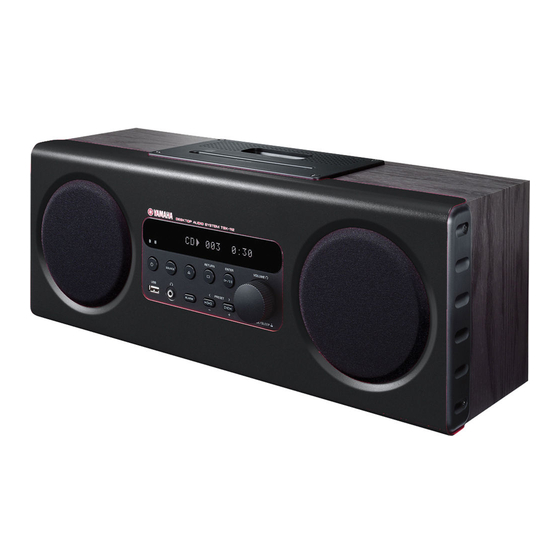
Yamaha TSX-112 Manual De Instrucciones
Tabla de contenido
Idiomas disponibles
Idiomas disponibles
Enlaces rápidos
Capítulos
Tabla de contenido
Solución de problemas

Manuales relacionados para Yamaha TSX-112


Resumen de contenidos para Yamaha TSX-112
- Página 1 DESKTOP AUDIO SYSTEM TSX-112 OWNER’S MANUAL MANUAL DE INSTRUCCIONES...
- Página 22 14 No intente modificar ni arreglar este aparato. Póngase 2 Instale esta unidad en un lugar bien ventilado, fresco, en contacto con el personal de servicio Yamaha seco y limpio, alejado de la luz directa del sol, cualificado cuando necesite realizar alguna reparación.
-
Página 23: Accesorios Suministrados
CONTENIDO NOMBRES DE LAS PARTES Y SUS REPRODUCCIÓN ALEATORIA/ FUNCIONES ..........2 REPETICIÓN ........... 12 CONEXIÓN DE UN iPod ......6 ESCUCHAR UNA FUENTE EXTERNA ... 12 AJUSTE DEL RELOJ .........6 USO DE LA FUNCIÓN DE ESCUCHAR EL iPod........7 TEMPORIZADOR DE APAGADO ... 13 ESCUCHAR UN CD Y UN USO DEL MENÚ... -
Página 24: Nombres De Las Partes Y Sus Funciones
PREPARATION NOMBRES DE LAS PARTES Y SUS FUNCIONES Panel superior, panel frontal IPod/iPhone LABEL SIDE IPod/iPhone LABEL SIDE RETURN ENTER VOLUME SOURCE PRESET ALARM SNOOZE SLEEP RETURN ENTER VOLUME SOURCE PRESET ALARM SNOOZE SLEEP 1 Base Dock para iPod: coloque un iPod. : expulsa el CD. -
Página 25: Visualizador Del Panel Frontal
NOMBRES DE LAS PARTES Y SUS FUNCIONES Visualizador del panel frontal SLEEP PRESET STEREO AUTO SHUFFLE REPEAT MUTE TUNED MEMORY ARTISTS ALBUMS SONGS 1 Indicador SLEEP: se enciende cuando el 8 Visualizador de información múltiple: muestra temporizador para dormir está activado. (☞ P. 13) información variada. -
Página 26: Panel Posterior (Conexión De La Antena)
NOMBRES DE LAS PARTES Y SUS FUNCIONES Panel posterior (conexión de la antena) SET ON 1 Antena FM (suministrada) 5 Cable de alimentación: conéctelo a una toma de corriente. 2 Terminal de antena FM: conecte la antena FM suministrada. Notas 3 AUX: conecte un dispositivo externo. - Página 27 NOMBRES DE LAS PARTES Y SUS FUNCIONES Mando a distancia 1 Transmisor de señales infrarrojas 2 SNOOZE/SLEEP: permite ajustar la repetición y el temporizador de apagado. (☞ P. 11, 13) Mantenga presionado este botón; a continuación, pulse el cursor ENTER para ajustar la función de temporizador de apagado.
-
Página 28: Conexión De Un Ipod
CONEXIÓN DE UN iPod Coloque el iPod en la base Dock para iPod. Adaptador de la Cuando el iPod está colocado en la base Dock base Dock para iPod se carga automáticamente. En el modo de ahorro de energía, el iPod no se carga. Notas •... -
Página 29: Escuchar El Ipod
OPERATION ESCUCHAR EL iPod Para obtener información sobre los modelos de iPod compatibles, consulte “ESPECIFICACIONES” (☞ P. 18). Para obtener información detallada sobre el manejo del mando a distancia, consulte “Mando a distancia” (☞ P. 5). Coloque el iPod en la base Dock para iPod. -
Página 30: Omisión De Una Carpeta De Un Cd De Datos/Dispositivo Usb
CAMBIO DE PANTALLA Omisión de una carpeta de un CD de datos/dispositivo USB Seleccione la carpeta con FOLDER. FOLDER La unidad salta al primer archivo en la carpeta anterior o siguiente. El nombre de la carpeta aparece en la pantalla del panel frontal durante un cierto tiempo. -
Página 31: Presintonización De Emisoras De Radio
ESCUCHAR EMISORAS DE RADIO Presintonización de emisoras de radio Puede almacenar sus 30 emisoras de radio favoritas con la función de presintonización. Presintonización automática Ajuste SOURCE en FM. Mantener pulsado Mantenga pulsado MEMORY durante más de 2 segundos. MEMORY ENTER SOURCE Para cancelar la presintonización, vuelva a Mando a distancia... -
Página 32: Usar La Función De Alarma
USAR LA FUNCIÓN DE ALARMA Funciones de alarma Esta unidad puede reproducir su música favorita y sonido de pitido a la hora programada. A continuación se describen las funciones de alarma. • Esta unidad ofrece tres tipos de alarma, que combinan la música con el sonido de pitido: SRC+BEEP La fuente de audio seleccionada y el sonido de pitido se reproducen a la hora programada. -
Página 33: Activación/Desactivación De La Alarma
USAR LA FUNCIÓN DE ALARMA Seleccione una pista o emisora de radio (según sus (Según sus preferencias) preferencias). ENTER Cuando la fuente es CD/USB/FM, PRESET seleccione una pista o una emisora de radio para la alarma. • Para seleccionar la última canción o emisora que escuchó, seleccione “---”. -
Página 34: Reproducción Aleatoria/Repetición
REPRODUCCIÓN ALEATORIA/REPETICIÓN Parada de la alarma Pulse ALARM o • A menos que usted detenga la alarma, la ALARM alarma se detiene automáticamente después de 60 minutos. • La función de alarma se apaga al parar la alarma, pero los ajustes (como la hora) se guardan para que pueda utilizarlos la próxima vez. -
Página 35: Uso De La Función De Temporizador De Apagado
USO DE LA FUNCIÓN DE TEMPORIZADOR DE APAGADO Puede configurar el momento en que se apagará el sistema automáticamente. Mantenga pulsado SNOOZE/ Mantener pulsado SLEEP durante más de 2 segundos. Seleccione el tiempo de apagado VOLUME entre 30, 60, 90,120 y SLEEP OFF. ENTER PRESET Al programar el tiempo, se activa la... -
Página 36: Solución De Problemas
Si tiene algún problema con la unidad, compruebe primero la siguiente lista. Si no puede solucionar su problema con las siguientes soluciones o si el problema no está en la lista, apague y desenchufe la unidad y a continuación, consulte al concesionario o centro de servicio Yamaha autorizado más cercano. General... -
Página 37: Mando A Distancia
SOLUCIÓN DE PROBLEMAS iPod Nota En caso de producirse un error de transmisión sin que aparezca un mensaje de estado en el panel delantero de esta unidad, compruebe la conexión de su iPod (☞ P. 6). Mensaje de estado Causa Remedio iPod Connecting La unidad está... -
Página 38: Reproducción De Un Disco
SOLUCIÓN DE PROBLEMAS Reproducción de un disco Problema Causa Solución No se puede introducir el disco. El sistema se encuentra en el modo de ahorro de energía (☞ P. 2). Ajuste CLOCK en ON en el panel posterior para cancelar el modo de ahorro de energía (☞ P. 4). No se pueden realizar algunas Es posible que el disco introducido en la Utilice un disco compatible con la unidad... -
Página 39: Notas Sobre Los Discos Y Los Dispositivos Usb
• Algunos discos no se pueden reproducir debido a las • Yamaha no se responsabilizará de los daños causados o las características del disco o a las condiciones de grabación. pérdidas de datos en el dispositivo USB que tengan lugar •... -
Página 40: Especificaciones
ESPECIFICACIONES SECCIÓN DEL REPRODUCTOR SEGURIDAD CONTRA LA RADIACIÓN LÁSER iPod (conexión digital) Esta unidad utiliza rayos láser. Debido a la posibilidad de que • Compatible con..iPod touch (1.ª, 2.ª, 3.ª y 4.ª generación) se produzcan daños en los ojos, la extracción de la cubierta iPod classic de la unidad o las reparaciones solamente deberán ser iPod nano (2.ª, 3.ª, 4.ª, 5.ª...