Tabla de contenido
Publicidad
Idiomas disponibles
Idiomas disponibles
Enlaces rápidos
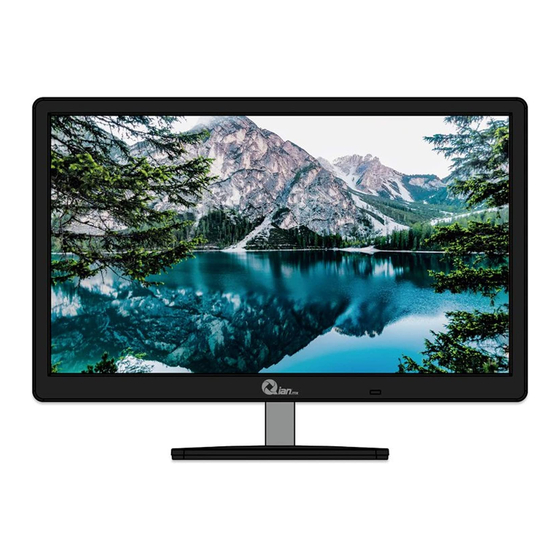
MONITOR LED QIAN 20"HD
QIAN LED MONITOR 20"HD
MOD. QM201901
Por favor lea cuidadosamente antes de usar su equipo
y guárdelo para uso de futuras consultas. (Página 2)
Please read carefully before using your equipment
and save it for future reference. (Page 23)
MANUAL DE USUARIO/USER MANUAL
(50.8 cm)
(50.8 cm)
Montaje en Pared
Wall Mounting
50.8
Centímetros
50.8
Centimeters
Publicidad
Capítulos
Tabla de contenido
Solución de problemas

Manuales relacionados para Qian QM201901

Resumen de contenidos para Qian QM201901
- Página 1 MONITOR LED QIAN 20”HD (50.8 cm) QIAN LED MONITOR 20”HD (50.8 cm) MOD. QM201901 Montaje en Pared 50.8 Centímetros Wall Mounting 50.8 Centimeters Por favor lea cuidadosamente antes de usar su equipo y guárdelo para uso de futuras consultas. (Página 2) Please read carefully before using your equipment and save it for future reference.
-
Página 2: Tabla De Contenido
CONTENIDO COMPATIBILIDAD ELECTROMAGNETICA PRECAUCIONES IMPORTANTES. Introducción General. Características. Lista de contenido. Instalación. Conexión de entrada HDMI o VGA. Conexión de los Cables de Alimentación y Señal de Video. Encendido del Equipo. Auto inspección. Ajuste de imagen. Funcionamiento. Botón de visualización en pantalla. Menú... -
Página 3: Compatibilidad Electromagnetica
COMPATIBILIDAD ELECTROMAGNÉTICA Este dispositivo ha sido probado y cumple con los estándares estableci- dos para los dispositivos digitales de clase B, de acuerdo con la Parte 15 de las normas FCC. Esos estándares están diseñados para proporcionar una protección razonable frente a interferencias perjudiciales en una ins- talación residencial. -
Página 4: Precauciones Importantes
PRECAUCIONES IMPORTANTES ADVERTENCIAS: 1. Antes de usar este dispositivo, lea las instrucciones en este manual. 2. Conserve el manual cuidadosamente para futuras referencias. 3. Desenchufe el dispositivo de la toma de corriente antes de limpiarlo. No usar limpiadores líquidos o en aerosol. Use un paño húmedo o mojado para limpiar. Por favor use un detergente de pantalla LCD para limpiar si todavía está... -
Página 5: Introducción
PRECAUCIONES IMPORTANTES 18. El cable de alimentación es la instalación principal para encender / apagar el dispositivo; desenchúfelo si el dispositivo no se utiliza durante un largo período de tiempo. 19. Guarde el dispositivo en un lugar con buena ventilación; Evite la luz solar fuerte, la temperatura alta o la humedad. -
Página 6: Instalación
2. INSTALACIÓN 1 Puerto HDMI Entrada de 1 Puerto Alimentación 1. 1 Puerto VGA: Conecta la toma de salida de señal VGA 2. 1 Puerto HDMI: Conecta la toma de salida de señal HDMI 3. Entrada de Alimentación: Conecta la entrada del adaptador de corriente al monitor 2.1 Conexión de entrada HDMI o VGA Conecta el cable del equipo a su monitor a través del cable HDMI o VGA (según sea el caso). -
Página 7: Autoinspección
2. INSTALACIÓN 2.4 Autoinspección Si en el monitor no hay señal horizontal y vertical, se le pedirá comprobar la entrada de video, consulte la imagen a continuación y el monitor entrará en modo de ahorro de energía después de varios segundos, el indicador se iluminará... -
Página 8: Funcionamiento
3. Funcionamiento 3.1 Botón de Visualización en pantalla (1) Interruptor de encendido Control digital de toque ligero, se utiliza para encender o apagar la energía del monitor. (2) Indicador de alimentación Cuando el monitor se encuentra bajo condiciones normales de trabajo, el indica- dor se iluminará... - Página 9 Con + o – seleccione los elementos deseados, y luego presione el botón de menú para ajustar, con el botón + o – ajustar los elementos de la pantalla a óptimo, pulse de nuevo para confirmar el ajuste y salir. Menú...
- Página 10 Función: Auto ajuste Color automático Salida Menú de ajuste de herramientas del Menú visualización: Menú visualización ajuste de posición H: Utilizar + o - para ajustar la posición horizontal. Menú visualización de ajuste de posición V: Utilizar + o – para ajustar la posición vertical.
- Página 11 Salir Salir: Salir del menú de Visualización...
-
Página 12: Menú Visualización En Pantalla E Introducción Al Menu De Operaciones (Opcional)
3. Funcionamiento 3.2 MENÚ VISUALIZACIÓN EN PANTALLA E INTRODUCCIÓN AL MENU DE OPERACIONES (OPCIONAL) 3.1 Botón de encendido y apagado Este botón es de control digital, accionado por tacto por tacto, que se utiliza para activar o desactivar la alimentación de la pantalla. 3.2 Indicador Luminoso Cuando el monitor está... -
Página 14: El Monitor Se Mostrará
Ajustar color. Mostrar información del monitor. Auto Ajuste. El monitor se mostrará fuera de rango si el monitor excede la resolución máxima. Cambiar el modo de pantalla. - Página 15 Menú Principal Submenú Función Imagen Brillo Ajustar el Brillo del Monitor Contraste Ajustar el Contraste del Monitor Ajuste Auto. Imagen Auto ajuste posición de la imagen Ajuste Auto. Color Auto ajuste color de la imagen Color Temperatura del Color Elegir la Temperatura del color Rojo El usuario puede ajustar esto cuando Verde...
-
Página 16: Precauciones
3.3 Precauciones Cuando la señal de video de la computadora exceda el rango de frecuen- cia del monitor, se apagará la señal de sincronización horizontal y vertical para el efecto de protección del monitor, vea la imagen en la parte inferior. El monitor entrará... -
Página 17: Especificaciones Técnicas
4. ESPECIFICACIONES TÉCNICAS PANEL Radio de Aspecto 16:9 432 mm * 239.7 mm Área Visual Ángulo Visual H:160° V:150° Resolución 1 600*900 Tamaño Punto 0.276 mm Color del Display 16.7 M de Colores Brillo (Max) 300 cd/m² FUNCIÓN / OPERACIÓN / CARACTERÍSTICAS / ENERGÍA 5 m/s Tiempo de Respuesta Típico Contraste Típico... -
Página 18: Asignación De Pines Del Cable De Señal
4.2 Asignación de pines del cable de señal Signal D-Sub Señal D-Sub Rojo Energia DDC Verde Tierra Azul Tierra Tierra SDA/DCC Prueba Sincronización H Tierra Rojo Sincronización V Tierra Verde SCL/DCC Tierra Azul 4.3 Inspección visual Incluso los pixeles normales en la pantalla LCD alcanzan 99.9% o superior, puede haber un 0.01% o menos de pixeles que se muestran de manera clara u oscura mientras se muestran. -
Página 19: Solución De Problemas
5. SOLUCIÓN DE PROBLEMAS Si el monitor no puede funcionar normalmente, consulte rápidamente los siguientes métodos para solucionar problemas comunes. Si necesita ayuda, llame al distribuidor donde adquirió el monitor. A. No hay imagen de la pantalla / LED sin luz. Verifique si la función del cable de alimentación está... -
Página 20: Garantía
5. El tiempo de reparación no será mayor de 30 días naturales a partir de la fecha de recepción del producto por parte de Qian S.A. de C.V. o en su Centro de Servicio Autorizado. - Página 21 Exclusiones: Qian S.A. de C.V. no hará valida esta póliza de garantía en los siguientes casos: • Cuando el producto se hubiese utilizado en condiciones distintas a las normales. • Cuando el producto no se hubiese operado de acuerdo al instructivo de uso que lo acompaña.
-
Página 22: Información Sobre Seguridad
INFORMACIÓN SOBRE SEGURIDAD Advertencias en materia de seguridad de CA (Corriente Alterna) ADVERTENCIA: Coloque el monitor cerca de una toma de corriente alterna. El cable de alimentación de corriente alterna es el medio principal de desconexión de su monitor y debe estar siempre al alcance. Por su seguridad, el cable de alimentación incluido con el sistema tiene toma de tierra. - Página 23 TABLE OF CONTENTS EMC COMPLIANCE Introduction General Features Packing list Installation HDMI or VGA Input Connection Connecting the Power and Video Signal Cables Turning on the Equipment Self inspection Image adjustment Operation OSD button. OSD menu and operation menu introduction Precautions Setting Display mode Technical specifications...
-
Página 24: Emc Compliance
EMC COMPLIANCE This device has been tested and meets the standards established for Class B digital devices, in accordance with Part 15 of the FCC rules. These standards are designed to provide reasonable protection against harmful interference in a residential installation. This device generates and can radiate radio frequency energy and if not installed and used in accordance with the instructions, may cause interference in radio communications. -
Página 25: Important Precautions
IMPORTANT PRECAUTIONS WARNINGS: 1. Before using this device, read the instructions in this manual. 2. Please keep the manual carefully for future reference. 3. Unplug the device from the power outlet before cleaning. Do not use liquid cleaners or Aerosol cleaners. Use a damp or wet cloth to clean. Please use LCD screen detergent for cleaning if it is still dirty. -
Página 26: Introduction
IMPORTANT PRECAUTIONS 18. The power cord is the main feature to turn on/off the device; unplug it if the device is not used for a long period of time. 19. Store the device at a place of good ventilation; avoid strong sunlight, high temperature or humidity. -
Página 27: Installation
2. INSTALLATION 1 HDMI Port Power 1 VGA Input Port 1. 1 VGA Port: Connect the VGA Signal Output Socket 2. 1 HDMI Port: Connect the HDMI Signal Output Socket 3. Power Input: Connect the Input of the Power Adapter to the Monitor 2.1 HDMI or VGA Input Connection Connect the equipment cable to your monitor through the HDMI or VGA cable (depending on the case). -
Página 28: Self Inspection
2. INSTALLATION 2.4 Self-inspection If the monitor inspects there is no horizontal and vertical signal, it will prompt to check the video input, please refer to the illustration below, and the monitor will enter into power saving mode after several seconds, the indicator will light red. -
Página 29: Operation
3. Operation 3. Operation 3.1 OSD Button (1) Power Switch Digital control light-touch-switch, used for turning on or off monitor power. (2) Power indicator When the monitor is under normal working condition, the indicator will light green (or blue); If the monitor is under saving mode, the indicator light red or off. - Página 30 With + or - select the desired items, and then press the MENU button for adjustment, with + or - button adjust the display items to optimum, press again for confirmation and exit adjustment. Color adjustment menu Brightness: use + or - to adjust the brightness to optimum Contrast: use + or - to adjust the contrast to optimum Exit: Return to the previous menu.
- Página 31 Function: Auto adjust Auto Colour Exit OSD Tool Adjustment Menu: OSD H-Position adjustment: use + or - to adjust the Horizontal position. OSD V-Position adjustment: use + or - to adjust the Vertical position. OSD Timer: Exit: Back to Previous menu MISC: Mode Select 16: 9...
- Página 32 Exit Exit: Exit OSD menu...
-
Página 33: Osd Menu And Operation Menu Introduction
3. Operation 3.2 OSD MENU AND OPERATION MENU INTRODUCTION 3.1 Power on-off switch This key is digital control, which is used to activate or deactivate the display power supply. 3.2 Light Indicator When the monitor is operating normally, the indicator light looks green (or blue); When the monitor is under power saving, the indicator light turns red or dies out, when it is turned off, the indicator light goes out, but the adapter continues on, for safety the power supply of the adapter must be cut off. - Página 35 Adjust color Show monitor information Auto Adjust. The monitor will be displayed out of range if the monitor exceeds the maximum resolution. Change the screen mode.
- Página 36 Main Menu Submenu Function Image Brightness Adjust monitor brigthness Contrast Adjust monitor contrast Automatic image adjust Auto adjust image position Automatic image color Auto adjust color image Color Color temperature Choose color temperature This settings can be adjusted when Green color temperature is selected Blue Image aspect ratio...
-
Página 37: Precautions
3.3 Precautions When the video signal from the computer exceeds the frequency range of monitor (refer to product specification),the micro-computer of monitor will turn off the sync signal of horizontal and vertical for the purpose of monitor protection, please refer to the illustration below. The monitor will enter saving mode after few seconds, and the power indicator will light red. -
Página 38: Technical Specifications
4. TECHNICAL SPECIFICATIONS PANEL 16:9 Aspect Ratio 432 mm*239.7 mm Visual Area Visual Angle H:160° V:150° Resolution 1 600*900 Dot Size 0.276 mm Display Color 16.7 M de Colors Brightness (Max) 300 cd/m² FUNCTION / OPERATION / CHARACTERISTICS / ENERGY 5 m/s Typical Response Time 1000: 1... -
Página 39: Visual Inspection
4.2 Pin assignment of the signal cable Signal D-Sub Signal D-Sub Energy DDC Green Ground Blue Ground Ground SDA/DCC Test H Sync Ground red V Sync Ground green SCL/DCC Ground blue 4.3 Visual Inspection Even normal pixels on the LCD screen reach 99.9% or higher, there may be 0.01% or less of pixels that are displayed clearly or darkly while they are displayed. -
Página 40: Troubleshooting
5. TROUBLESHOOTING If the monitor can not function normally, please refer to the following methods for common problems quickly, if you need help please call the distributor where you purchased the monitor. A. There is no image of the screen / LED without Light. Please check to see if the power cord function is securely connected to the monitor and wall outlet, and, if the display function is in power saving mode. -
Página 41: Warranty Policy
WARRANTY POLICY Qian S.A. de C.V., will warranty this product in all its parts and workman- ship for the period of 12 months, counting from the date of purchase against defects in manufacture and operation during normal and domestic use of this product. - Página 42 Exclusions: Qian S.A. de C.V. will not validate this warranty policy in the following cases: • When the product has been used under normal conditions.. • When the product had not operated according to the instructions of use that accompanies it.
-
Página 43: Security Information
SECURITY INFORMATION AC safety warnings (Alternate Current) WARNING: Place the monitor near an Alternating Current outlet. The AC power cord is the main means of disconnecting your monitor and should always be within reach. For your safety, the power cord included with the system is grounded. - Página 44 www.qian.mx...