LG LSGL5833 Serie Manual Del Propietário
Cocina de gas
Ocultar thumbs
Ver también para LSGL5833 Serie:
- Manual del propietário (164 páginas) ,
- Manual del propietário (88 páginas)
Tabla de contenido
Idiomas disponibles
Idiomas disponibles
Enlaces rápidos
us_main.book.book Page 1 Wednesday, June 16, 2021 3:46 PM
OWNER'S MANUAL
GAS RANGE
Read this owner's manual thoroughly before operating the
appliance and keep it handy for reference at all times.
ENGLISH
LSGL5833* / LSGL5831*
www.lg.com
MFL33029632
Rev.03_061621
Copyright © 2021 LG Electronics Inc. All Rights Reserved.
Capítulos
Tabla de contenido
Solución de problemas

Manuales relacionados para LG LSGL5833 Serie


Resumen de contenidos para LG LSGL5833 Serie
- Página 77 Page 1 Wednesday, June 16, 2021 3:51 PM MANUAL DEL PROPIETARIO COCINA DE GAS Lea el manual del propietario detenidamente previo a operar el electrodoméstico y mantengalo al alcance para futuras referencias. ESPAÑOL LSGL5833* / LSGL5831* www.lg.com Copyright © 2021 LG Electronics Inc. Todos los derechos reservados...
- Página 78 ls_main.book.book Page 4 Monday, March 15, 2021 3:51 PM Seguridad para una cocina de gas ADVERTENCIA: Si no sigue con exactitud la información de este manual, puede provocar un incendio o una explosión que cause daños en la propiedad, lesiones personales o la muerte. No guarde ni use gasolina u otros vapores o líquidos inflamables cerca •...
- Página 79 ls_main.book.book Page 3 Wednesday, June 16, 2021 3:51 PM ÍNDICE INSTRUCCIONES IMPORTANTES 19 Ajuste de los obturadores de aire (para conversiones a gas LP) DE SEGURIDAD Conexión de electricidad LEA TODAS LAS INSTRUCCIONES ANTES DE 20 Requisitos eléctricos UTILIZAR 20 Conexión a tierra 5 Mensajes de Seguridad Quemadores de superficie 5 Dispositivo antivuelco...
- Página 80 84 PROCEDIMIENTO PARA RESOLVER Aplicación LG ThinQ CONFLICTOS: 53 Funciones de la aplicación LG ThinQ 53 Antes de usar la aplicación LG ThinQ 54 Instalación de la aplicación LG ThinQ 54 Conexión a Wi-Fi 54 Especificaciones módulo LAN inalámbrico 54 Aviso de la FCC 55 Declaración sobre exposición a la radiación...
-
Página 81: Instrucciones Importantes De Seguridad
INSTRUCCIONES IMPORTANTES DE SEGURIDAD INSTRUCCIONES IMPORTANTES DE SEGURIDAD LEA TODAS LAS INSTRUCCIONES ANTES DE UTILIZAR Descargue este manual del propietario en http://www.lg.com Mensajes de Seguridad Su seguridad y la de los demás son muy importantes. Tanto en este manual como en el equipo, hemos proporcionado muchos mensajes de seguridad importantes. -
Página 82: Advertencia
ls_main.book.book Page 6 Wednesday, June 16, 2021 3:51 PM INSTRUCCIONES IMPORTANTES DE SEGURIDAD ADVERTENCIA • No coloque objetos grandes y pesados, como pavos enteros, sobre la puerta del horno abierta. La cocina podría inclinarse hacia adelante y ocasionar lesiones. • No se pare ni se siente sobre la puerta del horno. La cocina podría inclinarse y usted podría sufrir lesiones con líquidos calientes derramados, alimentos calientes o la cocina misma. -
Página 83: Funcionamiento
ls_main.book.book Page 7 Wednesday, June 16, 2021 3:51 PM INSTRUCCIONES IMPORTANTES DE SEGURIDAD instrucciones podría causar lesiones graves o daños a la propiedad. La agencia calificada que realice este trabajo asume la responsabilidad de la conversión. • Desconecte el suministro eléctrico antes de realizar el mantenimiento al electrodoméstico. •... -
Página 84: Mantenimiento
ls_main.book.book Page 8 Wednesday, June 16, 2021 3:51 PM INSTRUCCIONES IMPORTANTES DE SEGURIDAD • Para prevenir riesgos de incendio o descarga eléctrica, no use un adaptador o cable de extensión, ni retire la punta con conexión a tierra del cable de alimentación eléctrica. Si lo hace podría causar lesiones graves, incendio o incluso la muerte a niños o adultos. -
Página 85: Precaución
ls_main.book.book Page 9 Wednesday, June 16, 2021 3:51 PM INSTRUCCIONES IMPORTANTES DE SEGURIDAD • La prueba para detectar fugas del aparato se debe realizar según las instrucciones del fabricante. • Pueden producirse fugas de gas en el sistema y generar un riesgo grave. Es posible que no se detecten fugas de gas solo con el olfato. -
Página 86: Mantenimiento
ls_main.book.book Page 10 Wednesday, June 16, 2021 3:51 PM 10 INSTRUCCIONES IMPORTANTES DE SEGURIDAD - Carne de res, ternera, cerdo o cordero: 145 °F - Pescado/mariscos: 145 °F Mantenimiento • No use limpiadores comerciales para horno sobre el acabado ni alrededor de ninguna pieza del horno. Dañarán el acabado del aparato. -
Página 87: Descripción General Del Producto
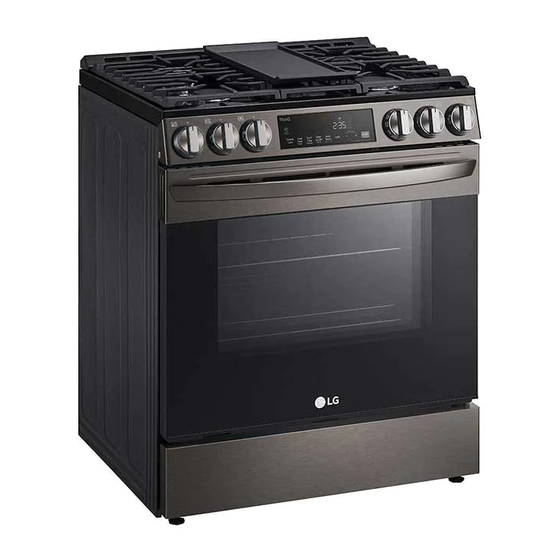
ls_main.book.book Page 11 Wednesday, June 16, 2021 3:51 PM DESCRIPCIÓN GENERAL DEL PRODUCTO DESCRIPCIÓN GENERAL DEL PRODUCTO Características del Producto Interior y exterior Placa de cocción Controlador de la placa de cocción Puerta del horno Cajón de almacenamiento Perilla de modo de horno (modelo LSGL5833*) Junta Placa con el número de serie y modelo Especificaciones del producto... -
Página 88: Accesorios
ls_main.book.book Page 12 Wednesday, June 16, 2021 3:51 PM 12 DESCRIPCIÓN GENERAL DEL PRODUCTO Accesorios Accesorios incluidos Kit antivuelco Soporte antivuelco (1 c/u) Tornillos (4 c/u) Anclajes (4 c/u) Plantilla (1 c/u) Kit de conversión para boquilla de LP Boquillas de placa de cocción (5 c/u) Boquillas de horno (2 c/u) Guía de instalación (1 c/u) Otros accesorios... - Página 89 DESCRIPCIÓN GENERAL DEL PRODUCTO NOTA • Comuníquese con el Servicio de atención al cliente de LG al 1-800-243-0000 (1-888-542-2623 en Canadá) si le falta algún accesorio. • Para su seguridad y una mayor duración del producto, utilice únicamente componentes autorizados.
-
Página 90: 14 Instalación
ls_main.book.book Page 14 Wednesday, June 16, 2021 3:51 PM 14 INSTALACIÓN INSTALACIÓN Antes de la Instalación Desembalaje y traslado de la cocina ADVERTENCIA Herramientas necesarias • Debe haber dos o más personas para mover e instalar la cocina. (Peligro de peso excesivo) Si no se cumple con esto, se pueden producir lesiones en la espalda o de otro tipo. -
Página 91: Elección De La Ubicación Adecuada
ls_main.book.book Page 15 Wednesday, June 16, 2021 3:51 PM INSTALACIÓN madera enchapada para evitar dañar el • Asegúrese de que el revestimiento del piso revestimiento del piso. pueda resistir temperaturas de 167 °F (75 °C) como mínimo. Consulte las Instrucciones de seguridad de instalación incluidas en este manual. -
Página 92: Dimensiones Y Espacios
ls_main.book.book Page 16 Wednesday, June 16, 2021 3:51 PM 16 INSTALACIÓN Dimensiones y Espacios • Deje suficiente espacio entre la cocina y las superficies combustibles adyacentes. • Se deben cumplir estas dimensiones para usar de manera segura su cocina. • Se debe modificar la ubicación del tomacorriente y la abertura de la tubería (consulte "Ubicaciones de tubería de gas y tomacorriente eléctrico"... -
Página 93: Nivelando
ls_main.book.book Page 17 Wednesday, June 16, 2021 3:51 PM INSTALACIÓN Espacios libres 30" (76.2 cm) 13" (33.0 cm) 30" (76.2 cm) 5" (12.7 cm) 18" (45.7 cm) 36" " 0" (91.4 cm) (0.6 cm) Mínimo Espacio mínimo a la izquierda/derecha de la pared Profundidad máxima para gabinetes ubicados sobre la mesada Borde frontal del panel lateral de la cocina delante del gabinete Para gabinetes debajo de la placa de cocción y en la parte posterior de la cocina... -
Página 94: Conexión De Gas
ls_main.book.book Page 18 Wednesday, June 16, 2021 3:51 PM 18 INSTALACIÓN podría ser más fácil insertar la pata trasera en el del regulador, la presión de entrada debe ser, soporte antivuelco. como mínimo, 1" más que la presión operativa (del colector) según se indica anteriormente. •... -
Página 95: Ajuste De Los Obturadores De Aire (Para Conversiones A Gas Lp)
ls_main.book.book Page 19 Wednesday, June 16, 2021 3:51 PM INSTALACIÓN Montaje del conector flexible Instale un adaptador de unión acampanada macho de 1/2" a la rosca interna de 1/2" NPT Pídale al instalador que le muestre la ubicación de en la entrada del regulador de presión. Use la válvula de corte de gas de la cocina y cómo una llave de sujeción en el accesorio del cerrarla si es necesario. -
Página 96: Conexión De Electricidad
ls_main.book.book Page 20 Wednesday, June 16, 2021 3:51 PM 20 INSTALACIÓN Conexión de electricidad Z223.1/NFPA 54 o, en Canadá, con el Código de Instalación de Gas Natural y Propano, CSA B149.1. Requisitos eléctricos NOTA Circuito exclusivo conectado a tierra de forma adecuada de 120 voltios, 60 Hz protegido por un •... -
Página 97: Verificación De Encendido De Los Quemadores De Superficie
ls_main.book.book Page 21 Wednesday, June 16, 2021 3:51 PM INSTALACIÓN Calidad de las llamas Asegúrese de que el orificio del cabezal del quemador esté ubicado sobre el electrodo. Debe confirmar visualmente la calidad de combustión de las llamas de los quemadores. Llamas amarillas Solicite mantenimiento. -
Página 98: Relleno Trasero Opcional
ls_main.book.book Page 22 Wednesday, June 16, 2021 3:51 PM 22 INSTALACIÓN Fije el conjunto de placa superior trasera y Tornillo de ajuste central relleno como se muestra en la imagen, con los tres tornillos que retiró en el paso 1. Gire el tornillo para ajustar. -
Página 99: Prueba De Funcionamiento
ls_main.book.book Page 23 Wednesday, June 16, 2021 3:51 PM INSTALACIÓN Prueba de funcionamiento • El uso de este dispositivo no impide que la cocina se caiga si no está bien instalado. Pruebe la cocina antes de usarla • Después de instalar el dispositivo antivuelco, intente inclinar la cocina hacia adelante para NOTA verificar una correcta instalación. - Página 100 ls_main.book.book Page 24 Wednesday, June 16, 2021 3:51 PM 24 INSTALACIÓN Gire la perilla de modo del horno para seleccionar el modo Broil. Hi aparece en la pantalla. • Asegúrese de que la puerta esté cerrada. Presione START. Modelo LSGL5831* Retire todos los materiales de embalaje del interior de la cavidad del horno.
-
Página 101: Funcionamiento
ls_main.book.book Page 25 Wednesday, June 16, 2021 3:51 PM FUNCIONAMIENTO FUNCIONAMIENTO Panel de control Funciones del panel de control Modelo: LSGL5833* Modelo: LSGL5831* Características Control del horno Botones +/– START CLEAR/OFF Smart Diagnosis NOTA • Reloj intermitente - Si el signo de dos puntos parpadea en la pantalla del reloj, presione Clock y restablezca la hora, o presione cualquier tecla para detener el parpadeo. -
Página 102: Cambio De Configuración Del Horno
ls_main.book.book Page 26 Wednesday, June 16, 2021 3:51 PM 26 FUNCIONAMIENTO NOTA • Para obtener mejores resultados, presione los botones del centro, incluso cuando active la función secundaria de un botón. Es posible que los botones no funcionen de forma adecuada si se presionen demasiado lejos del centro. -
Página 103: Wi-Fi
Gire la perilla de modo del horno a la posición 3 segundos. OFF. Mantenga presionado Start Time durante 3 segundos. Siga las instrucciones de la aplicación LG ThinQ para conectar el electrodoméstico. Presione +/- para ir cambiando entre un reloj de 12 horas y uno de 24 horas. - Página 104 ls_main.book.book Page 28 Wednesday, June 16, 2021 3:51 PM 28 FUNCIONAMIENTO Presione +/- para ir cambiando entre un reloj de 12 horas y uno de 24 horas. Modelo LSGL5833* Gire la perilla de modo del horno a la posición Presione START para aceptar el cambio. OFF.
-
Página 105: Bloqueo De Control
ls_main.book.book Page 29 Wednesday, June 16, 2021 3:51 PM FUNCIONAMIENTO Start Time varias veces hasta que aparezca Presione +/- para seleccionar F (Fahrenheit) o PrE en la pantalla. C (Celsius). Presione +/- para encender o apagar la luz. Presione START para aceptar el cambio. Modelo LSGL5831* Presione START para aceptar el cambio. -
Página 106: Cook Time (Timed Cook) (Tiempo De Cocción [Cocción Programada])
ls_main.book.book Page 30 Wednesday, June 16, 2021 3:51 PM 30 FUNCIONAMIENTO • Para cambiar el tiempo de cocción, repita el paso PRECAUCIÓN 3 y presione START. • Tenga cuidado con las funciones de Cocción • Si el reloj de horno está configurado para 12 programada retrasada. -
Página 107: Configuraciones Mínimas Y Máximas Predeterminadas
ls_main.book.book Page 31 Wednesday, June 16, 2021 3:51 PM FUNCIONAMIENTO Presione START. Suena un tono de error de la entrada (dos tonos cortos) si la entrada de la temperatura o tiempo Modelo LSGL5831* está por debajo de la configuración mínima o por encima de la máxima para esa función. -
Página 108: Quemadores De Superficie De Gas
ls_main.book.book Page 32 Wednesday, June 16, 2021 3:51 PM 32 FUNCIONAMIENTO Quemadores de superficie • Asegúrese de que todos los controles de superficie estén en posición OFF antes de de gas suministrar gas a la cocina. • Nunca deje los quemadores de superficie sin Antes de usar los quemadores de supervisión en ajustes de llama alta. -
Página 109: Ubicaciones De Los Quemadores
ls_main.book.book Page 33 Wednesday, June 16, 2021 3:51 PM FUNCIONAMIENTO puede hacer que el quemador no funcione • Asegúrese de que los quemadores y las rejillas correctamente. Esto puede provocar que el nivel estén fríos antes de tocarlos o de colocar una de monóxido de carbono sea superior a los agarradera, un paño de limpieza u otros estándares actuales permitidos, lo que generaría... -
Página 110: Uso De Los Quemadores De Gas De Superficie
ls_main.book.book Page 34 Wednesday, June 16, 2021 3:51 PM 34 FUNCIONAMIENTO Quemador ovalado El quemador central ovalado se utiliza para cocinar con parrilla u ollas ovaladas. Uso de los quemadores de gas de superficie Ajuste del tamaño de la llama PRECAUCIÓN Mire la llama, y no la perilla, mientras reduce el •... -
Página 111: Uso De Un Wok
ls_main.book.book Page 35 Wednesday, June 16, 2021 3:51 PM FUNCIONAMIENTO funcionan bien si se usan con calor medio PRECAUCIÓN según recomienda el fabricante. • No use rejillas sobre los quemadores de • Utensilios de cocina esmaltados superficie. Si usa una rejilla sobre el quemador - En ciertas condiciones, el esmalte de los de superficie, la combustión sería incompleta, lo utensilios de cocina podría derretirse. -
Página 112: En Caso De Corte De Energía Eléctrica
ls_main.book.book Page 36 Wednesday, June 16, 2021 3:51 PM 36 FUNCIONAMIENTO PRECAUCIÓN NOTA • No retire la rejilla central cuando use la parrilla. • Después de utilizar la parrilla durante un tiempo prolongado, ajuste la configuración de la • No retire la placa de la parrilla hasta que las temperatura de parrilla como el calor retenido rejillas, las superficies y la placa de la parrilla en la parrilla. -
Página 113: Ventilación Del Horno
ls_main.book.book Page 37 Wednesday, June 16, 2021 3:51 PM FUNCIONAMIENTO • No coloque recipientes cerrados sobre la placa cercanas durante cualquier operación de de cocción. Podría aumentar la presión en los cocina. recipientes cerrados y hacerlos explotar. • Los objetos metálicos se calentarán demasiado si los deja sobre la cocina y podrían causar quemaduras. -
Página 114: Uso De Los Estantes Del Horno
ls_main.book.book Page 38 Wednesday, June 16, 2021 3:51 PM 38 FUNCIONAMIENTO Gire la perilla de modo del horno para PRECAUCIÓN seleccionar Bake. • Los bordes de la ventilación de la cocina son filosos. Para evitar sufrir lesiones, use guantes Ajuste la temperatura del horno. Para ello, cuando limpie la cocina. -
Página 115: Convection Mode (Modo De Convección) (Modelo Lsgl5833*)
ls_main.book.book Page 39 Wednesday, June 16, 2021 3:51 PM FUNCIONAMIENTO normal de horneado. Esto sucede para asegurar Presione START. La pantalla muestra Conv. resultados uniformes de horneado. Bake o Conv. Roast y la temperatura convertida comienza en 100 °F. • A medida que el horno se precalienta, se Consejos de horneado muestran incrementos de temperatura cada 5 grados. -
Página 116: Guía De Recomendaciones Para Hornear Y Rostizar
ls_main.book.book Page 40 Wednesday, June 16, 2021 3:51 PM 40 FUNCIONAMIENTO Consejos para asar por convección Horneado en varios estantes Use una asadera y una rejilla cuando prepare carnes para asar por convección. La asadera contiene la grasa derramada, y la rejilla ayuda a prevenir las salpicaduras de grasa. -
Página 117: Broil (Asar)
ls_main.book.book Page 41 Wednesday, June 16, 2021 3:51 PM FUNCIONAMIENTO Guía para rostizado en estantes • Cuando use su asador, la temperatura dentro del horno será extremadamente elevada. Tenga cuidado de evitar posibles quemaduras por los Posición siguientes motivos: Comida estante - Mantener la puerta cerrada al asar - Siempre use guantes de cocina al insertar o... - Página 118 ls_main.book.book Page 42 Wednesday, June 16, 2021 3:51 PM 42 FUNCIONAMIENTO Presione START. El horno comienza a • Siga la sección "Guía recomendada para asar" calentar. siempre que sea posible. Si usa Broil, deje que el horno se precaliente durante aproximadamente cinco minutos antes de cocinar los alimentos.
-
Página 119: Guía De Recomendaciones Para Asar
ls_main.book.book Page 43 Wednesday, June 16, 2021 3:51 PM FUNCIONAMIENTO Guía de recomendaciones para asar El tamaño, peso, espesor, la temperatura inicial y su preferencia de cocción afectarán el tiempo de asado. Esta guía se basa en carnes a temperatura de refrigerador. Para obtener mejores resultados al asar, use una bandeja especial para asar. - Página 120 ls_main.book.book Page 44 Wednesday, June 16, 2021 3:51 PM 44 FUNCIONAMIENTO Primer Segundo Posición lado lado Comida Cantidad y/o espesor Comentarios (minuto (minuto estante Fetas de 1" de espesor Aumente el tiempo de jamón 5 a 10 minutos por (precocidas) lado para un espesor "...
- Página 121 ls_main.book.book Page 45 Wednesday, June 16, 2021 3:51 PM FUNCIONAMIENTO - Los trozos de carne que tengan más de dos pulgadas de espesor deben sacarse del refrigerador 30 minutos antes de cocinarlos. Esto permitirá cocinar de manera más rápida y uniforme, y producirá menos humo al asar.
-
Página 122: Proof (Leudar)
ls_main.book.book Page 46 Wednesday, June 16, 2021 3:51 PM 46 FUNCIONAMIENTO Proof (Leudar) Presione START. Esta función mantiene el horno caliente para leudar los productos con levadura antes de Presione CLEAR/OFF cuando se haya hornear. terminado el leudado. Configuración de la función Leudar NOTA Modelo LSGL5833* •... -
Página 123: Keep Warm (Mantener Caliente)
ls_main.book.book Page 47 Wednesday, June 16, 2021 3:51 PM FUNCIONAMIENTO NOTA • Para cancelar la configuración Keep Warm (Mantener caliente), presione Keep Warm de nuevo. Presione START. Presione START. Para cancelar la función Warm, presione CLEAR/OFF. Para cancelar la función Keep Warm (Mantener caliente) durante el NOTA funcionamiento, gire la perilla de modo del... -
Página 124: Freír Con Aire (Modelo Lsgl5833*)
Air Fry 400°F aparece en • Use la bandeja para freír con aire opcional la pantalla. disponible de LG o una bandeja para hornear oscura sin lados o con lados bajos que no cubra todo el estante. Esto permite una mejor Ajuste la temperatura del horno. -
Página 125: Guía Para Freír Con Aire Recomendada
ls_main.book.book Page 49 Wednesday, June 16, 2021 3:51 PM FUNCIONAMIENTO Recomendaciones para freír alimentos durante 15 minutos después de que haya terminado. con alto contenido de grasa • En lo posible, abra una ventana o una puerta Los alimentos con alto contenido de grasa se para asegurarse de que la cocina esté... - Página 126 ls_main.book.book Page 50 Wednesday, June 16, 2021 3:51 PM 50 FUNCIONAMIENTO Hora Cantidad Posición del Puntos recomendados Temp. (°F) Guía (minu aprox. (oz) estante Papas fritas de 3/8 in 30-40 Corte las papas y (10 mm) sumérjalas durante 30 minutos en agua caliente Gajos de papas 30-40 del grifo.
-
Página 127: Frozen Meal (Comida Congelada)
ls_main.book.book Page 51 Wednesday, June 16, 2021 3:51 PM FUNCIONAMIENTO Hora Cantidad Posición del Puntos recomendados Temp. (°F) Guía (minu aprox. (oz) estante Salchichas* de 2,5 oz 20-30 *Los alimentos con mucha y 3/4 in de diám. cada grasa pueden producir más una (70 g y 2 cm de diám. -
Página 128: Inicio Remoto
ls_main.book.book Page 52 Wednesday, June 16, 2021 3:51 PM 52 FUNCIONAMIENTO Inicio remoto Utilice las teclas +/– para establecer la temperatura de Bake (Horneado). Si el electrodoméstico está conectado a una red de Wi-Fi doméstica, esta función inicia el precalentamiento y luego mantiene la Presione START. -
Página 129: Funciones Inteligentes
• Si cambia de enrutador inalámbrico, proveedor de su red. de Internet o contraseña, borre el • LG ThinQ no es responsable por ningún electrodoméstico conectado desde la aplicación problema de conexión en red, falla, mal LG ThinQ y conéctelo de nuevo. -
Página 130: Instalación De La Aplicación Lg Thinq
Conexión a Wi-Fi receptor. • Consultar al vendedor o a un técnico de radio/TV El botón Wi-Fi, al ser usado con la aplicación LG con experiencia para solicitar ayuda. ThinQ, permite al electrodoméstico conectarse a El dispositivo cumple con la parte 15 de las Reglas la red Wi-Fi doméstica. -
Página 131: Declaración Sobre Exposición A La Radiación De Rf De La Fcc
ThinQ. no controlados. Este transmisor no se debe ubicar ni operar junto con ninguna otra antena ni • Inicie la aplicación LG ThinQ y seleccione la transmisor. función Smart Diagnosis en el menú. Siga las instrucciones provistas en la aplicación LG El equipo se debe instalar y operar con una ThinQ. - Página 132 ls_main.book.book Page 56 Wednesday, June 16, 2021 3:51 PM 56 FUNCIONES INTELIGENTES NOTA • Para obtener resultados óptimos, no mueva el teléfono mientras se transmitan los tonos.
-
Página 133: Mantenimiento
ls_main.book.book Page 57 Wednesday, June 16, 2021 3:51 PM MANTENIMIENTO MANTENIMIENTO Limpieza objetos de ellas. Puede dañar el eje de la válvula de gas. • Las perillas de control se pueden quitar para PRECAUCIÓN limpiarlas fácilmente. • No limpie este aparato con lejía. •... - Página 134 ls_main.book.book Page 58 Wednesday, June 16, 2021 3:51 PM 58 MANTENIMIENTO • No limpie la asadera ni la rejilla en el modo de NOTA autolimpieza. (Disponible en algunos modelos) • Los limpiadores o pulidores para • Retire la rejilla de la asadera. Vierta la grasa de la electrodomésticos de acero inoxidable pueden asadera en un recipiente adecuado con cuidado.
-
Página 135: Quemadores De Superficie De Gas
ls_main.book.book Page 59 Wednesday, June 16, 2021 3:51 PM MANTENIMIENTO Use una aspiradora con un accesorio de cepillo o • La tapa del quemador no está bien colocada. boquilla para limpiar la celosía de ventilación No quite el panel que cubre la cocina. Limpieza de tapas/cabezales del quemador Para lograr una llama uniforme y libre, las... - Página 136 ls_main.book.book Page 60 Wednesday, June 16, 2021 3:51 PM 60 MANTENIMIENTO Limpieza de la superficie de la placa de tamaño. Asegúrese de que el agujero del cabezal del quemador esté ubicado sobre el electrodo. cocción El revestimiento EasyClean facilita la limpieza de la Rejillas de los quemadores placa de cocción.
-
Página 137: Easyclean
La función EasyClean se beneficia con el nuevo esmalte de LG ya que ayuda a despegar la suciedad sin usar químicos fuertes y funciona SOLAMENTE CON AGUA durante apenas 10 minutos a baja temperatura para aflojar la suciedad LEVE antes de la limpieza manual. - Página 138 ls_main.book.book Page 62 Wednesday, June 16, 2021 3:51 PM 62 MANTENIMIENTO NOTA • Permita que el horno se enfríe a temperatura ambiente antes de usar el ciclo EasyClean. Si la cavidad del horno alcanza una temperatura superior a 150 °F (65 °C), aparecerá "Hot" en la pantalla y el ciclo EasyClean no se activará...
-
Página 139: Self Clean (Autolimpieza)
ls_main.book.book Page 63 Wednesday, June 16, 2021 3:51 PM MANTENIMIENTO en la base del horno para sumergir ambiente y, a continuación, rocíe o vierta agua completamente la suciedad. Agregue agua si en el horno y comience otro ciclo EasyClean. fuera necesario. Coloque una toalla en el piso •... - Página 140 ls_main.book.book Page 64 Wednesday, June 16, 2021 3:51 PM 64 MANTENIMIENTO calientes. El horno todavía puede estar MUY ADVERTENCIA CALIENTE. • En caso de un incendio en el horno durante la autolimpieza, apáguelo y espere a que se NOTA apague el fuego. No fuerce la puerta para abrirla.
- Página 141 ls_main.book.book Page 65 Wednesday, June 16, 2021 3:51 PM MANTENIMIENTO Clean atrasada nunca se podrá iniciar con más Nivel de suciedad Ajuste del ciclo de 12 horas de anticipación. Cavidad del horno Self Clean de 4 horas • Luego de que se apague el horno, el ventilador moderadamente sucia de convección seguirá...
-
Página 142: Extracción Y Colocación De Las Puertas Desmontables Del Horno
ls_main.book.book Page 66 Wednesday, June 16, 2021 3:51 PM 66 MANTENIMIENTO Presione más (+) o menos (–) para establecer Lock (Bloqueo) la hora del día en que desea iniciar Self Clean Desbloqueo (Autolimpieza). Tome firmemente ambos lados de la puerta Presione START. -
Página 143: Extracción Y Colocación De Cajones
ls_main.book.book Page 67 Wednesday, June 16, 2021 3:51 PM MANTENIMIENTO Borde inferior de la ranura Hendidura Abra totalmente la puerta. Si la puerta no se abre por completo, la hendidura no está bien apoyada en el borde inferior de las ranuras. Bloquee las trabas girándolas nuevamente hacia las ranuras del marco del horno hasta Localice las palancas de deslizamiento a... -
Página 144: Mantenimiento Periódico
ls_main.book.book Page 68 Wednesday, June 16, 2021 3:51 PM 68 MANTENIMIENTO Mantenimiento periódico Cambio de la luz del horno La luz del horno es una bombilla estándar halógena para electrodomésticos de 40 vatios. Se enciende cuando se abre la puerta del horno. Cuando la puerta del horno está... -
Página 145: Solución De Problemas
ls_main.book.book Page 69 Wednesday, June 16, 2021 3:51 PM SOLUCIÓN DE PROBLEMAS SOLUCIÓN DE PROBLEMAS Preguntas Frecuentes Preguntas frecuentes ¿Qué tipo de utensilios cocina se recomienda usar con la placa de cocción? • Las bandejas deben tener fondo plano y laterales rectos. •... - Página 146 ls_main.book.book Page 70 Wednesday, June 16, 2021 3:51 PM 70 SOLUCIÓN DE PROBLEMAS PRECAUCIÓN • Se puede utilizar papel de aluminio para envolver los alimentos dentro del horno o el cajón de calentamiento, pero no permita que el papel de aluminio entre en contacto con los elementos calentadores o asaderas del horno expuestos.
- Página 147 ls_main.book.book Page 71 Wednesday, June 16, 2021 3:51 PM SOLUCIÓN DE PROBLEMAS Depende del tipo de suciedad. Las manchas de azúcar y algunas de grasa son particularmente difíciles de limpiar. Además, si las manchas no están muy empapadas en agua, esto puede tener un efecto negativo en el desempeño de la limpieza.
-
Página 148: Antes De Llamar Al Servicio Técnico
ls_main.book.book Page 72 Wednesday, June 16, 2021 3:51 PM 72 SOLUCIÓN DE PROBLEMAS ¿Por qué no está funcionando Instaview? (En algunos modelos) Nivele la cocina ajustando las patas de nivelación con una llave. Antes de llamar al servicio técnico Revise esta sección antes de llamar para servicio; hacerlo le ahorrará tiempo y dinero. Cocción Problemas Causas posibles y solución... - Página 149 ls_main.book.book Page 73 Wednesday, June 16, 2021 3:51 PM SOLUCIÓN DE PROBLEMAS Problemas Causas posibles y solución Los alimentos no se Los controles del horno no se configuraron correctamente. asan de manera • Asegúrese de seleccionar el modo Broil correctamente. adecuada Se está...
-
Página 150: Partes Y Características
ls_main.book.book Page 74 Wednesday, June 16, 2021 3:51 PM 74 SOLUCIÓN DE PROBLEMAS Problemas Causas posibles y solución El horno hace El control no está configurado correctamente. demasiado humo • Siga las instrucciones de Configuración de los controles del horno. durante el asado. - Página 151 ls_main.book.book Page 75 Wednesday, June 16, 2021 3:51 PM SOLUCIÓN DE PROBLEMAS Problemas Causas posibles y solución La puerta del horno El horno está demasiado caliente. no se abre después • Deje enfriar el horno por debajo de la temperatura de bloqueo. de un ciclo Self Clean (En algunos modelos) El control y la puerta pueden estar bloqueados.
-
Página 152: Ruidos
ls_main.book.book Page 76 Wednesday, June 16, 2021 3:51 PM 76 SOLUCIÓN DE PROBLEMAS Problemas Causas posibles y solución No se puede mover Los gabinetes no son cuadrados o están instalados muy justos. el aparato con • Comuníquese con el fabricante o instalador para hacer que el aparato sea accesible. facilidad. -
Página 153: Wi-Fi
ls_main.book.book Page 77 Wednesday, June 16, 2021 3:51 PM SOLUCIÓN DE PROBLEMAS Wi-Fi Problemas Causas posibles y solución Problemas para La contraseña para la red Wi-Fi se introdujo de forma incorrecta. conectar el • Elimine su red Wi-Fi doméstica y comience el proceso de registro nuevamente. electrodoméstico y el teléfono Los Datos Móviles para su teléfono inteligente están activados. -
Página 154: 78 Garantía Limitada
CONTINUACIÓN LA SECCIÓN “PROCEDIMIENTO PARA RESOLVER CONFLICTOS”. En caso de que su Cocina a gas LG (“Producto”) presente alguna falla por defectos de materiales o de fabricación bajo uso apropiado y normal durante el período de garantía establecido más abajo, el mismo será... - Página 155 • Daños o fallos resultantes de mal uso, abuso, instalación, reparación o mantenimiento incorrectos. Una reparación incorrecta incluye el uso de piezas no autorizadas, aprobadas o especificadas por LG. La instalación o el mantenimiento inadecuado incluye aquellos contrarios a lo especificado en el manual del usuario del producto.
- Página 156 ls_main.book.book Page 80 Wednesday, June 16, 2021 3:51 PM 80 GARANTÍA LIMITADA Problema Posible causa y prevención Llama desigual Instalación incorrecta de la tapa del quemador La cabeza del quemador está asentada adecuadamente. La cabeza del quemador NO está asentada adecuadamente. •...
- Página 157 ls_main.book.book Page 81 Wednesday, June 16, 2021 3:51 PM GARANTÍA LIMITADA Problema Posible causa y prevención Perillas derretidas Uso inadecuado • No deje la puerta en la posición de detención durante del modo Asar/Hornear ni inmediatamente después de cocinar. El horno o los El papel de aluminio se derritió...
- Página 158 ls_main.book.book Page 82 Wednesday, June 16, 2021 3:51 PM 82 GARANTÍA LIMITADA Problema Posible causa y prevención La superficie no La cocina no está nivelada está nivelada El horno está inclinado • Primero consulte con el instalador. • Use un nivelador de carpintero para verificar la nivelación.
- Página 159 ls_main.book.book Page 83 Wednesday, June 16, 2021 3:51 PM GARANTÍA LIMITADA Problema Posible causa y prevención El instalador no realizó parte de la conversión. (Revise 3 partes: regulador, válvula Las llamas son demasiado de placa de cocción, válvula de asar/hornear.) grandes en la placa de cocción convertida (NP...
-
Página 160: Procedimiento Para Resolver Conflictos
Aviso de disputa. En caso de que usted desee iniciar un procedimiento de arbitraje, primero debe notificar a LG por escrito al menos 30 días antes de iniciar el arbitraje enviando una carta a LG a LG Electronics, USA, Inc. Atención: Legal Department- Arbitration 111 Sylvan Avenue, Englewood Cliffs, NJ... - Página 161 LG pueden solicitar al otro que participe en un procedimiento de arbitraje. Para excluirse usted debe enviar una notificación a LG, en un lapso de hasta 30 días continuos, contados a partir de la fecha de la primera compra del consumidor del producto, ya sea por: (i) el envío de un correo electrónico a...
- Página 162 (c) el nombre o el número del modelo del producto; y (d) el número del serial (el número del serial puede ser hallado (i) en el producto, o (ii) en la dirección de https:// www.lg.com/us/support/repair-service/schedule-repair-continued al hacer clic en “Find My Model & Serial Number”).