
Manuales relacionados para KEKAI OREGON

Resumen de contenidos para KEKAI OREGON
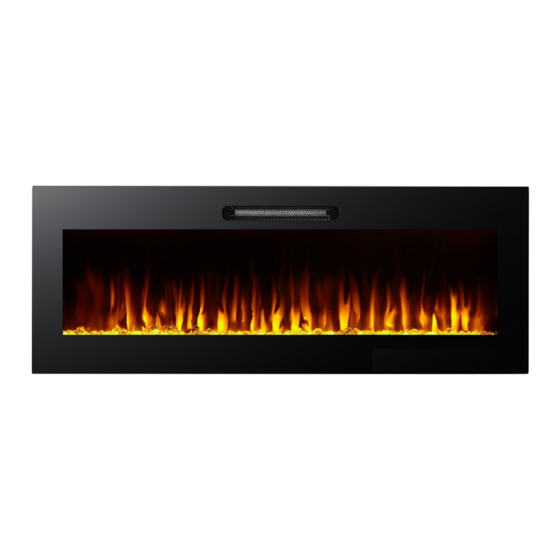
- Página 1 CHIMENEA ELECTRICA C/ EFECTO LLAMA 3D Y SALIDA DE AIRE FRONTAL 2000W OREGON REF: KT0940 Manual de instrucciones Instruction manual...
- Página 2 KT0940 Manual de Instrucciones Español Estimado/a cliente/a: Muchas gracias por elegir nuestros productos, nos complace ofrecerle nuestros productos y servicios. Lea atentamente el manual del usuario antes de utilizar el equipo y utilícelo siguiendo las instrucciones de funcionamiento de este manual para evitar incendios u otros peligros accidentales.
-
Página 3: Guía Práctica Del Usuario Para La Chimenea Eléctrica
GUÍA PRÁCTICA DEL USUARIO PARA LA CHIMENEA ELÉCTRICA 1. Antes de usar la chimenea eléctrica por primera vez, compruebe lo siguiente: • ¿Están encendidos los disyuntores de la unidad? • ¿Están flojas las bombillas de la chimenea eléctrica? Para comprobarlo, siga las instrucciones para sustituir las bombillas en la sección de mantenimiento de este manual. - Página 4 INSTRUCCIONES IMPORTANTES CONSERVE ESTA GUÍA DEL USUARIO PARA FUTURAS CONSULTAS Cuando se utilicen aparatos eléctricos, siempre se deben tomar medidas de precaución básicas para reducir el riesgo de incendio, descarga eléctrica y lesiones a las personas, incluidas las siguientes: 1. Lea todas las instrucciones antes de usar la chimenea eléctrica. 2.
-
Página 5: Riesgo De Descarga Eléctrica No Debe Abrirse
PRECAUCIÓN RIESGO DE DESCARGA ELÉCTRICA NO DEBE ABRIRSE EN EL INTERIOR NO HAY PIEZAS QUE PUEDA REPARAR EL USUARIO 7. No lo utilice al aire libre. 8. No utilice este calefactor en las inmediaciones de un cuarto de baño, una ducha o una piscina. - Página 6 19. Utilice siempre tomas de corriente polarizadas, con fusibles y debidamente conectadas a tierra. 20. Desconecte toda la fuente de alimentación antes de realizar cualquier limpieza, mantenimiento o traslado de la unidad. 21. Cuando transporte o almacene la unidad y el cable, manténgalos en un lugar seco y sin vibraciones excesivas, y guárdelos para evitar daños.
-
Página 7: Instalación De La Chimenea Eléctrica Nota
INSTALACIÓN DE LA CHIMENEA ELÉCTRICA NOTA Se requiere un circuito de 10 amperios y 230 voltios de corriente alterna (VCA). Es preferible un circuito específico, pero no es esencial en todos los casos. Se requiere un circuito específico si, después de la instalación, el disyuntor se dispara o el fusible se quema con regularidad cuando el calefactor está... -
Página 8: Piezas Y Materiales
PIEZAS Y MATERIALES B – Tornillos de madera C – Taco de anclaje A - Chimenea D – Cristales E – Juego Mando a distancia decorativos de leños ESPECIFICACIONES Y DIMENSIONES DIMENSIONES DEL PRODUCTO DIMENSIONES DEL PRODUCTO Número de modelo 50 “... -
Página 9: Distancia Mínima De Los Combustibles
PREPARACIÓN Este producto es un electrodoméstico de instalación mural, empotrado y/o en una repisa. Seleccione una ubicación adecuada, no susceptible a la humedad y alejada de cortinas, muebles y zonas muy concurridas. NOTA: adhiérase a todos los códigos eléctricos nacionales y locales. -
Página 10: Instalación Empotrada
INSTALACIÓN EMPOTRADA ADVERTENCIA SOLO UNA PERSONA CUALIFICADA PUEDE REALIZAR LA INSTALACIÓN. Tamaño del orificio PASO A. Seleccione una pared seca y practique un orificio para la caja de la chimenea. El tamaño del agujero debe ser como se muestra en el siguiente gráfico. - Página 11 Tamaño del orificio del marco Número de modelo 47,3 ” (120,14 cm) 18,8 ” (47,75 cm) EF-2050FU Anclajes a la pared (4 uds.) PASO B. Practique 4 orificios alrededor de la pared e instale los 4 tacos de anclaje (pieza C). Encaje la pieza C completamente en la pared.
- Página 12 PASO D. Retire los accesorios de embalaje del juego de leños. 1. Retire el césped delantero. 2. Retire el bloque de algodón. 3. Retire la bola de embalaje del juego de leños. PASO E. Entre dos personas, se debe retirar el panel de cristal de la caja de la chimenea.
- Página 13 Instalación mural ADVERTENCIA SOLO UNA PERSONA CUALIFICADA PUEDE REALIZAR LA INSTALACIÓN. Debido a la amplia variedad de materiales que se utilizan en las diferentes paredes, se recomienda encarecidamente que consulte a su constructor local antes de instalar este equipo en la pared.
-
Página 14: Instalación Del Juego De Leños/Brasas De Cristal
B – Tornillos para D – Tacos de anclaje madera 0,12-0,19 in 3. Instale los dos tornillos para 4. Se debe levantar la chimenea madera, con cuidado de no entre dos personas y colgarla de atornillarlos del todo. Atornille la los dos pasadores de detrás de los cabeza que sobresale a dos tacos de anclaje. - Página 15 2. Retire el juego de leños 3. Introduzca los cristales del interior. decorativos. 4. Instale la placa de cristal. ADVERTENCIA Antes de conectar o usar este producto, debe leer y comprender todo el contenido del manual del propietario, incluida la información de seguridad. De lo contrario, podría provocarse una descarga eléctrica, un incendio, lesiones graves o la muerte.
- Página 16 Mando a distancia pequeño TIRAR Retire la lámina de aislamiento del mando a distancia ICONOS FUNCIONES Botón de encendido/apagado, activación del funcionamiento: Pulse el botón «POWER» del teclado o del mando a distancia; oirá una señal acústica breve y la chimenea eléctrica empezará a funcionar. El botón «POWER»...
- Página 17 alto al bajo. La primera vez que pulse el botón, en la ventana de visualización se mostrará el modo de funcionamiento de calefacción actual (p. ej., el modo de ajuste de calefacción actual es calefacción alta); cuando vuelva a pulsar el botón, la pantalla mostrará que se ha pasado al modo de calefacción baja;...
-
Página 18: Regulador De La Llama
disponible en el mando a distancia). Cuando la temperatura esté configurada, la ventana de visualización de la temperatura parpadeará. Después de 10 segundos sin pulsar el botón de ajuste de temperatura, la ventana de visualización volverá a mostrar la temperatura de la estancia y quedará permanentemente iluminada. -
Página 19: Función De Corrección De Errores De Visualización De La Temperatura Ambiente
distancia y el teclado. Una vez finalizada la configuración de todas las funciones de los productos, pulse los botones «UP» y «DOWN» del teclado a la vez durante 3 segundos o el botón de bloqueo para niños del mando a distancia durante un segundo. Se oirá... -
Página 20: Función De Protección De Pantalla
3 segundos; después, la ventana de visualización de la temperatura ambiente debe cambiar a la pantalla de corrección de temperatura; la pantalla digital está en el modo de visualización intermitente. Cuando utilice la función de corrección de error de temperatura por primera vez, pulse el botón «TIME»... -
Página 21: Sustitución De La Pila Del Mando A Distancia
Información de la pila del mando a distancia El mando a distancia pequeño usa una pila CR2025 (incluida). La pila del mando a distancia que se utilice depende del tipo de mando AVISO a distancia seleccionado anteriormente. La pila del mando a distancia que se utilice depende del tipo de mando AVISO a distancia seleccionado anteriormente. -
Página 22: Limpieza Del Cristal
Especificaciones de la chimenea eléctrica : PELIGRO – para evitar el sobrecalentamiento, no cubra el calefactor. Si tiene que asentarse durante un tiempo prolongado, apague el interruptor de alimentación principal. MANTENIMIENTO ADVERTENCIA Desconecte el suministro eléctrico antes de intentar realizar cualquier labor de mantenimiento o limpieza para reducir el riesgo de incendio, descarga eléctrica o daños a las personas. -
Página 23: Resolución De Problemas
Resolución de problemas PELIGRO DESCONECTE EL APARATO COMPLETAMENTE Y DÉJELO ENFRIAR ANTES DE REALIZAR NINGÚNA LABOR DE MANTENIMIENTO. SOLO UN PROFESIONAL DE MANTENIMIENTO CUALIFICADO DEBE REALIZAR LAS LABORES DE MANTENIMIENTO Y REPARACIÓN DE ESTE ELECTRODOMÉSTICO. Problema Posible causa Solución 1. La chimenea se ha 1. - Página 24 1. Cambie las pilas del mando a distancia. 1. Las pilas están agotadas. 2. Apunte con el mando hacia el 5. El mando a 2. No está apuntando sensor situado directamente detrás de distancia no correctamente. la pantalla de cristal, en el centro de la funciona.
- Página 25 KT0940 English Instruction Manual Dear customer: Thank you very much for choosing our products, it’s our pleasure to offer you our products and service. Please read the user manual carefully before using the appliance and operate following the operation instructions in this manual, in order to prevent fire or other accidental danger. Keep this manual in a safe place for future reference.
- Página 26 QUICK REFERENCE GUIDE FOR THE ELECTRIC FIREPLACE 1. Prior to the first use of the electric fireplace verify the following: • Are the circuit breakers for the unit on? • Are the light bulbs in your electric fireplace loose? (to check, follow the instructions for replacing the light bulbs under the maintenance section of this manual) 2.
- Página 27 IMPORTANT INSTRUCTIONS PLEASE RETAIN THIS USER’S GUIDE FOR FUTURE REFERENCE When using electrical appliances, basic precautions should always be followed to reduce the risk of fire, electric shock, and injury to persons, including the following: 1.Read all instructions before using the electric fireplace. 2.The heater is hot when in use.
- Página 28 CAUTION RISK OF ELECTRIC SHOCK DO NOT OPEN NO USER-SERVICEABLE PARTS INSIDE 7.Do not use outdoors. 8.Do not use this heater in the immediate surroundings of a bath, a shower or a swimming pool 9.The heater must not be located immediately below a socket-outlet. Do not run the cord under carpeting.
- Página 29 21.When transporting or storing the unit and cord, keep in a dry place, free from excessive vibration and store so as to avoid damage. CAUTION:In order to avoid a hazard due to inadvertent resetting of the thermal cut-out, this appliance must not be supplied through an external switching device, such as a timer, or connected to a circuit that is utility 22.This appliance comes equipped with an overheat protection safety device.
- Página 30 ELECTRIC FIREPLACE INSTALLATION NOTE A 10 amp, 230 volt alternating current (VAC) circuit is required. A dedicated circuit is preferred but not essential in all cases. A dedicated circuit will be required if, after installation, the circuit breaker trips or fuse blows on a regular basis when the heater is operating.
-
Página 31: Product Dimensions
PARTS & HARDWARE SPECIFICATION AND DIMENSION PRODUCT DIMENSIONS... - Página 32 PREPARATION Your appliance is a wall-mounted, recessed and /or mantel installed appliance. Select a suitable location that is not susceptible to moisture and is away from drapes, furniture and high traffic areas. NOTE: Follow all National and local electrical codes. MINUMUM MANTEL CLEARANCES WARNING WHEN USING PAINT OR LACQUER TO FINISH THE MANTEL,...
- Página 33 RECESSED TO WALL INSTALLATION WARNING ONLY QUALIFIED PERSON CAN PERFORM THE INSTALLATION. STEP A. Selection a dry wall to open a hole for fireplace box . Size of hole as below chat.
- Página 34 STEP C. Take off the screws (The fourth screw from top to bottom) in both sides of fireplace. Figure (C)
- Página 35 STEP D. Remove packaging attachments from the log set. 1.Remove the front grass. 2.Remove the pear cotton block. 3.Remove the log set’s packaging bag. STEP E. Have two person to take the glass panel out of the fireplace box. Place it to a soft and clean place. Figure (E) STEP F.
- Página 36 you install this appliance on the wall. Log set/Crystal Ember Installation WARNING ONLY QUALIFIED PERSON CAN PERFORM THE INSTALLATION.
- Página 37 WARNING Read and understand this entire owner’s manual, including all safety information, before plugging in or using this product. Failure do to so could result in electric shock, fire, serious injury, or death.
- Página 38 OPERATION INSTRUCTION: Plug in a power plug hear a long buzzer and the electric fireplace is in standby mode. Press the POWER key on the keyboard to show red, and the rest of the display is not displayed. At this time, the electric fireplace is in standby mode. Note: the ICONS on the keypad have the same function as the ICONS on the remote control.
- Página 39 High Heating and Low heating setting: If press "HEATER" button on keypad by 3 seconds,can switch between℃and℉ (Please Note:this function is not available on the remote control.) Boot default setting temperature is 22℃(72℉), if the room temperature is lower than the setting temperature, Then the electric fireplace high heating mode start to work, if you need electric fireplace heating work in low heating mode, then click the keypad or remote control the HEAT button to switch the heating on high and low...
-
Página 40: Dimmer Function
Temperature setting increase buttons: Temperature setting range is15℃ (60℉)- 36℃ (97℉), ( the default setting temperature is 22℃/72℉), press the UP button on the keypad or remote control by each time, the temperature will add 1℃/1℉.If long time press on keypad (don't lose the button, the the Numbers is change) set temperature will continue to increase until maximum.(Note that this long press function is not available on the remote control.) When on temperature setting,... - Página 41 Child lock function: The electric fireplace have lock function on remote control and keypad, After finished all function setting of the products, press the "UP" and "DOWN" button together by 3 seconds on keypad or child lock button on remote control by one second, you will hear the buzzer short sound, then the electric fireplace is locked,the button can not be operating.The display window of middle display is in a flickering state by L after 10S the display...
- Página 42 error correction function, Press the TIME button for 3 seconds, and the display window will be displayed as 0. At this time, every time you press the up or down key of the remote control, the display window will be up +1 or down -1 accordingly, and the correction range is between -9 and 9.
-
Página 43: Replacing The Remote Control Battery
REPLACING THE REMOTE CONTROL BATTERY When the remote control stops operating or its range seems reduced, it is time to replace the battery with a new one. 1. The battery compartment is located on the back end of the remote. 2. -
Página 44: Glass Cleaning
Specification of Electric Fireplace : WARNING – In order to avoid overheating, do not cover the heater. If you have to leave for a long time, please turn off the main power switch after you. MAINTENANCE WARNING Disconnect power before attempting any maintenance or cleaning to reduce the risk of fire, electric shock or damage to persons. - Página 46 Oficina KOVYX OUTDOOR S.L Servicio Post-Venta Tel: (+34) 911 34 50 46 Tel: (+34) 918 09 62 29 C/ de las Moreras 1 - Naves 7-10 Email: info@kovyx.com Email: spv@kovyx.com Pol. Ind. Camporrosso Sur Av. de Andalucía, 208, 28350 - Madrid 28341 Valdemoro, Madrid www.kovyx.com...