Publicidad

Idiomas disponibles
  • ES

Idiomas disponibles

  • ESPAÑOL, página 68

Enlaces rápidos

Ring Smart Dash Cam 4000
Dashcam HD 1296p
English
Deutsch
Français
Español
Italiano
Dutch

Publicidad

Tabla de contenido
loading

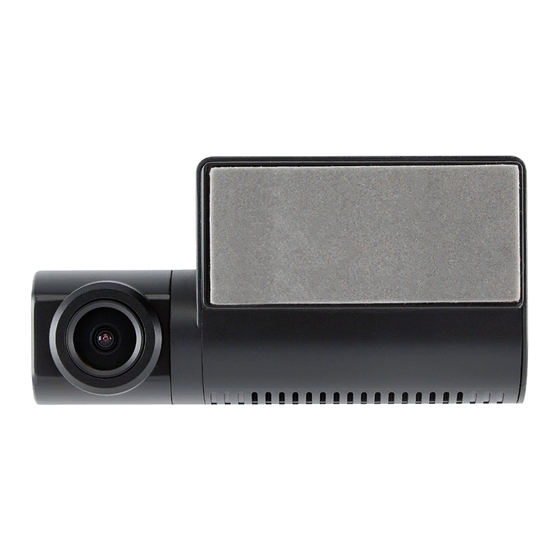
Resumen de contenidos para ring Smart Dash Cam 4000

  • Página 1 Ring Smart Dash Cam 4000 Dashcam HD 1296p English Deutsch Français Español Italiano Dutch...
  • Página 2 WARNING Individual special requirements and legislation of the countries must be observed, especially concerning the duration of the records/use and the transfer of data. Please make yourself familiar with the data pro- tection laws of your country and ensure that you comply with them. Please also familiarize yourself and comply with ...
  • Página 3: Before You Begin

    BEFORE YOU BEGIN If you haven’t already downloaded the app, do so now to get the most from your dashcamera. Download the app by searching for RINGconnect in the App Store (iPhone) or Google Play (Android). Open the app, follow the setup process shown and enable all necessary settings when prompted.
  • Página 4: Package Contents

    PACKAGE CONTENTS Dashcam Quick Start Guide Magnetic Mount USB Charging Cable Trim Removal Tool Window Sticker...
  • Página 5 ATTENTION! Choose the installation location in advance, as the adhesive tape on the mount is of single use. Ensure glass is dirt, dust and grease free. Warm adhesive pad part of mount in hands to ensure strong adhesion to glass. Once mount has been positioned connect dashcamera to the magnetic mount.
  • Página 6 To power the device and charge the battery, use only the power adapt- er included. Connect the power cable to the mount, and then plug the USB charger into the vehicles 12V power socket. When the vehicle’s engine starts, the device turns on automatically.
  • Página 7 INSTALLING microSD CARD Before installing a memory card, make sure the device is turned off. Insert the memory card until it clicks into place. Removing a card: press the card slightly and then reamove it from the slot. WARNING! Do not apply excessive force when inserting a memory card to avoid damage to the device.
  • Página 8: Turning On / Off

    TURNING ON / OFF • When the vehicle ignition is turned ON the dashcam turns on automatically. • To turn the device on manually, press the power button. • To turn the device off press and hold the power button for approx. 3 seconds.
  • Página 9 CONNECTING TO MOBILE Switch on dashcam. Your camera automatically broadcasts a Wi-Fi network. Open your phone’s Settings. Tap on Wi-Fi or Connections. Select the dashcam hotspot and enter the password “12345678”. You are now connected to your device.
  • Página 10 ADJUSTING VIEWING ANGLE ATTENTION! Adjusting the viewing angle can only be done along the vertical axis, so be sure to position the device correctly on the windshield along the hori- zontal axis as close as possible to the windshield’s center. While pulling or pushing the device in the holder, ensure that the camera cap- tures the image in proportions of 30% sky / 70% road.
  • Página 11: Menu Settings

    MENU SETTINGS To access the Menu settings, press the “Settings” button on the main menu. Video Quality: Select required option (the highest option provides optimum viewing performance). Image Resolution: 1-12 Megapixels Loop Recording: 1, 3, or 5 minutes Date Stamp: OFF / ON Record Audio: OFF / ON Parking Monitor: OFF / ON G-sensor: OFF / LOW / MEDIUM / HIGH...
  • Página 12: Emergency Recording

    EMERGENCY RECORDING Emergency recording is to protect the current video file from being overwritten and deleted. Emergency recording activated automatically when the G-sensor trig- gers (sudden acceleration /decelera- tion), or at point of collision. Emergen- cy recording is locked automatically to avoid erasing during loop recording.
  • Página 13 RECORDING PLAYBACK To access the playback menu, press the album but- ton on the main screen. Video & Image Menu. • Select either Videos or Images tiles to view.
  • Página 14 VIDEO MENU Short-press each video file once to get into the playback menu. Press and hold each video file for 3 seconds to access the vid- eo’s sub-menu. From there, lock, download, share, or delete the selected video.
  • Página 15: Image Menu

    IMAGE MENU Short-press each image file once to get into the playback menu. Press and hold each image file for 3 seconds to access the vid- eo’s sub-menu. From there, lock, download, share, or delete the selected image.
  • Página 16 FAQs MENU To access the FAQs Menu, press the dropdown menu and select FAQs. Swipe up or down to view all common frequently asked questions.
  • Página 17 INSTALLATION GUIDE MENU To access the Installation Guide Menu, press the dropdown menu and select Installation Guide. Another dropdown menu will ap- pear. Select the dashcam being used from the dropdown menu.
  • Página 18 FAILURE TO PHOTOGRAPH / RECORD VIDEO Check if there is enough free space on the micro SD card. RECORDING HAS STOPPED Too many video files stored. Only use at least class 10 U1 high-speed micro SD cards by proven manufacturers. When you try to view a photo/play a video file, the “wrong file”...
  • Página 19 HANG UP (NO IMAGE, NO BUTTON RESPONSE) Press the RESET button in the App to reboot the device. MicroSD Card not recognized when used in Ring Smart Dash Cam 4000 ** Please format card * Ensure MicroSD cards is inserted correctly into dashcam Connect dash cam to RINGconnect APP Once dashcam connected to APP select settings ‘COG ICON’...
  • Página 20 FEATURES Ring Smart Dash 1440 p 140 ° ≤128 GB* ≤20 HRS* Wi-Fi GPS Cam 4000 Ring Smart Dash 1296p 130 ° ≤64 GB* ≤12 HRS* Wi-Fi GPS Cam 3000 Ring Smart Dash 1080 p 120 ° ≤32 GB* ≤6 HRS*...
  • Página 21: Power Requirements

    POWER REQUIREMENTS ATTENTION! Once there is no external power input, the battery cannot support recording for a long time, please make sure power supply is connected when recording. Input voltage: 5V DC, 1.5A Charging input voltage: 12-24V DC Mini USB Connection for Power OPERATING TEMPERATURES (all models) Storage temperature: -20˚...
  • Página 22 PLEASE RECYCLE YOUR SPENT BATTERIES Batteries should not be disposed of in unsorted municipal waste, but separately collected to facilitate the correct treatment and recycling of the substances they contain. The recycling of batteries ensures the recovery of these valuable materials and prevents any potentially harmful effects upon both the environment and human health.
  • Página 23 Ring Smart Dash Cam 4000 Dashcam HD 1296p Deutsch...
  • Página 24 WARNUNG Individuelle besondere Anforderungen und Rechtsvorschriften der Länder sind zu beachten, insbesondere hinsichtlich der Dauer der Aufzeichnungen/Verwendung und der Übermittlung von Daten. Bitte machen Sie sich mit den Datenschutzgesetzen Ihres Landes vertraut und stellen Sie sicher, dass Sie diese einhalten. Bitte machen Sie sich auch mit den einschlägigen Gesetzen und Vorschriften in Bezug auf die Verwendung und den Besitz von Dashcams in Ihrem Land vertraut.
  • Página 25: Vor Dem Start

    Wenn Sie die App noch nicht heruntergeladen haben, tun Sie dies jetzt, um Ihre Dashcamera optimal zu nutzen. Laden Sie die App herunter, indem Sie im App Store (iPhone) oder bei Google Play (Android) nach RING- connect suchen. Öffnen Sie die App, folgen Sie dem angezeigten Setup- Vorgang und aktivieren Sie alle erforderlichen Einstel- lungen, wenn Sie dazu aufgefordert werden.
  • Página 26: Lieferumfang

    LIEFERUMFANG Dashcam Kurzanleitung Magnethalterung USB-Ladekabel Trimmentfernungswerkzeug Fensteraufkleber...
  • Página 27 ACHTUNG! Wählen Sie den Installationsort im Voraus, da das Klebeband auf der Halterung zum einmaligen Gebrauch bestimmt ist. Stellen Sie sicher, dass das Glas frei von Schmutz, Staub und Fett ist. Erwärmen Sie das Klebepadteil der Halterung in den Händen, um eine starke Haftung auf Glas zu gewährleisten.
  • Página 28 Verwenden Sie zum Einschalten des Geräts und zum Laden des Ak- kus nur das mitgelieferte Netzteil. Schließen Sie das Netzkabel an die Halterung an und stecken Sie das USB-Ladegerät in die 12-V-Steck- dose des Fahrzeugs. Wenn der Motor des Fahrzeugs startet, schaltet sich das Gerät auto- matisch ein.
  • Página 29 microSD-KARTE INSTALLIEREN Stellen Sie vor der Installation einer Speicherkarte sicher, dass das Gerät ausgeschaltet ist. Setzen Sie die Speicherkarte ein, bis sie einrastet. Entfernen einer Karte: Drücken Sie leicht auf die Karte und entfernen Sie sie dann aus dem Steckplatz. WARNUNG! Wenden Sie beim Einsetzen einer Speicherkarte keine übermäßige Kraft an, um Schäden am Gerät zu vermeiden.
  • Página 30 EIN / AUS • Wenn die Fahrzeugzündung einge- schaltet ist, schaltet sich die Dashcam automatisch ein. • Um das Gerät manuell einzuschalten, drücken Sie den Netzschalter. • Um das Gerät auszuschalten, halten Sie den Netzschalter ca. 3 Sekunden.
  • Página 31 ANSCHLUSS AN MOBIL Schalten Sie die Dashcam ein. Ihre Kamera sendet automatisch ein WLAN-Netzwerk. Öffnen Sie die Einstellungen Ihres Telefons. Tippen Sie auf Wi-Fior-Verbindungen. Wählen Sie den Dashcamhotspot aus und geben Sie das Passwort „12345678“ ein. Sie sind jetzt mit Ihrem Gerät verbunden.
  • Página 32 EINSTELLEN DES BETRACHTUNGSWINKELS ACHTUNG! Die Einstellung des Betrachtungswinkels kann nur entlang der ver- tikalen Achse erfolgen. Achten Sie daher darauf, dass Sie das Gerät entlang der horizontalen Achse so nah wie möglich an der Mitte der Windschutzscheibe po- sitionieren. Stellen Sie beim Ziehen oder Drücken des Geräts in der Halterung sicher, dass die Kamera das Bild in Proportionen von 30 % Himmel / 70 % Straße aufnimmt.
  • Página 33: Menü Einstellungen

    MENÜ EINSTELLUNGEN Um auf die Menüeinstellungen zuzugreifen, klicken Sie im Hauptmenü auf die Schalt- fläche „Einstellungen“. Videoauflösung: Wählen Sie die ge- wünschte Option aus (die höchste Option bietet die optimale Anzeigeleistung). Bildauflösung: 1-12 Megapixel Loop-Aufnahme: 3 oder 5 Minuten Datumsstempel: AUS / EIN Audio aufnehmen: AUS/EIN Parkmonitor: AUS / EIN G-Sensor:...
  • Página 34 NOTFALLAUFNAHME Die Notfallaufnahme soll die aktuelle Vi- deodatei vor dem Überschreiben und Löschen schützen. Die Notfallaufzeichnung wird automa- tisch aktiviert, wenn der G-Sensor aus- löst (plötzliche Beschleunigung / Verzö- gerung) oder an einem Kollisionspunkt. Die Notfallaufzeichnung wird automa- tisch gesperrt, um ein Löschen wäh- rend der Schleifenaufzeichnung zu ver- meiden.
  • Página 35: Aufnahme Und Wiedergabe

    AUFNAHME UND WIEDERGABE Um auf das Wiedergabe- menü zuzugreifen, drücken Sie die Albumtaste auf dem Hauptbildschirm. Video- und Bildmenü. • Wählen Sie entweder Videos oder Bilder aus, um sie anzuzeigen.
  • Página 36 SO VERWENDEN SIE DAS VIDEO-MENÜ Drücken Sie einmal kurz auf jede Videodatei, um zum Wiederga- bemenü zu gelangen. Halten Sie jede Videodatei 3 Se- kunden lang gedrückt, um auf das Untermenü des Videos zuzu- greifen. Von dort aus können Sie das ausgewählte Video sperren, herunterladen, freigeben oder lö- schen.
  • Página 37 BILD DES MENÜS Drücken Sie einmal kurz auf jede Videodatei, um zum Wiederga- bemenü zu gelangen. Halten Sie jede Videodatei 3 Se- kunden lang gedrückt, um auf das Untermenü des Videos zuzu- greifen. Von dort aus können Sie das ausgewählte Video sperren, herunterladen, freigeben oder lö- schen.
  • Página 38 FAQs MENÜ Um auf das FAQ-Menü zuzugreifen, drücken Sie auf das Dropdown-Menü und wählen Sie FAQs. Wischen Sie nach oben oder unten, um alle häufig gestellten Fragen an- zuzeigen.
  • Página 39 INSTALLATIONSANLEITUNG Um auf das Installationshand- buch-Menü zuzugreifen, drücken Sie auf das Dropdown-Menü und wählen Sie Installationshand- buch. Ein weiteres Dropdown-Menü wird angezeigt. Wählen Sie die verwendete Dashcam aus dem Dropdown-Menü.
  • Página 40 FEHLER BEI FOTOGRAFIE / VIDEOAUFNAHME Überprüfen Sie, ob auf der Micro-SD-Karte genügend freier Speicherplatz vorhanden ist. DIE AUFNAHME WURDE GESTOPPT Zu viele Videodateien gespeichert. Verwenden Sie mindestens U1-Hochgeschwindigkeits-Micro-SD- Karten der Klasse 10 von bewährten Herstellern. Wenn Sie versuchen, ein Foto anzuzeigen / eine Videodatei abzuspielen, wird die Meldung "Falsche Datei"...
  • Página 41 AUFGEHÄNGT (KEIN BILD, KEINE TASTENANTWORT) Drücken Sie die RESET-Taste, um das Gerät neu zu starten. MicroSD-Karte wird bei Verwendung in der Ring Smart Dash Cam 4000 ** nicht erkannt Bitte Karte formatieren * Stellen Sie sicher, dass die MicroSD-Karten korrekt in die Dashcam eingesetzt sind Verbinden Sie die Dash Cam mit der RINGconnect APP Sobald die Dashcam mit der APP verbunden ist, wählen Sie die Einstellungen 'COG ICON'.
  • Página 42 FUNKTIONEN Ring Smart Dash 1440 p 140 ° ≤128 GB* ≤20 HRS* Wi-Fi GPS Cam 4000 Ring Smart Dash 1296p 130 ° ≤64 GB* ≤12 HRS* Wi-Fi GPS Cam 3000 Ring Smart Dash 1080 p 120 ° ≤32 GB* ≤6 HRS*...
  • Página 43 ANFORDERUNGEN AN DAS STROMNETZ ACHTUNG! Wenn kein externer Stromeingang vorhanden ist, kann der Akku die Aufnahme für längere Zeit nicht unterstützen. Stellen Sie bitte sicher, dass die Stromversorgung bei der Aufnahme angeschlossen ist. Eingangsspannung: 5 V DC, 1,5 A. Ladeeingangsspannung: 12-24V DC Mini-USB-Anschluss für die Stromversorgung BETRIEBSTEMPERATUREN (alle Modelle)
  • Página 44 BITTE RECYCELN SIE IHRE VERBRAUCHTEN BATTERIEN Batterien sollten nicht im unsortierten Siedlungsabfall entsorgt, sondern separat gesammelt werden, um die korrekte Behandlung und das Recycling der enthaltenen Stoffe zu ermögli- chen. Das Recycling von Batterien gewährleistet die Rückgewinnung dieser wertvollen Ma- terialien und verhindert potenziell schädliche Auswirkungen auf die Umwelt und die mensch- liche Gesundheit.
  • Página 45 Ring Smart Dash Cam 4000 Dashcam HD 1296p Français...
  • Página 46 MISE EN GARDE Les exigences et la législation particulières individuelles des pays doivent être respectées, notamment en ce qui concerne la durée des enregistrements/l'utilisation et le transfert des données. Veuillez vous familiariser avec les lois sur la protection des données de votre pays et assurez-vous de les respecter. Veuillez également vous familia- riser et vous conformer aux lois et réglementations en vigueur concernant l'utilisation et la propriété...
  • Página 47: Avant De Commencer

    AVANT DE COMMENCER Si vous n'avez pas encore téléchargé l'application, faites-le maintenant pour tirer le meilleur parti de votre caméra de bord. Téléchargez l'application en recherchant RINGconnect dans l'App Store (iPhone) ou Google Play (Android). Ouvrez l'application, suivez le processus de configura- tion indiqué...
  • Página 48: Contenu De L'emballage

    CONTENU DE L'EMBALLAGE Caméra de bord Guide de démarrage rapide Fixation magnétique Câble de chargement Outil de retrait de garniture Autocollant de fenêtre...
  • Página 49 ATTENTION ! Choisissez à l'avance l'emplacement d'installation, car le ruban adhésif sur la fixation est à usage unique. Assurez-vous que le verre est exempt de saleté, de poussière et de graisse. Chauffez la partie du tampon adhésif de la fixation dans les mains pour assurer une forte adhérence au verre.
  • Página 50 Pour alimenter l'appareil et charger la batterie, utilisez uniquement l'adaptateur secteur inclus. Connectez le câble d'alimentation à la fixation, puis branchez le chargeur USB dans la prise d'alimentation 12 V du véhicule. Lorsque le moteur du véhicule démarre, l'appareil s'allume automati- quement.
  • Página 51: Installation De La Carte Microsd

    INSTALLATION DE LA CARTE microSD Avant d'installer une carte mémoire, assurez-vous que l'appareil est éteint. Insérez la carte mémoire jusqu'à ce qu'elle s'enclenche. Retrait d'une carte  : appuyez légère- ment sur la carte, puis retirez-la de son emplacement. AVERTISSEMENT ! N'appliquez pas de force excessive lors de l'insertion d'une carte mémoire pour éviter d'endommager l'appareil.
  • Página 52 ALLUMER / ÉTEINDRE • Lorsque le contact du véhicule est mis sur ON, la caméra de bord s’allume au- tomatiquement. • Pour allumer l'appareil manuellement, appuyez sur le bouton d'alimentation. • Pour éteindre l'appareil, maintenez le bouton d'alimentation enfoncé pendant env.
  • Página 53 CONNEXION AU TÉLÉPHONE PORTABLE Allumez la caméra de bord. Votre caméra diffuse automatiquement un réseau Wi-Fi. Ouvrez les paramètres de votre téléphone. Appuyez sur Wi-Fi ou connexions. Sélectionnez le hotspot de la caméra de bord et entrez le mot de passe « 12345678 ».
  • Página 54 RÉGLAGE DE L'ANGLE DE VUE ATTENTION ! Le réglage de l'angle de vue ne peut être effectué que le long de l'axe vertical, assurez-vous donc de positionner correctement l'appareil sur le pare-brise le long de l'axe horizontal aussi près que possible du centre du pare- brise.
  • Página 55 PARAMÈTRES MENU Pour accéder aux paramètres du menu, appuyez sur le bouton «  Paramètres  » du menu principal. Qualité vidéo  : sélectionnez l'option requise (l'option la plus élevée offre des perfor- mances de visionnage optimales). Résolution d'image : 1 à 12 mégapixels Enregistrement en boucle ...
  • Página 56 ENREGISTREMENT D'URGENCE L'enregistrement d'urgence sert à proté- ger le fichier vidéo actuel contre l'écra- sement et la suppression. L'enregistrement d'urgence est activé automatiquement lorsque le capteur G se déclenche (accélération /décéléra- tion soudaine), ou à un point de colli- sion. L'enregistrement d'urgence est verrouillé...
  • Página 57 LECTURE D'ENREGISTREMENT Pour accéder au menu de lecture, appuyez sur le bou- ton Album sur l'écran princi- pal. Menu Vidéo et Image. • Sélectionnez les vignettes Vidéos ou Images à affi- cher.
  • Página 58: Menu Vidéo

    MENU VIDÉO Appuyez brièvement une fois sur chaque fichier vidéo pour accé- der au menu de lecture. Appuyez sur chaque fichier vidéo et maintenez-le enfoncé pendant 3 secondes pour accéder au sous-menu de la vidéo. À par- tir de là, verrouillez, téléchargez, partagez ou supprimez la vidéo sélectionnée.
  • Página 59: Menu Image

    MENU IMAGE Appuyez brièvement une fois sur chaque fichier image pour accé- der au menu de lecture. Appuyez sur chaque fichier image et maintenez-le enfoncé pendant 3 secondes pour accéder au sous-menu de la vidéo. À par- tir de là, verrouillez, téléchargez, partagez ou supprimez la image sélectionnée.
  • Página 60 MENU FAQ Pour accéder au menu FAQ, appuyez sur le menu déroulant et sélectionnez FAQ. Faites glisser votre doigt vers le haut ou vers le bas pour afficher toutes les questions fréquemment posées.
  • Página 61 MENU GUIDE D'INSTALLATION Pour accéder au menu du guide d'installation, appuyez sur le menu déroulant et sélectionnez Guide d'installation. Un autre menu déroulant appa- raîtra. Sélectionnez la caméra de bord utilisée dans le menu dé- roulant.
  • Página 62: Échec De La Photographie / Enregistrement De La Vidéo

    ÉCHEC DE LA PHOTOGRAPHIE / ENREGISTREMENT DE LA VIDÉO Vérifiez s'il y a suffisamment d'espace libre sur la carte micro SD. L'ENREGISTREMENT S'EST ARRÊTÉ Trop de fichiers vidéo stockés. N'utilisez qu'au moins des cartes micro SD haute vitesse de classe 10 U1 de fabricants reconnus.
  • Página 63 Appuyez sur le bouton RESET dans l'application pour redémarrer l'appareil. Carte MicroSD non reconnue lorsqu'elle est utilisée dans la caméra de bord Ring Smart Dash Cam 4000 ** Veuillez formater la carte * Assurez-vous que les cartes MicroSD sont correctement insérées dans la caméra de bord Connectez la caméra de bord à...
  • Página 64 CARACTÉRISTIQUES Ring Smart Dash 1440 p 140 ° ≤128 GB* ≤20 HRS* Wi-Fi GPS Cam 4000 Ring Smart Dash 1296p 130 ° ≤64 GB* ≤12 HRS* Wi-Fi GPS Cam 3000 Ring Smart Dash 1080 p 120 ° ≤32 GB* ≤6 HRS*...
  • Página 65: Exigences De Puissance

    EXIGENCES DE PUISSANCE ATTENTION ! Une fois qu'il n'y a pas d'entrée d'alimentation externe, la batterie ne peut pas prendre en charge l'enregistrement pendant une longue période, veuillez vous assurer que l'alimentation est connectée lors de l'enregistrement. Tension d'entrée : 5 V CC, 1,5 A Tension d'entrée de charge : 12-24 V CC Connexion mini USB pour l'alimentation TEMPÉRATURES DE FONCTIONNEMENT...
  • Página 66 VEUILLEZ RECYCLER VOS BATTERIES USÉES Les batteries ne doivent pas être jetées dans les déchets municipaux non triés, mais collec- tées séparément pour faciliter le traitement et le recyclage corrects des substances qu'elles contiennent. Le recyclage des batteries assure la récupération de ces matériaux précieux et évite tout effet potentiellement nocif sur l'environnement et la santé...
  • Página 67 Ring Smart Dash Cam 4000 Dashcam HD 1296p Español...
  • Página 68 ATENCIÓN Deben respetarse los requisitos especiales y la ley de cada país, especialmente en lo relativo a la duración de los registros/uso y la transferencia de datos. Familiarícese con las leyes de protección de datos de su país y asegúrese de cumplirlas. Además, familiarícese y cumpla con las leyes y reglamentos correspondientes sobre el uso y la propiedad de las cámaras de salpicadero («dashcams») en su país.
  • Página 69: Antes De Comenzar

    ANTES DE COMENZAR Si aún no ha descargado la aplicación, hágalo ahora para sacar el máximo partido a su cámara de salpicadero. Descargue la aplicación buscando RINGconnect en la App Store (iPhone) o en Google Play (Android). Abra la aplicación, siga el proceso de configuración mostrado y active todos los ajustes necesarios cuan- do se le solicite.
  • Página 70: Contenido Del Paquete

    CONTENIDO DEL PAQUETE Cámara de salpicadero Guía de inicio rápido Montaje magnético Cable de carga USB Herramienta para tapicería Etiqueta de la ventana...
  • Página 71 ¡ATENCIÓN! Elija el lugar de instalación con antelación, ya que la cinta adhesiva de la montura es de un solo uso. Asegúrese de que el cristal no tenga suciedad, polvo y grasa. Caliente la parte de la almohadilla adhesiva con las manos para asegurar una sólida adhesión al cristal.
  • Página 72 Para alimentar el dispositivo y cargar la batería, utilice únicamente el adaptador de corriente incluido. Conecte el cable de alimentación al soporte y, a continuación, conecte el cargador USB a la toma de co- rriente de 12 V del vehículo. Cuando el motor del vehículo se pone en marcha, el dispositivo se enciende automáticamente.
  • Página 73: Instalación De La Tarjeta Microsd

    INSTALACIÓN DE LA TARJETA microSD Antes de instalar una tarjeta de memo- ria, asegúrese de que el dispositivo está apagado. Inserte la tarjeta de memoria hasta que encaje en su sitio. Extracción de la tarjeta: presione lige- ramente la tarjeta y luego retírela de la ranura.
  • Página 74 ENCENDIDO / APAGADO • Cuando el vehículo se pone en marcha, la cámara de salpicadero se enciende automáticamente. • Para encender el dispositivo manual- mente, pulse el botón de encendido. • Para apagar el dispositivo, mantenga pulsado el botón de encendido durante unos 3 segundos.
  • Página 75: Conexión Con El Móvil

    CONEXIÓN CON EL MÓVIL Encienda la cámara de salpicadero. La cámara emite automáticamente una red wifi. Abra los Ajustes del teléfono. Pulse Wifi o Conexiones. Seleccione el punto de acceso de la cámara de salpicadero e introduzca la contraseña «12345678». Ahora está...
  • Página 76: Ajuste Del Ángulo De Visión

    AJUSTE DEL ÁNGULO DE VISIÓN ¡ATENCIÓN! El ajuste del ángulo de visión solo puede hacerse a lo largo del eje vertical, por lo que debe asegurarse de colocar el dispositivo correctamente en el parabrisas a lo largo del eje horizontal, lo más cerca posible del centro del parabrisas.
  • Página 77: Ajustes Del Menú

    AJUSTES DEL MENÚ Para acceder a los ajustes del menú, pulse el botón «Ajustes» en el menú prin- cipal. Calidad del vídeo: Seleccione la opción requerida (la opción más alta proporciona el rendimiento óptimo de visualización). Resolución de imagen: 1-12 mega- píxeles Grabación en bucle: 1, 3 o 5 minutos Marcador de fecha: ENCENDIDO/APA-...
  • Página 78: Grabación De Emergencia

    GRABACIÓN DE EMERGENCIA La grabación de emergencia tiene el propósito de evitar que el archivo de vídeo actual se sobrescriba y se borre. La grabación de emergencia se activa automáticamente cuando se dispara el sensor G (aceleración repentina /deceleración) o en el momento de colisión.
  • Página 79: Reproducción De Grabación

    REPRODUCCIÓN DE GRABACIÓN Para acceder al menú de re- producción, pulse el botón del álbum en la pantalla prin- cipal. Menú de vídeo e imagen. • Seleccione los mosai- cos de vídeos o imáge- nes para verlos.
  • Página 80: Menú De Vídeo

    MENÚ DE VÍDEO Pulse brevemente cada archivo de vídeo una vez para acceder al menú de reproducción. Mantenga pulsado cada archi- vo de vídeo durante 3 segundos para acceder al submenú del ví- deo. Desde allí, bloquee, descar- gue, comparta o elimine el vídeo seleccionado.
  • Página 81: Menú De Imagen

    MENÚ DE IMAGEN Pulse brevemente cada archivo de imagen una vez para acceder al menú de reproducción. Mantenga pulsado cada archivo de imagen durante 3 segundos para acceder al submenú del ví- deo. Desde allí, bloquee, descar- gue, comparta o elimine la ima- gen seleccionada.
  • Página 82: Menú De Preguntas Frecuentes

    MENÚ DE PREGUNTAS FRECUENTES Para acceder al Menú de Preguntas frecuentes, pulse el menú desplega- ble y seleccione Preguntas frecuen- tes. Deslice el dedo hacia arriba o hacia abajo para ver todas las preguntas frecuentes.
  • Página 83 MENÚ DE LA GUÍA DE INSTALACIÓN Para acceder al menú de la Guía de instalación, pulse el menú desplegable y seleccione Guía de instalación. Aparecerá otro menú desple- gable. Seleccione la cámara de salpicadero utilizada en el menú desplegable.
  • Página 84: Problemas Al Hacer Fotos / Grabar Vídeos

    PROBLEMAS AL HACER FOTOS / GRABAR VÍDEOS Compruebe si hay suficiente espacio libre en la tarjeta micro SD. LA GRABACIÓN SE HA DETENIDO Demasiados archivos de vídeo almacenados. Utilice solo tarjetas micro SD de alta veloci- dad como mínimo de clase 10 U1 de fabricantes reconocidos. Cuando intenta ver una foto/reproducir un archivo de vídeo, aparece elmensaje «archivo incorrecto».
  • Página 85 Presione el botón RESET en la aplicación para reiniciar el dispositivo. La tarjeta MicroSD no se reconoce cuando se utiliza en la cámara de salpicadero Ring Smart Dash Cam 4000 ** Formatee la tarjeta * Asegúrese de que las tarjetas MicroSD se insertan correctamente en la cámara de salpicadero Conecte la cámara de salpicadero a la aplicación RINGconnect...
  • Página 86: Características

    CARACTERÍSTICAS Ring Smart Dash 1440 p 140 ° ≤128 GB* ≤20 HRS* Wi-Fi GPS Cam 4000 Ring Smart Dash 1296p 130 ° ≤64 GB* ≤12 HRS* Wi-Fi GPS Cam 3000 Ring Smart Dash 1080 p 120 ° ≤32 GB* ≤6 HRS*...
  • Página 87: Requisitos De Energía

    REQUISITOS DE ENERGÍA ¡ATENCIÓN! Cuando no hay entrada de energía externa, la batería no puede so- portar la grabación durante mucho tiempo. Asegúrese de que la fuente de alimen- tación está conectada cuando grabe. Voltaje de entrada: 5 V CC, 1,5 A Voltaje de entrada de carga: 12-24 V CC Conexión mini USB para alimentación TEMPERATURAS DE FUNCIONAMIENTO...
  • Página 88: Recicle Las Pilas Gastadas

    RECICLE LAS PILAS GASTADAS Las pilas no deben depositarse en la basura municipal sin clasificar, sino que deben reco- gerse por separado para facilitar el correcto tratamiento y reciclaje de las sustancias que contienen. El reciclaje de las pilas garantiza la recuperación de estos valiosos materiales y evita cualquier efecto potencialmente perjudicial tanto para el medioambiente como para la salud humana.
  • Página 89 Ring Smart Dash Cam 4000 Dashcam HD 1296p Italiano...
  • Página 90 AVVERTENZA Devono essere osservati i requisiti speciali individuali e la legislazione dei paesi, in particolare per quanto riguarda la durata della registrazione/l'utilizzo e il trasferimento dei dati. Acquisire familiarità con le leggi sulla protezione dei dati del proprio paese e assicurarsi di rispettarle. Si prega inoltre di acquisire fami- liarità...
  • Página 91: Prima Di Iniziare

    PRIMA DI INIZIARE Se non si è già scaricata l'app, farlo ora per ottenere il massimo dalla dashcam. Scaricare l'app cercando RINGconnect nell'App Store (iPhone) o in Google Play (Android). Aprire l'app, seguire la procedura di configurazione mostrata e abilitare tutte le impostazioni necessarie quando richiesto.
  • Página 92: Contenuto Della Confezione

    CONTENUTO DELLA CONFEZIONE Dashcam Guida rapida per iniziare Supporto magnetico Cavo di ricarica USB Strumento di rimozione del rivestimento Adesivo per finestrino...
  • Página 93 ATTENZIONE! Scegliere in anticipo la posizione di installazione, poiché il nastro adesivo sul supporto è monouso. Assicurarsi che il vetro sia privo di sporco, polvere e grasso. Riscaldare con le mani la parte di adesivo del supporto per garantire una forte adesione al vetro.
  • Página 94 Per alimentare il dispositivo e caricare la batteria, utilizzare solo l'adat- tatore di alimentazione incluso. Collegare il cavo di alimentazione al supporto, quindi collegare il caricatore USB alla presa di alimentazio- ne a 12V del veicolo. Quando il motore del veicolo si avvia, il dispositivo si accende auto- maticamente.
  • Página 95: Installazione Della Scheda Microsd

    INSTALLAZIONE DELLA SCHEDA microSD Prima di installare una scheda di me- moria, assicurarsi che il dispositivo sia spento. Inserire la scheda di memoria finché non scatta in posizione. Rimozione di una scheda: premere leg- germente la scheda e quindi rimuoverla dallo slot.
  • Página 96 ACCENSIONE / SPEGNIMENTO • Quando si porta su ON il blocchetto di accensione del veicolo, la dashcam si accende automaticamente. • Per accendere manualmente il disposi- tivo, premere il pulsante di accensione. • Per spegnere il dispositivo, tenere pre- muto il pulsante di accensione per ca. 3 secondi.
  • Página 97: Connessione Con Il Cellulare

    CONNESSIONE CON IL CELLULARE Accendere la dashcam. La fotocamera trasmette automaticamente una rete Wi-Fi. Aprire le Impostazioni del telefono. Toccare Wi-Fi o Connessioni. Selezionare l'hotspot dashcam e immettere la password "12345678". Ora si è connessi con il dispositivo.
  • Página 98 REGOLAZIONE DELL'ANGOLO DI VISIONE ATTENZIONE! La regolazione dell'angolo di visione può essere eseguita solo lun- go l'asse verticale, quindi assicurarsi di posizionare correttamente il dispositivo sul parabrezza lungo l'asse orizzontale il più vicino possibile al centro del parabrezza. Mentre si tira o si spinge il dispositivo nel ritegno, assicurarsi che la fotocamera acquisisca l'immagine in proporzioni del 30% di cielo /70% di strada.
  • Página 99: Impostazioni Menu

    IMPOSTAZIONI MENU Per accedere alle Impostazioni menu, premere il pulsante "Impostazioni" nel menu principale. Qualità video: selezionare l'opzio- ne richiesta (l'opzione più alta offre le prestazioni di visione ottimali). Risoluzione dell'immagine: 1-12 Megapixel Registrazione in loop: 1, 3 o 5 minuti Timbro data: OFF / ON Registrazione audio: OFF / ON Monitor di parcheggio: OFF / ON...
  • Página 100 REGISTRAZIONE DI EMERGENZA La registrazione di emergenza serve a proteggere il file video corrente dalla sovrascrittura e dall'eliminazione. La registrazione di emergenza vie- ne attivata automaticamente quando il sensore G si attiva (accelerazione /de- celerazione improvvisa) o al punto di collisione.
  • Página 101 RIPRODUZIONE DELLA REGISTRAZIONE Per accedere al menu di ri- produzione, premere il pul- sante album nella schermata principale. Menu video e immagine. • Selezionare i riquadri Video o Immagini da vi- sualizzare.
  • Página 102 MENU VIDEO Premere brevemente una volta ciascun file video per accedere al menu di riproduzione. Tenere premuto ciascun file vi- deo per 3 secondi per accedere al sottomenu del video. Da qui, bloccare, scaricare, condividere o eliminare il video selezionato.
  • Página 103: Menu Immagine

    MENU IMMAGINE Premere brevemente una volta ciascun file immagine per acce- dere al menu di riproduzione. Tenere premuto ciascun file im- magine per 3 secondi per acce- dere al sottomenu del video. Da qui, bloccare, scaricare, con- dividere o eliminare l'immagine selezionata.
  • Página 104 MENU FAQ Per accedere al menu delle domande frequenti, premere il menu a discesa e selezionare FAQ. Scorrere verso l'alto o verso il basso per visualizzare tutte le domande fre- quenti più comuni.
  • Página 105 MENU GUIDA ALL’INSTALLAZIONE Per accedere al menu Guida all'installazione, premere il menu a discesa e selezionare Guida all'installazione. Apparirà un altro menu a disce- sa. Selezionare la dashcam in uso dal menu a discesa.
  • Página 106 MANCATA FOTOGRAFIA / REGISTRAZIONE VIDEO Controllare se c'è abbastanza spazio libero sulla scheda microSD. LA REGISTRAZIONE È STATA INTERROTTA Troppi file video memorizzati. Utilizzare solo schede microSD ad alta velocità che siano almeno di classe 10 U1 di produttori affermati. Quando si tenta di visualizzare una foto/riprodurre un file video, viene visualizzato il messaggio "file sbagliato".
  • Página 107 Premere il pulsante RESET nella App per riavviare il dispositivo. Ring Scheda MicroSD non riconosciuta se utilizzata nella Smart Dash Cam 4000 Si prega di formattare la scheda * Verificare che le schede MicroSD siano inserite correttamente nella dashcam Collegare la dashcam all'APP RINGconnect...
  • Página 108: Caratteristiche

    CARATTERISTICHE Ring Smart Dash 1440 p 140 ° ≤128 GB* ≤20 HRS* Wi-Fi GPS Cam 4000 Ring Smart Dash 1296p 130 ° ≤64 GB* ≤12 HRS* Wi-Fi GPS Cam 3000 Ring Smart Dash 1080 p 120 ° ≤32 GB* ≤6 HRS*...
  • Página 109: Requisiti Di Alimentazione

    REQUISITI DI ALIMENTAZIONE ATTENZIONE! Se non è presente un'alimentazione esterna, la batteria non può supportare la registrazione per un lungo periodo, assicurarsi che l'alimentazione sia collegata durante la registrazione. Tensione di ingresso: 5 V CC, 1,5 A. Tensione di ingresso di ricarica: 12-24 V CC Connessione mini USB per l'alimentazione TEMPERATURE DI FUNZIONAMENTO (tutti i modelli)
  • Página 110 RICICLARE LE BATTERIE USATE Le batterie non devono essere smaltite nei rifiuti urbani indifferenziati, ma raccolte separata- mente per facilitare il corretto trattamento e riciclaggio delle sostanze in esse contenute. Il riciclaggio delle batterie garantisce il recupero di questi preziosi materiali e previene even- tuali effetti potenzialmente dannosi sia sull'ambiente che sulla salute umana.
  • Página 111 Ring Smart Dash Cam 4000 Dashcam HD 1296p Dutch...
  • Página 112 WAARSCHUWING Individuele speciale vereisten en wetgeving van de landen moeten in acht worden genomen, vooral met betrek- king tot de duur van de registratie/het gebruik en de overdracht van gegevens. Maak uzelf vertrouwd met de gegevensbeschermingswetten van uw land en zorg ervoor dat u deze naleeft. Maak uzelf ook vertrouwd met en houd u aan de relevante wet- en regelgeving met betrekking tot het gebruik en eigendom van dashcamera's in uw land.
  • Página 113: Voordat U Begint

    VOORDAT U BEGINT Als u de app nog niet hebt gedownload, doe dit dan nu om het meeste uit uw dashcamera te halen. Download de app door te zoeken naar RINGconnect in de App Store (iPhone) of Google Play (Android). Open de app, volg het getoonde installatieproces en schakel alle benodigde instellingen in wanneer daar- om wordt gevraagd.
  • Página 114: Inhoud Van De Verpakking

    INHOUD VAN DE VERPAKKING Dashcam Snelstartgids Magnetische houder USB-oplaadkabel Gereedschap voor het verwijderen van afwerkstukjes Raamsticker...
  • Página 115 LET OP! Kies van tevoren de montageplaats, want de plaktape op de houder is voor eenmalig gebruik. Zorg ervoor dat het glas vuil-, stof- en vetvrij is. Warm zelfklevend kussentje van de houder in de handen dient om een sterke hechting op glas te garanderen.
  • Página 116 Gebruik alleen de meegeleverde voedingsadapter om het apparaat van stroom te voorzien en de batterij op te laden. Sluit de voedings- kabel aan op de houder en sluit de USB-oplader aan op de 12V-aan- sluiting van de auto. Wanneer de motor van het voertuig start, wordt het apparaat automa- tisch ingeschakeld.
  • Página 117: De Microsd-Kaart Installeren

    DE microSD-KAART INSTALLEREN Zorg ervoor dat het apparaat is uitge- schakeld voordat u een geheugenkaart installeert. Plaats de geheugenkaart totdat deze op zijn plaats klikt. Verwijderen van een kaart: druk licht op de kaart en verwijder deze vervolgens uit de sleuf. WAARSCHUWING! Oefen geen overmatige kracht uit bij het plaatsen van een geheugenkaart om schade aan het apparaat te voorkomen.
  • Página 118 IN- / UITSCHAKELEN • Wanneer het contact van het voertuig wordt ingeschakeld, wordt de dashcam automatisch ingeschakeld. • Om het apparaat handmatig in te scha- kelen, drukt u op de aan/uit-knop. • Om het apparaat uit te schakelen, houdt u de aan/uit-knop ongeveer 2 seconden ingedrukt.
  • Página 119 MET MOBIEL VERBINDEN Schakel de dashcam in. Uw camera zendt automatisch een wifi-netwerk uit. Open de instellingen van uw telefoon. Tik opWifi-verbindingen. Selecteer de hotspot voor de dashcam en voer het wachtwoord "12345678" in. U bent nu verbonden met uw apparaat.
  • Página 120: De Kijkhoek Aanpassen

    DE KIJKHOEK AANPASSEN LET OP! Het aanpassen van de kijkhoek is alleen mogelijk langs de verticale as, dus zorg ervoor dat u het apparaat correct op de voorruit plaatst langs de hori- zontale as, zo dicht mogelijk bij het midden van de voorruit. Terwijl u het apparaat in de houder trekt of duwt, moet u ervoor zorgen dat de camera het beeld vastlegt in een verhouding van 30% lucht / 70% weg.
  • Página 121: Menu-Instellingen

    MENU-INSTELLINGEN Om toegang te krijgen tot de menu-in- stellingen, drukt u op de knop "Instellin- gen"; in het hoofdmenu. Videokwaliteit: selecteer de gewens- te optie (de hoogste optie biedt optimale kijkprestaties). Beeldresolutie: 1-12 megapixels Lus-opname: 1, 3 of 5 minuten Datumstempel: UIT/AAN Audio opnemen: UIT/AAN Parkeermonitor: UIT/AAN...
  • Página 122 NOODOPNAME Noodopname is bedoeld om te voorko- men dat het huidige videobestand wordt overschreven en verwijderd. Noodopname wordt automatisch ge- activeerd wanneer de G-sensor wordt geactiveerd (bij plotselinge versnelling / vertraging) of op het moment van een botsing. Noodopname wordt automa- tisch vergrendeld om het wissen tijdens lus-opname te voorkomen.
  • Página 123 OPNAME AFSPELEN Om het afspeelmenu te ope- nen, drukt u op de album- knop op het hoofdscherm. Menu Video en afbeelding. • Selecteer tegels van vi- deo's of afbeeldingen om te bekijken.
  • Página 124 VIDEOMENU Druk eenmaal kort op elk video- bestand om het afspeelmenu te openen. Houd elk videobestand 3 secon- den ingedrukt om het subme- nu van de video te openen. Van daaruit kunt u de geselecteerde video vergrendelen, downloaden, delen of verwijderen.
  • Página 125 MENU AFBEELDING Druk eenmaal kort op elk video- bestand om het afspeelmenu te openen. Houd elk videobestand 3 secon- den ingedrukt om het subme- nu van de video te openen. Van daaruit kunt u de geselecteerde video vergrendelen, downloaden, delen of verwijderen.
  • Página 126 MENU VEELGESTELDE VRAGEN Om het menu Veelgestelde vragen te openen, drukt u op het vervolgkeu- zemenu en selecteert u Veelgestelde vragen. Veeg omhoog of omlaag om alle veel- gestelde vragen te zien.
  • Página 127 MENU INSTALLATIEGIDS Om het menu Installatiehand- leiding openen, drukt op het vervolgkeuzemenu en selecteert u Installatiegids. Er verschijnt nog een vervolgkeu- zemenu. Selecteer de dashcam die wordt gebruikt in het vervolg- keuzemenu.
  • Página 128: De Opname Is Gestopt

    FOTO / VIDEO OPNEMEN MISLUKT Controleer of er voldoende vrije ruimte is op de micro SD-kaart. DE OPNAME IS GESTOPT Er zijn te veel videobestanden opgeslagen. Gebruik minimaal klasse 10 U1 high-speed micro SD-kaarten van deugdelijk gebleken producenten. Wanneer u een foto probeert te bekijken/een videobestand probeert af te spelen, wordt het bericht "verkeerde bestand"...
  • Página 129 VASTLOPEN VAN APPARAAT (GEEN BEELD, GEEN KNOPRESPONS) Druk op de RESET-knop om het apparaat opnieuw op te starten. MicroSD-kaart niet herkend bij gebruik in Ring Smart Dash Cam 4000 ** Formatteer de kaart * Zorg ervoor dat de MicroSD-kaarten correct in de dashcam zijn geplaatst...
  • Página 130 KENMERKEN Ring Smart Dash 1440 p 140 ° ≤128 GB* ≤20 HRS* Wi-Fi GPS Cam 4000 Ring Smart Dash 1296p 130 ° ≤64 GB* ≤12 HRS* Wi-Fi GPS Cam 3000 Ring Smart Dash 1080 p 120 ° ≤32 GB* ≤6 HRS*...
  • Página 131 STROOMVEREISTEN LET OP! Als er geen externe voedingsingang is, kan de batterij lange tijd geen opname ondersteunen. Zorg ervoor dat de voeding is aangesloten tijdens het op- nemen. Ingangsspanning: 5V DC, 1.5A Laadingangsspanning: 12-24V DC Mini USB-aansluiting voor stroomvoorziening BEDRIJFSTEMPERATUREN (alle modellen) Opslagtemperatuur: -20 °...
  • Página 132 Het recyclen van batterijen zorgt voor het terugwinnen van deze waardevolle materialen en voorkomt mogelijke schadelijke effecten op zowel het milieu als de menselijke gezondheid. Ring Automotive Limited Gelderd Road, Leeds, LS12 6NA United Kingdom Telephone +44 (0)113 213 2000 Fax +44 (0)113 231 0266 Email autosales@ringautomotive.com...

Tabla de contenido