Axis 213 Instalación
Tabla de contenido
Idiomas disponibles
Idiomas disponibles
Enlaces rápidos
Installing the AXIS 213
Please observe the following before installing the AXIS 213 PTZ Network Camera.
• This product is designed for indoor use or locations where it is protected from rain and moisture. To
operate the camera in these conditions, use the outdoor housing accessories.
• Do not use strong or abrasive detergents when cleaning the casing. Use a mild detergent and wipe
gently.
• Never position the camera directly towards the sun or other bright objects. Whether the camera is in use
or not, never aim it at the sun or other extremely bright objects.
Connecting the Hardware
Before you begin
If the AXIS 213 is to be mounted in a position where it is difficult to access, it is
recommended that you set the IP address and get the camera up and running before
completing the hardware installation, i.e. skip step 1 below until the installation is
completely verified.
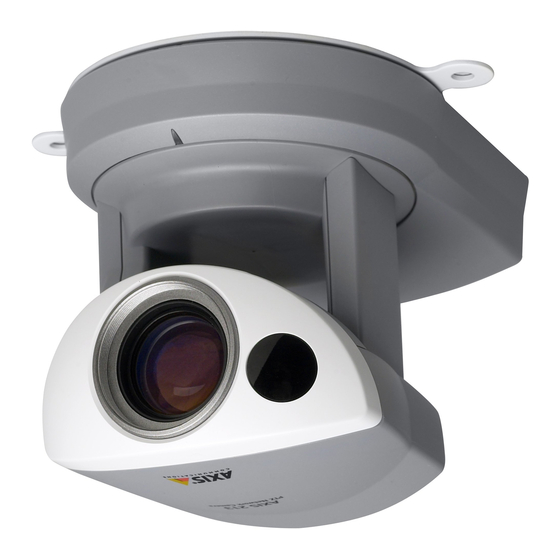
The AXIS 213 PTZ Network Camera is supplied with a bracket for ceiling mounting.
1. Drill two holes in the ceiling and
secure the bracket with the
appropriate screws according to
the ceiling material.
2. Connect a standard RJ-45 network
cable to your AXIS 213 and
connect it to the network.
3. Optionally, connect the Connection
Module (not supplied) to the
camera.
4. Connect the power cable.
5. The hardware installation is now
complete, proceed to Installing on
a Network, on page 2.
Note:
If the AXIS 213 is to be placed upright on a desktop, remove the four screws on the underside of the
unit to remove the bracket. Place the adhesive plastic feet by the screw holes.
All manuals and user guides at all-guides.com
AXIS 213 - Installing the AXIS 213
1
Tabla de contenido

Manuales relacionados para Axis AXIS 213


Resumen de contenidos para Axis AXIS 213
-
Página 19: Instalación De La Axis 213
1 más adelante hasta que la instalación haya sido totalmente verificada. La Cámara de Red PTZ AXIS 213 se suministra con un soporte para montaje en el techo. 1. Taladre dos orificios en el techo y fije el soporte con tornillos adecua- dos para el material del techo. -
Página 20: Instalación En Una Red
AXIS 213 - Instalación de la AXIS 213 Instalación en una red La AXIS 213 está diseñada para ser instalada en una red Ethernet. Esto supone asignar una dirección IP a la cámara PTZ, ya sea manualmente o a través de un servicio de red automatizado (DHCP). -
Página 21: Instalación Manual Utilizando Axis Ip Utility
AXIS 213 - Instalación de la AXIS 213 Instalación manual utilizando AXIS IP Utility AXIS IP Utility es una aplicación de software de Windows que instala la AXIS 213 en su red local utilizando una dirección IP estática. • Descargue el software de AXIS IP Utility en su ordenador, de forma gratuita, de las páginas de Asistencia técnica en http://www.axis.com/techsup/software... -
Página 22: Instalación Manual Utilizando Arp Y Ping En Windows
1. Obtenga una dirección IP no utilizada para la AXIS 213 desde su administrador de red. 2. Conecte un cable de red estándar a su AXIS 213 y conéctela a la red. 3. Ubique el número de serie/dirección MAC (S/N) que está situado en la etiqueta de la AXIS 213. -
Página 23: Instalación Manual Utilizando Arp Y Ping En Unix/Linux
1. Obtenga una dirección IP no utilizada para la AXIS 213 desde su administrador de red. 2. Conecte un cable de red estándar a su AXIS 213 y conéctelo a la red. 3. Ubique el número de serie/dirección MAC (S/N) que está situado en la etiqueta de la AXIS 213. - Página 24 AXIS Internet Dynamic DNS Service proporciona un procedimiento de clic único que da acceso a AXIS 213 en su red local y a través de Internet. En la instalación, la AXIS 213 recibirá un URL (dirección web), que entonces se puede utilizar para accederla. La Cámara de Red PTZ se puede desinscribir del servicio en cualquier momento.