Viqua VH200 El Manual Del Propietario
Idiomas disponibles
Idiomas disponibles
Owner's Manual
Models:
VH200, VH410, VP600, VP950
VH410M, VP600M, VP950M
Powered by
425 Clair Rd. W, Guelph, Ontario, Canada N1L 1R1
t. (+1) 519.763.1032 • f. (+1) 800.265.7246 (US and Canada only)
t. (+31) 73 747 0144 (Europe only) • f. (+1) 519.763.5069
e-mail: info@viqua.com
www.viqua.com
520110_RevL
Tabla de contenido

Manuales relacionados para Viqua VH200


Resumen de contenidos para Viqua VH200
- Página 2 • VIQUA replacement lamps undergo rigorous performance testing and strict quality control processes to ensure that the safety and performance certifications of the original equipment are not compromised. So, you can see that it's simply not worth the risk! Insist on genuine VIQUA replacement lamps.
-
Página 3: Safety Information
Safety Information Section 1 Safety Information Please read this entire manual before operating this equipment. Pay attention to all danger, warning, and caution statements in this manual. Failure to do so could result in serious personal injury or damage to the equipment. Make sure that the protection provided by this equipment is not impaired. -
Página 4: Water Chemistry
Safety Information WA R N I N G During extended periods of no water flow, the water in your chamber can become very hot (Approx. 60 °C) and potentially lead to scalding. It is recommended to run your water until this hot water has been purged from your chamber. Do not allow water to contact your skin during this time. To eliminate this condition, a temperature management valve can be installed at the outlet of your UV system. -
Página 5: General Information
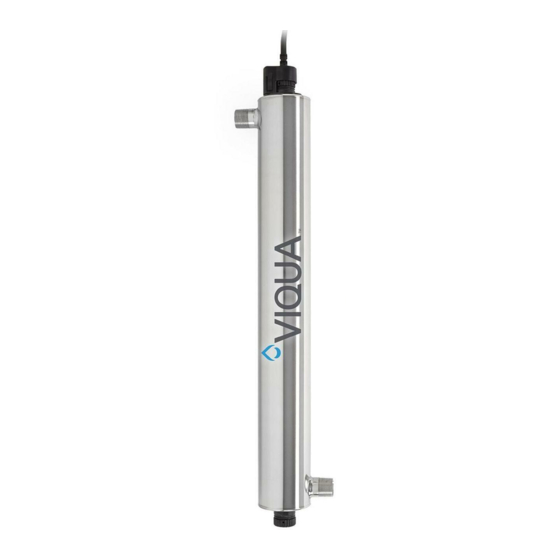
VP600, VP950 models only) BA-ICE-CM VH410M, VP600M, VP950M 260010 VH200, VH410, VH410M, VP600, VP600M, VP950, VP950M (N. America) 602637 VH200/2, VH410/2, VH410M/2, VP600/2, VP600M/2, VP950/2, VP950M/2 (EU CEE) VH200/2B, VH410/2B, VH410M/2B, VP600/2B, VP600M/2B, VP950/2B, VP950M/2B IEC replacement power cords for... - Página 6 Installation Section 3 Installation 3.1 UV Disinfection System C A U T I O N Electronic controller must be connected to a Ground Fault Protected Circuit (GFCI) receptacle and the lamp connector ground wire connected to the stainless steel chamber. The disinfection system is designed to be mounted either horizontally or vertically at the point-of-use or point-of-entry depending on the specific flow rate of the unit.
- Página 7 Figure 4 Flow Restrictor 4. Mount the VIQUA ICE controller horizontally to the wall, near the chamber. Ideally place the controller above the chamber and away from any water connection point, to prevent any water from potentially leaking onto the controller by means of a leak at a connection point or a “sweating”...
- Página 8 Installation Figure 5 Drip Loop 5. Install the UV lamp. Refer to Section 4.1. 6. When all plumbing connections are complete, slowly turn on the water supply and check for leaks. The most likely cause of leaks is from the O-ring seal. In case of a leak, shut water off, drain cell, remove the retaining nut, wipe the O-ring and threads.
- Página 9 Installation 30 mins • Turn on the hot water supply. • DO NOT use water for 30 • Reinstall filter cartridge(s). • Re-install the housings. minutes. • Turn on the cold water supply. • Open each faucet and all water openings until you smell •...
- Página 10 Maintenance Procedure: 10 mins • Disconnect main power • Shut off the water line to • Remove the lamp connector • Remove the lamp in upward source and allow the unit to chamber and release system direction from the chamber by squeezing the plastic cool for 10 minutes.
- Página 11 Maintenance Procedure: • Carefully, remove O-ring • Drain the chamber by using • Remove the top retaining nut • Remove the bottom retaining the drain port. and O-ring. adhering to the quartz sleeve. nut, floating spring, and O-ring. • Remove the quartz sleeve. click Mild Acid...
- Página 12 Maintenance 4.3 Cleaning and Replacing UV Sensor WA R N I N G The UV sensor is very delicate instrument. Extreme care is required when handling and cleaning. The sensor window itself is constructed from quartz which is extremely fragile, be careful you do not chip or break this quartz window. Manufacturer’s warranty does not cover damage due to neglect or misuse.