Dell PowerConnect J Serie Guia De Inicio Rapido
Ocultar thumbs
Ver también para PowerConnect J Serie:
- Inicio rápido (73 páginas) ,
- Inicio rápido (24 páginas) ,
- Inicio rápido (72 páginas)
Tabla de contenido
Idiomas disponibles
Idiomas disponibles
Enlaces rápidos
Dell PowerConnect J-Series J-SRX100 Services Gateway
Quick Start
Use the instructions in this quick start to help you connect the Dell PowerConnect
J-Series J-SRX100 Services Gateway to your network. For details, see the J-SRX100
Services Gateway Hardware Guide at http://www.support.dell.com/manuals.
(Regulatory model number SRX100)
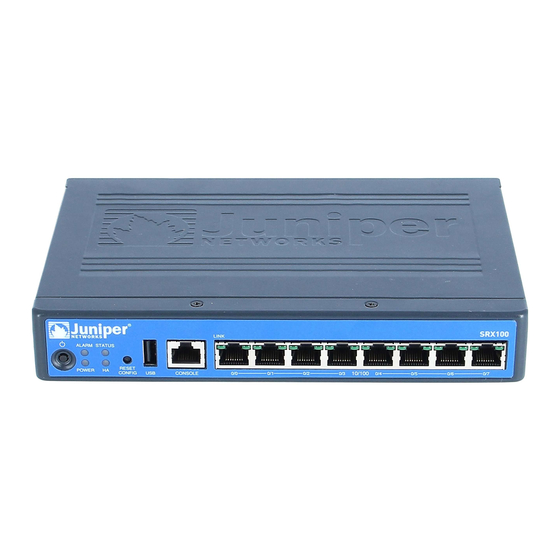
J-SRX100 Services Gateway Front Panel
Callout
Description
1
Power button
2
LEDs (ALARM, POWER, STATUS, HA)
3
Reset Config button
J-SRX100 Services Gateway Back Panel
Callout
Description
1
Lock for security cable
2
Grounding point
J-SRX
100
Callout
Description
4
USB port
5
Console port
6
Fast Ethernet ports
Callout
Description
3
Cable tie holder
4
Power supply input
J-SRX100 Services Gateway Models
The following models of J-SRX100 Services Gateway are available:
Device
DDR Memory
J-SRX100B
512 MB
J-SRX100H
1 GB
J-SRX100S
1 GB
J-SRX100SU
1 GB
Connecting and Configuring the J-SRX100 Services Gateway
Use the instructions below to connect and set up the J-SRX100 Services Gateway to
protect your network. Refer to the LEDs on the front panel of the device to help you
determine the status of the device.
Part 1: Connect the Services Gateway to Earth Ground
1.
Obtain a grounding cable—14 AWG single-strand, 4 A—with a ring-type,
vinyl-insulated TV14-6R lug or equivalent attached by a licensed electrician.
2.
Connect the grounding cable to a proper earth ground.
3.
Place the grounding cable lug over the grounding point on the middle rear of the
chassis, and secure the lug with one M3 screw.
Part 2: Connect the Power Cable to the Device
Connect the power cable to the device and a power source. We recommend using a
surge protector. Note the following indications:
POWER LED (green): The device is receiving power.
STATUS LED (green): The device is operating normally.
ALARM LED (amber): The device is operating normally, and may glow amber as a
rescue configuration has not been set. This is not a panic condition.
After a rescue configuration has been set, an amber ALARM LED indicates a
NOTE:
minor alarm, and a solid red ALARM LED indicates that a major problem exists on the
services gateway.
You must allow the device between 5 and 7 minutes to boot up after you have
NOTE:
powered it on. Wait until the STATUS LED is solid green before proceeding to the next
part.
Tabla de contenido

Manuales relacionados para Dell PowerConnect J Serie


Resumen de contenidos para Dell PowerConnect J Serie
-
Página 28: Conexión Y Configuración De La Puerta De Enlace De Servicios
Use las instrucciones de este inicio rápido para conectar a la red la puerta de enlace de servicios J-SRX100 de la serie J PowerConnect de Dell. Si desea más información, Los siguientes modelos de la puerta de enlace de servicios J-SRX100 se encuentran... - Página 29 Parte 3: Conecte el dispositivo de administración Parte 5: Asegúrese de que el dispositivo de administración adquiera una dirección IP Conecte el dispositivo de administración a la puerta de enlace de servicios con Después de conectar el dispositivo de administración a la puerta de enlace de servicios, cualquiera de los métodos que aparecen a continuación: el proceso del servidor DHCP de la puerta de enlace de servicios asignará...
-
Página 30: Apagado Del Dispositivo
La información de este documento está sujeta a cambios sin previo aviso. Todos los derechos reservados. Queda estrictamente prohibida la reproducción de este material de cualquier manera sin el permiso por escrito de Juniper Networks. Marcas comerciales que aparecen en este texto: Dell™, el logotipo de DELL™ y PowerConnect™ son marcas comerciales de Dell Inc. Juniper Networks® y G33® son marcas comerciales registradas de Juniper Networks, Inc. en los Estados Unidos y en otros países.