Tabla de contenido
Publicidad
Idiomas disponibles
Idiomas disponibles
Enlaces rápidos
Publicidad
Capítulos
Tabla de contenido
Solución de problemas

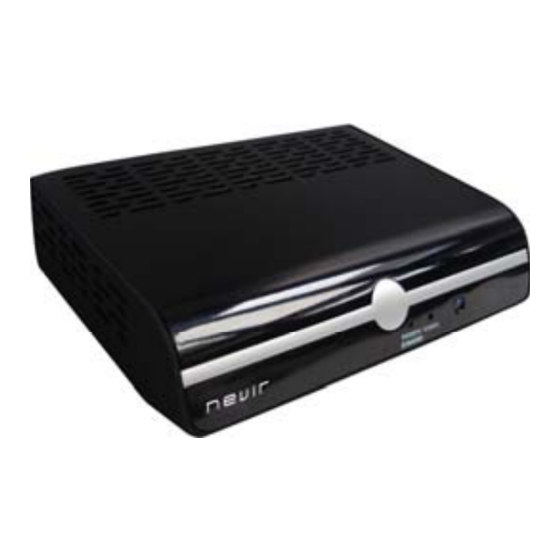
Resumen de contenidos para Nevir NVR-2580D
-
Página 2: Tabla De Contenido
Contenido Información sobre seguridad …….… 3 2. Instalación …………………...…..10 Características ……………….………4 3. Configuración ……………………..11 Accesorios ……………….………4 4. Herramientas …………………… 1 Referencia del panel de control ……..4 ....……………………14 Referencia del mando a distancia …...5 Conexión básica …………………….6 Visión general de OSD…………….…1 Funcionamiento ……………….…….7 Para su información ……………..…...1 Instalación rápida..………….……….7... -
Página 3: Información Sobre Seguridad
Información sobre seguridad Gracias por adquirir este Receptor digital terrestre. Siga con atención las instrucciones de funcionamiento y ponga atención a las medidas de seguridad para manejar esta unidad. Nota: Esta unidad sólo puede utilizarse con un suministro de alimentación CA 230V, 50Hz Aviso: PRECAUCIÓN RIESGO DE DESCARGA ELÉCTRICA... -
Página 4: Características
Características Compatible con MPEG-2 /DVB-T (TDT) Toma de Euroconector Ancho de banda de 7MHz ó 8 MHz opcional Guía de programación electrónica (EPG) Memoria de interrupción de suministro y reanudación Antena activa con salida de 5V CC automática Función LCN Subtítulos varios Posibilidad de versión mejorada de software vía toma Búsqueda automática / Búsqueda de canales... -
Página 5: Referencia Del Mando A Distancia
Referencia del mando a distancia 1. Botón EN ESPERA 2. Botón ÚLTIMO 3. Botón NUMÉRICO 1 4. Botón NUMÉRICO 2 5. Botón NUMÉRICO 4 6. Botón NUMÉRICO 7 7. Botón NUMÉRICO 8 8. Botón TV/R 9. Botón INFORMACIÓN 10. Botón MODALIDAD 11. -
Página 6: Conexión Básica
CONEXIÓN AL ORDENADOR PARA UNA Conexión básica VERSIÓN MEJORADA (B) Asegúrese de que los dispositivos de alimentación 1. Ordenador de mesa eléctrica de esta unidad y de los otros equipos estén 2. Receptor DVB-T (TDT) conectados y apáguelos antes de comenzar la conexión. 3. -
Página 7: Funcionamiento
Funcionamiento Instalación rápida Conecte el receptor y el resto de equipos siguiendo el apartado “CONEXIÓN BÁSICA”. Una vez se ha encendido el receptor, aparece el menú de Instalación rápida: a. Muévase por el menú mediante los botones y seleccione las opciones deseadas mediante los botones / . -
Página 8: Subtítulos
SUBTÍTULOS: Activa o desactiva la visualización de subtítulos en pantalla (si está disponible). CH+/CH- ( / ): Accede al canal anterior o al siguiente uno a uno. VOL+/VOL- ( / ): Sube o baja el volumen de un servicio. ACEPTAR: Confirma una operación o hace aparecer la Lista de canales de televisión cuando no aparece ninguna información OSD en pantalla. - Página 9 confirmado que desea saltar un canal se muestra un icono con forma de flecha curvada al final del nombre del canal. Esta configuración sólo será válida después de salir de la Lista de canales de televisión y desplazarse por los canales con los botones / ;...
-
Página 10: Instalación
1.4. Borrar todo Pulse ACEPTAR para acceder a este elemento de la configuración. A continuación borre todos los canales de televisión y de radio almacenados siguiendo las pautas de la pantalla. 1.5. Renombrar grupo Acceda a este menú y utilice los botones para seleccionar un grupo de la lista. -
Página 11: Configuración Del Sintonizador
Utilice los botones para seleccionar un elemento de configuración y los botones para pasar de una opción a otra. Pulse el botón SALIR para dejar este submenú. Nota: El sistema de frecuencia depende automáticamente de la región en la que se esté utilizando el receptor y la configuración de la frecuencia actual seguirá... -
Página 12: Región Y Hora
3.3 Región y hora El menú de Región y hora se compone de los siguientes elementos: Región: Francia, Alemania, Grecia, Irán, Italia, Polonia, Portugal, Rusia, España, Suecia, Reino Unido, Vietnam, Argentina, Australia, República Checa, Dinamarca y Finlandia. Esta configuración permite que los usuarios de diferentes regiones utilicen este dispositivo. Utilice los botones para seleccionar, los botones para cambiar, el botón ACEPTAR para entrar y el botón... -
Página 13: Temporizador De Suspensión
Utilice los botones para seleccionar, los botones para cambiar, el botón ACEPTAR para entrar y el botón SALIR para salir. Nota: Esta función no está disponible en receptores cuyo consumo en modalidad de en espera sea inferior a 1 vatio. Mes: 1, 2, 3, ~10, 11, 12. -
Página 14: Herramientas
Utilice los botones para seleccionar, los botones para cambiar, el botón ACEPTAR para entrar y el botón SALIR para salir. Si se activa el bloqueo de menú, el menú del sistema quedará bloqueado y deberá introducir la contraseña para desbloquearlo antes de poder realizar cualquier operación del menú. Si el bloqueo de menú... -
Página 15: Visión General De Osd
Visión general de OSD ú n ú n Lista de canales de TV Lista de canales de radio Canal Borrar todos los favoritos Borrar todo Renombrar grupo Modalidad de búsqueda Libre Búsqueda automática Todo Modalidad de búsqueda Por canal Por frecuencia Banda de búsqueda Instalación Número de canal... - Página 16 Fecha 1-30/31 Día Lunes- Domingo Hora inicio Hora fin Temporizador de suspensión Desactivado 10/30/60/90/120 minutos Tiempo restante Visualización de subtítulos Desactivada Estándar Teletexto Configuración OSD Transparencia OSD Desactivada 10%-70% Configuración de carga de los valores por omisión Bloqueo de menú Activado/Desactivado Bloqueo de canal Desactivado/Manual/Edad 4-18...
-
Página 17: Para Su Información
Para su información Mantenimiento del receptor Asegúrese de apagar la unidad y desconectar el cable de alimentación CA antes de realizar cualquier operación de mantenimiento de la misma. Mantenga limpia la unidad. Si la superficie está muy sucia, frote la unidad con un trozo de tela blanda seca. -
Página 18: Especificaciones
Especificaciones Sintonizador de alta frecuencia Rango de frecuencia de entrada : 174~230, 470~~862MHz (VHF y UHF) Ancho de banda : 7 ó 8 MHz Nivel de señal de entrada : -75~-20dBm Conector de entrada de RF : IEC169-tipo 2, hembra Impedancia de entrada : 75 Modalidad de demodulación... -
Página 19: Resolución De Problemas
Ajuste la antena llega “Para dar cumplimiento a la Norma UNE EN-60065, indicamos que si el cable flexible se daña, únicamente puede ser sustituido por un taller de reparación reconocido por el fabricante NEVIR, S.A., ya que se necesitan herramientas especiales”... - Página 21 Table of Contents Safety information 3. Setup Features 4. Tools Accessories Control Panel Reference Remote Control Reference OSD verview Basic connection For Your Reference Operation Receiver Maintenance Fast installation operation Definition of Terms Main Menu Specifications Troubleshooting 1. Channel 2. Installation...
-
Página 22: Safety Information
Safety Information Thank you for purchasing this Digital Terrestrial Receiver. Study carefully the operation instruction and pay close attention to the precautions before attempting to operate the unit. Note This unit can be used only where the power supply is AC 165 264V 50Hz. Warning To reduce the risk of fire or electric shock, do not expose this equipment to rain or moisture. -
Página 23: Features
Features MPEG-2 / DVB-T compatible TV SCART jack Bandwidth 7MHz or 8MHz optional Electronic Program Guide (EPG) Power interruption memory, automatic Active antenna with 5V DC output resumption. Support LCN function. Multiple subtitles Capable of software upgrade via SCART Auto scan/ Channel Scan jack Support OSD and teletext (VBI ) output Accessories... -
Página 24: Remote Control Reference
Remote Control Reference 1. STANDBY button 2. LAST button 3. NUMERIC 1 button 4. NUMERIC 2 button 5. NUMERIC 4 button 6. NUMERIC 7 button 7. NUMERIC 8 button 8. TV/ R button 9. INFO button 10. LAST button 11. MENU button 12. -
Página 25: Basic Connection
Basic connection Ensure that the power switches of this unit and CONNECTING COMPUTER other equipment to be connected, are turned off UPGRADE B before commencing connection 1. Desk computer Read the instructions attentively before connecting other equipments 2. DVB-T receiver Ensure that you observe the color-coding when 3. -
Página 26: Operation
Operation Easy Installation Connect the receiver and other equipments related according to “BASIC CONNECTION”: Generally, once the receiver is switched on, the Easy Install menu emerges: a. Explore the menu with button, and select the necessary setting options with button: Region (Default setting is France), and OSD Language (only English is available);... -
Página 27: Tv Channel List
LAST: Shift to the previous one channel. MODE: Toggle between display mode 4: 3 or 16: 9. INFO: View the information of the current channel. M/ P: Preview multiple channel windows (maxi. 9 channels) at the same time. AUDIO: Shift the audio output modes. EPG: Check the EPG information of current channel (if available). - Página 28 be valid only after you exit from TV Channel List and scroll through the channels with button, i.e. the target channel preset to be skipped over will be ignored at present. To cancel skip operation, repeat the operation above once. Numeric 4: Delete.
-
Página 29: Delete All
Press OK to get to this setup item, then delete all favorite TV channels and radio channels that have been edited following the navigation guidance on the screen. 1.4 Delete All Press OK to get to this setup item, then delete all stored TV channels and radio channels according to the hints on the screen. -
Página 30: Setup
Signal Intensity: Signal Quality: The green Signal Intensity bar and yellow Signal Quality bar indicate the real-time receiving condition of the signal. button to select a setting item, and button to shift the options. Press EXIT button to leave. Note: The frequency system automatically depends on the region where the receiver is in use, and the actual frequency setting should follow the practice strictly. -
Página 31: Region And Time
button to change the options. User can also press OK button to pop up the option list and use button to select one with OK button to confirm the change. If On is chosen for setting LCN mode, the system will automatically list the channels in the same order as in the signal stream;... -
Página 32: Sleep Timer
Wakeup Channel: If a timer is enabled and a wakeup channel is preset, the system will start showing the preset channel as the program wakes up. button to select, button to change, OK button to enter, EXIT button to exit. Note: A receiver of which the standby consumption is less than 1 Watt dose not support such function setting. -
Página 33: Tools
Select this menu and press OK button, an information bar will come up requiring that the password must be entered so as to open the menu. The password preset at the factory is 0000. The menu includes the following submenus: Menu Lock: On/Off. - Página 34 5.0. Game Select and open the menu that includes the following items: Tetris: Snake: Othello: button to select, button to change, OK button to enter, EXIT button to exit.
-
Página 35: Osd Overview
OSD Overview TV Channel List Radio Channel List Channel Delete all favorites Delete All Group Rename Free Scan Mode Auto Scan Search By Channel Scan Mode By Frequency Scan Band 5-12, Ch No. Installation 21-69 Channel Scan 174-230MHz Frequency 470-862MHz 6MHz Band Width 7MHz... - Página 36 Once Daily Timer Mode Weekly Monthly Radio Service Timer Service TV service Wakeup channel Month 1-12 Date 1-30/31 Sunday-Sat. Start time End time Sleep Timer 10/30/60/90/120 min Remains Subtitle Display Standard Teletext OSD Setting Off, OSD Transparency 10%-70% Load Default OSD Setting Menu Lock On/ Off Channel Lock...
-
Página 37: For Your Reference
For Your Reference Receiver Maintenance Be sure to turn the unit off and disconnect the AC power cord before maintaining the unit. Keep the unit clean. If the surface is extremely dirty, wipe the unit with a piece of dry soft cloth in stead of alcohol, benzene or other chemicals. -
Página 38: Specifications
Specification High Frequency Tuner Input Frequency Range : 174 230, 470 ~~ 862MHz (VHF&UHF) Bandwidth : 7 or 8MHz Input Signal Level 20dBm RF Input Connector : IEC169 2 type, Female Input impedance : 75 Demodulation Mode Waveform : COFDM Code Orthogonal Frequency Division Multiplexing Demodulation : QPSK QAM16 QAM64 Transmission Rate... -
Página 39: Troubleshooting
Too much interferential signal Adjust the antenna. normally In order to fulfill ruling UNE EN-60065, we indicate that if the flexible wire is damaged, it can only be substituted by a technical service recognized by NEVIR, S.A., as per special tooling is required. -
Página 40: Declaración De Conformidad
DECLARACIÓN DE CONFORMIDAD NEVIR, S.A. declara bajo su responsabilidad que el aparato indicado cumple los requisitos de las siguientes directivas: DIRECTIVA EMC LOW VOLTAGE DIRECTIVA EEC EN 55013:2001+A1:2003+A2:2006 EN 60065:2002+A1: 2006 EN 55020:2002+A1:2003+A2:2005 EN 61000-3-2:2000+A2:2005 EN 61000-3-3:1995 + A1:2001+A2:2005 Descripciones del aparato: Modelo NEVIR: NVR-2580D Sintonizador Digital Terrestre Importador: NEVIR, S.A.