Frigidaire FFEH3051VS Instrucciones De Instalación
Tabla de contenido
Idiomas disponibles
Idiomas disponibles
Enlaces rápidos
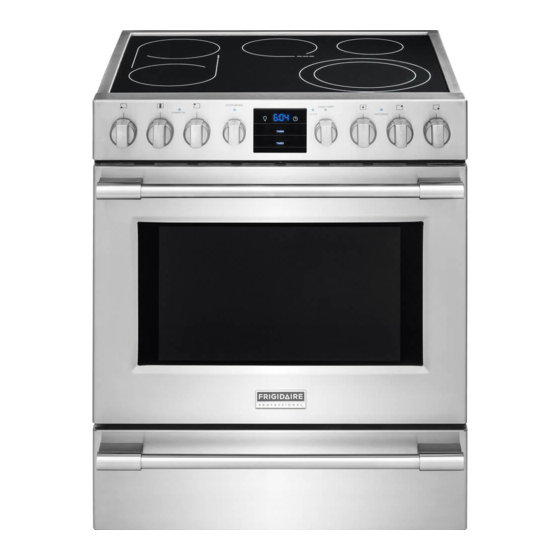
INSTALLATION INSTRUCTIONS
30" FRONT CONTROL FREESTANDING RANGE
INSTALLATION AND SERVICE MUST BE PERFORMED BY A QUALIFIED INSTALLER.
IMPORTANT: SAVE FOR LOCAL ELECTRICAL INSPECTOR'S USE.
READ AND SAVE THESE INSTRUCTIONS FOR FUTURE REFERENCE.
United States
Table of Contents
Important Notes to the installer ............................. 1
Important Note to the Customer ........................... 1
1. Clearances and Dimensions ................................2
2. Tools You Will Need .............................................3
Important Safety Warning ..............................3-4
Important Notes to the Installer
1. Read all instructions contained in these
installation instructions before installing range.
2. Remove all packing material from the oven and
the drawer compartments before connecting the
electrical supply to the range.
3. Observe all governing codes and ordinances.
4. Be sure to leave these instructions with the
consumer.
Important Note to the Consumer
Keep these instructions with your owner's guide for
future reference.
Printed in U.S.A.
FOR YOUR SAFETY: Do not store or
use gasoline or other fl ammable vapors and liquids
in the vicinity of this or any other appliance.
4. Serial Plate Information .......................................5
5. Electrical Connection Requirements ...............5-7
6. Checking Operation ............................................ 7
Before You Call For Service.................................... 7
Notes ......................................................................... 8
Tip Over Hazard
• A child or adult can tip the range
and be killed.
• Verify the anti-tip device has been
installed to fl oor or wall.
• Ensure the anti-tip device is re-engaged to fl oor or
wall when the range is moved.
• Do not operate the range without the anti-tip device
in place and engaged.
• Failure to follow these instructions can result in death
or serious burns to children and adults.
To check if the anti-tip bracket is installed
properly, use both arms to grasp the rear
edge of the range back. Carefully attempt to
tilt range forward. When properly installed,
the range should not tilt forward.
Refer to the anti-tip bracket installation instructions
supplied with your range for proper installation.
Canada
P/N 809127101 (1406) Rev. A
English - pages 1-8
Spanish - pages 9-16
Français - pages 17-24
Capítulos
Tabla de contenido

Manuales relacionados para Frigidaire FFEH3051VS


Resumen de contenidos para Frigidaire FFEH3051VS
-
Página 8: Notes
NOTES... -
Página 9: Notas Importantes Para El Instalador
INSTRUCCIONES DE INSTALACIÓN ESTUFA ELÉCTRICA DE 30" LA INSTALACIÓN Y EL SERVICIO DEBEN SER EFECTUADOS POR UN INSTALADOR CALIFICADO. IMPORTANTE: GUARDE ESTAS INSTRUCCIONES PARA USO DEL INSPECTOR LOCAL DE ELECTRICIDAD. LEA Y GUARDE ESTAS INSTRUCCIONES PARA REFERENCIA FUTURA. United States Canada PARA SU SEGURIDAD: No almacene ni utilice gasolina u otros vapores y... -
Página 10: Espacios Y Dimensiones
INSTRUCCIONES PARA INSTALACIÓN DE LA ESTUFA ELÉCTRICA DE 30” 1. Espacios y dimensiones: a. Proporcione espacios adecuados entre la estufa y las superfi cies combustibles adyacentes. b. Ubicación—Examine el lugar en el cual va a ser instalada la estufa. Determine la existencia de suministro eléctrico adecuado y la estabilidad del piso. -
Página 11: Herramientas Que Va A Necesitar
INSTRUCCIONES PARA INSTALACIÓN DE LA ESTUFA ELÉCTRICA DE 30” 2. Herramientas que va a necesitar Riesgo de volcamiento Para patas de nivelación y montura anti-vuelco: • Un niño o adulto puede volcar la ● Llave ajustable o alicates estufa y acabar muerto. ●... - Página 12 INSTRUCCIONES PARA INSTALACIÓN DE LA ESTUFA ELÉCTRICA DE 30” B. Perforación de agujeros piloto y montura de sujeción C. Nivele la cocina y coloque la cocina en su lugar. - Deslice la estufa a su lugar. Colocar la pata niveladora –...
-
Página 13: Placa De Identifi Cación
INSTRUCCIONES PARA INSTALACIÓN DE LA ESTUFA ELÉCTRICA DE 30” 4. Placa de Identifi cación 5.1 Modelos que requieren Juego de Cordón para el Suministro de Energía Esta placa de identifi cación está localizada sobre el marco. Consulte la placa de identifi cación para obtener Figure 7B –... - Página 14 INSTRUCCIONES PARA INSTALACIÓN DE LA ESTUFA ELÉCTRICA DE 30” Conexión del cable de cuatro conductores a la Este electrodoméstico fue fabricado cocina con el marco aterrizado a través de una correa de 1. Retire los tornillos de la parte baja de la cubierta conexión entre el neutral de la fuente de alimentación del cable trasero (cubierta de acceso), para tener y el marco.
-
Página 15: Antes De Llamar Al Servicio
INSTRUCCIONES PARA INSTALACIÓN DE LA ESTUFA ELÉCTRICA DE 30” Conexión eléctrica directa al corta circuito, a la caja Donde los códigos locales NO permitan conectar el conductor de puesta a tierra del electrodoméstico al de fusibles o la caja de empalmes neutral (blanco), o si está... -
Página 16: Notas
NOTAS... -
Página 24: Notes
Notes...