Champion Essick WC37 Manual
Ocultar thumbs
Ver también para WC37:
- Manual de uso (13 páginas) ,
- Manual (13 páginas) ,
- Manual del usuario (13 páginas)
Tabla de contenido
Idiomas disponibles
Idiomas disponibles
Enlaces rápidos
Manual Control Units
WC37-N37W
WC44-N44W
WC46 -N46W
WC50 -N50W
Remote Control Units
RWC35 • RN35W
RWC46 • RN46W
RWC50 • RN50W
Circle the model of your cooler and
record the serial number below.
Encierre con un circulo el 11Iodelode su
y
enfriador
escribe el IIllmero de serie abajo.
Serial #
''--./
Numero De Serie
Read And Save These Instructions
Vea el Espanol en el interior
Evaporative Cooling
Evaporative cooling is nature's way of cooling. When air is moved
over a wet surface, water is evaporated and heat is absorbed. When
stepping out ofa swimming pool with the wind blowing, evaporative
cooling makes you feel cool, even though the air may be warm.
The human body itself is cooled primarily by the evaporation of
perspiration.
This unit works on the same principle.
filter pads where the air is cooled by evaporation and then circulated
throughout the building. It is this combination of cooled air and the
movement of air over the skin which makes it feel cool.
Unlike refrigeration systems which recirculate the air,an evaporative
cooler continually brings in fresh air while exhausting old air. You
are completely replacing the air every 2 to 4 minutes by opening
windows or doors or a combination of both. The air is always fresh,
not stale, laden:with smoke and odors as happens with refrigerated
air conditioning .
. ~ ;l
110496-1
;:",'
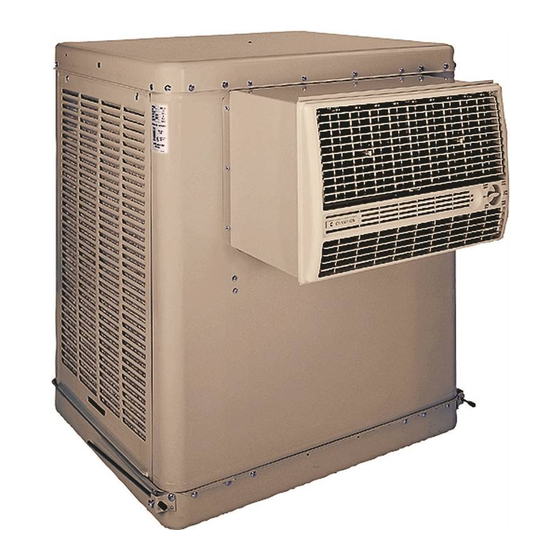
CHAMPION-ESSICK
Window Evaporative
Cooler Manual
Air is drawn across wet
www.championcooler.com
Read Carefully All Of This Manual
Before Installing The Unit.
Lea Con Cuidado Todo Este Manual Antes
De Instalar La Unidad.
Safety Rules
1. Read these instructions carefully.
2. Unit must be in the Off Position and Unplugged
receptacle when installing or performing any maintenance.
3. This cooler will run on 120 volt A.C., 60 Hz (cycle) current
only,
4. Motor and pump are grounded and have an automatic thermal
overload switch which will "shutmotor offwhen it overheats. The
motor will restart automatically when it cools down.
5. Pump receptacle is for grounded evaporative cooler pump only_
Do not plug anything else into receptacle.
6. Do Not operate any fan with a damaged cord or plug. Discard fan
or return to an authorized service facility for examination and/or
repair.
7. Do Not run cord under carpeting. Do Not cover cord with throw
rugs, runners or similar coverings.
furniture or appliances. Arrange cord away from traffic area and
where it will not be tripped over.
&WARNING:
To reduce the risk offire or electric shock, dn not
use this fan with any ~solid-state fan speed control device."
Units
~\ndow
Convertible K'tt Nor Shipped With (ookr
Available Upon Request At No Additional (ost
from power
Do Not route cord under
1-11
Tabla de contenido

Manuales relacionados para Champion Essick WC37


Resumen de contenidos para Champion Essick WC37
-
Página 8: Reglas De Seguridad
Operacion Conserve Estas.Instrucciones Para Las Unidades De Control Manual Reglas De Seguridad • La posicion PUMP. EI interruptor tiene seis posicioncs. Ajuste el intenuptor a la posicion PUMP (bomba) para poner en mareha I. Lea las instruccioncs con cuidado. la bomba sin el ventilador. Para mejor resultauo ponga en marcha la bomba par lInos ClIantos minutos para mojar los filtros antes de 2. - Página 9 • Quite todas las rcjas de los costados. ;,Cuanto Debe Abrir Las Ventanas? Un concepto a menudo entendido mal de enfriamiento por evapora- • Fije los ganchos en la pared. Ponga los dos ganchos para la cadena cion es la cantidad de aire que debe agotada.
-
Página 10: Mantenimiento
• Limpie la bomba. Es necesario limpiar la bomba una vez al Conectar EI Agua principio de cada ano. Por su propia seguridad, apague Ia unidad Quite la tuerca y pase la boquilla • Instale el montajc de desagiie. desconectela de la electricidad. Quite el sujetador de plastico de porel agujcro de la bandeja, colocando la arandela de goma entre la la montura y jale la bomba, deslizandola hacia usted. -
Página 11: Esquemas Del Cableado
5. Con los tornillos quitados Conversion Al Conducto Vertical Alinec A 1.os Dos previamente de la tapa, asc- Agujcros Mcclios c'\ . gme eI conducto a la unidad. Esta unidad sc puede configurar de nuevo a una configuraci6n con el -<... -
Página 12: La Localizacion De Averias
La Localizacion De Averias Remedio Causa Posible Problema Remedio Causa Posible Problema I. Compruebe el voltajc I. Voltajc deficiente Motor se apaga I. Revise la comente I. No IIcga corriente No arranca Ajustc la tension de la Demasiada tension en y sc cnciende Cambie el fusible Fusible fundido...