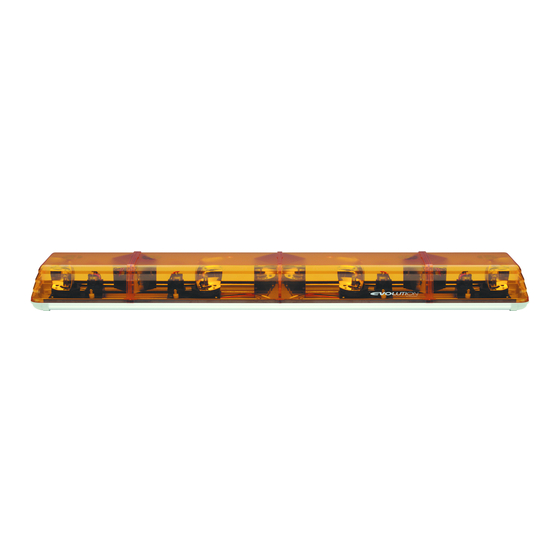
Ecco Evolution Serie Instrucciones De Instalación Y Funcionamiento
Tabla de contenido
Idiomas disponibles
Idiomas disponibles
Enlaces rápidos
IMPORTANT!
Read all instructions before installing and using. Installer: This manual must be
delivered to the end user.
!
WARNING!
Failure to install or use this product according to manufacturer's recommendations may result in property
damage, serious bodily/personal injury, and/or death to you and those you are seeking to protect!
Do not install and/or operate this safety product unless you have read and understand the safety
!
information contained in this manual.
1. Proper installation combined with operator training in the use, care, and maintenance of emergency warning devices are essential to
ensure the safety of emergency personnel and the public.
2. Emergency warning devices often require high electrical voltages and/or currents. Exercise caution when working with live electrical
connections.
3. This product must be properly grounded. Inadequate grounding and/or shorting of electrical connections can cause high current arcing,
which can cause personal injury and/or severe vehicle damage, including fire.
4. Proper placement and installation is vital to the performance of this warning device. Install this product so that output performance of
the system is maximized and the controls are placed within convenient reach of the operator so that s/he can operate the system with
out losing eye contact with the roadway.
5. It is the responsibility of the vehicle operator to ensure daily that all features of this product work correctly. In use, the vehicle operator
should ensure the projection of the warning signal is not blocked by vehicle components (i.e., open trunks or compartment doors),
people, vehicles or other obstructions.
6. The use of this or any other warning device does not ensure all drivers can or will observe or react to an emergency warning signal.
Never take the right-of-way for granted. It is your responsibility to be sure you can proceed safely before entering an intersection, drive
against traffic, respond at a high rate of speed, or walk on or around traffic lanes.
7. This equipment is intended for use by authorized personnel only. The user is responsible for understanding and obeying all laws
regarding emergency warning devices. Therefore, the user should check all applicable city, state, and federal laws and regulations.
The manufacturer assumes no liability for any loss resulting from the use of this warning device.
Introduction:
The ECCO Evolution Series are powerful, permanently mounted,
low-profile light bars available in several sizes.
Specifications:
Length
36"
Height
4.3"
Depth
8.5"
Weight
10 Lb
Input Voltage:
12 VDC system
Cable Length:
15' – 16'
Unpacking:
Carefully remove the light bar and place it on a flat surface. Examine
the unit for transit damage, and locate all parts. If damage is found,
or parts are missing, contact the transit company or ECCO. Do not
use damaged or broken parts.
920-0002-00 Rev. C
Installation and Operation Instructions
Evolution Series Light Bars (36"-72")
48"
54"
4.3"
4.3"
4.3"
8.5"
8.5"
8.5"
14 Lb
18 Lb
20 Lb
Important:
connected to its own, separate fused power point to
assure its continued operation should any other electrical
accessory fail.
!
60"
CAUTION!
make sure that the area is free from any electrical wires,
fuel lines, vehicle upholstery, etc. that could be damaged.
Installation & Mounting:
Permanent Mounting:
Before proceeding with installation, plan all wiring and cable
routing. Select the mounting location for the light bar on a flat,
smooth surface, light assembly should be centered (left to right). If
the light bar is to be mounted on a curved surface, such as on the
roof of the vehicle, choose a placement with the least amount of
curvature. The mounting location for the light bar should be chosen
such that there is maximum visibility to the oncoming traffic.
Use the following instructions for mounting (refer to Figure 1).
1. Position the mounting feet (without hardware) on the vehicle in
the desired location.
This unit is a safety device, and it must be
When drilling into any vehicle surface,
Page 1 of 8
Tabla de contenido

Manuales relacionados para Ecco Evolution Serie


Resumen de contenidos para Ecco Evolution Serie
-
Página 9: Introducción
Esta unidad es un dispositivo de seguridad y debe conectarse a su propia alimentación con fusible, para Las balizas de la serie ECCO Evolution son balizas potentes, de bajo perfil, garantizar una operación continua en el caso de que falle de montaje permanente que se encuentran disponibles en varios tamaños. -
Página 10: Instrucciones Del Cableado
0.5‘ MÍN. DETERMINADO POR EL USUARIO. DEBE SER SIMÉTRICO LÍNEA DEL TECHO Figura 1 BALIZA PERNOS DE MONTAJE BASE DE MONTAJE TECHO (RECORTE) ARANDELAS FENDER TUERCAS NYLOC Figura 2 2. Ubique la baliza sobre la base de montaje. Asegúrese de que la baliza 5. -
Página 11: Instrucciones Generales Del Cableado
2. Conecte los cables de alimentación al lado positivo del interruptor apropiado de la baliza o de los interruptores del panel de conmutación ¡PRECAUCIÓN! con terminales de desconexión rápida o mediante soldadura. Desconecte la alimentación antes de cablear la baliza o el ca- 3. -
Página 12: Sistema Para El Cableado De Cuatro Cabezales Estroboscópicos De 360
Las tres opciones se muestran en la figura 3 (se utiliza si la baliza tiene una alimentación simple, de 4 cabezales) y en la figura 4 (se utiliza si la baliza tiene dos alimentaciones de 2 cabezales). El modo predeterminado (es decir, con el cableado de fábrica de ECCO) es el que se muestra en la opción 1. - Página 13 Figura 4 (alimentación dual con dos cabezales) Página 5 de 8 920-0002-00 Rev. C...
-
Página 14: Mantenimiento
3. Sujete la lámpara y el portalámparas y sepárelas. No tire del hilo. 4. Cambie la lámpara por una lámpara de halógeno de 12 V, 55 vatios, H1 (n.° de pieza de repuesto ECCO R5812BH). No toque el vidrio con las manos. -
Página 15: Estroboscopios Direccionales
6. Conecte la alimentación y pruebe el sistema antes de volver a colocar los lentes. Lámparas DOT: 1. Las lámparas DOT son lámparas LED y no deberían quemarse. En el caso de un fallo de la lámpara DOT, comuníquese con ECCO para recibir instrucciones de recambio. -
Página 16: Piezas De Repuesto Del Lente
Piezas de repuesto del lente: Consulte el plano de los productos terminados. Limitación de responsabilidad y garantía limitada del fabricante: El fabricante garantiza que al momento de la compra, este producto cumple con las especificaciones del fabricante para el mismo (disponibles a pedido). El fabricante garantiza además que el presente producto está libre de defectos en sus materiales y en su fabricación.