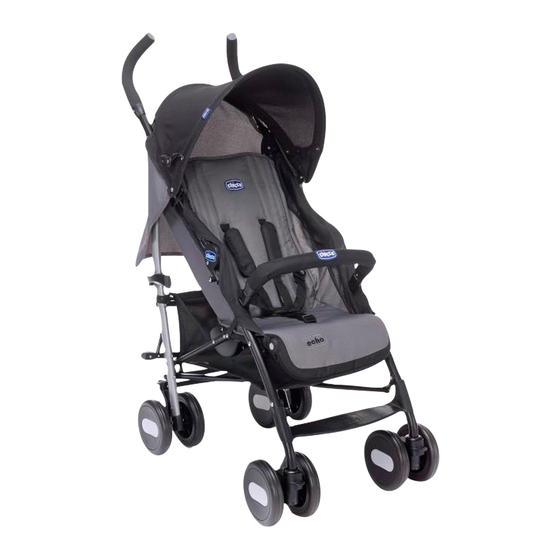
Chicco Echo Manual Del Propietário
Ocultar thumbs
Ver también para Echo:
- Instrucciones de uso (60 páginas) ,
- Manual del propietário (18 páginas) ,
- Instrucciones de uso (48 páginas)

Manuales relacionados para Chicco Echo


Resumen de contenidos para Chicco Echo
- Página 1 USE of product. KEEP INSTRUCTIONS FOR FUTURE USE. Lea todas las instrucciones ANTES de armar y USAR este producto. CONSERVE LAS INSTRUCCIONES PARA USO FUTURO. Echo Stroller Owner's Manual Manual del propietario IS0069.4 ES ©2012 Artsana USA, INC. 05/13...
- Página 18 Swivel wheels Ruedas giratorias WARNING ADVERTENCIA The swivel wheels make the stroller Las ruedas giratorias permiten maniobrar easier to maneuver on smooth la silla con mayor facilidad, sobre surfaces; it is recommended to use superficies lisas y se aconseja mantener locked wheels to guarantee the safe las ruedas bloqueadas para garantizas el use of the stroller (on gravel, unpaved...
-
Página 19: Storage Basket Cestillo Portaobjetos
Storage basket Cestillo portaobjetos WARNING ADVERTENCIA Do not load the storage basket with No cargue el cestillo portaobjetos con weights over 5 lbs (2.3 kg). pesos que excedan las 5 libras (2.3 kg). The stroller is equipped with a storage basket. -
Página 20: Attach The Parent Cupholder Instale El Apoyavasos Para Padres
Attach the parent cupholder Instale el apoyavasos para padres WARNING ADVERTENCIA Never place a container weighing more Nunca coloque ningún recipiente que than 1 lb (0.5 kg) in the Cup holder. pese más de 1 libra (0.5 kg) en el dispositivo de soporte para tazas. - Página 21 Canopy Capota WARNING ADVERTENCIA The canopy must be fixed on both sides Es necesario fijar la capota en ambos of the stroller. Ensure that the hood is lados de la capota. Verificar que la correctly secured into position. capota esté correctamente colocada en su pocisión.
- Página 22 Canopy Capota WARNING ADVERTENCIA Always release the two-side locking Si se quiere cerrar la capota destrabar mechanisms if you wish to close the siempre los mecanismos de bloqueo canopy. laterales antes de hacerlo. 18. Open the hood and secure it by pressing the two-side locking mechanisms.
- Página 23 Canopy Capota 19. Attach the back panel of the canopy to the front of the canopy using the hook and loop fasteners on both sides. 19. Anexar el panel trasero de la capota a la parte frontal de la capota usando los sujetadores de gancho y pasador en ambos lados.
- Página 24 Canopy Capota 20. The Canopy can become a Summer Canopy by removing the rear panel. Unzip the rear panel from the canopy near the stroller handles. Then undo the hook and loop fasteners at the sides of the canopy. 20. La capota puede convertirse en una capota de verano al retirar el panel trasero.
-
Página 25: Closing The Stroller Cierre Del Cochecito
Closing the stroller Cierre del cochecito ADVERTENCIA WARNING Efectuar esta operación prestando When closing the stroller, ensure that atención a que el bebé y otros niños your child, or other children, are kept at se encuentren a la debida distancia. a safe distance. - Página 26 Closing the stroller Cierre del cochecito 22. Release the secondary lock, by pressing the pedal on the right side of the stroller’s frame with your foot. 22. Desbloquear el dispositivo de seguridad complementario apretando con el pie el pedal situado en el lado derecho de la silla de paseo.
- Página 27 Closing the stroller Cierre del cochecito 24. The stroller has an automatic locking system. Close the stroller ensuring that the closing device located on the side of the stroller is locked correctly. This operation prevents the accidental opening of the stroller. 24.
-
Página 28: Care And Maintenance
Care and Maintenance The cleaning and maintenance of this product must be carried out on a regular basis by the user. The cleaning and maintenance of the stroller must only be carried out by an adult. CLEANING The cover is not removable. Clean the fabric parts with a damp sponge and neutral detergent. - Página 29 For More Information Pour plus d’information For USA customers : If you have any questions or comments about this product, or are missing any of the parts. Please do not return this product to the store. Contact us in one of the following ways: Si tiene preguntas o sugerencias sobre este producto, o falta alguna de las partes, no devuelva este producto a la tienda.
- Página 30 www.chiccousa.com...