Publicidad

Idiomas disponibles
  • ES

Idiomas disponibles

Enlaces rápidos

User Guide
English ( 2 – 5 )
Guía del usuario
Español ( 6 – 9 )
Guide d'utilisation
Français ( 10 – 13 )
Guida per l'uso
Italiano ( 14 – 17 )
Benutzerhandbuch
Deutsch ( 18 – 21 )
Appendix
English ( 22 – 23 )

Publicidad

Tabla de contenido
loading

Resumen de contenidos para Denon DJ AXIS8

  • Página 1 User Guide English ( 2 – 5 ) Guía del usuario Español ( 6 – 9 ) Guide d’utilisation Français ( 10 – 13 ) Guida per l’uso Italiano ( 14 – 17 ) Benutzerhandbuch Deutsch ( 18 – 21 ) Appendix English ( 22 –...
  • Página 2: Setup / Connection Diagrams

    User Guide (English) Introduction Box Contents Axis Loudspeaker User Guide Power Cable Safety & Warranty Manual Support For the latest information about this product (system requirements, compatibility information, etc.) and product registration, visit denondj.com. Setup / Connection Diagrams You can set up your Axis loudspeaker in one of two ways: Important: Please also see the following Important Safety Instructions chapter.
  • Página 3 Example 2: 2 loudspeakers with mixer Power Power Mixer Connect the left and right output of your mixer to Input 1 of each loudspeaker using XLR or 1/4” (6.35 mm) TRS cables. Make sure the Line/Mic Selectors are set to Line. Tip: To send the same mix to both loudspeakers, connect both channels of your mixer to the Inputs 1 and 2 of one loudspeaker, set its Input 1/Mix Selector to Mix, and then connect that loudspeaker’s Thru Output to Input 1 of the other loudspeaker.
  • Página 4: Important Safety Precautions

    Important Safety Precautions Please note: Denon DJ and inMusic are not responsible for the use of its products or the misuse of this information for any purpose. Denon DJ and inMusic are not responsible for the misuse of its products caused by avoiding compliance with inspection and maintenance procedures.
  • Página 5: Rear Panel

    Features Rear Panel 1. Cooling Vent: Keep the area in front of this vent clear from obstructions. The fan behind the vent cools the amplifier, preventing overheating. This 10 10 fan operates as needed to control the amplifier’s internal temperature. Due to minor differences in electrical component tolerances, it is normal for the fan speed and behavior to vary from unit to unit.
  • Página 6: Introducción

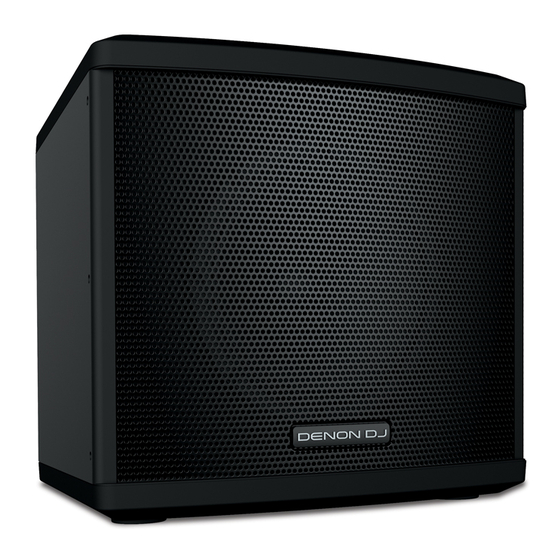
    Guía del usuario (Español) Introducción Contenido de la caja Altavoz Axis Guía del usuario Cable de corriente Manual sobre la seguridad y garantía Soporte Para obtener la información más reciente acerca de este producto (requisitos de sistema, información de compatibilidad, etc.) y registrarlo, visite denondj.com. Diagramas de instalación / conexión Puede instalar su altavoz Axis de dos maneras: Importante: Consulte también las siguientes...
  • Página 7 Ejemplo 2: 2 altavoces con un mezclador Suministro Suministro eléctrico eléctrico Mezclador Conecte la salida izquierda y derecha de su mezclador a la entrada 1 de cada altavoz mediante cables XLR o TRS de 6,35 mm (1/4 pulg.). Asegúrese de que los selectores Line/Mic (Línea/Mic) estén en Line.
  • Página 8: Precauciones Importantes Para La Seguridad

    Precauciones importantes para la seguridad Para tener en cuenta: Denon DJ e inMusic no son responsables del uso de sus productos o el mal uso de esta información para cualquier propósito. Denon DJ e inMusic no son responsables del mal uso de sus productos causados por la omisión del cumplimiento de los procedimientos de inspección y mantenimiento.
  • Página 9: Características

    Características Panel trasero Respiraderos de enfriamiento: Mantenga el área frente a esta ventilación libre de obstáculos. El 10 10 ventilador que está detrás de la ventilación enfría el amplificador, evitando recalentamiento. Este ventilador opera según se necesite para controlar la temperatura interna amplificador.
  • Página 10: Installation/Schémas De Connexion

    Guide d’utilisation (Français) Présentation Contenu de la boîte Enceinte Axis Guide d’utilisation Câble d’alimentation Consignes de sécurité et informations concernant la garantie Assistance technique Pour les toutes dernières informations concernant ce produit (configuration système, compatibilité, etc.), veuillez visiter le site denondj.com. Installation/Schémas de connexion Vous pouvez installer l’enceinte Axis de l’une des deux façons suivantes : Important : Veuillez également consulter la section...
  • Página 11 Exemple 1 : 2 enceintes et une console de mixage Alimentation Alimentation Console de mixage Branchez les sorties gauche et droite de la console de mixage à l’entrée 1 de chaque enceinte en utilisant des câbles XLR ou TRS 6,35 mm. Veuillez vous assurer que le sélecteur Line/Mic est réglé...
  • Página 12: Consignes De Sécurité Importantes

    Consignes de sécurité importantes Veuillez noter : Denon DJ et inMusic ne sont pas responsables de la mauvaise utilisation de leurs produits ou de l’utilisation faite de ces informations. Denon DJ et inMusic ne sont pas responsables de la mauvaise utilisation de leurs produits causés par le non-respect des procédures d’entretien et d’inspection.
  • Página 13: Panneau Arrière

    Caractéristiques Panneau arrière Orifice de ventilation : Veuillez vous assurer de maintenir cet orifice non obstrué en tout temps. Le ventilateur se trouvant derrière permet de 10 10 refroidir l’amplificateur afin qu’il ne surchauffe pas. Ce ventilateur fonctionne lorsque nécessaire pour contrôler température...
  • Página 14: Configurazione / Schema Dei Collegamenti

    Guida per l’uso (Italiano) Introduzione Contenuti della confezione Altoparlante Axis Guida per l’uso Cavo di alimentazione Manuale di sicurezza e garanzia Assistenza Per le ultime informazioni in merito a questo prodotto (requisiti di sistema, informazioni sulla compatibilità, ecc.) e per la registrazione del prodotto, recarsi alla pagina denondj.com. Configurazione / Schema dei collegamenti È...
  • Página 15 Esempio 2: 2 altoparlanti con un mixer Alimentazione Alimentazione Mixer Collegare le uscite sinistra e destra del proprio mixer all’Ingresso 1 di ciascun altoparlante servendosi di cavi XLR o TRS da 6,35 mm (1/4”). Assicurarsi che i Selettori Line/mic siano impostati su Line (linea).
  • Página 16: Importanti Precauzioni Di Sicurezza

    Importanti precauzioni di sicurezza Nota bene: Denon DJ e inMusic declinano qualsiasi responsabilità per l’uso dei loro prodotti o per l’utilizzo errato delle presenti informazioni a qualsiasi scopo. Denon DJ e inMusic non sono responsabili per il cattivo utilizzo dei loro prodotti causato dalla mancata conformità con le procedure di ispezione e manutenzione.
  • Página 17: Caratteristiche

    Caratteristiche Pannello posteriore Ventola di raffreddamento: mantenere l’area di fronte a questa bocchetta libera da ostacoli. La 10 10 ventola dietro la bocchetta raffredda l’amplificatore, impedendone il surriscaldamento. Questa ventola opera come necessario per regolare la temperatura interna dell’amplificatore. Per via di minime differenze a livello delle tolleranze dei componenti elettrici, è...
  • Página 18: Schnelles Einrichten / Anschlussdiagramm

    Benutzerhandbuch (Deutsch) Einführung Lieferumfang Axis Lautsprecher Benutzerhandbuch Netzkabel Sicherheit und Garantiehandbuch Kundendienst Für die neuesten Informationen zu diesem Produkt (Systemanforderungen, Informationen zur Kompatibilität etc.) und für die Produktregistrierung besuchen Sie denondj.com. Schnelles Einrichten / Anschlussdiagramm Sie können Ihren Axis-Lautsprecher auf zwei verschiedene Arten einrichten: Wichtig: Bitte beachten Sie auch das folgende Kapitel Wichtige Sicherheitshinweise.
  • Página 19 Beispiel 2: 2 Lautsprecher mit Mixer Stromversorgung Stromversorgung Mixer Verbinden Sie den linken und rechten Ausgang Ihres Mixers mit Eingang 1 jedes Lautsprechers mit einem XLR- oder 6,35mm Klinkenkabel. Sorgen Sie dafür, dass die Line/Mic-Wahlschalter auf Line eingestellt sind. Tipp: Um den gleichen Mix an beide Lautsprecher zu senden, verbinden Sie beide Kanäle Ihres Mixers mit den Eingängen 1 und 2 eines Lautsprechers, stellen seinen Eingang 1/Mix- Wahlschalter auf Mix und verbinden dann den Thru-Ausgang dieses Lautsprechers mit dem Eingang 1 des anderen Lautsprechers.
  • Página 20: Wichtige Sicherheitshinweise

    Wichtige Sicherheitshinweise Bitte beachten Sie: Denon DJ und inMusic sind weder für die Verwendung ihrer Produkte noch für den Missbrauch dieser Informationen für beliebige Zwecke verantwortlich. Denon DJ und inMusic sind nicht für die missbräuchliche Verwendung ihrer Produkte verantwortlich, die durch verabsäumte Inspektions- und Wartungsarbeiten verursacht wurde.
  • Página 21 Funktionen Rückseite Lüftungsöffnung: Bereich dieser Lüftungsöffnung darf nie blockiert werden. Der 10 10 Ventilator hinter der Lüftungsöffnung kühlt den Verstärker und verhindert, dass das Gerät überhitzt. Dieser Ventilator arbeitet nach Bedarf, um die Verstärkerinnentemperatur zu kontrollieren. Durch geringfügige Unterschiede bei den elektrischen Bauteiltoleranzen normal, dass...
  • Página 22: Technical Specifications

    Appendix (English) Technical Specifications Any differences between Axis 8 and Axis 12 are noted below. Specifications are subject to change without notice. Power System 2000 W peak, 1000 W continuous Class D; 500 W LF + 500 W HF with DSP Frequency Response 45 Hz –...
  • Página 23: Wiring Diagrams

    Wiring Diagrams Ring Ring Sleeve Sleeve Ring Sleeve Ring Sleeve Sleeve Sleeve Sleeve Ring Ring Sleeve Sleeve Trademarks and Licenses Denon is a trademark of D&M Holdings Inc., registered in the U.S. and other countries. All other product or company names are trademarks or registered trademarks of their respective owners.
  • Página 24 denondj.com Manual Version 1.1...

Este manual también es adecuado para:

Axis12

Tabla de contenido