Pioneer DEH-P4100R Manual De Operación
Reproductor de cd de alta potencia con control múltiple de cd y sintonizador rds

Manuales relacionados para Pioneer DEH-P4100R


Resumen de contenidos para Pioneer DEH-P4100R
- Página 1 Multi-CD control High power CD player with RDS tuner Reproductor de CD de alta potencia con control múltiple de CD y sintonizador RDS Operation Manual DEH-P4100R Manual de Operación...
- Página 50 Contenido Guía de botones ........3 Operación del sintonizador ....15 Unidad principal Sintonización de búsqueda local (LOCAL) Controlador remoto (CD-R600) Memoria de las mejores emisoras (BSM) Antes de usar este producto ....4 Uso de las funciones RDS ...... 16 Sobre este producto ..........
- Página 51 Uso de reproductores de Multi-CD ..26 Extracción y colocación del panel delantero ..........40 Reproducción de repetición (REPEAT) Reproducción aleatoria (RANDOM) Protección contra robo ........40 Reproducción con exploración (SCAN) Extracción del panel delantero Pausa (PAUSE) Colocación del panel delantero ITS (Selección de canción instantánea) ..
-
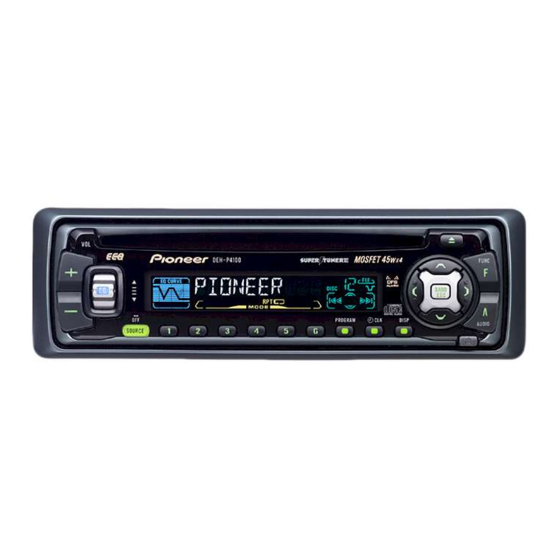
Página 52: Guía De Botones
Guía de botones Unidad principal Botones 5/∞/2/3 Ranura de carga de disco Botón EJECT Botón FUNCTION Botón +/– Botón AUDIO Botón BAND Botón DETACH Botón EQ Botones 1 – 6 Botón DISPLAY Botón PTY Botón SOURCE Botón TA/NEWS Controlador remoto (CD-R600) El controlador remoto (CD-R600) que permite el control remoto de la unidad principal se vende separadamente. -
Página 53: Antes De Usar Este Producto
Antes de usar este producto Sobre este producto • Este producto cumple con las Directivas EMC (89/336/CEE, 92/31/CEE) y Directiva de Marcación CE (93/68/CEE). Las frecuencias del sintonizador en este producto se han repartidas para uso en Europa Occidental, Asia, Oriente Medio, Africa y Oceanía. El uso en otras áreas puede resultar en recepción inapropiada. -
Página 54: Precaución
CLASS 1 LASER PRODUCT • El Pioneer CarStereo-Pass es para uso solamente en Alemania. • Guarde este manual a mano como referencia para los procedimientos de operación y precauciones. • Mantenga siempre el volumen bajo lo suficiente para oír los sonidos de tráfico. -
Página 55: Operación Básica
= Reproductor de Multi-CD = Unidad Externa = AUX Nota: • Unidad externa refiérese a un producto Pioneer (como un disponible en el futuro) que, mientras sea incompatible como una fuente, permite el control de funciones básicas por este producto. -
Página 56: Operación Básica Del Sintonizador
Operación básica Operación básica del sintonizador La función AF de este producto se puede activar y desactivar. Se debe desactivar la función AF para operaciones de sintonización normales. Sintonización de búsqueda y manual • Se puede seleccionar el método de sintonización cambiando el lapso de tiempo de presión del botón 2/3. -
Página 57: Operación Básica Del Reproductor De Cd Incorporado
Operación básica del reproductor de CD incorporado Cambio de la presentación visual Expulsión A cada presión del botón DISPLAY Nota: cambia la presentación visual en el orden • Se puede activar o desactivar la siguiente: función de CD con el disco en la Modo de reproducción (Tiempo de repro- producto. -
Página 58: Operación Básica Del Reproductor De Multi-Cd
Operación básica Operación básica del reproductor de Multi-CD Este producto puede controlar un reproductor de Multi-CD (en venta por separado). Búsqueda de pista y avance rápido/retroceso • Se puede seleccionar entre la búsqueda de pista o el avance rápido/retroceso presionan- do el botón 2/3 durante un lapso diferente de tiempo. -
Página 59: Visualizaciones Y Botones Correspondientes
Visualizaciones y botones correspondientes El visualizador de este producto presenta los indicadores de guía de botones. Estos indi- cadores se iluminan para indicar qué botones 5/∞/2/3, FUNCTION y AUDIO se pueden utilizar. Cuando se está en el menú de funciones (vea la siguiente sección), el menú de ajustes detallados (vea la página 13), menú... -
Página 60: Funciones Del Menú De Funciones
Operación básica 2. Opere un modo. (tal como la reproducción de repetición) El botón usado y la operación que realiza se indi- can por el indicador de guía de botones. Presione el botón 5 para activar el indicador de guía de botones, y el botón ∞... -
Página 61: Reproductor De Cd Incorporado
7 Reproductor de CD incorporado Nombre de la función (Visualización) Botón : Operación Página 5: Active Reproducción de repetición (REPEAT) ∞: Desactive 5: Active Reproducción aleatoria (RANDOM) ∞: Desactive 5: Active Reproducción con exploración (T-SCAN) ∞: Desactive 5: Active Pausa (PAUSE) ∞: Desactive 7 Reproductor de Multi-CD Nombre de la función (Visualización) -
Página 62: Selección Del Menú De Ajustes Detallados
Operación básica Selección del menú de ajustes detallados En el menú de ajustes detallados, se pueden ejecutar funciones convenientes y complejas para cada fuente. 1. Seleccione el menú de ajustes detallados. Sostenga durante 2 segundos. 2. Seleccione el modo deseado. (Vea la siguiente sección, “Funciones del menú de ajustes detallados”.) Cada presión cambia el modo ... -
Página 63: Funciones Del Menú De Ajustes Detallados
Funciones del menú de ajustes detallados En la siguiente tabla se muestran las funciones para cada fuente en el menú de ajustes detallados. En la tabla también se muestran las indicaciones para cada función, opera- ciones y botones usados para realizar las operaciones. Para más detalles, o cuando desea saber más sobre una operación, refiérase al número de página indicado en la tabla. -
Página 64: Operación Del Sintonizador
Operación del sintonizador Sintonización de búsqueda local (LOCAL) Cuando el modo local está activado, se puede seleccionar solamente emisoras de señales fuertes. 1. Presione el botón FUNCTION y seleccione el modo LOCAL (LOCAL) en el menú de funciones. 2. Active o desactive el local con los botones 5/∞. -
Página 65: Uso De Las Funciones Rds
Uso de las funciones RDS ¿Qué es RDS? RDS (Radio Data System) es un sistema para transmisión de dados con los programas de FM. Esos datos, que son inaudibles, proveen una variedad de funciones tales como: nom- bre de servicio de programa, indicación de tipo de programa, espera por anuncio de tráfico, sintonización automática y sintonización por tipo de programa, para ayudar los oyentes de radio a sintonizar una emisora deseada. -
Página 66: Función Af (Af)
Uso de las funciones RDS Función AF (AF) La función AF (Alternative Frequencies search) se usa para buscar otras frecuencias en la misma red de la emisora sintonizada actualmente. La función sintoniza de nuevo el recep- tor automáticamente a una otra frecuencia en la red con señales más fuertes, cuando hay problemas en la recepción de la emisora sintonizada actualmente, o si es posible obtener una mejor recepción en una frecuencia diferente. -
Página 67: Función De Búsqueda Pi
Función de búsqueda PI El sintonizador busca por una otra frecuencia transmitiendo el mismo programa. “PI SEEK” (búsqueda PI) aparece en el visualizador y el volumen de la radio se enmudece durante la búsqueda PI. El enmudecimiento cesa después de completada la búsqueda PI, tenga la búsqueda PI sido exitosa o no. -
Página 68: Función Ta (Ta)
Uso de las funciones RDS Función TA (TA) La función TA (espera por anuncio de tráfico) le permite recibir anuncios de tráfico automáticamente, independientemente de la fuente que esté escuchando. La función TA se puede activar para una emisora TP (una emisora que transmite información de tráfico) o una emisora EON TP (una emisora que transmite informaciones interreferenciales remisivas a las emisoras TP). -
Página 69: Cancelación De Anuncios De Tráfico
Cancelación de anuncios de tráfico • Presione el botón TA/NEWS mientras recibe un anuncio de tráfico para cancelar el anuncio y volver a la fuente original. El anuncio se cancela pero el sintonizador permanece en el modo TA hasta que se presione el botón TA/NEWS nuevamente. -
Página 70: Función Pty
Uso de las funciones RDS Función PTY Con la clasificación de ancho y estrecho del tipo de programa, la función PTY proporciona dos maneras para seleccionar las emisoras por el tipo de programa que se está emitiendo (PTY Search). La función también provee la sintonización automática a radiodifusiones de emergencia (PTY Alarm). -
Página 71: Ajuste De Interrupción De Programa De
Ajuste de interrupción de programa de noticias La recepción automática de los programas de noticias con código PTY puede ser activada o desactivada. Cuando un programa de noticias recibido termina, la recepción del programa precedente continúa. • Ajuste la interrupción a activado o desactivado. Sostenga durante 2 segundos. -
Página 72: Lista De Pty
Uso de las funciones RDS Lista de PTY Ancho Estrecho Detalles NEWS/INF NEWS Noticias. AFFAIRS Temas de actualidad. INFO Información general y consejos. SPORT Programas deportivos. WEATHER Informes del tiempo/Información meteorológica. FINANCE Informes del mercado de valores, comercio, operaciones de compraventa, etc. POPULAR POP MUS Música popular. -
Página 73: Uso Del Reproductor De Cd Incorporado
Uso del reproductor de CD incorporado Reproducción de repetición (REPEAT) La reproducción con repetición reproduce la misma pista repetidamente. 1. Presione el botón FUNCTION y seleccione el modo de repetición (REPEAT) en el menú de funciones. 2. Active o desactive la reproduc- ción de repetición con los botones 5/∞. -
Página 74: Reproducción Con Exploración (T-Scan)
Uso del reproductor de CD incorporado Reproducción con exploración (T-SCAN) La reproducción con exploración reproduce en sucesión los primeros 10 segundos más o menos de cada pista de un CD. 1. Presione el botón FUNCTION y seleccione el modo de exploración (T-SCAN) en el menú... -
Página 75: Uso De Reproductores De Multi-Cd
Uso de reproductores de Multi-CD Reproducción de repetición (REPEAT) Existen tres gamas de reproducción con repetición: Repetición de una pista, repetición de disco y repetición de reproductor de Multi-CD. La gama de reproducción con repetición es la repetición de reproductor de Multi-CD. 1. -
Página 76: Reproducción Con Exploración (Scan)
Uso de reproductores de Multi-CD Reproducción con exploración (SCAN) En la repetición de disco, se explora el comienzo de cada pista en un disco seleccionado durante aproximadamente 10 segundos. En la repetición de reproductor de Multi-CD y de repetición total, se explora el comienzo de la primera pista de cada disco durante aproximadamente 10 segundos. -
Página 77: Its (Selección De Canción Instantánea)
ITS (Selección de canción instantánea) La función ITS le permite buscar la canción que desea reproducir cuando se hay instalado uno reproductor de Multi-CD. Se puede utilizar la función ITS para programar hasta 24 canciones en cada disco de un total de 100 disco para una reproducción automática. (Se puede almacenar un programa ITS y datos de título de disco para un máximo de hasta 100 discos en la memoria.) Programación ITS (ITS) -
Página 78: Borrado De Una Pista Programada
Uso de reproductores de Multi-CD Borrado de una pista programada 1. Durante la reproducción ITS, seleccione la pista que desea borrar. 2. Seleccione el modo de programación ITS (ITS) en el menú de ajustes detallados. (Vea la página 13.) 3. Borre la pista programada con el botón ∞. -
Página 79: Título De Disco
Título de disco Ingreso de título de disco (TITLE IN) Esta función le permite ingresar hasta un máximo de 100 títulos de disco compuestos de hasta 10 letras. Además, esta función le permite fácilmente buscar y seleccionar un disco deseado para reproducción. (Se pueden almacenar datos de programa ITS y de título de disco para hasta un máximo de 100 discos en la memoria.) 1. -
Página 80: Selección De Discos Mediante La Lista De
Uso de reproductores de Multi-CD Selección de discos mediante la lista de títulos de disco (TITLE LIST) Para reproducir un disco para el cual ha ingresado el título en un reproductor Multi-CD y un disco CD TEXT en un reproductor Multi-CD compatible con CD TEXT, sigas los procedimientos siguientes. -
Página 81: Compresión Y Dbe (Comp/Dbe)
Compresión y DBE (COMP/DBE) El uso de las funciones COMP (Compression) y DBE (Dynamic Bass Emphasis) le permite ajustar la calidad sonora del reproductor de Multi-CD. Ambas las funciones le permiten ajustar en dos niveles. Conmutación COMP/DBE ON/OFF 7 COMP 7 DBE La función COMP (Compression) La función DBE (Dynamic Bass... -
Página 82: Desplazamiento De La Visualización
Uso de reproductores de Multi-CD Desplazamiento de la visualización del título Este producto visualiza solamente las primeras 10 letras del título del disco, nombre de artista y título de pista. Con textos con más de 10 letras, puede ver el resto del texto desplazando la visualización. -
Página 83: Ajuste De Audio
Ajuste de audio Selección de la curva del ecualizador Se puede cambiar entre las curvas del ecualizador. • Mueva el botón EQ hacia arriba o abajo para seleccionar la curva del ecualizador deseada. Curva del ecualizador POWERFUL + = NATURAL + = VOCAL + = CUSTOM + = EQ FLAT + = SUPER BASS Nota: •... -
Página 84: Funciones Del Menú De Audio
Ajuste de audio Funciones del menú de audio El menú de audio provee las siguientes funciones. Ajuste del equilibrio (FADER) Esta función le permite seleccionar un ajuste de potenciómetro/equilibrio que proporciona las condiciones de audición ideales para todos los presentes. 1. -
Página 85: Ajuste De La Curva Del Ecualizador
Ajuste de la curva del ecualizador (EQ-LOW/MID/HIGH) Los ajustes de la curva del ecualizador seleccionada actualmente se pueden ajustar de la manera deseada. Los ajustes de la curva del ecualizador se memorizan en “CUSTOM”. 1. Presione el botón AUDIO y seleccione el modo de ecualizador (EQ-LOW/MID/HIGH) en el menú... -
Página 86: Ajuste Fino De La Curva Del Ecualizador
Ajuste de audio Ajuste fino de la curva del ecualizador Se puede ajustar la frecuencia central y el factor Q (características de curva) de cada banda de curva seleccionada actualmente (EQ-LOW/MID/HIGH). Los ajustes de la curva del ecualizador se almacenan en “CUSTOM”. Nivel (dB) Q=2W Q=2N... -
Página 87: Ajuste De Sonoridad (Loud)
Ajuste de sonoridad (LOUD) La función de sonoridad compensa las deficiencias en las gamas de sonido altas y bajas en volúmenes bajos. Se puede seleccionar un nivel de sonoridad deseado. 1. Presione el botón AUDIO y seleccione el modo de sonoridad (LOUD) en el menú... -
Página 88: Ajuste Del Nivel De La Fuente (Sla)
Ajuste de audio Ajuste del nivel de la fuente (SLA) La función SLA (Source Level Adjustment) evita saltos radicales en el volumen cuando se cambia entre las fuentes. Los ajustes se basan en el volumen de FM, que permanece inal- terado. -
Página 89: Extracción Y Colocación Del Panel Delantero
Extracción y colocación del panel delantero Protección contra robo El panel delantero de la unidad principal es extraíble como una medida antirrobo. Extracción del panel delantero 1. Expulse el panel delantero. 2. Para extraer el panel delantero, tómelo del lado derecho y tire de él hacia afuera. -
Página 90: Ajustes Iniciales
Ajustes iniciales Selección del menú de ajustes iniciales Con este menú se pueden realizar los ajustes iniciales para este producto. 1. Desactive las fuentes. 2. Seleccione el menú de ajustes iniciales. Sostenga durante 2 segundos. 3. Seleccione el modo deseado. Cada presión cambia el modo ... -
Página 91: Funciones Del Menú De Ajustes Iniciales
Funciones del menú de ajustes iniciales El menú de ajustes iniciales provee las siguientes funciones. Cambio del paso de sintonía de FM (FM STEP) Normalmente ajustado en 50 kHz durante la sintonización por búsqueda en el modo FM, el intervalo de afinación cambia a 100 kHz cuando se activa el modo AF o TA. Puede ser preferible ajustar el intervalo de afinación a 50 kHz en el modo AF. -
Página 92: Conmutación Del Modo Aux (Aux)
Ajustes iniciales Conmutación del modo AUX (AUX) Es posible usar un equipo auxiliar (AUX) con este producto. Active el modo AUX cuando utilice un equipo externo con este producto. 1. Presione el botón FUNCTION y seleccione el modo AUX (AUX) en el menú de ajustes iniciales. -
Página 93: Otras Funciones
Otras funciones Uso del botón PGM (PGM-FUNC) El botón PGM puede memorizar una de las funciones del menú de funciones. Es posible memorizar una función diferente para cada fuente. Las operaciones del botón PGM solamente son posibles con el control remoto. Algunas unidades de control remoto, tales como el controlador remoto de volante, no vienen equipadas con un botón PGM. -
Página 94: Uso Del Botón Pgm
Otras funciones Uso del botón PGM El botón PGM funciona de manera diferente dependiendo de la función programada (memorizada). • Utilice el botón PGM. 7 Sintonizador Nombre de la función (Visualización) Presione Sostenga durante 2 segundos Memoria de las mejores emisoras (BSM) Desactive Active Sintonización de búsqueda local (LOCAL) -
Página 95: Uso De La Fuente Aux
Uso de la fuente AUX Es posible usar un equipo auxiliar (AUX) con este producto. Para escuchar al equipo auxiliar, active el modo AUX en el menú de ajustes iniciales, y seguidamente seleccione la fuente deseada. Selección de la fuente AUX •... -
Página 96: Reproductor De Cd Y Cuidado
Cuando ocurren problemas con la reproducción de CD, aparece un mensaje de error en el visualizador. Vea la tabla siguiente para identificar el problema, y luego tome la acción recomendada. Si el error persistiera, comuníquese con su concesionario o Centro de Servicio PIONEER más cercano. Mensaje Causa posible Acción recomendada... -
Página 97: Especificaciones
Especificaciones General Reproductor de CD Fuente de alimentación ........14,4 V CC Sistema ....Sistema de audio de discos compactos (10,8 – 15,1 V permisible) Discos usables .......... Disco compacto Sistema de conexión a tierra ......Tipo negativo Formato de las señales ..Frecuencia de muestreo: 44,1 kHz Consumo de energía máximo ........