Tabla de contenido
Publicidad
Idiomas disponibles
Idiomas disponibles
Enlaces rápidos
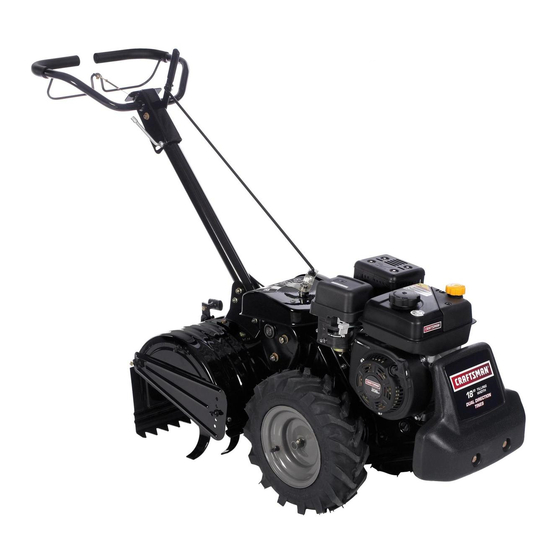
Operator's Manual
450 Series
REAR TINE TILLER
Model No. 247.299321
CAUTION: Before using this product,
read this manual and follow all safety
rules and operating instructions.
Sears Brands Management Corporation, Hoffman Estates, IL 60179, U.S.A.
Visit our website: www.craftsman.com
®
• SAFETY
• ASSEMBLY
• OPERATION
• MAINTENANCE
• PARTS LIST
• ESPAÑOL
Form No. 769-08106D
(October 27, 2015)
Publicidad
Capítulos
Tabla de contenido
Solución de problemas

Manuales relacionados para Sears Craftsman 450 Serie

Resumen de contenidos para Sears Craftsman 450 Serie
- Página 1 • PARTS LIST CAUTION: Before using this product, • ESPAÑOL read this manual and follow all safety rules and operating instructions. Sears Brands Management Corporation, Hoffman Estates, IL 60179, U.S.A. Visit our website: www.craftsman.com Form No. 769-08106D (October 27, 2015)
-
Página 2: Tabla De Contenido
This warranty is void if this product is ever used while providing commercial services or if rented to another person. This warranty gives you specific legal rights, and you may also have other rights which vary from state to state. Sears Brands Management Corporation, Hoffman Estates, IL 60179 PRODUCT SPECIFICATIONS... -
Página 3: Safety Instructions
SAFETY INSTRUCTIONS WARNING DANGER This symbol points out important safety instructions which, if not This machine was built to be operated according to the safe operation followed, could endanger the personal safety and/or property of practices in this manual. As with any type of power equipment, yourself and others. -
Página 4: Maintenance & Storage
SAFETY INSTRUCTIONS • To reduce fire hazards, keep machine free of grass, leaves, or other debris • If the machine should start making an unusual noise or vibration, stop the build-up. Clean up oil or fuel spillage and remove any fuel soaked debris. engine, disconnect the spark plug wire and ground it against the engine. -
Página 5: Safety Symbols
In the State of California the above is required by law (Section 4442 of the California Public Resources Code). Other states may have similar laws. Federal laws apply on federal lands. A spark arrestor for the muffler is available through your nearest Sears Parts and Repair Service Center. SAFETY SYMBOLS This page depicts and describes safety symbols that may appear on this product. -
Página 6: Assembly
ASSEMBLY NOTE: This tiller is shipped without gasoline or oil in the engine. Be certain to Raise the tine shield hinge flap assembly and insert the depth stake assembly service engine with gasoline and oil as instructed in the Operation section of this in the slot, under the tine shield and up through the tine shield assembly. - Página 7 ASSEMBLY Attaching the Control Rod Push the cable through the hole in the center of the handle and snap in the plastic fitting. See Figure 6. Make sure the handle assembly is in the highest position. Refer to the Operation Section. Remove the hairpin clips from the control rod, put the rubber washers in place.
-
Página 8: Fuel Recommendations
ASSEMBLY Set-Up Fuel Recommendations Use automotive gasoline (unleaded or low leaded to minimize combustion chamber Tire Pressure deposits) with a minimum of 87 octane. Gasoline with up to 10% ethanol or 15% MTBE Check the air pressure in both tires. The air pressure should be between 15-20 PSI. (Methyl Tertiary Butyl Ether) can be used. - Página 9 ASSEMBLY Adjustments Handle The handle should be adjusted so that when the tiller is digging 3-4” into the soil, WARNING the handle falls to about waste-high. Rotate the handle adjustment lock rearward, move the handle to the desired position and then lock into place by rotating the Prior to operating your tiller, carefully read and follow all instructions below.
-
Página 10: Air Filter
OPERATION Clutch Control Gear Selection Handle Muffler Handle Adjustment Lock Fuel Cap Air Filter Oil Fill Cap & Dipstick Choke Control Depth Stake Throttle Shift Lever Indicator Control Recoil Starter Handle Rear Tine Shield Side Shield Figure 12 Throttle Control Now that you have set up your tiller for operation, get acquainted with its controls and features. - Página 11 OPERATION Oil Fill Cap and Dipstick Starting the Engine Engine oil level can be checked and oil added through the oil fill. Attach spark plug wire and rubber boot to spark plug. NOTE: This unit was shipped WITHOUT oil in the engine. Oil is included in the Fill tank to no more than 1/2”...
-
Página 12: Adjusting The Handle Height
OPERATION Engaging the Drive and Tines To adjust the depth stake, remove the clevis pin and cotter pin. Move the depth stake to the desired setting and secure with the clevis pin and cotter pin. See Figure 14. WARNING Do not push down on the handlebars to try to make the tiller till more Depth Stake deeply. - Página 13 OPERATION Clearing the Tines • When cultivating (breaking up the surface soil around the plants to destroy weeds, See Figure 16), adjust the tines to dig only 1” to 2” deep. Using the shallow tilling depth helps prevent injury to the plants whose roots often WARNING grow close to the surface.
- Página 14 OPERATION Suggested Tilling Patterns • If the garden size will not permit lengthwise and then crosswise tilling, then overlap the first passes by one-half a tiller width, followed by successive • When preparing a seedbed, go over the same path twice in the first row, passes at one-quarter width.
- Página 15 OPERATION Terrace Gardening Loading and Unloading the Tiller • To create a terrace, start at the top of the slope and work down Go back and WARNING forth across the first row. See Figure 20. Loading and unloading the tiller into a vehicle is potentially hazardous and doing so is not recommended unless absolutely necessary, as this could result in personal injury or property damage.
-
Página 16: General Recommendations
Use the Service Log column to keep track of completed maintenance tasks. To Before performing any type of maintenance/service, disengage all controls schedule service from Sears Parts & Repair, call 1-888-331-4569. and stop the engine. Wait until all moving parts have come to a complete stop. -
Página 17: Servicing The Air Cleaner
SERVICE AND MAINTENANCE Remove the spark plug boot and use a spark plug wrench to remove the Servicing the Air Cleaner plug. See Figure 21. WARNING Never use gasoline or low flash point solvents for cleaning the air cleaner element. A fire or explosion could result. The air cleaner prevents damaging dirt, dust, etc., from entering the carburetor and being forced into the engine and is important to engine life and performance. -
Página 18: Change Engine Oil
22 ounces of Benalene 920 grease, and assemble fifty hours or every season thereafter. Change oil every twenty five hours the left half to it. See an authorized Sears Service Center to have the transmission when operating engine under heavy load or in high temperatures. -
Página 19: Belt Replacement
SERVICE AND MAINTENANCE Lubrication Belt Replacement After every 10 operating hours, oil or grease the lubrication points. Use clean Your tiller has been engineered with a belt designed for long life and optimal lubricating oil (#30 weight motor oil is suitable) and clean general purpose grease performance. - Página 20 SERVICE AND MAINTENANCE Tines Adjustments The tines will wear with use and should be inspected at the beginning of each tilling Handle season and after every 30 operating hours. The tines can be replaced. Refer to the The handle may be adjusted to the desired height. Refer to the Assembly section for Parts List section of this manual for part numbers.
- Página 21 SERVICE AND MAINTENANCE Idler Pulley Rod After the belt tension has been adjusted, if the belt is excessively stretched, you may need to adjust the idler pulley rod. This can be checked easily. With the engine off and the clutch control bail disengaged, shift the gear selection handle to each forward mode.
-
Página 22: Preparing The Engine
OFF-SEASON STORAGE WARNING Never store tiller with fuel in tank indoors or in poorly ventilated areas where fuel fumes may reach an open flame, spark, or pilot light as on a furnace, water heater, clothes dryer, or gas appliance. Preparing the Engine Preparing the Tiller Engines stored between 30 and 90 days need to be treated with a gasoline stabilizer When the tiller won’t be used for an extended period, prepare it for storage as follows:... -
Página 23: Troubleshooting
Disconnect spark plug wire and ground it against the engine to prevent unintended starting. Always wear safety glasses during operation or while performing any adjustments or repairs. This section addresses minor service issues. To locate the nearest Sears Service Center or to schedule service, simply contact Sears at 1-888-331-4569. Problem Cause... -
Página 24: Owner's Warranty Responsibilities
USED ELSEWHERE IN THE UNITED STATES (AND AFTER JANUARY 1, 2001 IN CANADA). California and United States Emission Control Defects Warranty Statement The California Air Resources Board (CARB), U.S. EPA and Sears are pleased to explain the control system on your engine for the periods of time listed below, provided there has Emission Control System Warranty on your model year 2000 and later small off-road been no abuse, neglect or improper maintenance of your small off-road engine. -
Página 25: Manufacturer's Warranty Coverage
FEDERAL and/or CALIFORNIA EMISSION CONTROL WARRANTY STATEMENT YOUR WARRANTY RIGHTS AND OBLIGATIONS MTD Consumer Group Inc, the United States Environmental Protection Agency (EPA), and for those products certified for sale in the state of California, the California Air Resources Board (CARB) are pleased to explain the evaporative emission control system (ECS) warranty on your 2015-2016 small off-road equipment (outdoor equipment) . -
Página 26: Warranted Parts
WARRANTED PARTS: The repair or replacement of any warranted part otherwise eligible for warranty coverage may be excluded from such warranty coverage if MTD Consumer Group Inc demonstrates that the outdoor equipment has been abused, neglected, or improperly maintained, and that such abuse, neglect, or improper maintenance was the direct cause of the need for repair or replacement of the part . -
Página 27: Repair Protection Agreement
Discount of 25% from regular price of service and related installed parts not covered by the agreement; also, 25% off regular price of preventive maintenance check Fast help by phone – we call it Rapid Resolution – phone support from a Sears representative. Think of us as a “talking owner’s manual.”... -
Página 28: Garantía
Esta garantía será nula si el producto es utilizado alguna vez, mientras que la prestación de servicios comercial o si se alquila a otra persona. Esta garantía le otorga derechos legales específicos, y usted también puede tener otros derechos que varían de estado a estado. Sears Brands Management Corporation, Hoffman Estates, IL 60179 ESPECIFICACIONES DEL PRODUCTO N.º... -
Página 29: Instrucciones De Seguridad
INSTRUCCIONES DE SEGURIDAD ADVERTENCIA PELIGRO La presencia de este símbolo indica que se trata de instrucciones de Esta máquina está diseñada para ser utilizada respetando las normas de seguridad importantes que se deben respetar para evitar poner en seguridad contenidas en este manual. Al igual que con cualquier tipo de peligro su seguridad personal y/o material y la de otras personas. -
Página 30: Manejo Seguro De La Gasolina
INSTRUCCIONES DE SEGURIDAD Manejo seguro de la gasolina: • Sea sumamente precavido cuando opere la máquina sobre una superficie con grava o al cruzarla. Manténgase alerta por si se presentan peligros ocultos o Para evitar lesiones personales y daños materiales tenga mucho cuidado al tránsito. -
Página 31: Mantenimiento Y Almacenamiento
Podrá obtener un amortiguador de chispas para el silenciador en el centro de • Siga las instrucciones de este manual para cargar, descargar, transportar y servicio de piezas y reparaciones Sears más cercano. almacenar de manera segura esta máquina. •... -
Página 32: Símbolos De Seguridad
INSTRUCCIONES DE SEGURIDAD SÍMBOLOS DE SEGURIDAD En esta página se presentan y describen los símbolos de seguridad que pueden aparecer en este producto. Lea, entienda y cumpla todas las instrucciones incluidas en la máquina antes de intentar armarla y utilizarla. Símbolo Descripción LEA LOS MANUALES DEL OPERADOR... -
Página 33: Funcionamiento
FUNCIONAMIENTO NOTA: Esta unidad se envía sin gasolina ni aceite en el motor. Antes de operar Levante el montaje de la aleta con bisagras del protector de dientes e inserte la máquina cargue el motor con gasolina y aceite como se indica en la sección el montaje de la estaca de profundidad en la ranura, debajo del protector y Funcionamiento de este manual. -
Página 34: Acople De La Varilla De Control
FUNCIONAMIENTO Acople de la Varilla de Control Acople del Cable del Embrague Asegúrese de que la unidad de la manija esta en la posición más alta. Quite el perno de ojo roscado y la tuerca del extremo del cable. Remítase a la Sección de Funcionamiento. Conduzca el cable del embrague por el lado derecho de las ménsulas de Retire los broches de horquilla de la varilla de control, coloque las arandelas montaje de la manija y por debajo de la manija. -
Página 35: Configuración
FUNCIONAMIENTO Configuración Recomendaciones Sobre el Combustible Utilice gasolina para automóviles (sin plomo o bajo contenido de plomo para minimizar El Control y la Adición de Aceite los depósitos en la cámara de combustión) con un mínimo de 87 octanos. Se puede usar gasolina con hasta un 10% de etanol o un 15% de MTBE (éter metílico terciario-butílico). -
Página 36: Cable Del Embrague
FUNCIONAMIENTO Ajustes Manejar El mango debe ser ajustado de manera que cuando la caña está cavando 3-4 “en el ADVERTENCIA suelo, el mango cae sobre los residuos de alta. Gire el controlador de ajuste hacia atrás de bloqueo, mueva la palanca a la posición deseada y luego colocado en Antes de operar su cultivadora, lea atentamente y cumpla todas las su sitio girando el bloqueo de ajuste de palanca hacia adelante para asegurar la instrucciones que aparecen a continuación. -
Página 37: Silenciador
FUNCIONAMIENTO Control de embrague Manija selectora de cambios Traba de ajuste de la manija Silenciador Filtro de aire Estaca de profundidad Tapón de combustible Protector de dientes trasero Tapón de llenado y varilla del nivel de aceite Protector lateral Figura 12 Control de Embrague Ahora que tiene la cultivadora preparada para funcionar, familiarícese con los controles y funciones. - Página 38 FUNCIONAMIENTO Tapón de Llenado y Varilla del Nivel de Aceite Para Arrancar el Motor Es posible controlar el nivel de aceite del motor, así como también agregar aceite, a Conecte cable de la bujía y la bota de goma a la bujía. través del llenado de aceite.
-
Página 39: Para Engranar La Transmisión Y Los Dientes
FUNCIONAMIENTO Para Engranar la Transmisión y los Dientes Para regular los protectores laterales, saque las tuercas de mariposa. Mueva el protector lateral a la posición deseada y vuelva a colocar las tuercas de mariposa. Ajuste bien. Vea la Figura 14. ADVERTENCIA No empuje hacia abajo sobre las barras de control para intentar hacer que la cultivadora labre más profundo. -
Página 40: Eliminación De Los Dientes
FUNCIONAMIENTO Eliminación de los Dientes • Al realizar tareas de labranza (rompiendo la superficie de suelo alrededor de las plantas para destruir las malezas, vea la Figura 16), ajuste los dientes para cavar únicamente a una profundidad de 1 a 2 pulgadas. La labranza a poca ADVERTENCIA profundidad ayuda a evitar lesiones a las plantas cuyas raíces a menudo crecen Antes de despejar los dientes a mano, detenga el motor, deje que todas las... -
Página 41: Modelos De Labranza Sugeridos
FUNCIONAMIENTO Modelos de Labranza Sugeridos • Si las dimensiones del jardín no permiten la labranza en sentido longitudinal y luego transversal, traslape las primeras pasadas por la mitad del ancho de • Al preparar el lecho de siembra, recorra la misma senda dos veces en la la cultivadora, continuando con sucesivas pasadas a un cuarto del ancho. -
Página 42: Cuesta Abajo
FUNCIONAMIENTO Jardinería en Terrazas Carga y Descarga de la Cultivadora • Para crear una terraza, comience en la cima de la pendiente y trabaje hacia ADVERTENCIA abajo. Recorra la primera hilera hacia atrás y hacia adelante. Vea la Figura 20. La carga y descarga de la cultivadora en un vehículo es potencialmente peligrosa y no se recomienda a menos que sea absolutamente necesario, ya que esto podría resultar en lesiones personales o daños materiales. -
Página 43: Servicio Y Mantenimiento
Para ubicar el Centro todos los controles y detenga el motor. Espere a que se detengan de Servicio Sears más cercano o para programar un servicio, simplemente comuníquese con Sears al teléfono 1-800-4-MY-HOME®. -
Página 44: Limpieza Del Motor
SERVICIO Y MANTENIMIENTO Mantenimiento del Filtro de Aire. Retire la funda de bujía y utilice una llave para bujías para extraer la bujía. Vea la Figura 21. ADVERTENCIA Nunca use gasolina o solventes de punto de encendido bajo para limpiar el elemento del depurador de aire. -
Página 45: Inspeccione El Aceite Del Motor
22 onzas de grasa Benalene carga pesada o en altas temperaturas. 920, y monte la mitad izquierda sobre la derecha. Vaya a un Centro de Servicio Sears Drenaje del Aceite autorizado para que le cambien el aceite de la transmisión o para programar un servicio, simplemente comuníquese con Sears al teléfono 1-888-331-4569. -
Página 46: Lubricación
SERVICIO Y MANTENIMIENTO Lubricación Cambio de Correa Después de cada 10 horas de funcionamiento, aceite o engrase los puntos de Su cultivadora ha sido equipada con una correa diseñada para una vida útil lubricación- Use aceite lubricante limpio (es adecuado el aceite para motores prolongada y un óptimo rendimiento. - Página 47 SERVICIO Y MANTENIMIENTO Extraiga la polea loca retirando el perno y la tuerca. Instale cada conjunto de dientes de modo que el borde cortante (filoso) Vea la Figura 28. de los dientes penetre el suelo primero cuando la cultivadora se mueva hacia adelante.
- Página 48 SERVICIO Y MANTENIMIENTO Polea Loca de Rod Después de la tensión de la correa se ha ajustado, si la correa está demasiado extendido, es posible que necesite ajustar la barra de la polea loca. Esto se puede comprobar fácilmente. Con el motor apagado y la libertad bajo fianza de control motor desembragado, cambiar el manejador de selección de equipos para cada modo de avance.
-
Página 49: Preparación Del Motor
ALMACENAMIENTO FUERA DE TEMPORADA ADVERTENCIA Nunca almacene la cultivadora con combustible en el tanque en un espacio cerrado o en áreas poco ventiladas donde los gases del combustible puedan llegar a una llama expuesta, una chispa o un piloto como el que tienen algunos hornos, calentadores de agua, secadores de ropa o algún artefacto a gas. -
Página 50: Solución De Problemas
En esta sección se analizan problemas menores de servicio. Para ubicar el Centro de Servicio Sears más cercano o para programar un servicio, simplemente comuníquese con Sears al teléfono 1-888-331-4569. - Página 51 . 3 . Trasmisión interna desgastada o dañada . 3 . Contacte con su centro de piezas y reparaciones Sears . 4 . Perno suelto en la polea de transmisión . 4 . Ajuste el perno . Los dientes giran, las ruedas 1 .
-
Página 52: Declaración De Garantía Sobre Defectos En El Control De Emisiones Para California Y Los Estados Unidos
Las siguientes son disposiciones específicas relacionadas con la cobertura de la garantía para Sin cargo defectos en el control de emisiones. Es un añadido a la garantía de motor Sears para motores no La reparación o reemplazo de cualquier parte con garantía se realizará sin cargo alguno regulados que se encuentra en las instrucciones de funcionamiento y mantenimiento. -
Página 53: Cobertura De La Garantía Del Fabricante
DECLARACIÓN FEDERAL y/o DE CALIFORNIA SOBRE GARANTÍAS EN EL CONTROL DE EMISIONES SUS DERECHOS Y OBLIGACIONES EN CUANTO A LA GARANTÍA MTD Consumer Group Inc, la Agencia de Protección Medioambiental de los Estados Unidos (EPA), y para aquellos productos certificados para su venta en el estado de California, el Departamento de los Recursos del Aire de California (CARB) se complacen en explicar la garantía que evaporativo sistema de control de emisiones (ECS) de su equipo (equipos de exteriores) de encendido por chispa para todo terreno, pequeño, de exteriores del año 2015-2016 . -
Página 54: Piezas Garantizadas
Durante la totalidad del período de garantía del motor y equipo para todo terreno arriba mencionado, MTD Consumer Group Inc mantendrá un suministro de piezas bajo garantía suficiente para satisfacer la demanda esperada de tales piezas . Cualquier pieza de reemplazo se podrá usar para el cumplimiento del mantenimiento o las reparaciones bajo garantía y se suministrarán sin cargo para el propietario . -
Página 55: Acuerdo De Protección Para Reparaciones
El *Coverage en Canadá varía en algunos artículos. Para detalles llenos la llamada Chamusca Canadá en 1-800- 361-6665. Servicio de instalación de Sears Si desea solicitar la instalación profesional de Sears de aparatos domésticos, dispositivos para abrir portones, calentadores de agua y otros artículos domésticos importantes, en los Estados Unidos o Canadá llame al 1-888-331-4569. - Página 56 ® Registered Trademark / Trademark of KCD IP, LLC in the United States, or Sears Brands, LLC in other countries ® Marca Registrada / Marca de Fábrica de KCD IP, LLC en Estados Unidos, o Sears Brands, LLC in otros países...